2012 LR4 Overland Project - Build Journal & Blog

treckin

Member
I also just installed 275/55R20..., I noticed there's a rubbing if the steering is fully turned...., specially when the car is reversing.

I am thinking to install a steering rack limiters, basically they are just simple nylon collars slip over the end of the rack limiting movement or put 1/2" spacers on the front wheels.

It was very easy and zero dollars for me to get rid of the rubbing 100%.

See the posts above - a few inches of plastic, and 1 hour of grinding and pounding on the frame horns.
 

bezzita

New member
It was very easy and zero dollars for me to get rid of the rubbing 100%.

See the posts above - a few inches of plastic, and 1 hour of grinding and pounding on the frame horns.

Do you mind sharing photos of these frame horns before and after?

EDIT: Found the picture above, it didn’t load last time....
 
Last edited:

justuspost

New member
Nice build thread gents. I was playing in the woods and missed it.

Did the rear locker add on project ever lock up? I researched that option originally didn't think it was feasible, realistically. Ultimately hunted down a HD packaged truck.

My To Do is getting shorter:
1. Rear swing away for spare
2. Front locker
f7d038c1daf522205c0eafbb4ae1aa5f.jpg
 

ishapiro

New member

treckin

Member
Yes, I retrofitted a brand new LR4 locking diff (was lucky to snap it of ebay for about 1.2K). Also upgraded the rear half axles, installed a brand new ECU and changed the CCF to accommodate.

2 questions:

Half shafts upgraded because it’s a different part moving to the locker?

CCF mod - did you just use your GAP tool? Any chance you remember any details on this part?

Cheers,
 

ishapiro

New member
Shafts replaced because they are stronger than the ones for the open diff. But originals could be used as well. The splines are the same.

I worked with GAP developers to add the option of modifying the CCF section relevant to the RDCM. I wish I had done a full write up at the time but was super busy.
The main chalange was to source the used harness and the new shafts at a reasonable price. I also ended up buying an older generation ECU at first which didn't work as the CAN bus protocol handshake changed in 2010.

The only issue I haven't resolved yet is the visuals on the infotainment system (no rear padlock icon) but I know the system works because I can see it and also read the live values from the ECU with my IIDtool.
I know the guys in UK solved that for the Disco 3 though.

Sent from my SM-G965W using Tapatalk
This is a good reference for the D3 retrofit that was very helpfull to me. View attachment E-diff Fitment.pdf

Sent from my SM-G965W using Tapatalk
 

treckin

Member
I’m not too worried about the wiring or the mechanical as I think I’ve already ticked all the boxes - using IID it wasn’t clear to me how to modify the ccf to add the ediff module.

At this point I’m also on pause trying to figure out who will rebuild the diff for me. I don’t really want to go through the whole conversion without doing a rebuild first.

Any thoughts on how to add the ediff to the CCF?
 

ishapiro

New member
You don't really need to "add ediff" into the CCF. you just need to enable two settings. I will take screenshot of the relevant config when I get a chance

Sent from my SM-G965W using Tapatalk
 

treckin

Member
You don't really need to "add ediff" into the CCF. you just need to enable two settings. I will take screenshot of the relevant config when I get a chance

Sent from my SM-G965W using Tapatalk


Any chance you have those screenshots? Ive finally come around to doing the differential project.

Here's the latest:

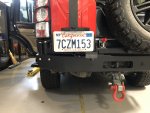
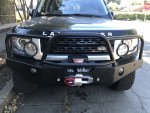
Got the TR full armor installed - bumpers, double swing out, nerf bar steps and sliders, gas tank skid etc etc.

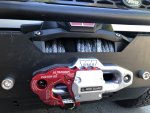
I had a Warn 12S Platinum installed, with a Factor 55 Ultrahook

Removed the drawer system, posting it for sale here shortly (LMK if anyone's interested!). I liked it, but the wife missed the trunk space so it came out.

Did a full service on the trunk, changed every fluid in it (brake fluid, PS fluid, ATF, all 3 diffs, and coolant)

Did the EBC slotted rotors and pads all around

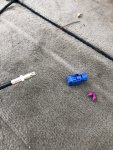
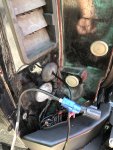
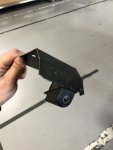
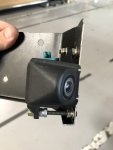
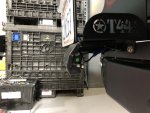
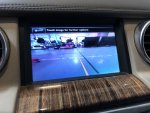
Removed the backup camera from the rear hatch and re-routed the coaxial cable our the rear left tail lamp area and made a bracket for the camera, mounted under the TR jerry can swingout. FoV is similar to the OEM location.

Need to unplug the rear ultrasonics, as they go nuts on the tire carrier whenever I put the truck into reverse.

I found a shop to do the differential rebuild (SF Differentials on Bryant in San Francisco), locating axles now. I also found a stretch of harness that has the 10-pin Kostal connector I needed to drive the diff. Its from an older build, but I think that the connector itself is correct. Hopefully the pinout is close and wont require major retooling.

Scoping the front ARB locker, compressor, and air lines. Thinking of mounting this compressor and a reservoir in the factor spare tire wheel well, and using the secondary trailer plug location next to the rear tow hook as a mounting location for air fittings (tools, airing up/down)

I read about L8 fitting 35" tires on their vehicle, now considering this route.

Pics:
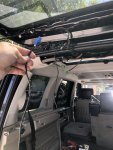

ToT9UQmhQ5ayZC1egAs11Q.jpgarfaw%VTQVKOylxYyE6LKg.jpgmIXNxW6tRmiWNCH1pyLWKQ.jpg8NGBBu+PT+6CHE%8EgHiww.jpguwUmOpWVRn62IxWIO6oi4g.jpgsNQ4RH8zSimWqIxtiF3bew.jpgPJ0SfBO%Sm2xIoHtZJTOgA.jpgdYqHGefnT3Son43zPZPCoA.jpgQI3ACcYaSuqnIb+4BF1YOg.jpgZLvOQlsoRSyuLVKvPj5A4w.jpg


Additional photos in next post
 

Blue Traveler

New member
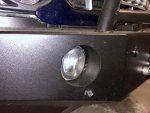
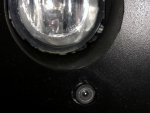
Hey Treckin... I have the same year, make and model as your rover. I also just had installed the same front and back bumpers with rock sliders. I was hoping you could explain a little further on how you installed your front cameras. The shop that I took mine to said they would mount exactly where the fog lights are located. They also said relocating the fiber-optic cameras could cause issues for the entire camera system. Have you had any problems with your relocation?
 

treckin

Member
Hey Treckin... I have the same year, make and model as your rover. I also just had installed the same front and back bumpers with rock sliders. I was hoping you could explain a little further on how you installed your front cameras. The shop that I took mine to said they would mount exactly where the fog lights are located. They also said relocating the fiber-optic cameras could cause issues for the entire camera system. Have you had any problems with your relocation?

I haven’t mounted my front cameras yet, they’re currently disconnected.

Note that the cameras are not fiber optic - they’re coaxial jus to like Cable TV lines, although they have two coaxial wires in a single insulator, 4 pins plus shielding.

The pictures above where I remounted the backup camera show the conductor and connector used. The front cameras are the same.

In terms of signal stability, you won’t be able to extend the lines much without risking signal collapse, but you won’t have to.

The front bumper cameras have more than enough length to reach the new mounting locations.

Good luck!
 

Blue Traveler

New member
I haven’t mounted my front cameras yet, they’re currently disconnected.

Note that the cameras are not fiber optic - they’re coaxial jus to like Cable TV lines, although they have two coaxial wires in a single insulator, 4 pins plus shielding.

The pictures above where I remounted the backup camera show the conductor and connector used. The front cameras are the same.

In terms of signal stability, you won’t be able to extend the lines much without risking signal collapse, but you won’t have to.

The front bumper cameras have more than enough length to reach the new mounting locations.

Good luck!

Thanks for the update. They fabricated some mounts, drilled holes, and installed them below the fog lights. They also said there was slight damage to the powder coating on the bumper that they also repainted. I will let you know how it works once all the repairs are done.
 

Forum statistics

Threads
188,000
Messages
2,900,865
Members
229,233
Latest member
cwhit5
Top