2020 Ram 5500 DIY Composite Panel Camper Build Thread

java

Expedition Leader
Using 2 LG residential 42 volt 375 watt panels wired in series and mounted with adhesive attached mounts to prevent drilling and possible leaks.

Panels: https://tandem-solar-systems.com/buy-solar-products/lg-375q1c-v5-neon-r-blkwht-module/

Thanks to @java for the heads up on these bad boys.

View attachment 615603

View attachment 615604
What adhesive did you use.... Those abs corners are hard to get things to stick to.

Sent from my SM-G973U using Tapatalk
 

RAM5500 CAMPERTHING

OG Portal Member #183
What adhesive did you use.... Those abs corners are hard to get things to stick to.

For these, i used the supplied Korapop 225 after extensive testing!

Extensive testing be seeing if it holds my fat ass dangling on it from the top of the lift.

Testing went well! :)
 

java

Expedition Leader
For these, i used the supplied Korapop 225 after extensive testing!

Extensive testing be seeing if it holds my fat ass dangling on it from the top of the lift.

Testing went well! :)
Sweet. Skia 252 didn't bond. Even with the primer.... 5200 seems to be sticking, but sadly I added screws also. Didn't want that coming off at highway speeds.

Sent from my SM-G973U using Tapatalk
 

RAM5500 CAMPERTHING

OG Portal Member #183
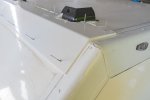
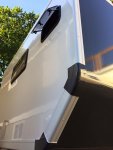
The roof AND the front panel need to be cut at a 22.5 degree angle to mesh up all happy and nicely.

It is then covered with a 45 degree piece of whatever you decide. I used aluminum, and had it powdercoated white to match the extrusions.

This was another example of calling in favors to friends. THANKS JARED! :)

One thing i didnt take into consideration was the solar panel mounts so i had to notch the aluminum before final fitting.

I used 1/8 washers to be able to space the aluminum away from the panel and get a good bond with the adhesive.

I then used Blind Rivets (waterproof, only open on one side) through the washers to line everything up so the adhesive and everything cured smoothly

anglecut_FORUM.jpganglecut2_FORUM.jpg

anglerivets1_FORUM.jpg
 
Last edited:

RAM5500 CAMPERTHING

OG Portal Member #183
All and all, super happy with the fit and quality of the kit, and how responsive @Victorian has been to questions.

If i had to do anything differently, i would of chose a 45 degree angle for the front wall instead of the radius curve. This was the only part of the kit i wasnt all that impressed with.

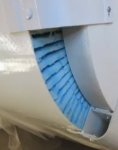
Although i feel the radius front, LOOKS better for sure, the way the Kerf cuts are done, and its sealed, you have a decent gap area with no insulation. Also i think it would make the outside front panel area weaker and vulnerable if hit a branch or something.

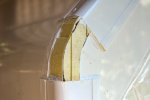
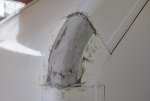
I came up with a fix for this, and used some of the insulation from the AC hole i cut to fill the void, seal the hell out of it, and then my friend Mike worked his fiberglass skills on making it pretty and ready to put the final pieces on.

I'll still brainstorm how to beef up the entire area in the event of an impact from something

kerf_forum.jpg

kerf1_FORUM.jpg

radiusfiber1_FORUM.jpg
 

Victorian

Approved Vendor : Total Composites
I like that solution. Well done. Here is what we have done in the past . Your solution is better as it maintains the insulation value.
We are aware of the "weak point on the radius" . For that reason we have used a more impact resistant FRP. Got the same on ours and have "cleared" many branches lately. But you are correct, we should maybe reconsider 2X 45 degree joints instead.
Your input is priceless! Thank you.
 

Attachments

  • 19510657_477709849238837_5819796749257658585_n.jpg
    19510657_477709849238837_5819796749257658585_n.jpg
    61.8 KB · Views: 54

RAM5500 CAMPERTHING

OG Portal Member #183
Another thing of note that kind of caught me off guard.

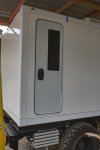
I went with the Arctic Tern "Euro" door.

Super nice quality, beefy and well sealed unit with all nice quality components.

But its not designed for a 2" wide wall, and comes up a little short to be able to nicely clean up the finish with the supplied trim,

This will be dealt with later, as this type of stuff is totally out of my wheelhouse, but it works great, and seals well.

A screen door is important to me, as i almost always leave my door open, and the one included is quite cheesy and mine doesnt even close properly. That will also be remedied later.
 

Attachments

  • doorfinal2FORUM.jpg
    doorfinal2FORUM.jpg
    270.1 KB · Views: 94
  • doorfinal_FORUM.jpg
    doorfinal_FORUM.jpg
    205.2 KB · Views: 98

RAM5500 CAMPERTHING

OG Portal Member #183
I like that solution. Well done. Here is what we have done in the past . Your solution is better as it maintains the insulation value.
We are aware of the "weak point on the radius" . For that reason we have used a more impact resistant FRP. Got the same on ours and have "cleared" many branches lately. But you are correct, we should maybe reconsider 2X 45 degree joints instead.
Your input is priceless! Thank you.

Thanks. Yeah, i watched that video to get a general idea, and wanted to add insulation. I did add the adhesive/sealant as shown in that video.

The finished product my friend is working on is going to surprise you! :)
 

RAM5500 CAMPERTHING

OG Portal Member #183
To Recap:

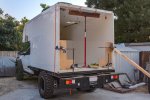
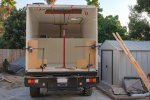
I built it on the truck due to space and manpower limitations. Would of been a bit easier building it on the ground instead, but wasnt an option for me.

Nothing about this was "difficult" or "hard", and only simply hand tools were used for the most part.

A nice powered cordless caulking gun is basically mandatory equipment for this in my opinion.

Could easily be done in a weekend by some motivated individuals in normal weather with ample adhesive.

I was very hesitant, as other have expressed about the quality, since its coming out of China, which we all know is hit or miss.

This was definitely a hit, and everyone that assisted commented on how good the quality and fitment was.

I paid full price (will go over that later), didnt get a discount, and not sponsored, this is my unfiltered .02

I had sent emails to Total Composites, GXV, and Box Manufaktur and TCs email response is what made me go with them. The other 2 simply didnt want my $. Their loss!

A lot more details soon once i get it weighed.

And YESSSSSSSSSSS I am going to add windows!!!!!!! Everyone keeps asking! Hahahaha!

Not ordering them until i get my lay out dialed in, so they are in the exact spot i want them. In my last one they were all in the wrong spots and it drove me freaking bonkers!
 
Last edited:

andy_b

Well-known member
The roof AND the front panel need to be cut at a 22.5 degree angle to mesh up all happy and nicely.

It is then covered with a 45 degree piece of whatever you decide. I used aluminum, and had it powdercoated white to match the extrusions.

This was another example of calling in favors to friends. THANKS JARED! :)

One thing i didnt take into consideration was the solar panel mounts so i had to notch the aluminum before final fitting.

I used 1/8 washers to be able to space the aluminum away from the panel and get a good bond with the adhesive.

I then used Blind Rivets (waterproof, only open on one side) through the washers to line everything up so the adhesive and everything cured smoothly

What did you cut this angle with? I appreciate all the photos and info as I'm waiting for my TC kit as we speak. Your project is looking good!

a
 

RAM5500 CAMPERTHING

OG Portal Member #183
What did you cut this angle with? I appreciate all the photos and info as I'm waiting for my TC kit as we speak. Your project is looking good

Thanks

Extrusions were cut with a simple chop saw.

The roof itself, I did it a little weird, on purpose.

I used the extrusions to mark the lines and projected them across the roof and cut the skin along the lines with a multi tool and removed it

I cut the insulation with a hand saw so I could leave a little extra (less than 1/8”) on both the roof and the front wall, so the insulation touched and formed a good insulation connection and no gaps.

I was afraid if I cut it all as one piece and it didn’t fit perfect, they’d be air gaps.

Was I worrying about nothing? Maybe? No one knows hahahaha. But it’s sealed up damn good now! Ha
 

RAM5500 CAMPERTHING

OG Portal Member #183
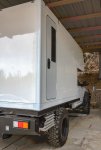
Here is a side profile shot.

The passenger side cab support will be removed once the aluminum box is built to house the fridge is done and it will be modified accordingly to be used inside the box.

The spare tire will fit on the other side.

Boxes will he made for under the subframe in front of the rear wheels also

72500CA6-3488-491D-8FE3-5FE34A53A606.jpeg
 
Last edited:

Forum statistics

Threads
188,362
Messages
2,906,008
Members
230,117
Latest member
greatwhite24
Top