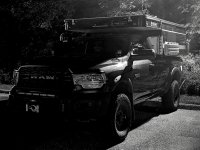
2021 RAM 3500 Tradesman | AEV Prospector | FWC Grandby

ramblinChet

Well-known member
Although the summer is fading away and fall temperatures will be cooling things down soon my plans are to spend much time down south once again this winter so the sun and temperatures will be a bit higher at the lower latitudes. For the past few years I have been meaning to order a sunscreen for my truck although I just have never found one that I really liked.

Companies I have researched over the past few years included Husky and WeatherTech. Maybe I was not using their web site correctly but Husky was only able to return a universal sun shade and to me that was unacceptable. WeatherTech was nice since they required vehicle options such as: cab style (regular, crew, mega), windshield mounted sensor (none, small, large), and rear window (solid or sliding). The WeatherTech was a roll-up and I decided that it was not the best options for me.

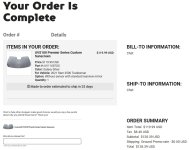
Recently I happened upon Covercraft Industries who manufacture custom UVS100 Premier Series Custom Suncreens. They also ask you to down-select the submodel (Big Horn, Laramie, Tradesman, etc.) and type of windshield mounted sensor (none, small 5", or large 10"). They are custom fit, are rigid, have foam insulation, a black backing so I am able to reverse it at night to black out my interior, and have three different colors available: chrome camouflage, galaxy silver, and white. Here is a Covercraft video which details the manufacturing process:


Here is a nice video which compares WeatherTech and Husky.


Keep in mind since these are made-to-order I am not expecting this to arrive for 3-4 weeks:

covercraft.jpg
 
Last edited:

ramblinChet

Well-known member
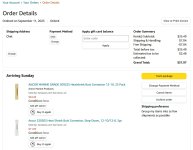
The past week has not been as productive as I had imagined although I can sense things beginning to fall into place as I prepare for the next phase of improvements. With that in mind I decided to order some additional electrical supplies and tools. You may have noticed I have purchased all of my wire, splices, and some tools, from Ancor - they specialize in marine grade electrical components. When I purchase a series of components I often like to source many parts from the same company since I would expect them to share additional information and hopefully work better together. I realize this is not always true but I like to stack the deck in my favor if possible.

Here is a quote regarding their marine grade wire:

"Ancor is the original Marine Grade® wire. This means that all of our wire and cable is built to withstand the harsh marine environment. Proprietary jacketing material is extremely UV and corrosion resistant. Individually tinned wire strands ensure optimal conductivity. We have everything you need from primary wire to battery cable and specialty wire. We carry all ABYC recommended colors in a variety of sizes to handle any wiring project."

And here is a quote discussing the butt splices I selected from Ancor:

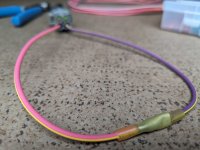
"Ancor heat shrink connectors offer heat activated adhesive built into the sleeve of the heat shrink tubing. When heated, these connectors form a water tight seal and the ultimate vibration and strain relief."

When reordering components such as butt splices it would be very easy and cheaper to stop by local store but once I begin moving in a particular direction I generally remain in that same direction unless something significant changes my view. Sure, these splices cost a bit more and will take more time to arrive but my projects are worth the slight additional effort and I will be happy with my decision for years to come. And as we all know, it's all about the details.
ancor 10.jpg

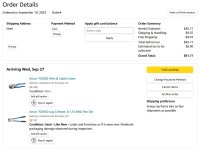
The tools below were purchased in preparation for addressing the heavier wiring included in my system. The wire and cable cutter below will handle wire from 22AWG through 2/0 AWG and should cover all of my applications. I went out on a limb and ordered a "damaged" lug crimper which normally retails from $150-200 and crimps wire from 8 AWG to 1/0 AWG. This will save me much in the long run since I will be able to crimp the cable for my air compressor, DC-to-DC charging circuit, etc.

From what I am able to gather it sounds like the packing was damaged or open so it will be interesting to see when it arrives. In an earlier post I ordered an Ancor single crimp ratchet tool which services wire sizes between 22 AWG and 8 AWG so between that tool and the one ordered today I am covered crimping wire and cable from 22 AWG through 1/0 AWG. If I ever share a trail with any of you and you would like to crimp some wires please don't hesitate to ask.
ancor 21.jpg

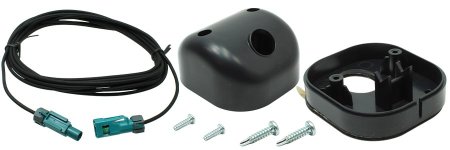
For quite some time I have been planning to relocate my OEM backup camera but handing over $199 for a plastic box, a few screws, and a special wire just didn't excite me. Based upon my research it appears that there are just a few companies such as Rostra, Voxx, and Zorg, who offer kits to relocate back-up cameras. As I dug further down the backup camera relocation rabbit hole it appeared that there was some level of relationship between a few of these companies but in the end I just wanted to resolve my issue for a reasonable price.
rostra 2508663-small-1.jpg

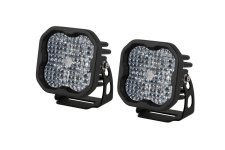
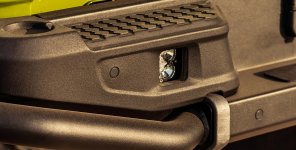
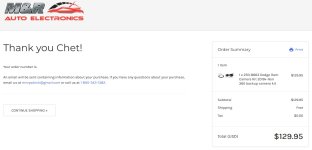
While revisiting the issue again this morning I came upon M&R Electronics in Michigan who appear to be selling the Rostra kit for a somewhat reasonable price. A few clicks later and I am not a full step closer to seeing what is behind me once again as I back up. This camera relocation kit in conjunction with my Diode Dynamics SS3 pod lights mounted in my rear bumper should be quite nice.rostra 250 8663.jpg
 

ramblinChet

Well-known member
For a few years I have been waiting for JKS Manufacturing to manufacture anti-sway bar disconnects for my RAM 3500 based AEV Prospector. I was waiting since I have a long history with JKS components extending back into the '90s and consider them a quality manufacturer. Recently I discovered that JKS are now owned by Sport Truck USA, a Division of Fox Factory Inc., who also manufactures and distributes BDS, Crawltek, etc. As I examined the BDS disconnects (#122414) I noted many similarities between them and JKS so I decided to purchase a pair.

This system will permit me to drive on pavement with the anti-sway bar connected to maintain safe handling. While off-road, I can quickly disconnect the same bar to take advantage of increased ride comfort and suspension travel. The additional articulation of the front axle helps to keep both front tires in contact with the ground thus maintaining traction. Yes, back in the early '90s I ran one of my Jeep Cherokee XJs for some time with the front anti-sway bar removed - I was a fool back then. It was in the mid-90s that I began installing discos on my vehicle from Rubicon Express, Teraflex, etc. and there was no going back. For a few hundred dollars you too can enjoy safe handling on road with increased comfort and travel off-road.

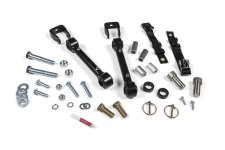
The parts below provide you with a manual version of the Power Wagon, or Jeep Rubicon, electronic anti-sway bar disconnect. Instead of an electronically driven coupling that slides over splined shafts on the anti-sway bar to disconnect, and reconnect, this system disconnects the entire shaft from the mounting tabs on each side of the axle.

BDS disco pic.jpg

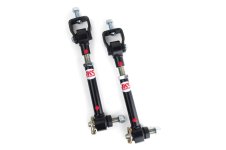
Below are a pair of the JKS Quicker disconnects that I have installed on my Jeep TJ. The most significant difference is that the JKS are adjustable in length and that is one feature I was not a fan of so I was happy to discover the BDS were fixed length. If you compare the BDS above to the JKS below you might suspect they are being manufactured at the same location - I do. Many of the parts are of similar design such as: upper u-strap, spherical bushing, click pin, Zerk fittings, etc. The only obvious differences between the bodies is the fact that one is adjustable whereas the other is fixed length. The JKS stainless steel post on the bottom has a slight taper while the BDS has a chamfer.

jks.jpg

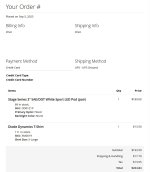
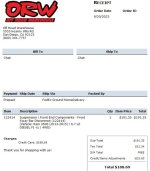
Here is a copy of my receipt for reference:

BDS disconnect.jpg

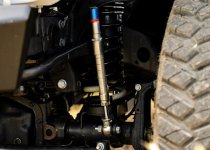
Another consideration I had was for the AutoLynx disconnects produced by Apex Design and Performance Products. They are currently only available for Jeeps although I spoke with the company and they referred me to a few men who have modified them for use on their HD Rams. What I really like about this innovative design is that instead of crawling under the front of the vehicle to muscle off a dirty and greasy fitting, you simply reach into the upper section of the wheel well and rotate the blue know on top 180-degrees. That is an awesome design and I still may consider them in the future although for right now the BDS will work just fine.
07625393-F091-4C0B-AF64-2422D13482B1.jpg
 
Last edited:

ramblinChet

Well-known member
The past few weeks have been focused on long-overdue upgrades, maintenance, etc. At the same time I decided to upgrade a few of my tools and below is another example. Of course, I have owned wire strippers since the early 80s but I never really had what I considered a nice pair, so I purchased these Klein Heavy Duty Wire Strippers which strip from 8-20 AWG stranded wire.

The paperwork is part of the RAM Upfitter Electrical Kit (#68398184AB) that came with my vehicle.
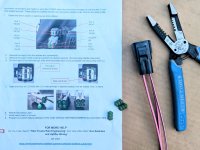
image000000(26).jpg

I figured if I was going to spend more money on strippers I would do my best to spend locally. The local ACE have a great selection of nuts, bolts, washers, etc., so I also took time to look for large washers that would be used to square up my Maxtrax mounts. They had large washers but they were $2-3 each and for the price it was just easier to purchase a piece of flat stock to cut and drill. One note, they offered to cut for free so I accepted but ended up with an assortment of parallelograms. It works but is pretty ugly by my measure.
image000000(25).jpg

Here is a Battle Born 100Ah 12V LiFePO4 deep cycle battery previously used on my Jeep as a house battery. What I am attempting to do is to wake-up the Battery Management System (BMS) since the battery has been in storage for the past nearly two years. Despite me charging the battery to 100% prior to storage and the company stating that "the batteries lose approximately 2-3% capacity per month" and they have a 10-year warranty, it appears that the $925 I spent on this battery will be a total loss.

When I contacted Battle Born they partially agreed with their instructions by stating that "you should jump your battery within twenty-four hours of entering low-voltage disconnect otherwise you risk damaging your battery and voiding your warranty." The disagreement came when what they verbally stated their batteries lose around 5% capacity per month which is twice as much as compared to their instructions which state a loss of 2-3% per month. This is frustrating since they promote how rugged and reliable these batteries are while at the same time not really identifying what could potentially render a battery useless. I will continue performing testing and discussing this with Battle Born and will share the outcome.
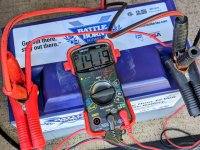
image000000(27).jpg

Here is my Maxxfan Plus (#00-04500K) which also requires service since the fan itself stopped working months ago. I took the fan apart and cleaned it up and after re-installing it and applying power the only part that seemed to work was the motor for automatically closing the cover. I will call Maxxair and post my update here.
image000000(29).jpg

Finally, a successful repair! Here is my Helio Pressure Shower from Nemo Equipment that I have owned for approximately five years. Over the past few months it has leaked a few times with the occasional leak appearing to come from a partially failed valve inside the foot-pump. I called Nemo and discussed the problem with them and a few days later a new foot-pump arrived. A few minutes later the new pump was on and they pressure shower seems to be repaired. The new design seems to be much more robust.
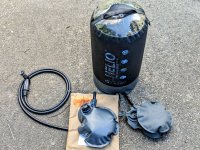
image000000(30).jpg

Yet another successful repair this time on my Renogy 200 watt 12 volt monocrystalline foldable solar suitcase. What failed were the adjustment knobs on the legs - they rusted so bad that one seized up and the leg was rendered inoperable. The solar panels and charge controller still worked fine so I contacted Renogy and they shipped out another set or legs complete with mounting blocks, bolts, etc. To be fair, I did not receive two new complete legs - they appeared to be used and were missing a few small parts. This was not an issue for me since my goal was to bring the system back into operation and I was able to cannibalize the missing knob and bolts from the old components.
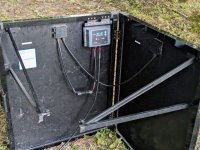
image000000(32).jpg

Here are the locks I finally selected to protect my four Maxtrax MKII recovery boards mounted on the side of my pop-up camper. It will be interesting to see if these are able to stand up to full time use on the exterior of my adventure vehicle. Over the past few weeks I have been stopping at all sorts of placed and visiting many web site searching for the largest outdoor lock for the least amount of money that would work in conjunction with the Maxtrax MKII mounting pins. Maxtrax recommends a TSA-style lock but they just appear to be small and weak like most guys these days.
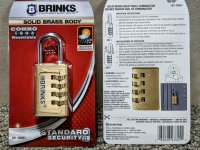
image000000(33).jpg

These Brinks 30mm solid brass 4-dial resettable padlocks are made in China out of solid brass using a steel shackle which has a cut strength up to 1200 lbs. Ultimately, if someone really has a desire to defeat a system like this - it is rather easy. Then again, when I travel I am usually inside or in close proximity to my vehicle most of the time while exploring the wilderness. It's only when I am in-town stopping into a store to stock up on supplies that my vehicle is most vulnerable. I do hope these last for a reasonable amount of time.
image000000(34).jpg

Not a favorite place to purchase anything but I occasionally enjoy a night spent in their parking lot so I don't feel bad spending money there sometimes. Receipt for reference.

image000000(35).jpg

Over the past half-century I have developed a small group of good friends - sort of an inner circle. One man was a fellow student at Penn State University who also roadraced superbikes with me at WERA events, another worked with me at Lord Corporation in the High Energy Laboratory. A few worked at Siemens VDO with me while I partnered with another at NASA Langley Research Center. Recently, I lost one of my inner circle - we spent nearly two years together struggling through initial training in the military. When we finally graduated and looked back upon hundreds of quitters, and selected orders to our initial duty stations, we smiled knowing that we would always have each others back.

I am talking to the men out there, not the guys. If you are a man, you must expose yourself to tough times and dangerous situations to begin to form an inner circle. This does not happen quickly, it has taken me the better part of a half-century and I can count my brothers on one hand. This is how it is, always has been, and always will be. You don't develop meaningful and lasting friendship with other men during good times - it happens when things are tough and your respect, your reputation, or even your life, are on the line. My men have weathered many storms with me and they can count on me for anything with no questions asked. Anything.

A few of my brothers invited me to join them recently at a remote location. It was on the property of another fellow who seems like a nice guy himself. We talked openly and shared everything, as always. On public forums such as this I am required to temper my speech so as not to offend but in private, I have no filter - I let the truth out and I speak it with my chin held high, my chest out, and a smile on my face. At this point in my life I really don't care what others think or say about my beliefs, what I do, where I go, why I am who I am, etc. The four of us sat around a fire and devoured two pounds of bacon, two pounds of shrimp, and a dozen eggs.

I am where I am and I am doing what I am doing because I love freedom and despise tyrannical orders issued by despotic leaders. You guessed it, I didn't play well with others in grade-school. Now for some truth - stop worrying about your job, stop worrying about money, stop worrying if your wife or girlfriend will leave you, and stop making excuses - it's time for you to lift a heavy load and embrace the struggle, and love it. If you are one of the 3% of men who have the balls to do this - you will eventually form an inner circle. On the other hand, it you are like 97% of the guys, you will continue to serve and obey, just like a mindless slave.

So go get a truck, grab a gun, knife, and blanket, and head out into the wilderness to figure things out. The longer you are outside the more open to the truth your mind becomes. Happy trails.
image000000(36).jpg
 
Last edited:

ramblinChet

Well-known member
Marine-grade electrical components manufactured by Ancor or wire clamps and screws from McMaster-Carr seem to be expensive options but when you break it all down the cost is actually reasonable considering the quality. Whenever I begin searching for equipment or components for my adventure vehicle some of the first qualities I review include outdoor use, UV resistant, etc. Over the past few decades I have placed increasingly more weight on specific brand names produced or manufactured these United States, Germany, etc. If we spend money on premium electrical components from Victron Energy or REDARC is it not logical to support them with same-quality wire, splices, and clamps; and tools to install?

With that in mind I will admit that it was tough to spend $170 on heat shrink tubing and tinned copper lugs but after spending many hours researching all of the available options, I did it and have no regrets. As I grow older what I have learned in life is there exists two primary types of regret - this first and most easy to deal with would be the regret for doing something wrong. That hurts and may haunt us but it is noting compared to the weight of the regret we carry for not taking a chance and doing something. And many times in life we only have once chance to seize an opportunity so keep your keep your head on a swivel and prepare to take risks.
Ancor Heat Shrink Tubing Kit #330101

47 piece Adhesive Lined Heat Shrink Tubing
  • (10) Black 3/16" x 6" (10) Black 1/4" x 6" (10) Black 3/8" x 6" (5) Black 1/2" x 6" (3) Black 3/4" x 3" (3) Red 3/4" x 3" (3) Black 1" x 3" (3) Red 1" x 3"
  • Cross Linked polyolefin tubing is much stronger than PVC tubing and will not burn like PVC
  • Heat activated adhesive lining provides impervious seal to salt water, oil, acids, and sunlight as well as providing strain relief
  • Highest shrink ratio - shrinks to 1/3 original size
  • Shrinks at 257 deg F / 125 deg C
  • Operating temperature range of -40 deg C to 110 deg C
ancor 31.jpg
ancor 32.jpg

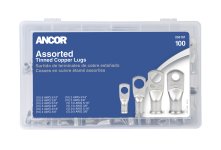
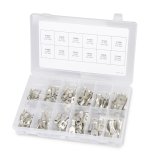
Ancor Tinned Copper Lugs Kit #255101

100 piece Tinned Copper Lugs
  • (10) 8 AWG 5/16"; (10) 8 AWG 3/8"; (10) 6 AWG 5/16"; (10) 6 AWG 3/8"; (10) 4 AWG 5/16"; (10) 4 AWG 3/8"; (10) 2 AWG 5/16"; (10) 2 AWG 3/8"; (5) 1/0 AWG 5/16"; (5) 1/0 AWG 3/8"; (5) 2/0 AWG 5/16"; (5) 2/0 AWG 3/8"
  • Ancor Marine Grade lugs are manufactured from 100 percent heavy-duty annealed tinned copper, providing for maximum current flow while resisting corrosion from salt and moisture. Seamless barrel design allows for maximum strength when crimped. Closed end design seals out moisture so cables stay dry and corrosion free.
ancor 33.jpg
ancor 34.jpg

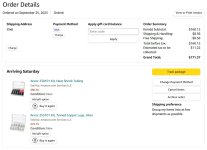
Receipt for reference:

ancor 30.jpg

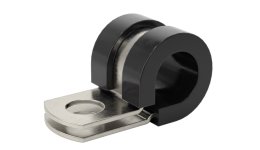
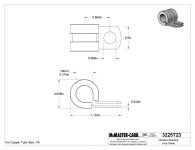
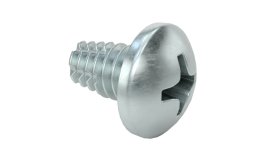
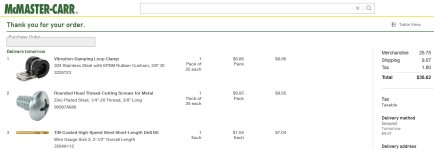
Here are supplies I ordered to assist with the installation of my OEM backup camera on Four Wheel Camper:

Vibration-Damping Loop Clamp
304 Stainless Steel with EPDM Rubber Cushion, 3/8" ID

mcmaster carr 020.jpg
mcmaster carr 021.jpg

Rounded Head Thread-Cutting Screws for Metal
Zinc-Plated Steel, 1/4"-20 Thread, 3/8" Long

mcmaster carr 022.jpg
mcmaster carr 023.jpg

Receipt for reference:

mcmaster carr 011.jpg
 
Last edited:

ramblinChet

Well-known member
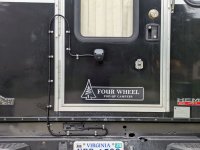
My most recent modification involved transferring my OEM backup camera from my tailgate to the rear door of my Four Wheel Camper. It sounds like a fairly easy evolution but I have a habit of spending dozens of hours contemplating various options, researching components and even comparing the same components produced by different manufacturers. Trust me, there are differences and I am happy to take a little bit longer, and pay slightly more, for a much better overall package.

Most of the components for this modification originated from two companies: Rostra and McMaster-Carr. The backup housing and wire were discussed in this previous post while the remaining components were discussed here and here. The picture below is of the finished product and since the placement of the camera was made in accordance with Ram_HD CC_Camera System - Analog_2019+_Rev A.pdf (see attached) which specifies an ideal camera height of 55", the camera being centered, and at an angle of 42° relative to the ground. The reverse image displayed on my OEM center console screen is perfect.

After backing up using only side mirrors for such a long time it was refreshing to use the OEM camera once again.
image000000(39).jpg

My OEM tailgate was pulled from storage and it took just a few tools and a couple of minutes to remove the OEM camera. Once you remove the metal panel on the inside vertical face of the tailgate there are two screws, and one electrical connection to address. The tailgate handle will begin to move about once the screws are loosened but you still much reach inside along the top of the handle to depress the two plastic holders and then it will pop right out. After that there are four small Torx screws that are removed from a plastic retainer and out comes the camera.
image000000(37).jpg

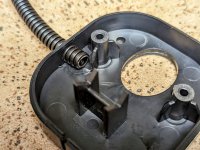
The instructions for the Rostra mount suggest routing the camera's LVDS cable out the rear of the housing and this is why you see the large hole in the back. I was not excited about complicating this installation by running the wire through the door and then the wall of the camper so I elected to drill a hole in the side and pass the corrugated conduit through there. It worked out although I will state the design of the housing places the LVDS connector in conflict with the surface of the door when mounted so it was still necessary to relieve the area. If they would have made the housing another 3-5mm thicker this all could have been avoided. It's still a very nice housing though with the camera fitting perfectly inside.
image000000(38).jpg

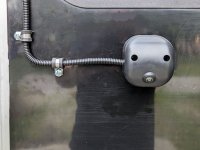
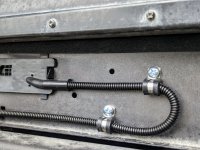
Here is the corrugated conduit and LVDS exiting the housing and then turning up preparing to cross over door hinge. Time will tell if this loop works or not although I suspect it will be fine for many years.
image000000(40).jpg

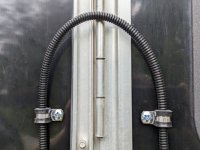
A close up of the corrugated conduit looping up and across door hinge. In many industrial or commercial applications where a wire jumps across a door hinge you will see it looping down but in this case the assembly was so light that I elected to use this shorter and more direct route by utilizing a vertical loop.
image000000(42).jpg

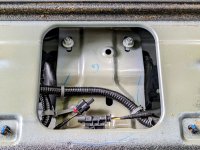
What was really nice is the corrugated conduit I used was perfect size relative to the OEM connector on the rear of the bed. Everything fits perfectly and I wish I could say that I had planned this section this way but I didn't - I actually intended to drill a slightly larger hole, install a protective bushing, and penetrate the sheet metal that way. Once I was working down in the area I took a closer look at the OEM connector, compared sizes, and elected to pass the corrugated conduit through this existing entry point. It works well and looks clean.
image000000(41).jpg

I celebrated the installation by driving down to Yorktown Beach, confidently backing into a parking space, and taking a nice long walk along the shore.
image000000(43).jpg
 

Attachments

  • Ram_HD CC_Camera System - Analog_2019+_Rev A.pdf
    998.8 KB · Views: 0
Last edited:

ramblinChet

Well-known member
Curious to know how these plans turned out? Did you like the AEV spare mount system?

The installation of the tank has been completed and one of my next projects will involve the installation of a Wallas Nordic DT stove and heater. Here are three posts which include additional information related to the installation:


Regarding the AEV spare tire mount system - the only two that I am aware of for Prospectors use room in the bed and since my camper occupies the entire bed, I am unable to use either. For some time I had hoped they would integrate a swing-away tire carrier with their rear bumper but it does not sound like that will be happening. And even if they did, I am sure the latching method would incorporate the rear tailgate which in my case, had to be removed during the installation of my Four Wheel Camper.

Others have successfully used hitch-mounted swing away tires carriers but I have decided that I will simply design one myself and have it cut, bent, welded, and coated, at a local fabrication shop. My design will be different and I will be happy to post all the information here once it has been completed. In short, it will wing open towards the drivers side, carry a 37" tire, and incorporate a nice large stainless steel fold-down table for cooking outside.
 

ramblinChet

Well-known member
For some time I have been planning to enhance my ability to repair tires in an emergency situation. In a previous post I share details on the ARB Speedy Seal Puncture Repair Kit Series II that I carry and thankfully have never had to use. The ARB kit deals specifically with punctures in the tread area of the tire and is a very nice kit and addresses the most common form of tire damage.

Repairing sidewalls for emergency purposes requires an different type of repair kit and after taking time to consider the various kits I could find I decided upon the 4x4 Sidewall Repair Kit by GlueTread. Initially I was planning to purchase an "agricultural tire sidewall repair kit" but I suspect that the materials used for tractor tires may be different when compared to those of personal vehicles. If anyone has additional information please feel free to share it but for now this kit should provide that next level of security just in case.

The kit includes:
  • [2] 4" x 4.5" patchs
  • [2] 3” x 1.5” patchs
  • [1] 2oz bottle GlueTread accelerator
  • [4] bottles GlueTread adhesive
  • [8] applicator tips
  • [10] pieces of sand paper
Technical specifications include:
  • pressure strength: 40 PSI
  • bond strength: 5,000 PSI
  • patch durometer: 75
  • initial cure time: 30 seconds
  • full cure time: 1 hour
  • immediate cure when used with GlueTread accelerator

glue tread 02.jpg

Here is an interesting video:


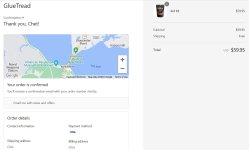
Receipt for reference:
glue tread.jpg
 

ramblinChet

Well-known member
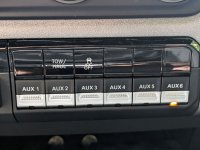
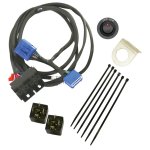
Today I installed the 2 Low UnLoc from BD Diesel and although they provided a switch, I decided to use auxiliary switch number six. Being able to control power delivery in an adventure vehicle is good and that is why from the factory, we can select two-wheel drive high, four-wheel drive high, and four-wheel drive low. With this kit now we can add two-wheel drive low to the list of options.

For those situations where you are in a high-traction environment and would benefit from being in two-wheel drive low range, this is where the 2 Low UnLoc is especially beneficial. Maybe I am dating myself but back in the 80s and 90s it was not uncommon for Jeep CJ owners to modify their Dana 300 transfer case with a twin-stick application which permitted two-wheel drive low range along with a variety of other options such as running the front axle in high range with the rear axle in low range.

Now here was the challenge, using my Aux 6 switch in my cab which pushes a 12 Vdc signal through the firewall, and then out to a auxiliary connector under the hood. But my plan required that same 12 Vdc signal to come back through the firewall and into the cab to command the 2 Low UnLoc, and I did not want to punch a hole through the firewall. Here was my solution: an example of how you can loop one auxiliary circuit (PK/YE) and pass it back through the OEM wiring. The pass through circuit (VT/YE) emerge under the dash up above the parking brake - there is a light grey six-pin connector that you can plug in to.
image000000(44).jpg

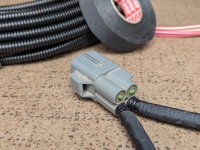
Here is the same connector and loop circuit now prepared to be installed under the hood. Whenever possible, I install Electriduct polypropylene wire loom which is "light weight and resistant to abrasion, gasoline, oil and other chemicals allows this corrugated conduit to work in extreme environments found around engine bays, manufacturing machinery and hydraulic systems." Then I wrap the wiring loom in Tesa Triple A 51036 cloth tape which itself "provides excellent abrasion protection of automotive harnesses and withstands high temperatures and demanding environmental conditions."
image000000(45).jpg

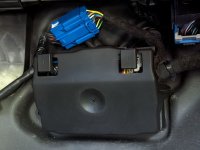
Below is the Drivetrain Control Module on the up high in the passenger footwell. The OEM blue connector (under the black protective cover) is disconnected and the 2 Low UnLoc is attached in-line. This is post install and the black cover required only minor trimming to fit back on since new circuits used additional room.
image000000(46).jpg

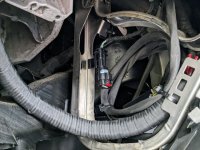
This is looking up under the steering column off to the right towards the center stack. The large bundle of protected wires looping down from the upper left that are zip-tied off to the metal frame to the right are wires originating from that light gray connector I mentioned earlier that was up above the parking brake in the back corner. I really wanted to route this bundle up over the steering column but despite my best efforts, I was unsuccessful. You can also see the much smaller bundle of wires with the shiny cloth protective cover that is looped around and zip-tied - this the the wiring harness for the 2 Low UnLoc coming through the center stack from the passenger side. I am not sure what the open ended three wire connector hanging down is. Does anybody know?
image000000(47).jpg

There we are - press Aux 6, shift into four-low, and turn as hard as you wish without any front wheel hopping or drivetrain binding. Yippee-Ki-Yay!
image000000(48).jpg

Here is the kit from BD Diesel. It did feel funny purchasing something from a diesel shop knowing that I was driving a gas truck, lol. See attached instructions if you are interested in performing this quick upgrade.
bd diesel 01.jpg

Here is a fantastic video which provides great details on the auxiliary switch package, pass through circuits, etc.
 

Attachments

  • (I-00373) - 1030705 Dodge 2 Low Unloc Diff Kit.pdf
    1.1 MB · Views: 0
Last edited:

Buddha.

Finally in expo white.
I had a similar failure of a maxxfan, the warranty process took months. If they ever do send you out a new fan know that you don’t need to remove the whole thing from the roof. You open the fan all the way and then remove four screws from the sides of the fan, up on the roof that is. The trim ring stays secured to your roof. You put the new fan in the old trim ring. Saves some time and you don’t have to reseal anything.
 

ramblinChet

Well-known member
I had a similar failure of a maxxfan, the warranty process took months. If they ever do send you out a new fan know that you don’t need to remove the whole thing from the roof. You open the fan all the way and then remove four screws from the sides of the fan, up on the roof that is. The trim ring stays secured to your roof. You put the new fan in the old trim ring. Saves some time and you don’t have to reseal anything.

My hope is that, with their assistance, I can troubleshoot the fan and narrow the problem down to a circuit board or something similar. Since my camper is over two years old it may be too old for a warranty claim. The good thing is that the fan is not a critical component and I am able to still manually open the cover.
 

ramblinChet

Well-known member
Today began with meeting some old friends at a gathering if the Middle Peninsula Jeep Association here in Virginia. I have been a member of this fine club off and on for the past two decades and enjoyed many trail rides with the folks. Prior to that I was a member of the White Sands Jeep Club located in the panhandle of Florida in the late '90s and early '00s. Scratching my head, I am having trouble remembering the name of the first Jeep club I was ever a member of in Pennsylvania in during the mid-90s.

I guess the more important fact is that they were all good clubs overflowing with adventurers and outdoor enthusiasts. Most clubs welcomed all levels from street legal stock Jeeps up through extensively modified off-road only rigs. The organized rides were most often a day ride, some were a two-day weekend, and the distances covered on the trail were often a dozen miles or so. Now the terrain was often a bit more challenging with many obstacles and when it comes to pushing a dozen plus Jeeps with different levels of modification and a variety of driver skill levels, sometimes it took the group an hour or longer to clear a single obstacle.
It would be interesting to see if there are overland-specific clubs that are beginning to spring up and how they operate as compared to a traditional Jeep club. If you have a club in your area I would encourage you to attend a meeting or event since there are all sorts of folks with a wide variety of rigs who share a common love or adventure.

After spending a few hours reminiscing with the Jeep folks I stopped over my buddies house to quickly yank off my anti-roll bar links. Ed has an amazing tool selection with most handtools being Proto, MAC, etc. In his garage is an equally impressive range of professional air-powered tools to include an industrial air compressor, aftercooler, etc. I wanted to take him to lunch so stopping over to zip four nuts off was a great excuse.

Once I returned home I began to compare the OEM anti-roll bar links (outboard) to the recently procured BDS #122414 disconnects. Measuring from the top surface where the link attached to the anti-roll bar down to the center of the horizontal mounting bolt which connects the link to the axle we have the following overall lengths:
  • OEM 5.50"
  • BDS 8.75"
The additional length of the BDS will push the anti-roll bar up, effectively shortening the lever arm, and increasing the effectiveness of the stock bar. This is a good direction to move in but may be possibly too good since the stock set up is firm enough.
image000000(49).jpg

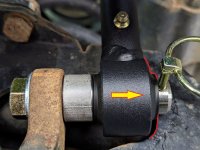
Spoiler alert - BDS disconnects are not compatible with the AEV raised track bar tower which is part of their high steer kit.

While the passenger side fit as expected, there was conflict on the passenger side. The first problem is the fact that the linch pin is not able to be fully seated and locked. Once the linch pin has been removed it is not possible to slide the BDS disconnect off the disconnect stud since there is conflict with the AEV raised track bar tower. As this picture shows - AEV designed this bracket to be used with only the OEM link.
image000000(50).jpg

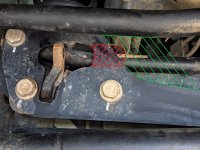
Here is a picture showing more of the AEV raised track bar tower with the BDS link removed. The only possible solution I can think of right now would include an extension (green) of the existing tower and removal (red) of additional material thus permitting the BDS disconnect to slid off and be disconnected. After reviewing this objectively, this would take far too long since I was not the original designer of the tower and do not have access to the projected loads imposed upon it by the track bar. In short, it's just too much trouble for very little reward. At this point I will restore my rig to its previous condition and place the BDS disconnects on the shelf for the time being. There are other more important projects that must be addressed right now.
image000000(51).jpg
 
Last edited:

Forum statistics

Threads
188,069
Messages
2,901,837
Members
229,418
Latest member
Sveda
Top