2022 Ford F550 - DIY - Adventure Expedition Vehicle Build Thread

Vance Vanz

Well-known member
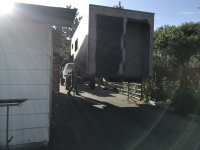
I got the camper mounted to the truck a couple weeks ago, and took it on a trip. Still a lot to do, but so far so good. The poly isolator pivot system seems to work well. I'm trying to figure out how to use the ridiculous amount of space underneath the camper, particularly at the front.
View attachment 796873

Man, I nearly dumped the camper on the ground at one point when I had it ~50" in the air! My tires stick out a little farther than the camper, so I made extensions for the mounting points on the jacks... but that didn't work at all. Very unstable! Making two beams (pairs of 2x4s screwed together) to go across worked great though.
Congrats on getting the camper on the truck 😁 !!!! It's definitely a milestone in the build process, especially when you are building your own shell (y).

The space up front almost looks big enough to have a compartment that spans the width of the camper-access/doors on both sides????

You and I ran into the same exact problem with the Brophy Jacks. I also had to use two sets of two 2x4's screwed together that spanned wider than the width of the camper. I then placed another set of two screwed together 2x4's on each side of the camper, underneath the two sets of 2x4's that spanned the width of the camper. All of this was needed/done so the feet on the Brophy Jacks were wider/cleared the outside of the tires. My camper is the same width as the outside of the tires and the Brophy Jacks wouldn't work unless I had them about 4-5" wider than the outside edge of the camper/tires. Lucky for me, I had some extra 10' 2x4's laying around so I was able to make the needed adjustments on the fly pretty quick.

I'm glad you didn't send the camper head first into the ground when lifting/mounting it o_O.

Keep at it, we're getting there!
 

Vance Vanz

Well-known member
Mounting the Camper - For the First Time

It was a little premature to move to a new shop given where I'm at in the build process, but the owner of my current shop has been an absolute PIA. You know, young kids trying to be real-estate tycoons by being cheap, never fixing anything, always trying to pass on the expense of every needed repair to the tenant and treating their tenants like crap :confused:(n). I decide to move along, rather than strangle the kid ;), and find a new shop that was tall enough to accommodate the camper being mounted on the truck.

It took a lot of leg work and a little time to find another shop with a shorter lease term, but I lucked out.

Sooooooooo, it's time to get the camper mounted on the truck as the new shop's square footage is smaller. The only way everything can fit in the new shop, is if the camper is mounted on the truck and my large layup table goes bye bye.

Getting prepped
IMG_9725.jpeg
IMG_9727.jpeg

First stab at it and.................... Unsuccessful! The Brophy Jacks were not wide enough given that the width of my tires is the same width of the camper. The tires would have ran over the feet on the Brophy Jacks, just a wee bit.
IMG_9729.jpegIMG_9730.jpeg

Sorry, I don't have pics of what I needed to do to adjust everything to make it work. By the time I added additional 2x4's and got everything placed, it was already dark. The description of what was needed to make it all work is noted above in my response to rruff. Maybe I'll snap some photos of everything when we slide the camper back during the fabrication of the pass through flanges.

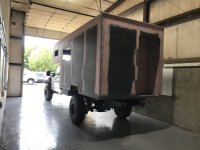
The campers first fitting 😁:geek:. Lucky for me, everything lined up great.

IMG_9733.jpegIMG_9734.jpegIMG_9735.jpegIMG_9740.jpeg

The fairing/body work on the outside of the camper (excluding the bottom edge) is also finished. The paint/coating shop came out and put a sets of eyes on everything and ran their hands across some areas, while we were looking at/discussing samples, and they gave me (y)(y). I'll create a a separate post related to what I have decided to do related to painting/coating when I have time.

I've also finally decided to take a vacation, as a little preventative measure/insurance so I don't reach the snapping/ shattering point on the build which causes me to pull the plug on the whole project. Working long days to finish up the body work/fairing, getting everything prepped to get the camper mounted and moving shops mid build, just days before leaving the country, has me a bit sideways.

I'm heading to Bali on Monday to surf my face off for a week and then I'm going to get lost for the last week I'll be there. Hopefully two weeks will be enough time to checkout from the build and provide a decent reset for when I return, so I can hammer out the remainder of the build.

When I return from my vaca: the pass through flanges will be fabricated first and then I'll start on the body work on the inside of the camper in conjunction with designing/laying up the fairings for the bottom side of the camper. Hopefully everything will be in paint/coating by mid December, or the first of the year at the latest 🤞.
 

rruff

Explorer
The space up front almost looks big enough to have a compartment that spans the width of the camper-access/doors on both sides????
There is an amazing amount of space underneath the camper! That's about 13" square that runs the full width behind the cab. Planning to put an auxiliary fuel tank and water tank in there, plus a propane tank on the right side of the frame a little further back. There will be side fairings in front of the wheels that hinge up for access, and sealed storage boxes behind the wheels. I need to build all that yet...

Your camper looks great! Nice fit and a perfect size for that truck.
 
Last edited:
Looks like a very nice job so far. If you kept the stock suspension, I applaud you following KISS.
Forgive me if I already made this suggestion to you in particular.
MPT and military tires are NOT easy to find at tire stores, anywhere in the world. Especially in new condition.
I strongly suggest from personal experience that you carry a second unmounted spare. It doesn’t need to be new, just serviceable.
If you’re going to use Hutchinson type wheels (if you do, get internal beadlocks for sure), the advice still applies. If you have the bad luck to ruin a tire, all of a sudden your trip becomes “I hope we make it home”, unless you have an unmounted 2nd spare.
In some places (continent of South America in particular), 20” MPT or military tires are unobtainium.
 

Vance Vanz

Well-known member
There is an amazing amount of space underneath the camper! That's about 13" square that runs the full width behind the cab. Planning to put an auxiliary fuel tank and water tank in there, plus a propane tank on the right side of the frame a little further back. There will be side fairings in front of the wheels that hinge up for access, and sealed storage boxes behind the wheels. I need to build all that yet...

Your camper looks great! Nice fit and a perfect size for that truck.
Hey rruff,

Sorry for the late reply. I just arrived back in the U.S. earlier this week from vaca and I'm finally getting settled and back into the swing of things.

I look forward to seeing all your fancy work on the utilization of that space. Custom fairings and utility boxes as well (y). It's going to be a lot of work, but I'm sure it will look great and you will get it all dialed in.

I like your updated profile pic with the shell mounted on the truck. Don't be shy about posting a pic of your progress every now and then on my thread (if you want), so I/others can see how things are coming along.

Thanks for the compliment on the camper and its size related to the truck. I was hoping for a good balance, not too big or small (the main body of the camper as well as the cab over section, and I think I got it dialed. I tried to get everything I wanted in the camper/layout while making sure to not oversize anything.

Keep cranking, we're in trenches.
 

Vance Vanz

Well-known member
YES...so awesome to get a glimpse of what it will look like mounted. Amazing looks great.
Thanks trackhead.

It's so nice to actually see the black box on the truck. It's finally starting to feel like I'm actually building something-heck, maybe even an expedition vehicle 🙃.

For so long it has been a truck sitting over there (in the shop) and a black box over here (the camper) that doesn't seem to want to stop kicking my A(smiley face)SS on a daily basis.

Body work on the inside and fairings and then I will finally be done with the composite work. I don't even know what I will do with myself when the composite work is done.
 

Vance Vanz

Well-known member
Looks like a very nice job so far. If you kept the stock suspension, I applaud you following KISS.
Forgive me if I already made this suggestion to you in particular.
MPT and military tires are NOT easy to find at tire stores, anywhere in the world. Especially in new condition.
I strongly suggest from personal experience that you carry a second unmounted spare. It doesn’t need to be new, just serviceable.
If you’re going to use Hutchinson type wheels (if you do, get internal beadlocks for sure), the advice still applies. If you have the bad luck to ruin a tire, all of a sudden your trip becomes “I hope we make it home”, unless you have an unmounted 2nd spare.
In some places (continent of South America in particular), 20” MPT or military tires are unobtainium.
Charlie,

Sorry for the belated reply; I have been out of the country on vaca.

Thanks so much. I'm trying to keep the standard as top notch as I can throughout the entirety of the process, but these builds are beasts. I'm humbled on a daily basis.

Yes, considering this thing will spend about 75-80% of it's time outside of the U.S. and Canada, I wanted to keep the suspension mostly stock/as simple as possible. I know there are some great options out there that can improve ride quality, but simplicity and serviceability were the main factors for me.

I appreciate the advice/recommendation on the second spare tire. I know just about everyone that has traveled an entire continent in an expedition vehicle, with unique/military tires, advises on having a second spare.

Unfortunately, I just don't have the room on my build, and/or I am not willing to add something structurally janky/awkward looking to the build just to get a second spare mounted. I'm also not willing to delete something or give up some existing functionality on the rig to make this happen. I know this is a bit of a risk, considering I'm headed to the tip of South America and back, but I'm an adventurer and creative fella. I'll figure something out if the worst comes to worst.
 

Vance Vanz

Well-known member
Camper Shell - Fairing/Body Work - Interior
I thought I should do a quick build update before one month turns into two months.

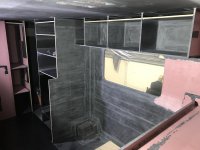
The fab shop needed another week or two before getting to the pass through flanges, so I had to pivot and move onto the camper shell interior fairing/body work .

I decided to start in the cab over section, since it is probably going to be the most time consuming/pain. I guess I like to get the worst punishment out of the way first 😁.

Structural sand, vacuum and wipe down for the first coat of fairing material.
IMG_9975.jpeg

Here is one of the corners. You can see black reference lines marking the highest/thickest spot in the tabbing- guide lines I use while applying the pooky to keep things straight. You can also see some small surface pockets on the tabbing (not a structural issue, just a cosmetic one). When I was cranking out 16-20 days to get the tabbing for the interior done, in two layups, I was exhausted at the end of the layup and didn't do as thorough of a final wet out on the peel ply as I should have. As a result, there are more surface blemishes in the tabbing than normal. The fairing material will take care of this with no problem, it just requires a little more work than normal/needed.
IMG_9977.jpeg

Pooky-ing the field of the panels and the corners first. After these areas are sanded, I will come back with a second coat to feather the highest/thickest point of the tabbing into the field of the panels. The bummer, time suck, is that just about every surface that will receive paint on the interior, will also need to be faired.
IMG_9982.jpegIMG_9984.jpeg
IMG_9983.jpeg
 

Vance Vanz

Well-known member
Habitat Box - Fairing/Body Work - Interior - Continued......

Not the most exciting, but I'm doing my best to crank out long days and get this fairing/body work behind me.

Moving around the box in a clockwise direction and trying to get as much of a first coat on everything as I can without messing up anything that I just put down/is still tacky. Same process/plan as the cabover area.

Passenger side
IMG_9989.jpegIMG_0001.jpegIMG_0002.jpeg

Back wall
IMG_9995.jpegIMG_0005.jpeg

Drivers side
IMG_0009.jpegIMG_0014.jpeg
IMG_0017.jpeg
IMG_0018.jpegIMG_0022.jpeg

Now it's a ton of sanding o_O!
 

ITTOG

Well-known member
Man, you are crazy or a little OCD! LOL

I don't think I would worry about the fairing inside cabinets given they won't be seen unless you open a door. Very thorough though. It should look amazing when you are done.
 

ITTOG

Well-known member
Make sure you take a picture of yourself when you are done sanding. I imagine you might look like the pink panther?
 

Forum statistics

Threads
188,217
Messages
2,903,949
Members
229,805
Latest member
Chonker LMTV
Top