2022 Ford F550 - DIY - Adventure Expedition Vehicle Build Thread

Vance Vanz

Well-known member
Just in awe of the work and detail you are putting into this, and taking the time to report and document, too! (y)
Thanks rruff.

It's waaaaay more work than I bargained for, but that is the price I'm paying for a custom land yacht that will hopefully look like it came out of a factory/professional shop.

BONKERS, absolutely BONKERS!
 

Alloy

Well-known member
Hey Alloy,

Thanks for the comments.

For the interior, a high build primer is going to be used first, followed by a second layer of primer, before paint is applied. Per the paint shop, this will be thick enough to cover all pen markings. I went with a marker, instead of a pencil, because I needed permanent reference lines for sanding multiple coats and because various adjacent coats use the same single reference line(s) when being applied/sanded. In addition, the CF is black and may/often will show up through the fairing material in patches and as lines.

I'm using a combo of a 36", 24" 17" and 8" sanding board/block, but mostly the 36" and 17" are used on the larger areas.

Areas needing to be filled will change with each layer so I've never used a permanent marking. Thinners in the top coat WILL reactivate the felt pen. This can happen through 2-3 layers of filler so it's important to make sure the filler is sealed with a primer/barrier coat. A carpenters pencil is better.

Awlgrip makes spray able filler that can be rolled. Easy to put on and it helps to fill the 1000s of pin holes in the Awlfair.

On the outside you'll want 72" boards. I've used boards made from alum that had velcro glued on. We used 36/40/80 grit rolls of 4" wide cloth backed sand paper on them.

Applying a glossy primer will show how true the surfaces are.

Might want to look at an industrial top coat (Endura or PPG) that has less gloss but it's easy to spray and repair.

Awlgrip top coat has a high gloss but it's allot harder (best to use someone that's used/sprayed it before) to spray. It is tough as nails but this makes it REALLY hard to repair/blend/ polish.

Spraying the inside of the box is going to be brutal. Lighting increases the risk of fire/explosion. I'd suggest using a foam (epoxy compatible!!) roller. The textures of the surface can be determined by the amount/type (slow or fast) reducer/thinner that's used. The texture (test beforehand) will also hide areas that aren't perfect.

I highly recommend using one of these. Isocyanates (kills brain cells) go right though respirator filters. Make sure the air supply is clean.


Vance Vanz

Well-known member
Hey Alloy,

I have certain areas/heights in the fairing compound that need to be maintained as subsequent and/or adjacent layers are applied and re-sanded, so I need something permanent to hold those markings/lines. But, yes, in general, it is always better to use a pencil to mark body work. I also used a marker so you could see them in the photos better, for the build thread. The first layer of primer will be an epoxy based high build sealer primer.

Yah, I noticed Awlgrip had a specific spot fill material (in smaller containers/quantities) that they discontinued. The only other product I could find (that was recommended/compatible for their product line/fairing compound) was in a gallon can. I only researched this a bit, as I've been applying the fairing compound in a way that has virtually eliminated any/all pin holes. They just haven't been an issue for me yet 🤞.

The outside is already done, excluding the bottom, and a 36" board will be used/fit the remaining areas well. You must have the wing spa of an NBA player and arms the size of Popeye to be pushing a 72" board 🤣!! There is no way I would want anything to do with that, my arms would fall off.

Since I'm only doing the body work and no priming/painting/coating, the painters/coaters will catch any areas that may need more faring/body work when they spray the primer coats on. In particular, they will see them when the primer is first sprayed on/when it is still wet. I've been pretty meticulous, so hopefully they won't have much to address. Also, I don't have the skills or equipment to paint/coat this thing myself and I definitely don't have the time or desire to learn. I'll leave this one to the professionals.

I'll cover which paints/coatings/colors I'm going with, on the inside/outside, when I get a little closer and have made all final decisions. The inside of the camper will get paint (Automotive/Commercial grade) and the outside will be coated (similar to Raptor Liner, but a different product).

Thanks again for adding some info and knowledge on the subject.

Back to the grind, or I should say sand!
 

driveby

Active member
So if you’re going Raptor Liner on the outside, doesn‘t that cover all manor of sins? Meaning fairing doesn’t have to be perfect. Btw, I think you are insane for doing this but I’m amazed and happy for you in your progress. No way I’d attempt something like this myself.
 

rruff

Explorer
So if you’re going Raptor Liner on the outside, doesn‘t that cover all manor of sins?
Indeed! If he is going to all this trouble, a high gloss automotive finish is in order.

I should have used Raptor though. It's amazing how visible a 1/2 mm discontinuity is. In the right light you can see it a couple hundred feet away... 😱
 

Alloy

Well-known member
Indeed! If he is going to all this trouble, a high gloss automotive finish is in order.

I should have used Raptor though. It's amazing how visible a 1/2 mm discontinuity is. In the right light you can see it a couple hundred feet away... 😱

I hate the stuff. It hides everything but it also keeps cracking/water damage/electrolysis hidden.

Horrible stuff to repair:
- Only way to remove it is with an air chisel. Imagine what what does to the substrate.
- It can't be blended. Blending is done inside a pickup box were it doesn't matter but on an outside surface the matching the textures is like white on black.
 

Vance Vanz

Well-known member
So if you’re going Raptor Liner on the outside, doesn‘t that cover all manor of sins? Meaning fairing doesn’t have to be perfect. Btw, I think you are insane for doing this but I’m amazed and happy for you in your progress. No way I’d attempt something like this myself.
I was specifically told by many Linex shops and shops that spray other types of thinner coatings (Raptor Liner/Equivalent) on trucks, NOT to rely on the coating to cover up poor body work. Basically, they said to get everything straight/dialed in and sanded to 80 grit in prep for the coating (Linex and/or any other similar/thinner coating).

Also, I have spent waaaay too much time and money on the composite camper to cut any corners. All of the professional (painters and coaters) stressed taking the time to do all of the body work well, or I would regret it in the end. They also know the finish/build quality I'm shooting for.

The outside wasn't so bad, but the inside is a whole different story. I am getting my azzz handed to me right now. The inside has to be sanded to 180 grit and the amount of visible radiused corners and transitions I have to sand is ABSOLUTELY F(smiley face)CKING NUTS.

It will be super cool and unique when it is done, but it is a MO FO.
 

Vance Vanz

Well-known member
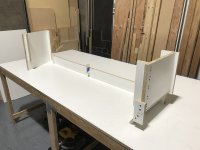
New Shop Task

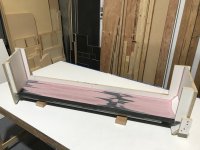
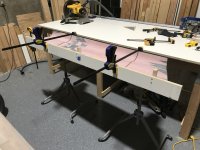
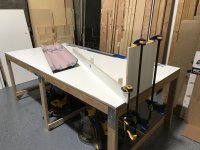
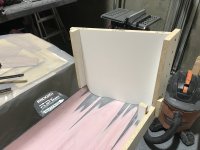
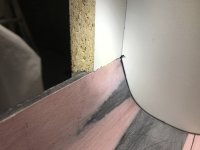
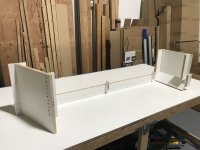
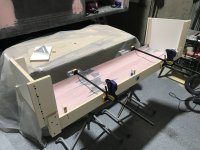
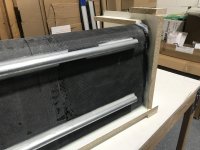
I've been putting it off, but it was time to build a new/smaller layup/work table for the new shop. I will need it if/when I resin infuse a door for the pass through and when I make/vacuum bag my rear fenders. It pretty much killed a day of work on the build since it has to be perfectly level; time I don't have to spare ☹️.

IMG_0163.jpeg

IMG_0164.jpegIMG_0165.jpegIMG_0166.jpeg

FYI: If you are going to build a composite layup table out of wood that you will be resin infusing/vacuum bagging on (especially larger size panels) make sure you shim the heck out of the space between the table surface and the framing. It is crazy how much the vacuum/air pressure will pull the table top against the crowns in the wood frame, which will show up in/distort your composite layup. Also make sure to wood glue the shims in place so they don't fall out, or get sucked out by the shop vac, since you will most likely shop vac your layup table a thousand times during your project like I did/have been doing 😁😚. I should have mentioned this when I built my first layup table.
 
Last edited:

Vance Vanz

Well-known member
Fairing/Skirt Mold for the Camper - Drivers Side Front

I held off on the fairings/skirts for the bottom side of the camper until pretty much everything that could/would possibly change the height of the camper was complete. In this case, the last item was the pass through. Maybe I was being too cautious, but this is a prototype build.

I started on the mold for the drivers side front fairing/skirt first. I will then move to the passenger side front, followed by the drivers side rear and finally the passenger side rear. I'm moving in this order because I will be reusing the main mold section I made off of the truck's rocker panels, for each fairing/skirt, and the front fairings are the longest. I will have to bond specific/unique end pieces to the main mold section for each fairing/skirt. I will also have to cut off the end pieces/sections on each mold, before I move onto the next mold. The alternative would have been to make three-four main mold sections off the rocker panels of the truck, in order to make four separate molds. This would have taken foooooooooooorever and was also not necessary because I am not keeping any of the molds I will make.

Consistent with the theme of the build so far 🙃😜, the mold took longer than I would have expected. Since this is the first mold, I am going to be a bit more detailed on the steps. I'll even include a highlight of a screw up of mine (y):oops:!

Bonding the two separate main mold sections together that where made off of the trucks rocker panels. I already laid out and cut the angle on one end of the mold, which matches the angle for the wheel well on the camper.
IMG_0150.jpegIMG_0152.jpeg

Tabbing the back side of the main mold and reinforcing it with 3/4" EMT to prevent "The mold from potato chipping" as my composite mentor likes to say.
IMG_0158.jpeg
IMG_0160.jpeg
IMG_0162.jpeg

Cut to size and the joint/seam on the inside faired and sandedIMG_0167.jpeg

Now the head scratching fun begins :geek:. I had to make sure that the main mold section for the fairing sat at the same angle/plane as the rocker panel on the truck. I used the very top portion of the mold (1-3/8" tall relatively flat-ish section) as my reference point. After taking some measurements off of the same section on the truck, I was able to calculate the angle that the top flange (that will be bonded to the bottom side of the camper) would need to be/sit in order for the mold to match the rocker panel.
IMG_0149.jpeg

Top flange piece of the mold mounted and held at the exact angle with the three blocks that are screwed to it. The three blocks will be removed after the mold is bonded.IMG_0168.jpegIMG_0169.jpeg
 
Last edited:

Vance Vanz

Well-known member
Fairing/Skirt Mold for the Camper - Drivers Side Front - Continued......

I then started on the back side/wheel well side of the mold. I decided to use 3/4" Melamine for the top and sides of the mold-scraps/pieces from my original layup table. This side wasn't so bad to layout and construct.
IMG_0171.jpegIMG_0172.jpegIMG_0173.jpeg

Trying to keep everything as flush as possible not only for fitment, but to save on fairing/body work.
IMG_0184.jpeg

All complete. The front side of the mold, that needs to match the angled front corner of the camper, was a bit more tricky to layout and construct. Also, to get the aesthetics/lines dialed in (specifically how and where the bottom rounded contour in the main mold section would intersect with/on the angle of the front corner) was super tricky. Remember, no CAD or CNC on this project, so I have to be able to hold all of these angles/contours in my head, or do mock ups. The crapy part about my first guesstimate, on how/where the bottom contour would intersect the front corner, is I was off by 3/16". This caused me to have to rip 3/8" off the bottom of the main mold section and rework the wheel well side. Not so fun when you are cutting CF/composite, have to re-jig/support/clamp the mold for an odd cut, have to suite up/PPE every time to make a cut and then spend the next 10 minutes vacuuming up all of the CF/composite dust.
IMG_0181.jpegIMG_0182.jpeg

I also constructed the entire section made out of melamine in a way that it could be easily basketed on the main mold section. This was super helpful during construction, having to put on and take everything off a hundred times for fitment.

It doesn't look like much, but it took some time to get all of the angles and measurements dialed in. It's also a bit nerve racking when there is no margin for error. If I do something to screw the main mold section up, I don't have extra. I would also hate to layup the first fairing and something be off enough that I have to scrap the part. This would be a huge waste of time (labor) and cost me a bit of $$ for the wasted CF and resin. Fingers crossed that I have done all of the math correctly!
IMG_0177.jpegIMG_0176.jpeg

Bonding the entire mold together. I bonded the edge of the main mold to the melamine and also ran a fillet along the entire bottom edge of the main mold.
IMG_0185.jpegIMG_0186.jpeg
 
Last edited:

Vance Vanz

Well-known member
Fairing/Skirt Mold for the Camper - Drivers Side Front - Continued......

And now it is time for my Screw Up :love:🤩🤟! This wasn't even a Rookie move. This was like someone with zero trade experience, or someone who had never cut a piece of large contoured base board/molding. I have no idea what I was thinking, or obviously not thinking 😆. Let's chalk it up to burn out, working too late and/or being in the weeds.

I don't have a large (12" blade) table saw, radial arm saw, compound miter saw, etc......, so I had it stuck in my head that I was going to have to cut the needed 90 degree cross cut/on a 32 degree angle (on the CF main mold section) with one of the more basic powered hand tools I did have (skill saw, jig saw, sawzall). It was never going to work, but tunnel vision some how did it anyway. What a Wanker 🤣!

IMG_0188.jpegIMG_0190.jpeg

Lucky for me, my roommate just bought this. And the irony, it was sitting in the garage the whole time. Thanks Dan-Oh; you keep buying the cool tools and I'll keep borrowing them!
IMG_0180.jpeg

I had a small scrap piece, from the first cutoff on the main mold, that I was able to match up to patch my screw up. Not a huge deal, just one of those head shaking moments that keep you human and humble.

I then had to template all of the needed corner radiuses for the mold and modify/make a few fairing tools.
IMG_0191.jpeg

Fairing all the corners to match the needed/existing radiuses on the camper
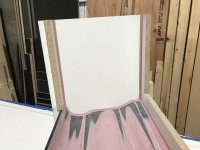
IMG_0193.jpegIMG_0195.jpegIMG_0198.jpeg

And finally a sealer coat before the release wax is applied
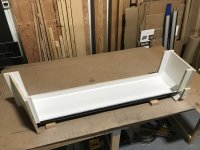
IMG_0200.jpegIMG_0201.jpeg

I'm going to let the mold dry/set up for another day, while I start cutting materials, and then hopefully get it laid up early this week (y)🤞!
 
Last edited:

Vance Vanz

Well-known member
@Vance Vanz How did you acquire all these skills? Did you work in aerospace? I am dumbfounded by your capabilities.
Thanks 38snubby (y)🙂!

Definitely not from the aerospace industry. If so, I probably would have been smart enough to know NOT to try and tackle a project like this myself, or at all 🤣.

My first career was in the trades and I have always been some what of a Jack of all trades. Being: driven, detailed oriented, and a bit fearless (which unfortunately can also lead to a bit of ignorance) helps. But, a lot of this you just have to dive in and figure it out as you go.

Thanks again; I'll keep chipping away at this mountain.
 

38snubby

Active member
Thanks 38snubby (y)🙂!

Definitely not from the aerospace industry. If so, I probably would have been smart enough to know NOT to try and tackle a project like this myself, or at all 🤣.

My first career was in the trades and I have always been some what of a Jack of all trades. Being: driven, detailed oriented, and a bit fearless (which unfortunately can also lead to a bit of ignorance) helps. But, a lot of this you just have to dive in and figure it out as you go.

Thanks again; I'll keep chipping away at this mountain.
Huge level of respect for you brother.
 

Forum statistics

Threads
188,214
Messages
2,903,879
Members
229,665
Latest member
SANelson
Top