2022 Ford F550 - DIY - Adventure Expedition Vehicle Build Thread

Vance Vanz

Well-known member
Man, you are crazy or a little OCD! LOL

I don't think I would worry about the fairing inside cabinets given they won't be seen unless you open a door. Very thorough though. It should look amazing when you are done.
Apparently I am a bit of both ;).

If you are going to do something, go all in. I'm swinging for the fences 😁!

It better look good when it's all finished, especially considering the amount of time going into this thing 🙃.

Let's just hope I don't lose my mind before it is finished.
 

Vance Vanz

Well-known member
Make sure you take a picture of yourself when you are done sanding. I imagine you might look like the pink panther?
The shop vac is running 24/7.

That's why my profile pic is a shop vac; it's the tool I use more than any other on the build.

I tell people I'm a professional shop vac-er now.
 

rruff

Explorer
You must have been a walking dust monster during the composite and body work on the shell.
I still am if I touch anything in the garage... :ROFLMAO:

Sort of kidding. The level of dust in there gradually declines as I track out less than I add. It is still a hell of a mess though. I would have gotten a vacuum, but I'm trying to avoid buying things that I won't bring with me in the truck.
 

Vance Vanz

Well-known member
I still am if I touch anything in the garage... :ROFLMAO:

Sort of kidding. The level of dust in there gradually declines as I track out less than I add. It is still a hell of a mess though. I would have gotten a vacuum, but I'm trying to avoid buying things that I won't bring with me in the truck.
I don't know how you do it. I go bonkers if my shop is not spick and span.

I completely understand related to avoiding additional tool purchases.

I'm now only buying a tool if it is absolutely necessary for the build, as everything will need to be moved and stored once I take off for my trip. I'm sooooooo tired of moving and storing crap.

Back to pass through design/fabrication and sanding :).
 

Vance Vanz

Well-known member
Pass Through Fabrication - Cab & Camper Flanges:

As previously stated in the build thread, I'm going to be detailed on the pass through sections :geek:(y).

I was having a tough time finalizing the pass through flanges at my shop, so I decided to just head down to the fabrication shop so we could get started and also work together to get the remaining details/20% dialed in. Maybe it was lack of sleep, being over worked, not being a professional metal fabricator, the damn thing just being a bit complicated because of the tight space, or a combination of all of the above 😁.

Some details/parameters before I get started. It's all about the details............
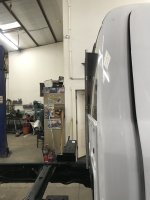
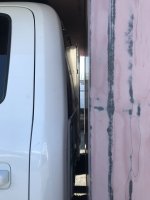
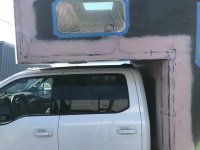
  • I have 2.5" between the cab and the camper. I wanted the accordion boot, and both the cab and camper flanges that the accordion boot slips onto, to sit within this 2.5" space. This would allow the accordion boot to sit wider/outside the actual opening of the pass through. This looks cleaner (IMHO) and allowed the max actual opening size of the pass through as possible.
  • My camper side pass through flange, and the accordion boot, had to sit/mount on the front face of the camper and could not sit inside the opening/actual wall of the camper. The front pass through wall on the camper is only 1-1/16" thick and I will also have a removable door that is about 7/8" thick in this wall.
  • I wanted the cab side pass through opening/flanges, that penetrate into the actual crew cab area, to extend into the crew cab as little as possible. I also wanted them to end/sit behind the inside edges of the seats, as opposed to extending in between the seats. This would allow a more open area/feeling for passengers sitting in the seats of the crew cab. I did not want it to feel somewhat boxed in if there was a flange right next to your face and or arm/also something in your line of vision if you were trying to have a conversation with someone sitting in the back with you.
  • I was also trying to keep it as simple as possible for upholstery/clean lines. I'm going to re-use/keep the existing factory single upholstery piece that sits behind the seats and I will only have to add two small sections of upholstery above the seats that will match the headliner in the truck. I should also be able to easily do this myself.
Here we go

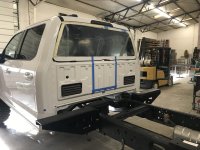
First step, getting the camper off.IMG_0027.jpeg


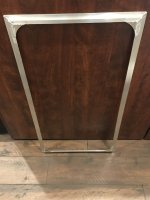
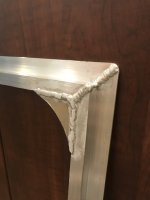
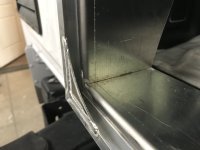
Because I only had 2.5" for the accordion boot and both flanges, aluminum extrusions needed to be used. I used a 3/4"x1/2"x3/4" Z channel, 1/16" wall thickness, for the camper side flange. I ripped one 3/4" side down to 1/2". Radiuses where added to the corners. This was the easy one :cool:.
IMG_0032.jpeg72057066921__D4B19F6D-5C25-4C69-9722-D33E262AAEA3.jpeg
IMG_0055.jpeg

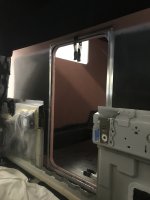
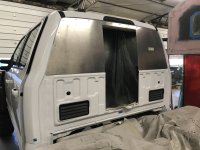
Next up, cut the cab. And...... pray you cut the opening smaller if you happened to screw your measurements up ;).
72057070055__6F2FF461-06E3-4F69-9472-5E454E67E3EB.jpegIMG_0033.jpegIMG_0035.jpeg

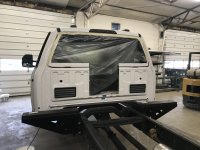
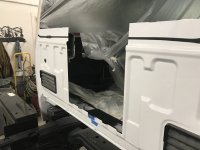
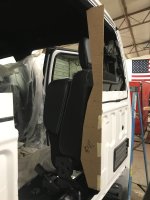
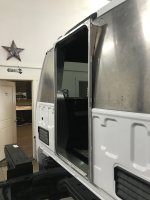
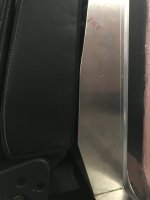
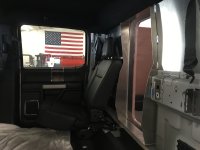
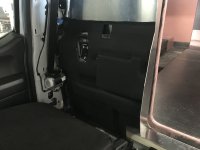
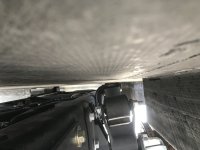
Now that the cab was cut, I could start finalizing a template for the flanges that would penetrate into the crew cab area. This took a bit of time to ensure that I had all of the correct angles to account for the 40 seats in both the folded up and down positions and to keep ample open area/space for the inlets of the cab vents . I also needed to make sure that all of the upholstery end cuts on the back wall could be hidden using the flanges of the pass through
IMG_0043.jpeg
 
Last edited:

Vance Vanz

Well-known member
Pass Through Fabrication - Cab & Camper Flanges - Continued......

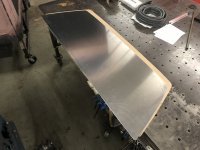
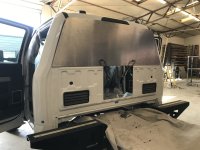
Shaping the back window fill sheet
IMG_0048.jpeg
IMG_0052.jpeg

I had to grind down both of theses ripples in the aluminum around the frame of the window, on both sides, so the aluminum sheet could sit flat against the window frame
IMG_0057.jpeg

We went roundy, round a few times. And a few more times. And maybe even a couple more times after that 😛 on finalizing the design of the cab side flange/c channel that the accordion boot would slip onto. For the cab side, an extruded c channel 1/2"x1/2"x1/2", 1/16" wall thickness, was used. Obviously this needed to be finalized/figured out before making some final cuts. I also decided to rivet the the back window sheet, on average, about every 5". I wasn't sure if the sheet was going to form to the back window, or if we were going to have to roll it a bit in the corners. The sheet thickness is just under an 1/8". Luckily the sheet formed nicely to the contour of the frame using #6 bolts to temporarily hold everything in place. It was a bit of a pain to get all of these in and tightened down. On the bottom of the window sheet, I added three extra rivets, (second row of rivets/temp screws up from the bottom) so the sheet could be riveted to the c channel that use to extend across the entire back of the cab. I wanted to have the additional reinforcement of the window sheet being secured/tied into the c channel.
IMG_0059.jpeg
IMG_0077.jpeg
IMG_0079.jpeg
IMG_0078.jpeg
IMG_0081.jpeg

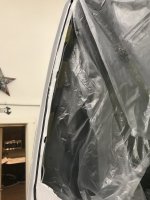
The cab and camper side flanges won't be sealed, riveted and/or painted/coated until I'm ready to send the camper to paint. NOTE: The camper side flange is not mounted in this pic.
IMG_0092.jpeg
 

Vance Vanz

Well-known member
Pass Through Fabrication - Cab & Camper Flanges - Continued......

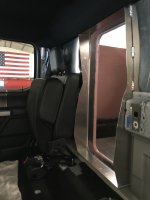
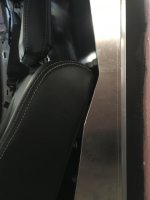
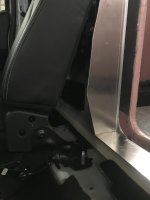
Here is what the inside looks like.

40 seat up, matching the bottom contour of the flange
IMG_0105.jpegIMG_0107.jpeg

40 seat down, matching the top contour of the flange
IMG_0111.jpegIMG_0109.jpeg

Keeping the bottom area open a bit for the cab vents
IMG_0110.jpeg

Factory back wall upholstery piece roughly cut to size
IMG_0113.jpeg
 

Vance Vanz

Well-known member
Camper Flex & Clearance Test

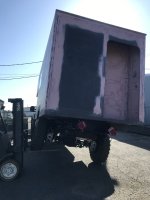
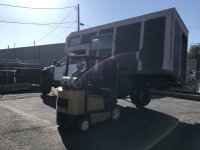
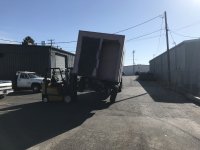
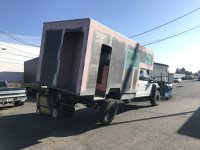
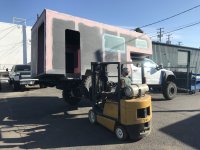
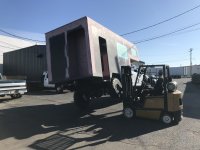
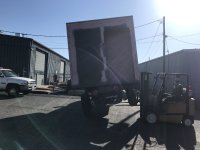
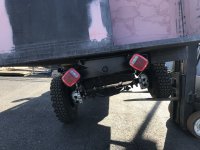
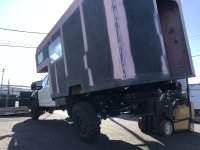
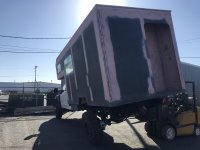
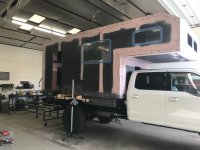
Since the fab shop has one of those fancy things they call a fork lift, I thought I would do a quick flex test since the camper shell is basically structurally complete.

Going up just a bit while checking clearances on everything, chassis/subframe to camper and camper to truck/cab.
IMG_0083.jpeg

ALL GOOD (y)(y).

Let HER RIP!
IMG_0090.jpegIMG_0088.jpegIMG_0089.jpeg

It doesn't look like much in the photos, but you get a bit bright eyed :oops:o_O when you see the left front tire just come off the ground, start hearing/seeing the right rear rear tire slide to the left/towards the fork lift, and only one wheel is about to be touching the ground-the right front. That is when you say I think we've got it.

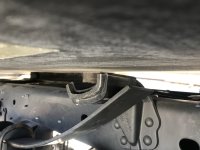
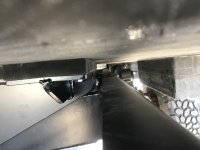
My clearances and bump stop at max flex test are dialed in just about perfectly. 1/2" between the top of the factory spring stop and the bottom of the camper and about a 1/16" space left on my pivot bump stop before it locks the rear pivot out.
IMG_0085.jpegIMG_0086.jpeg
 

Vance Vanz

Well-known member
Camper Flex & Clearance Test - Continued......

Hellz Yahz, that was fun; lets do the other side 😜🤪🤩

IMG_0100.jpegIMG_0101.jpegIMG_0102.jpegIMG_0103.jpegIMG_0099.jpegIMG_0095.jpegIMG_0098.jpegIMG_0094.jpegIMG_0093.jpeg

Everything seems super solid. Not a creek, squeak, scrape, grind, thud, crack, pop, or snap. Nothing but Crickets!!!!

Alright.............., enough screwing around; time to get back to work.
 

Vance Vanz

Well-known member
Camper Shell - Fairing/Body Work - Interior - Continued

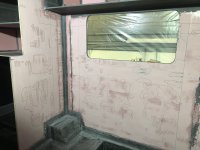
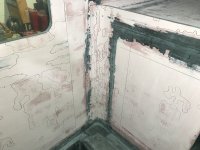
Sanding the first coat of fairing material is always the worst 🤨.

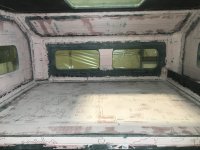
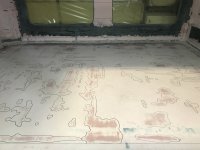
The first applied coat: in the bed area, on the pass through wall and the main walls of the drivers side wall are sanded. Now I'm laying down some camo and guide lines to apply a second spot fill coat. Certain areas on these noted areas/walls still need a first coat, but that wont happen until the second coat is applied and sanded on the original areas.
IMG_0124.jpegIMG_0129.jpeg
IMG_0118.jpeg
IMG_0130.jpeg

I'm sanding the first coat with 80 grit and then any second or third spot fill coat with 180. Not much material is needed for the second coat, and I usually apply it evenly/smoothly, so there shouldn't be any high spots that would require 80 grit. Also, the final sand on my end, in prep for primer, needs to be 180, so I'm trying to save some time on sanding by just transitioning to 180 for the second/third coats.

The pass through took longer than expected at the fab shop, go figure, so I'm going to try and power through some long days/weeks of fairing/body work to make up some time. I'm also a little brain fried from all of the thinking and designing required on the pass through, so some mindless sanding will be a little break.

I'm also going to start on the molds for the fairings this weekend or early next week. Those are going to take some time and require some brain power, patience and a lot of deep breathing.
 

Alloy

Well-known member
Camper Shell - Fairing/Body Work - Interior - Continued

Sanding the first coat of fairing material is always the worst 🤨.

The first applied coat: in the bed area, on the pass through wall and the main walls of the drivers side wall are sanded. Now I'm laying down some camo and guide lines to apply a second spot fill coat. Certain areas on these noted areas/walls still need a first coat, but that wont happen until the second coat is applied and sanded on the original areas.
View attachment 805136View attachment 805137
View attachment 805135
View attachment 805138

I'm sanding the first coat with 80 grit and then any second or third spot fill coat with 180. Not much material is needed for the second coat, and I usually apply it evenly/smoothly, so there shouldn't be any high spots that would require 80 grit. Also, the final sand on my end, in prep for primer, needs to be 180, so I'm trying to save some time on sanding by just transitioning to 180 for the second/third coats.

The pass through took longer than expected at the fab shop, go figure, so I'm going to try and power through some long days/weeks of fairing/body work to make up some time. I'm also a little brain fried from all of the thinking and designing required on the pass through, so some mindless sanding will be a little break.

I'm also going to start on the molds for the fairings this weekend or early next week. Those are going to take some time and require some brain power, patience and a lot of deep breathing.

A notched trowel will reduce filler/sanding

Felt pen can print through.
How long are the fairing/sanding boards?

Touch is better than the eye when fairing
 

rruff

Explorer
Just in awe of the work and detail you are putting into this, and taking the time to report and document, too! (y)
 

Vance Vanz

Well-known member
A notched trowel will reduce filler/sanding

Felt pen can print through.

How long are the fairing/sanding boards?

Touch is better than the eye when fairing
Hey Alloy,

Thanks for the comments.

For the interior, a high build primer is going to be used first, followed by a second layer of primer, before paint is applied. Per the paint shop, this will be thick enough to cover all pen markings. I went with a marker, instead of a pencil, because I needed permanent reference lines for sanding multiple coats and because various adjacent coats use the same single reference line(s) when being applied/sanded. In addition, the CF is black and may/often will show up through the fairing material in patches and as lines.

I'm using a combo of a 36", 24" 17" and 8" sanding board/block, but mostly the 36" and 17" are used on the larger areas.
 

Forum statistics

Threads
188,349
Messages
2,905,972
Members
229,958
Latest member
bdpkauai

Members online

Top