You are using an out of date browser. It may not display this or other websites correctly.
You should upgrade or use an alternative browser.
You should upgrade or use an alternative browser.
2022 Ford F550 - DIY - Adventure Expedition Vehicle Build Thread
- Thread starter Vance Vanz
- Start date
Vance Vanz
Well-known member
Thanks trackheadBeautiful work, will be a shame to cover all that pretty carbon with paint
Luckily I already processed the grief of painting all that pretty carbon fiber
Vance Vanz
Well-known member
Thanks so much and you are welcome.Your attention to detail and this build is TOP SHELF! Thanks for the pics!
BEAUTIFUL work! And lots of it!
I like the front profile.
CHEERS!!
Im enjoying your build as well and the clean work you are putting out.
If I only had a magic wand to speed up the process ?.
Vance Vanz
Well-known member
Bonding & Filleting - Front Walls of Camper
Not the most exciting to look at , but a necessary step in the process. Also, we gotta put something out there to keep the thread alive
  .
.
After everything was dry fit, it all came down so it could be sanded and cleaned. I was lucky to have no major gaps (less than 1/64") in any of the joints that would require excessive epoxy and therefor potentially create a spot for thermal bridging to occur.
Once the walls were epoxied and set in place, every thing was filleted and/or faired as needed. Getting everything to sit perfect, level and square, took some patience. Not setting the angled roof panel exactly in place and bonding it with the other three nose pieces was a pain, but necessary. I held off on bonding the front angled roof panel so I would be able to dry fit it in conjunction with the larger roof panel. This will ensure that I don't have any unanticipated fitting issues between the two.

Not the most exciting to look at
After everything was dry fit, it all came down so it could be sanded and cleaned. I was lucky to have no major gaps (less than 1/64") in any of the joints that would require excessive epoxy and therefor potentially create a spot for thermal bridging to occur.
Once the walls were epoxied and set in place, every thing was filleted and/or faired as needed. Getting everything to sit perfect, level and square, took some patience. Not setting the angled roof panel exactly in place and bonding it with the other three nose pieces was a pain, but necessary. I held off on bonding the front angled roof panel so I would be able to dry fit it in conjunction with the larger roof panel. This will ensure that I don't have any unanticipated fitting issues between the two.


Last edited:
Vance Vanz
Well-known member
Tabbing - Front Walls of Camper
After bonding and filleting, all of the surfaces were sanded and cleaned for tabbing. I did all of the tabbing for the interior joints (excluding the back wall and roof) in one layup. I wanted everything to be one chemical bond. I would have liked to do all of the interior tabbing in one shot, but the door for the MTB/gear locker did not arrive when it was supposed to, so the back wall still has not been laid up. I had to adapt and keep the project moving forward. Apparently, Santa did not grant me my one wish/present for X-Mas. I guess this was my year for a lump of coal!
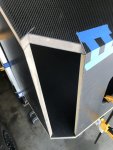
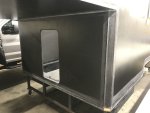
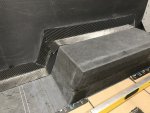
I routed/rounded off the top edge of the bed platform (so the CF could lay nicely over the corner-no bridging in the cloth and/or air gaps) and also did a tiny bit of structural fairing where the bed platform met the pass-through wall-before any tabbing went down (First picture). This was the only spot I needed to do any sort of fairing in the interior (1/32").
The tabbing schedule for the interior finished walls is: 4-1/2" width for the first layer (9.5oz plain) 6-1/2" W for the second layer (8.85oz biax) and 8.5" W for the third layer (5.7oz 2x2 twill). As always, I cut and dry fit everything prior to the layup: cloth, peel ply and plastic (to wet out some of the layers on and make it easier/cleaner to install them).
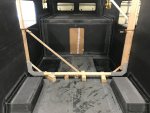
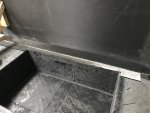
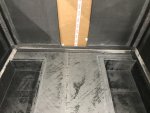
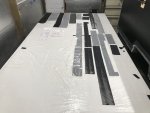
I was supposed to have someone helping me for the layup, but that fell through last minute, so it was another LONG solo day. 16 hours straight to get it all laid up and peel plied in one shot. Since the walls were only bonded and filleted, I was not able to put any weight on the bed platform/get up on it. All of the tabbing for the front section of the cab over had to be laid through the windows while bent over and standing on a ladder. Good times and a lot of deep breathing about 14 hours in.
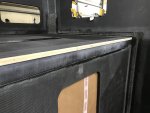
Some pictures of the cured tabbing:
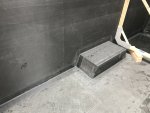
Bed platform rounded edge
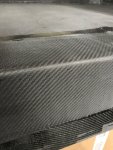
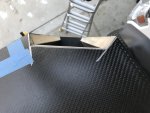
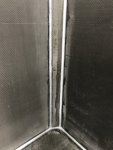
Angled corner of pass through wall and side wall.
(This is the best shot to see how the layers of cloth gradually step down, which should make finished fairing easier and only require a thin layer of material)

After bonding and filleting, all of the surfaces were sanded and cleaned for tabbing. I did all of the tabbing for the interior joints (excluding the back wall and roof) in one layup. I wanted everything to be one chemical bond. I would have liked to do all of the interior tabbing in one shot, but the door for the MTB/gear locker did not arrive when it was supposed to, so the back wall still has not been laid up. I had to adapt and keep the project moving forward. Apparently, Santa did not grant me my one wish/present for X-Mas. I guess this was my year for a lump of coal!
I routed/rounded off the top edge of the bed platform (so the CF could lay nicely over the corner-no bridging in the cloth and/or air gaps) and also did a tiny bit of structural fairing where the bed platform met the pass-through wall-before any tabbing went down (First picture). This was the only spot I needed to do any sort of fairing in the interior (1/32").
The tabbing schedule for the interior finished walls is: 4-1/2" width for the first layer (9.5oz plain) 6-1/2" W for the second layer (8.85oz biax) and 8.5" W for the third layer (5.7oz 2x2 twill). As always, I cut and dry fit everything prior to the layup: cloth, peel ply and plastic (to wet out some of the layers on and make it easier/cleaner to install them).


I was supposed to have someone helping me for the layup, but that fell through last minute, so it was another LONG solo day. 16 hours straight to get it all laid up and peel plied in one shot. Since the walls were only bonded and filleted, I was not able to put any weight on the bed platform/get up on it. All of the tabbing for the front section of the cab over had to be laid through the windows while bent over and standing on a ladder.
Some pictures of the cured tabbing:

Bed platform rounded edge

Angled corner of pass through wall and side wall.
(This is the best shot to see how the layers of cloth gradually step down, which should make finished fairing easier and only require a thin layer of material)

Last edited:
Vance Vanz
Well-known member
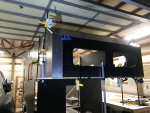
Over Sized Back Door - For the MTB/Gear Locker
I could not believe how hard it was to get a door with these basic specs: 36" to 42" wide, 70-72" high, no window, foam core and 1-1.5" thick. I'll spare you all the details, but here were a few of the hurdles.
Several of the vendors I was going to use didn't: want to make an oversized door because they felt it would warp, didn't want to ship one, were 6-8 months out when I was quoted 2-3 months max just a week prior, only wanted to make a door with a wood core, wanted $5,000-6,000 for the door,..........etc.
I finally found one, ordered it and the shipping company lost it for two weeks........... Are you kidding me? 10-15 phones calls and over 4 hours on the phone ? and I finally get it 3-4 weeks later. I also had to pick it up from the local shipper myself, so it would not take another 1-2 weeks to get to me ?.
It's finally here ?, not exactly what I want, but with a few modifications, I'll get it dialed in ?.
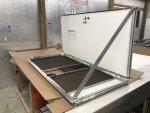
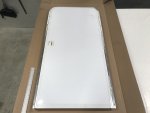

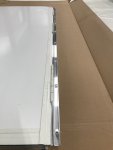
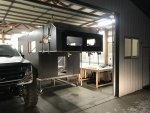
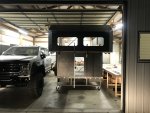
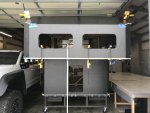
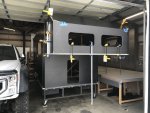
First Step, ditch the screen door.
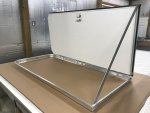
Next step, give it a little hair cut/trim
(As it will be screwed to the wall on the inside of the door jamb/frame, not the exterior/finished trim of the door frame and therefore through the exterior of the camper wall-Odd design)
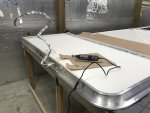
Now that looks a little cleaner
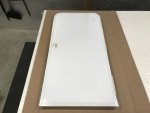
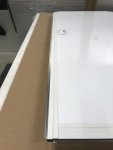

Next steps will be cutting the frame width down to 1-1/8" and having it painted along with the camper shell to match the truck.
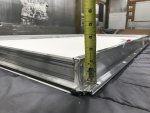
And yes, I thought about making my own back door. I was told by several others who have built their own fiberglass/carbon fiber camper shell and door(s) that building your own door may sound simple, but securing the hinges and creating a door seal that does not leak, is a COMPLETE P.I.T.A. I heeded their advice/warning and left it alone.
I could not believe how hard it was to get a door with these basic specs: 36" to 42" wide, 70-72" high, no window, foam core and 1-1.5" thick. I'll spare you all the details, but here were a few of the hurdles.
Several of the vendors I was going to use didn't: want to make an oversized door because they felt it would warp, didn't want to ship one, were 6-8 months out when I was quoted 2-3 months max just a week prior, only wanted to make a door with a wood core, wanted $5,000-6,000 for the door,..........etc.
I finally found one, ordered it and the shipping company lost it for two weeks...........
It's finally here ?, not exactly what I want, but with a few modifications, I'll get it dialed in ?.


First Step, ditch the screen door.

Next step, give it a little hair cut/trim
(As it will be screwed to the wall on the inside of the door jamb/frame, not the exterior/finished trim of the door frame and therefore through the exterior of the camper wall-Odd design)

Now that looks a little cleaner


Next steps will be cutting the frame width down to 1-1/8" and having it painted along with the camper shell to match the truck.

And yes, I thought about making my own back door. I was told by several others who have built their own fiberglass/carbon fiber camper shell and door(s) that building your own door may sound simple, but securing the hinges and creating a door seal that does not leak, is a COMPLETE P.I.T.A. I heeded their advice/warning and left it alone.
Last edited:
Hey Vance,
thanks.
This is the most informative camper build thread I've read. Answered a lot of questions that I was still rolling in my head before diving into such an adventure.
A question, if you don't mind. Fresh, gray and black water tanks. Did you find the sizes you need, or just create a sealed "box" for each?
In case you need some help with electronics - solar or else, that's an area I might be able to chime in
Thanks
Oskar
Vance Vanz
Well-known member
Hey Oskar,Hey Vance,
thanks.
This is the most informative camper build thread I've read. Answered a lot of questions that I was still rolling in my head before diving into such an adventure.
A question, if you don't mind. Fresh, gray and black water tanks. Did you find the sizes you need, or just create a sealed "box" for each?
In case you need some help with electronics - solar or else, that's an area I might be able to chime in
Thanks
Oskar
Thanks ? and I'm glad the thread has been helpful in some way.
Since this thing is taking so long, (specifically the composite work) I figured why not include more detailed info of the process. Maybe I won't be so detail oriented on the thread once I get all of the composite work complete and it starts moving along a bit faster ?.
As far as fresh and grey water tanks (No black as I will be using a composting toilet) I will have each custom made (By a professional shop). The carbon fiber box that houses my water tank has a small jog in it and the top of my water tank will probably be wider than the base that sits inside the box, so custom is my only option to maximize every inch I can get. I'm shooting for 90-100 gallons of fresh water.
They grey water tank will also be custom made as it will sit behind the driver's side rear tire and taper/angle up on the back side. It will need to sit within the custom fairing that I'm planning on making out of CF or fiberglass.
I appreciate your offer related to electrical. Electrical and plumbing are my next steps on the build, at least getting all of the layout and routing finalized. I'm sure i'm going to be asking for a lot of input from the Forum Brain Trust once I get the shell complete-Thousands of minute decisions and details to come ?.
If you have any other questions just let me know, I'll do my best to answer what I can.
Last edited:
StenchRV
Well-known member
I'm shooting for 90-100 gallons of fresh water.
They grey water tank will also be custom made as it will sit behind the driver's side rear tire and taper/angle up on the back side. It will need to sit within the custom fairing that I'm planning on making out of CF or fiberglass.
Sounds very familiar
Cheers,
Craig
Alloy
Well-known member
Two of my FW tanks are 110g roto molded. There must be 20gal of plastic because the tanks only hold 90gal.
Two other 110g tanks are fabricated with 3/8" HDPE. The shop wanted to use 1/4" LDPE (easier to weld) but I didn't want it because I've seen what (strech/sag) happens to it over time. We settled on 3/8" HDPE for the bottom and sides (welded both sides) with a 1/4" (weded one side) reinforced (1/4"x 1 1/2" strips) HDPE top.
Clearance on the plumbing/electrical/framing was really close (ideas/designs change) so I made the mandrels and spun the fitting in myself after everything was test fit.
For frost protection there is 2" XPS on 6 sides and the bottom XPS is sloped 1/4 / ft to the drains and pick-ups. For sanitizing It's best if the FW tanks drain 100%.
Similar threads
- Replies
- 5
- Views
- 484
- Replies
- 25
- Views
- 2K
- Replies
- 2
- Views
- 624
- Replies
- 0
- Views
- 865

