2022 Ford F550 - DIY - Adventure Expedition Vehicle Build Thread

Vance Vanz

Well-known member
Fairing/Skirt Mold for the Camper - Drivers Side Front - Continued......

Where did we leave off.........?

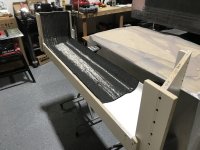
Finishing touches on the mold before waxing it and dry fitting materials. It never ends 😜!

Rounding off all squared edges so the mold is less likely to puncture the vacuum bag.
IMG_0208.jpeg

Bondo-ing the ends of the EMT (were also sanded smooth) and molding clay in screw holes to prevent possible vacuum bag elongation/punctures.
IMG_0209.jpegIMG_0210.jpeg
 

Vance Vanz

Well-known member
Prep & Dry Fit of Materials for Carbon Fiber Fairing/Skirt - Drivers Side Front

I'm always surprised at how long it takes to prep materials and do a layup o_O.

I still had some Kevlar left over from the inside of the wheel wells, so I decided to reinforce the front corners of the front fairings for both sides of the camper. This is probably one of the areas most prone to getting hit by rocks, road debris, etc. Two layers of Kevlar were used.
IMG_0211.jpeg

Dry fitting one of the CF layers
IMG_0214.jpegIMG_0216.jpeg

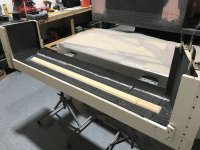
The mold has plenty of bends/contours to help reinforce the carbon fiber/part, but I also wanted to add something down the length of it, to help reinforce it and prevent any possible bowing. Any number of products could have been used, but I decided to use something I already had on hand, 1/2" thick Divinycell core. I beveled and rounded off the edges so the CF cloth could more easily form to it/to prevent air gaps.
IMG_0221.jpegIMG_0207.jpeg

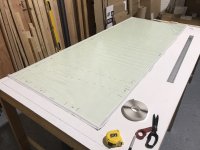
Now onto the consumables: peel ply, bleeder breather cloth (Not shown) and the vacuum bag. Note: Some use very large vacuum bags and they can just put a ton of slack in the bag, tacky tape it down/together and call it good. Unfortunately for me, I am only using the standard 110" wide rolls/bag, so I have to measure what I need to make sure I don't come up short-especially on complex molds/parts. I also pre-mark and pre-pleat everything because I am always pressed for time at the end of the layup, to get the part on a pump before the resin flashes off and starts to cure. I'm also working solo on these layups, so it's always a bit of organized-anxious-chaos by the end. Basically a good old fashioned Sh(smiley face)t Show!

I share this because, measuring, marking and pre pleating a bag for a complex part/layup takes fooooooreeeeeevvvvvver! The price you have to pay for being a one man DIY shop on somewhat of a budget :cry:😁.
IMG_0227.jpeg
IMG_0229.jpegIMG_0230.jpeg

Technical Info for those interested:

I wanted to make sure that the layup schedule/weight of carbon fiber for the fairings/skirts was between 40-50oz. Some might say this is a little overkill, but this is an expedition vehicle, not a show car, RIGHT? I wanted them to be able to take a little beating if needed.

I could have just used two layers to get to the desired weight I wanted (I would have had to purchase additional/separate material), but I wanted/needed to use the CF cloth I had left over from the rest of the build. I also wanted to ensure the weaves of each layer were different/in a different orientation for added strength, so this mainly determined the number of layers I used. Additional thinners layers, for the first two layers used, also helped the CF cloth shape/contour to the mold better than a thicker single first layer.

Layup Schedule (Four Layers - 47.4oz Total):
5.7oz 2x2 twill (first-outside/top layer), 8.85oz 45 biaxial (second/middle front layer), 24oz plain weave (third/middle back layer), ½” thick 2-1/2” wide core foam (down center of front fairings) and 8.85oz 45 biaxial (fourth-most inside/back layer).

Kevlar used to reinforce the front corner was a 6oz-ish and a 10oz-ish.
 

Vance Vanz

Well-known member
Staging for Layup of Carbon Fiber Fairing/Skirt - Drivers Side Front

I had to finally give the vacuum pump a little love for all of its hard work so far on the build
IMG_0232.jpeg

Strategically staging everything so I can get the fairing/part on the pump as fast/efficient as possible before the resin flashes off.
IMG_0235.jpeg
IMG_0237.jpeg

Additional CF/Kevlar layers stacked on separate pieces of cardboard, oriented appropriately and on pre-cut pieces of plastic for wetting them out.
IMG_0239.jpeg

Consumables in order and stands ready/needed for the mold/part when applying the vacuum bag.
IMG_0234.jpeg

Two piece vacuum bag, misc items and pump ready to go
IMG_0233.jpegIMG_0236.jpeg
 

Vance Vanz

Well-known member
Layup & Demolding of Carbon Fiber Fairing/Skirt - Drivers Side Front

Finally on the pump after wrangling several 50" long wetted out pieces of CF cloth in place, that had multiple tabs cut in them, and had to be laid perfectly and precisely in some very tight radiused corners. Not to mention trying to do this with already wetted out CF cloth/side walls close by that would catch and stick the piece I was trying to lay.

Where the H(smiley face)ll is my little composite helper/extra set of hands when I need them? Good thing I'm proficient at deep breathing and meditation 😖😇.

Vacuum pulling down and orienting pleats where they need to sit.
IMG_0242 2.jpeg

Vacuum all good to go. Too bad it's 2 am because I started my day/the layup later than expected :poop:🙃.
IMG_0243.jpegIMG_0247 2.jpeg

The aftermath of the slightly anxious-organized-chaos 😁!
IMG_0245 2.jpegIMG_0246 2.jpeg

A day or two later, demolding. I built the mold (end sections) so they were strong enough to support/reinforce the part, while also being somewhat easily-ish removable/breakable if needed to get the fairing/part out. It took some time, but the part came out unscathed.
IMG_0253.jpeg
IMG_0254.jpeg
IMG_0255.jpeg
 
Last edited:

Vance Vanz

Well-known member
Carbon Fiber Fairing/Skirt for Camper - Drivers Side Front

Here is the rough part out of the mold. The white is the sealer that came off the mold with the part and will be taken off, sanded, when I prep the part for bonding to and fairing with the camper.
IMG_0256.jpegIMG_0257.jpegIMG_0258.jpegIMG_0259.jpegIMG_0260.jpegIMG_0261.jpegIMG_0262.jpegIMG_0264.jpegIMG_0265.jpeg

Everything looks good and the layup held all of the lines/contours from the mold very well.
 

Vance Vanz

Well-known member
Dry Fit & Shaping - Carbon Fiber Fairing/Skirt for Camper - Drivers Side Front

What do you think?
IMG_0266.jpegIMG_0267.jpegIMG_0268.jpegIMG_0269.jpegIMG_0270.jpegIMG_0271.jpeg

It's a bit hard to see the definition of the lines, contours and corners on the fairing, because of the patches of white sealer, but the overall fitment came out better than I expected. I was pleasantly surprised. The endless hours of designing and building the mold paid off.

For me, (up close) the fairing looks a little weird/wonky on the camper, but I think that is a combination of: 1. the white sealer on the fairing needing to be removed 2. the line between the bottom of the camper and top of the fairing needing to be tabbed/faired and 3. the rear fairing and fender needing to be fabricated/installed to tie it all together. Good thing I can just look at the newer ER's as a reference and assurance to know that it will all look great in the end.

I bathroom scaled the fairing and it came in right at 6lb's. I'm also glad I reinforced the center of it with the core material.

Final contouring on the mold so it accommodates the cut in boxes on the camper and subframe. The notch in the bottom of the fairing (first pic) provides clearance for the front outrigger when removing/installing the camper. It's only visible if you crouch way down/look under the truck/camper.
IMG_0273.jpegIMG_0274.jpeg

I'm already underway with the design and layout, but I have three more fairings to complete. It is going to take some time and be a bit of a PITA. I may go dark for a bit on the build thread, while completing them, or only post significant/important layout items and/or the finished product.

The general process for the three remaining fairings is going to be the exact same as this fairing and I think we have all had enough composite information/projects for a single build thread. I'm surprised I haven't had any composite nightmares yet, or a composite break down 😖🤬😩😭😵‍💫🥴!

Until next time............
 
Last edited:

Vance Vanz

Well-known member
A BIG Thanks to Wilds!!!!

A gentleman, and scholar, by the name of Wilds Drake reached out to me on the portal earlier this year. He let me know that he had just finished his own similar custom expedition truck (EarthRoamer-ish inspired) and offered to be a resource if I needed it. He said his two-year build/journey put him through the ringer!

He knew better than I, the can of worms I had opened up and the magnitude of what I was in for related to embarking on such a comprehensive build. Tack on trying to complete it all primarily DIY style and Wilds probably thought I had a few screws loose 🤪🤯🤣.

He passed along his Instagram, which included some photos of his completed project
I was absolutely BLOWN AWAY 😳🤩 by his build quality and attention to detail. His rig is the closest thing to an EarthRoamer (ER), without being an ER, that I have seen. It was/is the build quality I’m shooting for. Wilds, You Da F(Smiley Face)cking Man 😎!

Lucky for Wilds, he is a professional as opposed to a pre-fessional like me. He builds carbon-epoxy flats boats for a living. If you like boats, fishing, or just seeing cool-clean built products, check him out https://www.drakeboatworks.com/.

True to his word, Wilds has become an invaluable resource for me on the build, a TREMENDOUS help! He’s also been somewhat of a composite mentor given his profession and the current stage I’m at in the project. Since his build standard is professional and top notch, he always keeps me pointed in the right direction, even if it’s going to kill me by doing so ;)😁. Seriously though, I appreciate that our build quality, and willingness to do what it takes to get there, is similar.

I’ve thanked Wild’s more times than I can probably count, to express the appreciation and gratitude I have for all of his time, knowledge, kindness and help, but I thought this could be one more way. Taking the time to publicly thank and acknowledge him was important to me, especially on the build thread and in the expedition/overland community.

Wild’s, one last BIG thanks to you Brotha! And as always, if there is ever anything I can do to return the favor, Just Ask! Until my next round of slightly anxious-endless-silly build questions, at a time when you are least expecting them ……………………… 😊
 
Last edited:

Vance Vanz

Well-known member
It looks wonderful, professional. Also a bit OCD, ADD, ADHD, crazy, insane, etc. You are going to really enjoy this thing once it is done. Sit back with a 12 pack and just drool over how good it will look.
Thanks ITTOG 🙂; I appreciate it (y)!

Yahp, I'm trying to catch all of the desires and details the first go around/build. I don't think I have any interest in attempting another one, so there won't be a second chance/opportunity.

I better have a trip of a lifetime in this thing. If not, I might just set it on fire somewhere in South America and catch a flight back to the U.S. 😆.
 

Vance Vanz

Well-known member
This thread is nuts. Your “one off” first effort success rate is like 100%
Don't jinx me trackhead ;)!

No major screw ups and/or scrapped parts yet and I don't want to start now 😁.

I may be batting a 1000 percent on the end product, but the amount of time AND times I: plan, design, measure, layout, template, dry fit, contemplate, rework, recontemplate............ and if needed, Re: plan-design-measure-layout-template-dry fit-contemplate-work....... is completely NUTS.

I always get subtle waves of anxiety when I start a new part of the project that I know will cost a lot of time and money if I screw something up. And the irony, this is basically everything on the build 🤪🤣! This is also the tough thing about composite work in particular. You can spend a week designing and building a mold and then another three to four days prepping materials and doing the layup. 7-11 days, at 12-14 hours per day, is a Mo Fo to lose for a screw up. And, if it is a big enough screw up, you might have to start the whole process over again 😳😖😫🤬😩😢.

Thanks for your kind words trackhead. I'll keep cranking on this thing!
 

ITTOG

Well-known member
Don't jinx me trackhead ;)!

No major screw ups and/or scrapped parts yet and I don't want to start now 😁.

I may be batting a 1000 percent on the end product, but the amount of time AND times I: plan, design, measure, layout, template, dry fit, contemplate, rework, recontemplate............ and if needed, Re: plan-design-measure-layout-template-dry fit-contemplate-work....... is completely NUTS.

I always get subtle waves of anxiety when I start a new part of the project that I know will cost a lot of time and money if I screw something up. And the irony, this is basically everything on the build 🤪🤣! This is also the tough thing about composite work in particular. You can spend a week designing and building a mold and then another three to four days prepping materials and doing the layup. 7-11 days, at 12-14 hours per day, is a Mo Fo to lose for a screw up. And, if it is a big enough screw up, you might have to start the whole process over again 😳😖😫🤬😩😢.

Thanks for your kind words trackhead. I'll keep cranking on this thing!
I get that anxiety as well. I little bit of excitement and a lot of concern over getting it right the first time.
 

Vance Vanz

Well-known member
Electric Entry Steps - Layout & Mounting

It may sound silly, but getting the electric steps mounted on the camper is a mini-milestone for me on the build. It's an indicator that 1. the exterior composite work is close to being done and 2. The most complicated section/meeting point on the build (in my opinion), step box/wheel well/entry door, is finalized. It's also a great feeling to be able to mount something to the build that I haven't had to spend weeks, if not months, fabricating.

Taking a ton of measurements and cross referencing it all, about a 100 times, in conjunction with the design/layout of the rear fairing/skirt.
IMG_0276.jpeg
IMG_0286.jpeg

My "backyard jack stands" to get some additional measurements.
IMG_0280.jpeg

I drilled and tapped the steel imbedded in the step box so six 3/8" grade 8, fine thread, bolts can be used. Mounting the steps by myself was a chore (lets just be honest and say it was a PITA:p) and required some monkey maneuvering 🐒! And as my luck would have it, after getting three of the four bolts in the step mounting plate, the fourth one was off by about a 1/16". I had to pull everything down, grind out the hole and monkey maneuver the entire assembly back up again. Gotta love it when the factory pre drilled mounting holes are not square.
IMG_0297.jpeg
IMG_0298.jpeg

Finally got her dialed
IMG_0304.jpegIMG_0303.jpegIMG_0299.jpeg

These are the additional brackets I had fabricated to help distribute the stress/torque/weight of the steps, when they open, across the entire step box. I didn't want a stress crack to possibly form in the carbon fiber of the camper, just behind the back of the factory step mounting platform. Maybe not needed, but I'm building this thing to last.
IMG_0292.jpegIMG_0300.jpeg
 
Last edited:

Forum statistics

Threads
188,259
Messages
2,904,635
Members
229,805
Latest member
Chonker LMTV
Top