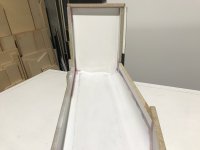
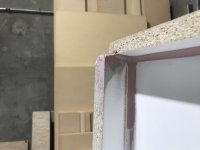
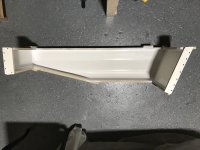
2022 Ford F550 - DIY - Adventure Expedition Vehicle Build Thread

Vance Vanz

Well-known member
Layout & Templating - Carbon Fiber Fairings/Skirts for Camper - Rear

Ohhhhhhh Man!

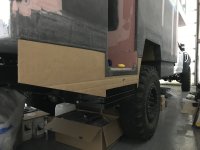
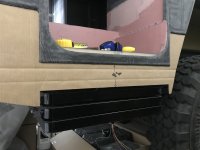
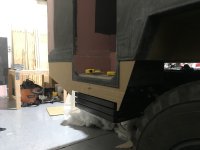
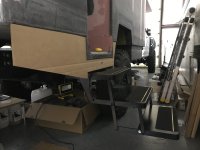
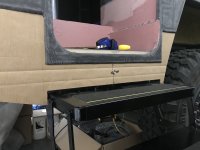
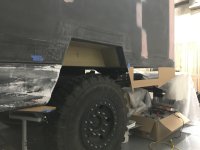
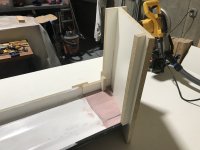
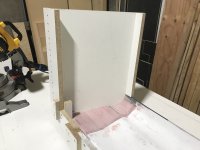
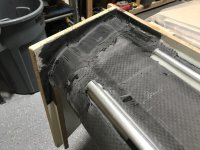
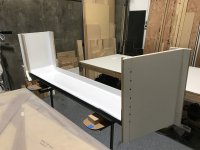
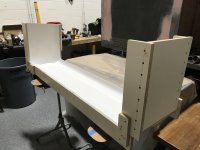
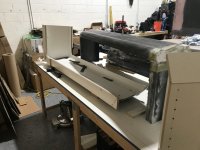
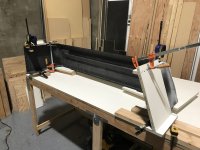
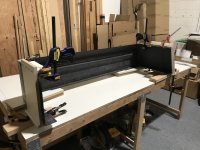
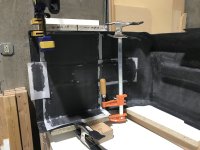
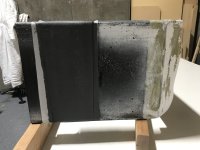
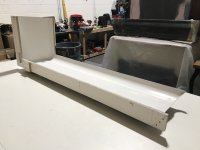
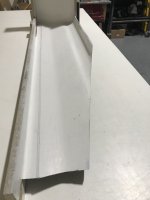
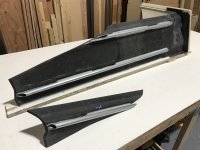
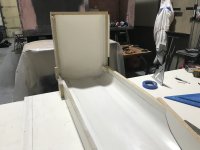
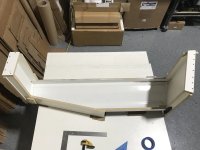
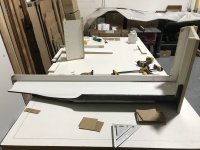
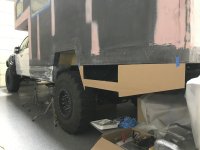
This may not look like much, but it took days to dial in the template for the rear fairings/skirts. I decided to start with the passenger side rear first, that fits around the step box. Step box wrap around, entry step location/mounting, mud flap mount/design/protection of steps, exhaust pipe routing/termination, departure angle, aesthetic tie in with the rear bumper, ........... etc. all had to be factored.

Once all of this was finalized on the passenger side, I then had to consider/account for everything on the drivers side rear of the camper that may affect the shape/design of the fairing, since the fairings will be an exact mirror of each other. Sounds simple, but the drivers side has the grey water tank, two plumbing drain lines going through the camper floor, two fuel filler lines going through the camper floor, ................. You get the idea.

This is when a lot of anxiety kicks in, because I don't want to forget something. One screw up could mean a scrapped composite fairing and weeks of extra work 😬😵‍💫.

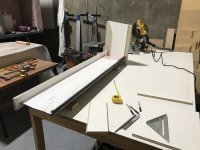
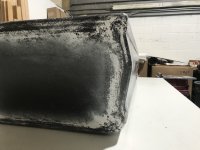
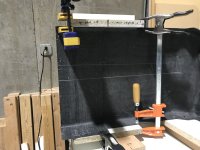
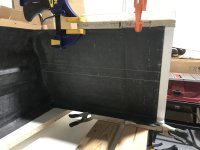
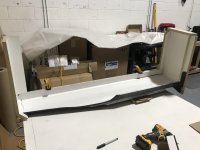
All of the top templates, to aid in getting the bottom one.
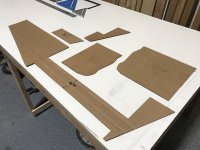
IMG_0324.jpeg

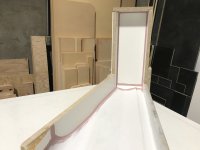
Building the mold for this one is going to be............... (I don't have a word of phrase for it yet🙁. I'll get back to you)!
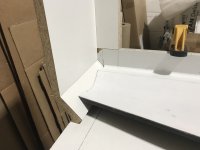
IMG_0315.jpeg
IMG_0312.jpeg
IMG_0311.jpeg
IMG_0319.jpeg
IMG_0317.jpeg

Obviously the fairing for the drivers side will not have cut outs for the step box and stairs in it.
IMG_0321.jpeg
IMG_0323.jpeg
 
Last edited:
trackhead

Adventurer
With such a light build with carbon interior/exterior I can't imagine you'll be anywhere near GVWR when this project is rolling down the road. I know it's hard to estimate, but it's hard to imagine the camper finished weighing more than 3,000lbs dry?
 

Vance Vanz

Well-known member
With such a light build with carbon interior/exterior I can't imagine you'll be anywhere near GVWR when this project is rolling down the road. I know it's hard to estimate, but it's hard to imagine the camper finished weighing more than 3,000lbs dry?
I know of two other people who built their camper shells out of carbon fiber (CF). One is similar in size to mine and the other is slightly smaller. The one similar to mine included CF fairings and no core material. The smaller one had resin infused walls like mine, with core material, but no other CF parts/items. They were both in the 900lb-ish range for just the carbon fiber shell/items noted above.

I'm completely guessing here, but I would imagine I will be in the 1,200 to 1,300lb range for the shell and all associated CF items built into it/attached to it. I would hope no more than 1,350lb.

As far as the dry weight of the camper when the build is complete, I have no idea. Maybe we should start a little betting pool. The winner would get the cash and the loser (furthest away from the actual weight) could pay for my custom bumper or spare tire carrier 😁 😜.
 

trackhead

Adventurer
I'm going with 2300lbs complete, but no water, food, bedding.

Either way, that 550 is going to be chill to drive and nowhere near GVWR which will obviously be awesome.
 

180out

Well-known member
You may like to add a mud/sand flap to protect those steps. they get fussy when they fill with grit. Mine are in a direct path of the front tires and i learned the hard way.
 

Vance Vanz

Well-known member
You may like to add a mud/sand flap to protect those steps. they get fussy when they fill with grit. Mine are in a direct path of the front tires and i learned the hard way.
Thanks for the additional confirmation on this 180out (y)(y)!

This is one thing I noticed on most, if not all, of the professional builders that have electric steps mounted behind the rear tire. They only protect the upper mounting plate section, with the drive motor and electric parts, but leave the step arms and associated bushings exposed.

I was a bit shocked and wasn't going to make the same mistake on my build.

I have accounted for this in two ways. 1. I made the front section of the fairing/skirt that surrounds the steps (passenger side rear) 19" long. This puts the inside/back edge of the front of the fairing a 1/4" past the very back end of the step arms. 2. I'm also going to make the mud flap that attaches to this section of the fairing the same depth, towards the back/inside edge, and the front/outside edge will also extend out maybe 1.5-2" past the fairing/front of the steps. This way, the entire set of steps, including the step arms and bushings will all be completely protected.

Keep chiming in with these helpful nuggets of info whenever you see/think of something.

I hope you had a good Christmas!
 
Last edited:
180out

Well-known member
Thanks for the additional confirmation on this 180out (y)(y)!

This is one thing I noticed on most, if not all, of the professional builders that have electric steps mounted behind the rear tire. They only protect the upper mounting plate section, with the drive motor and electric parts, but leave the step arms and associated bushings exposed.

I was a bit shocked and wasn't going to make the same mistake on my build.

I have accounted for this in two ways. 1. I made the front section of the fairing/skirt that surrounds the steps (passenger side rear) 19" long. This puts the inside/back edge of the front of the fairing a 1/4" past the very back end of the step arms. 2. I'm also going to make the mud flap that attaches to this section of the fairing the same depth, towards the back/inside edge, and the front/outside edge will also extend out maybe 1.5-2" past the fairing/front of the steps. This way, the entire set of steps, including the step arms and bushings will all be completely protected.

Keep chiming in with these helpful nuggets of info whenever you see/think of something.

I hope you had a good Christmas!
I did and Happy new year to you and yours! looking forward to finding you on a dirt road some day soon.
 

Vance Vanz

Well-known member
Fairing/Skirt Mold for the Camper - Passenger Side Front

Time just flies bye on these builds :oops: ?????????

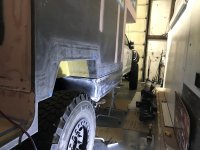
First step was cutting the main mold section used on the previous mold (Drivers Side Front), in a manner that maximized its use for all of the subsequent molds. I also had to cut it in a way that left the top portion undisturbed, so I wouldn't have to rebond it and also because it is the main reference point for all aspects of the molds layout.
IMG_0326.jpeg

Bonding and tabbing an additional main section onto the main mold
IMG_0328.jpegIMG_0329.jpeg

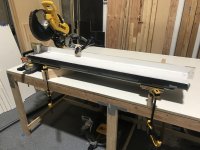
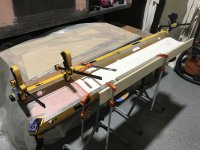
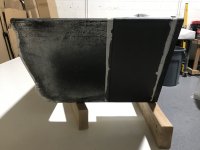
Cutting it down to size. (The odd ways I often have to support/jig something in order to make a cut.)IMG_0335.jpegIMG_0337.jpeg IMG_0338.jpeg

Building the first end/side of the mold
IMG_0341.jpeg
IMG_0342.jpeg
 
Last edited:
Vance Vanz

Well-known member
Fairing/Skirt: Mold, Layup & Demold for the Camper - Passenger Side Front

Second side/end under construction
72523866917__A6B61893-F915-4D81-A7FF-2EEF3DD8AE56.jpeg

I also tabbed the wheel well side/end of the mold to the main mold section, on the bottom side of the mold. This side is the back portion for this mold and will become the front portion of the next mold (the drivers side rear fairing). I wanted to ensure that this side of the mold did not break loose during the demolding process. This will save me some time of not having to rebuild one end of the next mold. It's not the prettiest tabbing job, but it will get the job done
IMG_0352.jpeg

Mold complete, faired/filleted and sealed
IMG_0345.jpegIMG_0346.jpeg

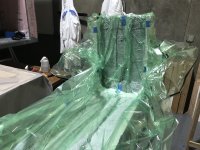
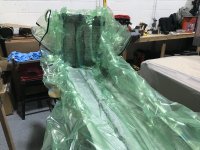
Layup on a pump
IMG_0361.jpegIMG_0357.jpegIMG_0359.jpeg

Demolding. And...., my wheel well tabbed side/end stayed put as planned 😎!
IMG_0371.jpeg
 

Vance Vanz

Well-known member
Carbon Fiber Fairing/Skirt for Camper - Passenger Side Front

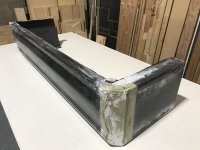
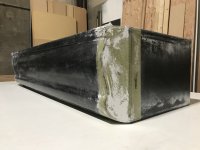
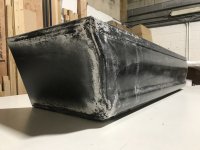
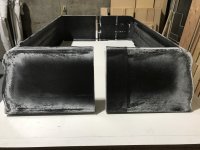
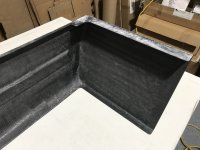
Rough part out of the mold.
IMG_0382.jpegIMG_0379.jpeg
IMG_0380.jpegIMG_0381.jpeg

The inside of the the part has some additional CF reinforcement on both ends of the fairing/skirt. I will explain the purpose of this in a later post.
IMG_0377.jpegIMG_0378.jpeg

Final cutting and shaping
IMG_0385.jpegIMG_0386.jpeg

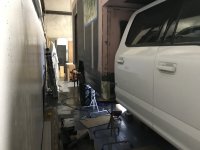
Dry fitting onto the truck. Sorry the camera angles/pictures are not that great. The lighting in the shop sucks and the truck is pretty close to the wall on this side of the shop.
IMG_0396.jpegIMG_0394.jpeg
 

Vance Vanz

Well-known member
Oversight & Additional Composite Work - (That Sucks!)

trackhead, you jinxed me. I blame this one on you ;)😛!

You may, or may not, have noticed that the sides/ends of the passenger side front mold/fairing are longer than the drivers side. After staring at the drivers side front fairing (dry fitted on the truck) for a couple of days, I decided the front side/section was too short. Originally I had it terminate about an inch or so past the turn out on the back of the cab. This was simply too short, as the termination/end of the fairing kept catching my eye and you could also see back into the mounting bolts on the front outriggers of the subframe. You could also see part of the e-brake mounting bracket. It just didn't look clean enough for me.

In addition, the back end (wheel well side) of the fairing originally terminated even with the back wall of the wheel well. After thinking about how I wanted to fasten a blank of piece that will sit below the bottom of the camper and along the back wall of the wheel well (to block off being able to see the 4"H space/gap between the chassis frame and the bottom of the camper), I decided to extend the back side of the fairing as well. This way, the fasteners for this blank off piece, on the back wall of the wheel well, can be installed on the back side, hidden. Also, the additional length on the fairing hides/cleans up being able to see other components on the truck chassis. Basically it cleans a lot of aesthetics up.

it doesn't sound like much, but adding 5-3/4" to the front side of the fairing and 4-1/2" to the back side was a couple days of work. I could have let it go, but I knew this is one of those things that I would have regretted and been pissed at myself for not taking the additional time to make it look better. I caught all of this and made these decisions before I started on the passenger side front mold/fairing, so I was able to incorporate the new measurements into the associated mold/layup.

Here's what it took to extend the drivers side, to match the passenger side 🤨☹️.

Laying up new pieces for the front and back ends.
Note: since the front and back ends are now a bit longer for both of the front fairings, I wanted to add something to them to stiffen them up, to prevent them from possibly bowing (in the center and at the very ends). Rather than using a 1/2" Dinycell stringer, like I did down the side length of each fairing, I just added an additional 3" width CF layer of 24oz plain weave, to the very vertical end of the fairing and down the center line of both ends (On the inside of both fairings). This did the trick and was all that was needed.​
IMG_0331.jpeg

Using pieces from the previous mold as jigs to get everything straight/inline for bonding
IMG_0362.jpegIMG_0363.jpegIMG_0364.jpegIMG_0365.jpeg

Tabbing the insides.
IMG_0366.jpeg

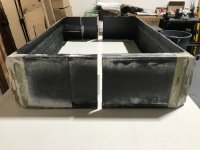
Both front fairings. You can see the additional length that was added to each side.
IMG_0383.jpegIMG_0384.jpeg

Tabbing the outsides
IMG_0391.jpegIMG_0392.jpeg

Who said composite work wasn't fun and fast? I have all the time in the world. Who needs a life or to finally get on the road and actually enjoy this thing? Not me I say; I love working on this thing 24/7, 365 😫😵‍💫...... 😆.
 

Vance Vanz

Well-known member
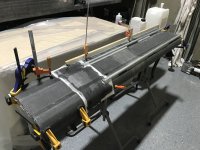
Fairing/Skirt Mold for the Camper - Drivers Side Rear

Maybe this is already assumed/known, but I'll share it for general build info. If I'm not working on the fairings/skirts (making molds or doing the layup), I'm doing fairing/body work on the inside of the camper. I have been bouncing back and fourth between the two ever since I started on the fairings/skirts.

Maybe I should have said BRUTAL fairing/body work on the inside of the camper. I won't even get started on how it may be the most tediously time consuming form of manual labor I have ever done. Let's get back to making the mold before I go down the rabbit hole.

Here is what I'm starting with from the previous mold. One end is already almost fully complete, Whoo Hoo!
IMG_0376.jpeg

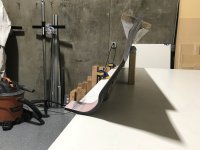
I had to make a long cut at an angle on the back end of the main mold, for the departure angle of the fairing. Since I did not have a tool/machine to make this long of a straight cut and deep enough of a cut (given the contours/depth of the main mold) I was contemplating/planning on having a commercial shop make the cut. I decided to give Wilds a call to see if he had any ideas.

He simply said "Just cut it with an angle grinder." After I though about it, I chuckled a bit. I know composite workers and metal workers use an angle grinder to cut just about anything and everything they can get their hands on. Hell, composite and metal workers would probably cut down a tree, or their filet mignon, with an angle grinder if they could 🤣!

It's kind of funny, I have been cutting and shaping the finished CF fairing/skirts with my angle grinder, but my brain did not translate cutting the main mold the same way. I guess it hadn't crossed my mind because I needed this cut to be perfectly straight and it is a long cut at an angle with large contours in the mold. I also needed the cut line, blade of the cutting tool, to stay perpendicular to the mold the entire length of the cut. Not to mention we are also talking about the main mold section I only have one of and I can't afford to make a single mistake. I will also have to rebond the piece that I cut off (for this long angled cut), as I need to reuse this section for the next mold. If I don't/can't reuse this section, I won't have enough of the main mold section left for the final mold. You get the idea of why my brain was in uber conservative/heightened protective mode.

Well long story long, I made the cut with an angle grinder. Getting a straight line drawn on the large contours of the mold was actually harder than making the cut. Thanks again Wild's, you saved me $75-150 bucks and a couple of hours running around town (y)(y).
IMG_0398.jpeg
IMG_0401.jpeg
IMG_0400.jpeg

Building the remaining end.
IMG_0406.jpegIMG_0405.jpeg

IMPORTANT Intelligence Reminder!
If you set your very laboriously time consuming mold on the end of your shop table, and your gut says it might fall, DON'T leave it there to go quickly grab a clamp to clamp it down to the table. If you do, as soon as you turn around to go grab the clamp to fasten/support it to the table, to prevent it from falling off the table, YOU WILL HEAR A LOUD CRASH and YOUR MOLD WILL BE ON THE SHOP FLOOR!​
If such a thing happens to you, REMEMBER to LOOK AWAY first. No peeking! Then IMMEDIATELY take at least a couple of deep breaths (probably even better that you take15-20 deep breaths), before you look at the mold and mess.​
What a Jack Off 🤡!​
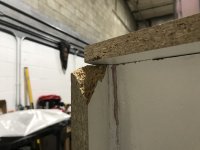
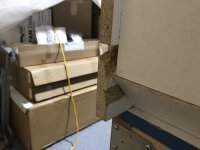
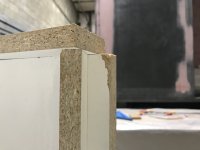
Lucky for me, only some corners got banged up. Nothing some pooky can't fix. Somebody must be looking out for me. If I would have broke off one of the ends, in particular the one I tabbed, I would have lost it, exploded or imploded​

IMG_0411.jpeg
IMG_0407.jpeg
IMG_0409.jpegIMG_0412.jpeg
 
Last edited:
Vance Vanz

Well-known member
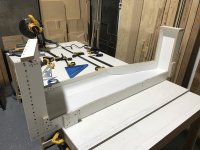
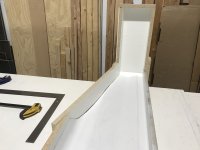
Fairing/Skirt Mold for the Camper - Drivers Side Rear - Continued......

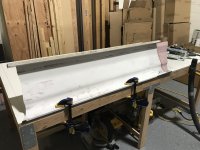
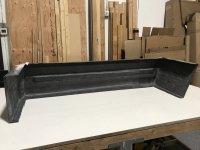
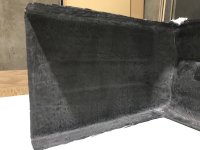
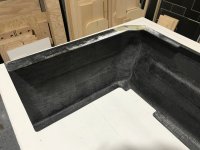
Finishing out the build of the ends and bottom side of the mold.
The bottom side and ends of the front and back of the mold all have a flange, so a bottom and back panel can be fastened to the fairing and each other. This will allow the grey water tank, that will sit inside of this fairing, to be sealed/insulated.​
IMG_0415.jpegIMG_0416.jpegIMG_0417.jpegIMG_0420.jpeg

Prepping/Staging everything for bonding all of the pieces of the mold
IMG_0421.jpeg

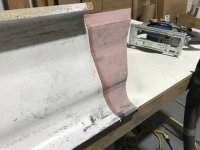
Fairing and filleting.
It was a bit of a pain to get the fillets laid in nice and smooth for the back corner of the fairing. It is a tight space to get a fillet tool in.​
IMG_0428.jpegIMG_0430.jpeg

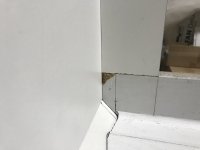
And of course, fixing my broken corners.
IMG_0431.jpeg

Sealed and ready for wax/dry fitting of cloth
IMG_0437.jpeg

Hopefully this thing will be coming out of the mold on Saturday or Sunday. It will be nice to see what a completed side looks like (minus the rear fender).

Off to bed, see you on the next post!
 

Trail Talk

Well-known member
As far as the dry weight of the camper when the build is complete, I have no idea. Maybe we should start a little betting pool. The winner would get the cash and the loser (furthest away from the actual weight) could pay for my custom bumper or spare tire carrier 😁 😜.
I'm following this amazing build to learn many things, one of which will eventually be the final dry weight of your cabin once fitted-out with appliances, fixtures, fittings, etc. Fascinated to compare these CF builds with our 15.5 ft composite cabin's dry weight of 2720 lbs as delivered. I've missed your cabin's length and width somewhere in the thread but if you can share again, I'd love to enter the lottery :unsure:
 

Vance Vanz

Well-known member
I'm following this amazing build to learn many things, one of which will eventually be the final dry weight of your cabin once fitted-out with appliances, fixtures, fittings, etc. Fascinated to compare these CF builds with our 15.5 ft composite cabin's dry weight of 2720 lbs as delivered. I've missed your cabin's length and width somewhere in the thread but if you can share again, I'd love to enter the lottery :unsure:
Hey Trail Talk.

The man with the yellow toilet :D; I love it!

I guess I'm just going to have to disappoint you now. Hopefully you wont stop checking in on the build thread because of it ☹️;).

I don't think I will have a weight, or an accurate, dry weight for just the camper (completely fitted out). Im going to weigh just the camper (All interior composite/body work completed) right before it goes to paint/coating, or right after it comes back from paint/coating. This will hopefully be the very last time the camper comes off/goes on the truck.

I haven't installed the: aux. alternator, onboard air, aux. gas tank, winches, ..... etc., on the truck yet. So, when the build is closer to completion/completed, I wont be able to weigh the camper and truck separately. Or, another way of saying it is, I will choose not to unhook everything to weigh just the camper and truck.

There is a post somewhere with dimensions attached, but here is the general gist: Main camper section 13'-1"L x 7'-6"W x 7'-4"H, Cabover/bed Area 5' 5-1/2"L x 7'-6"W x 3'-4"H, Overall camper 18' 6-1/2"L x 7'-6"W x 7'-4"H.

Hope you're having a good weekend.
 

Forum statistics

Threads
188,380
Messages
2,906,418
Members
230,117
Latest member
greatwhite24
Top