2022 RAM 5500 Composite "Super Camper"

StenchRV

Well-known member
More progress :cool:

One of the things I forgot to mention in the previous post. The VHB I am using is .040 thick, on purpose, as it makes the Koropop bond much stronger.

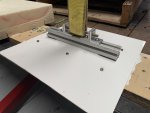
I have a test piece all glued up, exactly as I installed my 8020, and the pull scale arrives Tuesday. More to follow on that. 10 inches of 8020 glued to a roof 14 inch roof plug. I will pull away until something fails. I just want to know......just because. :)

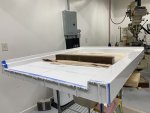
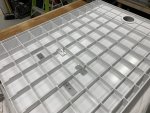
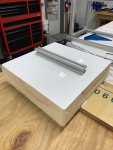
Shower pan- cut and installed. GREAT quality and easy to cut. We found one the correct width but 4 inches longer than we needed. Cut, install 1/4 aluminum bar tapped for 1/4-20 SS hardware for the toilet and seal up the end before we move on to the bathroom wall panels.


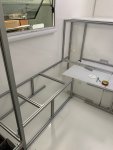
Interior 8020 glue in almost complete, upper cabinets frames to finish.

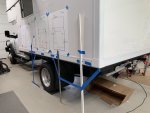
The wonderful wife tackled exterior box mock up and planning. THANK YOU @CAMPERTHING for the design and lead on the side cargo boxes! We will use your design for the two side boxes and will contact Highway Products this week to get the custom grey tank box(she found a perfect HDPE tank to fit), and stair side recovery gear box, design process rolling and discuss time lines.


IMG_5994.jpeg
The Do all came in HANDY!

IMG_5996.jpegIMG_6001.jpeg
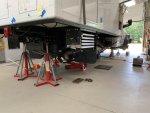
VERY WELL supported! This thing is a beast!
IMG_6002.jpeg

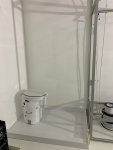
IMG_5999.jpegII I cut the drain hole after this test fit. THAT is where it lives!
IMG_6022.jpeg
IMG_6026.jpeg
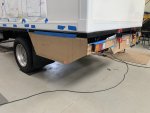
Notice the cardboard "box". More CAD!

ONWARD.....here comes rear bumper, plumbing and heater installation.

CHEERS!!
 

StenchRV

Well-known member
Full on CAD today! Trying to get the Highway Products boxes ordered so they can be in progress while we work on the other 1000 things that need to be accomplished! Cardboard Aided Design helps!
The rear bumper should get cut out in the next week or so, then welding time :cool:
We will also have 2 side boxes, one per side. THANK YOU K!

IMG_6049.jpeg


IMG_6050.jpeg

CHEERS!
 

StenchRV

Well-known member
Lots of projects at once :) and waiting on parts.

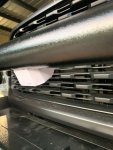
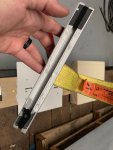
One of the projects on the burner was a front camera relocation mount. We have the 360 camera system and when you install the LARGE Buckstop bumper the center bar is in the way of the camera in the stock grill. Mention the fact you are calling a 3d printer friend to the wonderful wife and BOOM, she starts the mock up process. Came out great and we will send it to the 3d printer wizard friend and might even make one out of aluminum at some point.

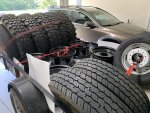
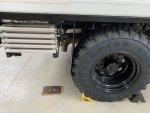
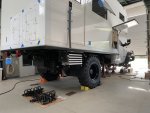
Waiting on some water tank plumbing parts...for the 3rd time! Amazon cancelled the last order as "parts not available" after moving the delivery date twice. McMaster to the rescue! So what do you do while you are waiting and tired of gluing 8020 and you have a choice between wood working and turning wrenches.....EASY CHOICE! SUPER SINGLES! We started the process and will get the tires swapped out Monday. HOPEFULLY by the end of the week the beast will look a little different. :)
Core 4X4 control arms arrived today. 1" longer than stock and WOW...BUILT!!!

Took the bumper layout to the laser cut out shop, should have that back in a few weeks.

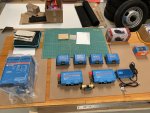
Battle born Victron order should also show up this week. Electrical after plumbing. MOST of the plumbing parts are here or on the way.

Parts is a game these days! Seems like half of the build is spent ordering parts!

Glued a test panel up for destruction later this week. Scale showed up :) Lets see if I can pull 8020 off of the TC panel. :)

ONWARD!


IMG_6066.jpeg
Possible camera housing.

IMG_6065.jpeg
This close to done with 8020!
IMG_6075.jpeg
Fun with a cutoff wheel and grinder. ALWAYS fun cutting into your nice truck!
IMG_6082.jpeg

IMG_6085.jpeg
THE GOODS!!!
IMG_6090.jpeg

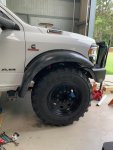
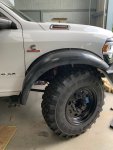
Almost done with the Buckstop fender fit. Raptor Liner to follow on the fenders and the lower portion of the door. Front Kelderman air kit install this week!
IMG_6087.jpeg
Slight difference! It always comes down to size. NO ONE wants a small beer!
IMG_6088.jpeg
CHEERS!!
 

StenchRV

Well-known member
Never thought I would see this! Feels a little BIG now! Tire run tomorrow!

IMG_6093.jpeg


IMG_6098.jpeg
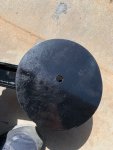
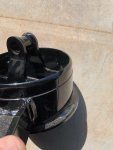
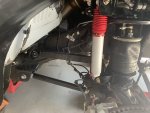
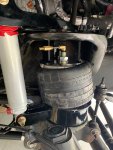
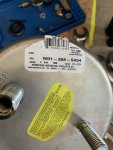
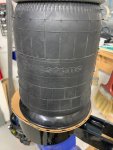
Airbag mount. Looks a little different, more oval?, hole is not centered. COULD be a good thing.

IMG_6096.jpeg

IMG_6095.jpeg
Install the front Kelderman tomorrow after the tire run. Centramatic's show up Tuesday. Fingers crossed all goes well and the super single swap will be complete by the end of the week.

CHEERS!
 

StenchRV

Well-known member
Getting there! Should finish up by the the weekend. Fingers crossed!
Might still have to make airbag offset plates.

Like these:
https://expeditionportal.com/forum/threads/another-2020-ram-5500-flatbed-camper-build.218958/page-7 Thank you Brad for your work on this issue and for your help!

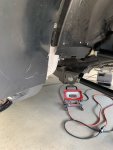
Still have to finish up and cycle the suspension to see the air bags in action. Except for everything being big and heavy, great for our needs :) ,pretty straight forward installation. I will cut the control arm bolt they installed before the engine went in this morning, new bolt is in the mail.

Thank you Kevin, RAM5500 CAMPERTHING , for the heads up on the TIGHT fit on the rim powder coat. I had to sand if almost all off on the rears to get the rim to fit the hub. Will probably be the same for the fronts. Touch paint and a little grease hopefully to help for removal later!


Time to move the mudflap!
68116624020__993A35D6-D6F1-4195-B445-B371A53C88FC.jpeg

Me LIKEE!!
IMG_6105.jpeg
THIS CLOSE!
IMG_6113.jpeg


CHEERS!!
 

RAM5500 CAMPERTHING

OG Portal Member #183
Hell Yeah!

Looking awesome man!

PROTIP: Get a Crows foot thingamcjig for a 1/2 ratchet to fit that nut on the control arms, will make your life 10x easier making adjustments.
 

StenchRV

Well-known member
8020 bonding information. The foam to FRP bond will fail LONG before the 8020 to FRP bond fails. IN MY OPINION.

Total Composites has done its own research and advises how to attach almost everything.
Follow their instructions, if applicable.

My own choice on MY build.

TEST PIECE:

I was trying to get a pound per square inch result. Just wanted to know.

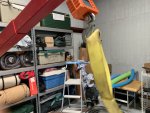
10” piece of 8020, small VHB on each end, like I mount in the camper, to hold in place. The entire remaining has Korapop and Sika primer.

Ran a test this week…for my own knowledge.

5FC814AF-AED6-4726-B5D6-0D7191099210.jpeg0C05475B-75DC-4CB1-8C81-8FFC21BB1D9E.jpegB8ABF3F4-10EC-4882-80F7-07E257DA2663.jpeg075ACB78-9190-45F6-BBF8-12B801BAB1F0.jpeg0E365C81-3D0F-4208-AFEA-12B8E3776BDC.jpeg
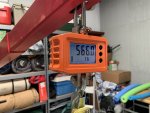
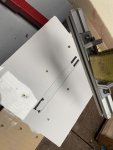
Look closely at the last scale picture and you can see 622LB! Took the picture just as the bond failed. The after picture.

This is with no additional plates! WOW!!

CHEERS!!!
 

StenchRV

Well-known member
THIS CLOSE....EVERYTHING takes longer than you think.

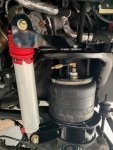
I put it all together took measurements and then tore 1/2 of it back apart to correct the airbag mounting issue made worse by moving the axle forward 1". The result was a GREAT improvement.

Brad....thank for the GREAT documentation. A GREAT read for ANYONE thinking of super singles for the front with a Kelderman air.


I followed your lead, did my own measurements. Our measurements came out almost exactly the same. Measured 3 different times from 11 1/4" down to 7" I picked the midrange measurement as my "normal" ride height.

My Buckstop mounts were not perfect circles, they had an offset (wish it was on the side needed) so my new airbag mounting plates were NOT ovals, more like a modified guitar pick. Still needed a good welding flange all the way around. I used the 2" taller bags and 3/8" cold rolled plate, after a talk with my local fabrication shop where I purchase my steel. The limiting factor for welding on my mounts was the Bucktop 1/4" top plate. Worked really well. New bump stops are in our future.

@RAM5500CAMPERTHING has advised me Suspension Maxx now makes an adjustable track bar and mount. I installed the Buckstop track bar relocation mount with the stock track bar. The Buckstop mount is designed for a larger lift than we need so I think a new track bar will also be in our future to get the suspension really dialed in. THANKS Kevin!


BEFORE with 2" taller bag.
IMG_6132.jpeg
2" taller bag.
IMG_6133.jpeg
3/4" towards the rear. 1/4" to the left, on both plates.
IMG_6146.jpeg

AFTER with 2" taller bag
IMG_6153.jpeg
Bags set at 60 PSI...just a test. Drivers side in the morning.
IMG_6155.jpeg

CHEERS!!
 
Last edited:

StenchRV

Well-known member
Pressing forward! Seems like a busy week and not as much done as I would like but....such is life :)

I was PM'd about a few things and pictures are worth a 1000 words.

The other picture of the bonding test. It was the VHB and the Korapop that failed. Both were still stuck to the 8020 and the FRP of the Total Composites panel. Granted they failed at 600 + pounds on a 10" piece and that is WAY better than I expected.
IMG_6141.jpeg

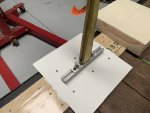
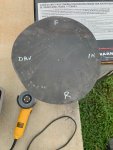
Bag offset plates. Drivers side in steel. If you drill the hole you need in the Kelderman bag mount, mine were 3/4" towards the rear and about 1/4" to the LEFT on BOTH plates (due to axle movement) the offset plate template is almost a mirror image of each other for passenger and driver. The dot in the middle if the plate is for the 1/2" bag mounting bolt. Bolt the two together and rotate the plate to get the best fit for the air bag and welding flange. EASY!

IMG_6158.jpeg

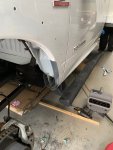
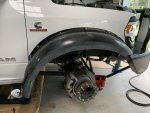
We had to trim the stock fender liner a BUNCH to get the MPT's to clear. A little at a time and what you have left works out pretty well. We used part of the front that we cut off to extend the rear inner to help cover up the electrical body connections. A few aluminum rivets and rivet washers and done.
Raptor liner is running late... :-( T 65 PSI in the front bags in the picture. 85 PSI later. Time to order a tire size computer tool. My friends $15K Snap On one needed a software update to cover our 2022 :-(.
68185445132__23440F42-F859-4717-BCB4-7E772AC10C1C.jpeg
IMG_6208.jpeg

We've got the Blues
IMG_6139.jpeg

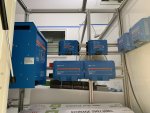
HOPEFULLY we will be busy wiring next week. LOVE the large electrical bay hatch!
I could sit in there and work! The fresh water tank was pulled out behind for plumbing work. :) Just looks funny in the picture. More parts to mount but getting there. The Cerbo GX , and 7" touch screen, will control everything, along with the APP :)
IMG_6187.jpeg

CHEERS!!
A day off from the build is always good, now and then, clears the brain! It is BEER 30!
 

Forum statistics

Threads
188,034
Messages
2,901,400
Members
229,411
Latest member
IvaBru
Top