4307's Canadian Taco Build

4307

Adventurer
Dusting of my build thread....:bigbossHL:

It's been a long winter, it was good to start building again. :wings:

Ok.... managed to do some more welding, windy day but managed to get er done.
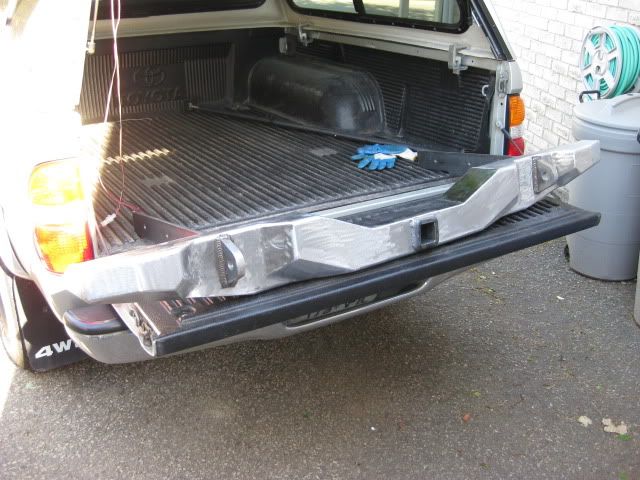
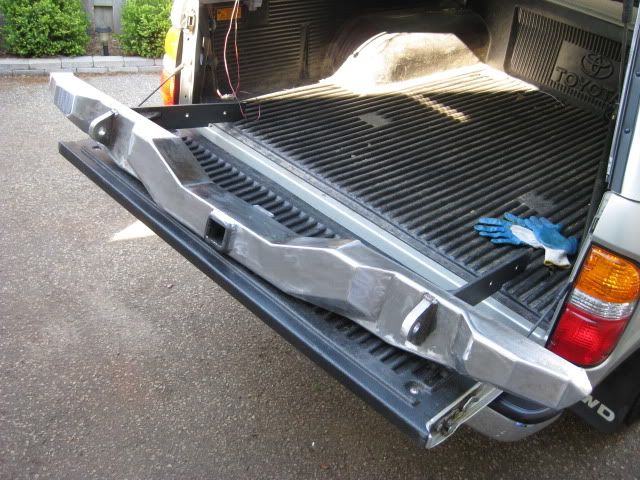
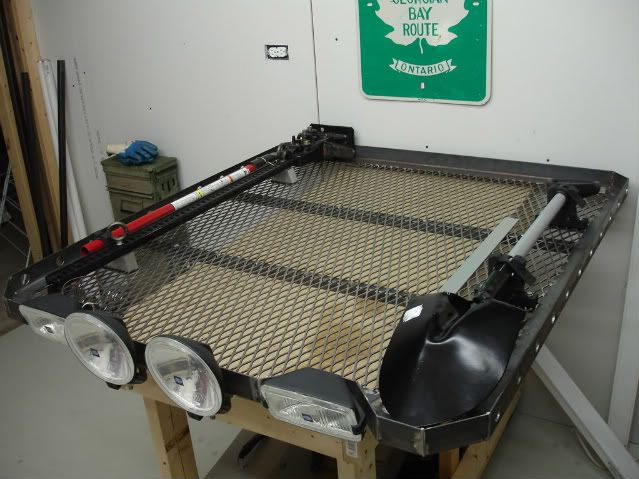
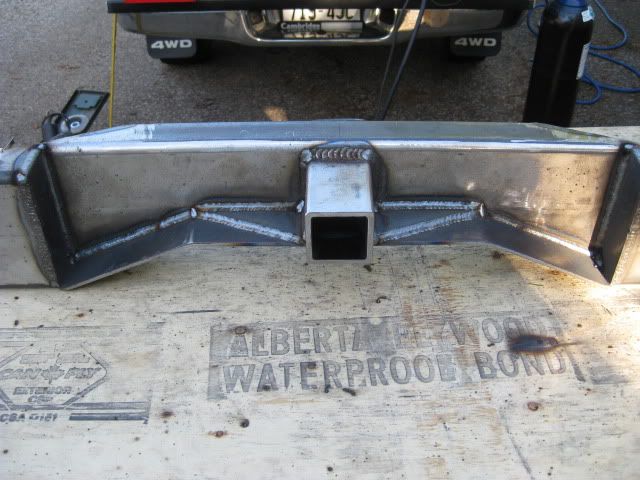
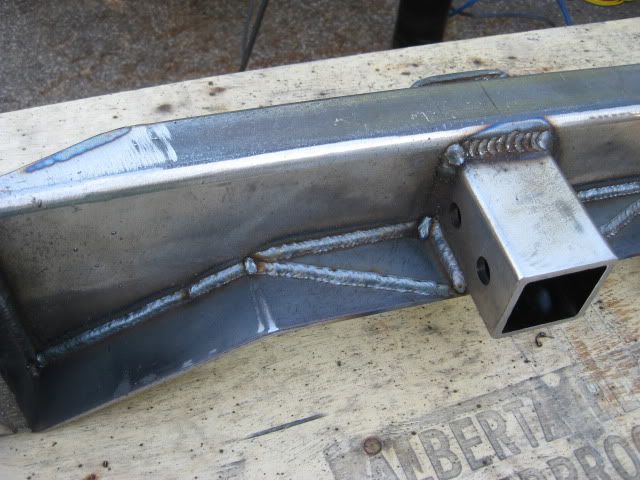
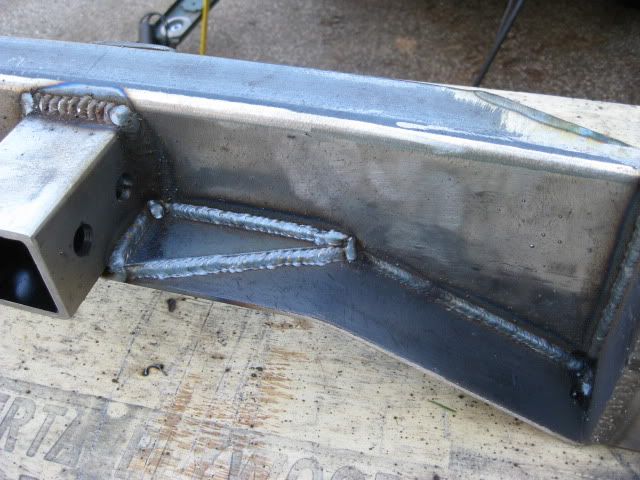
I welded the receiver gusset plate and top plate inside seam. These were the last structural welds.

IMG_2769.jpg


IMG_2767.jpg


IMG_2768.jpg


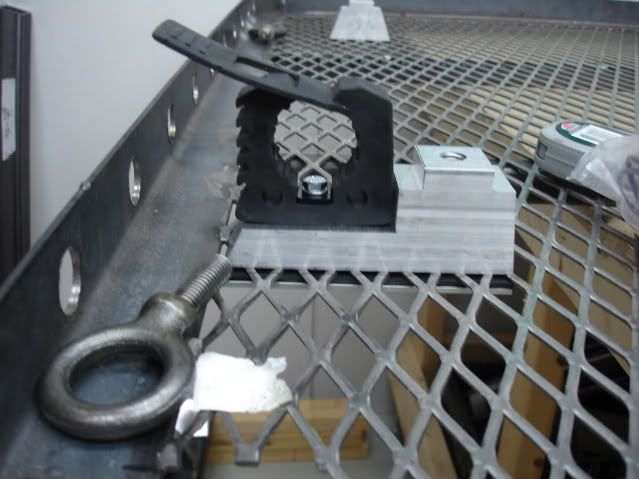
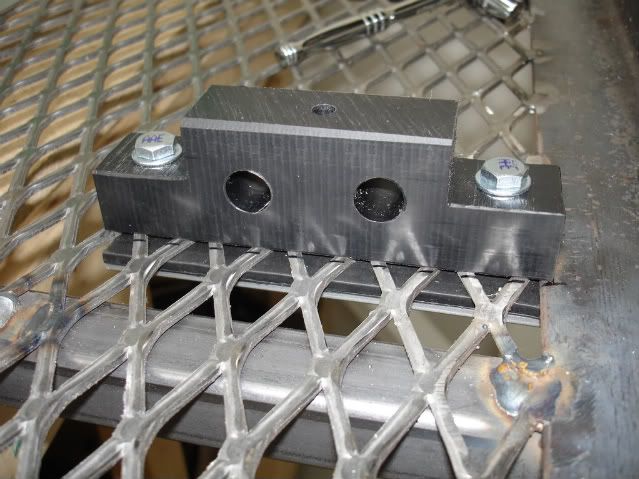
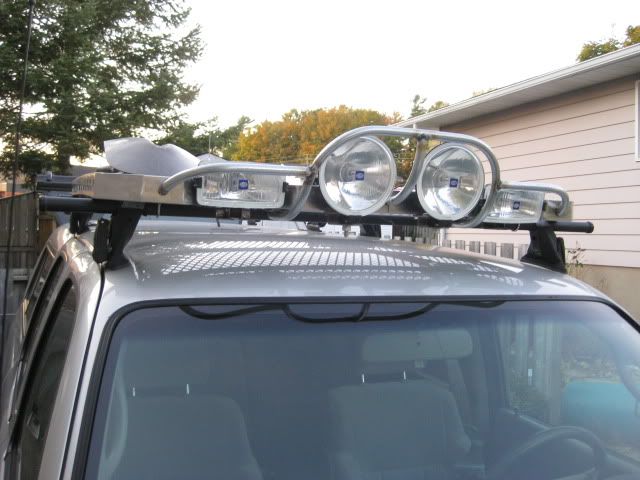
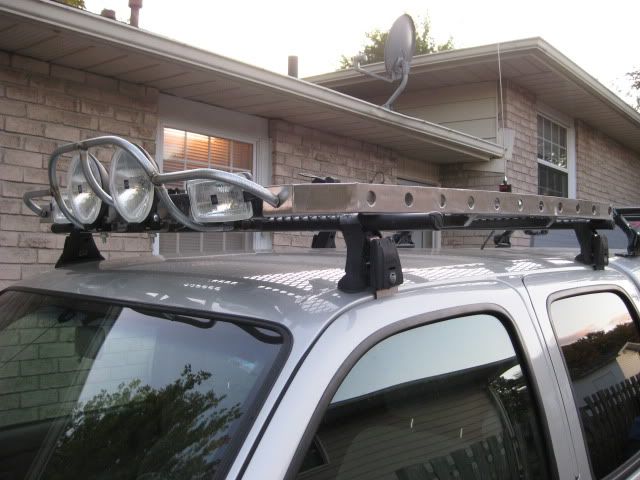
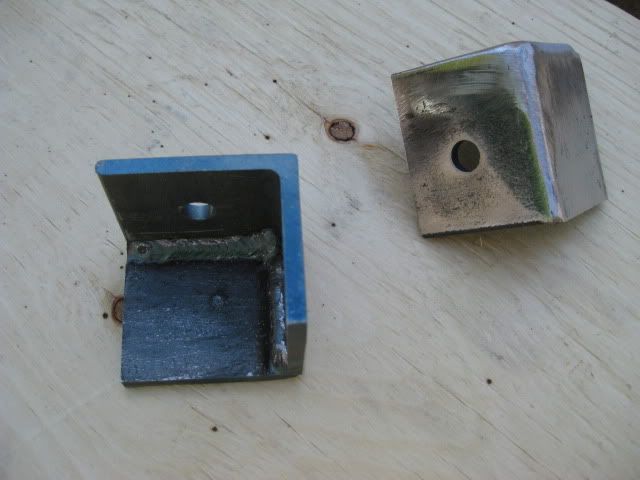
The next scene in this program was adding the rock light brackets.
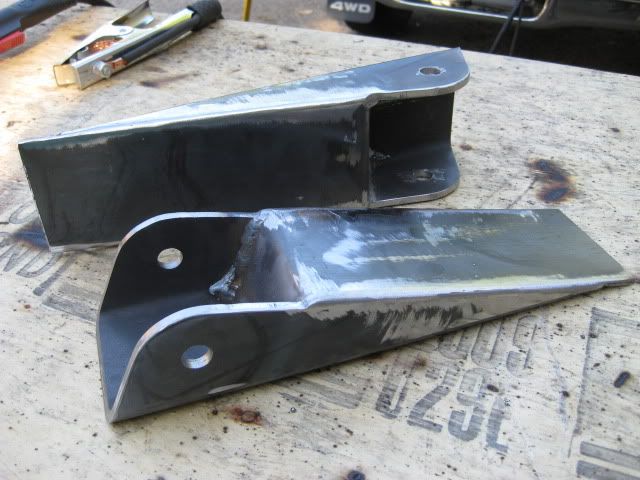
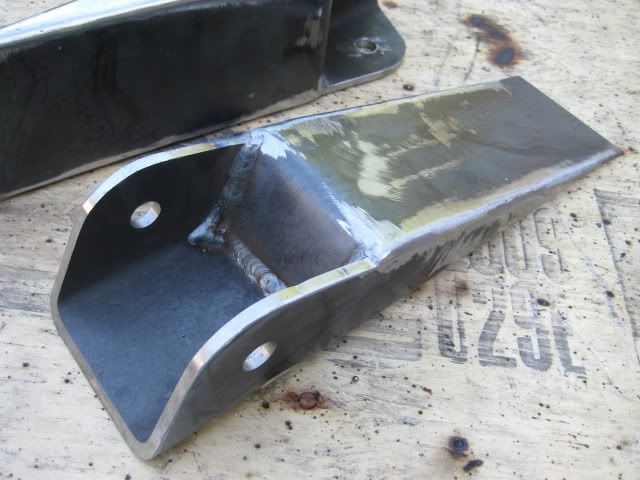
I used some angle iron and pieces of scrap to form the brackets, then welded them up....

IMG_2772.jpg


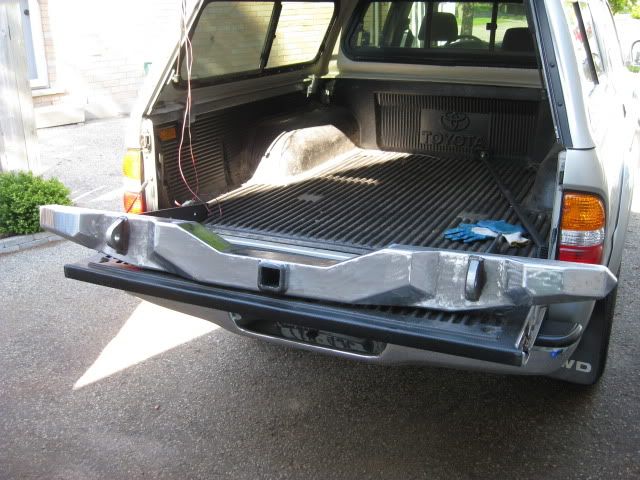
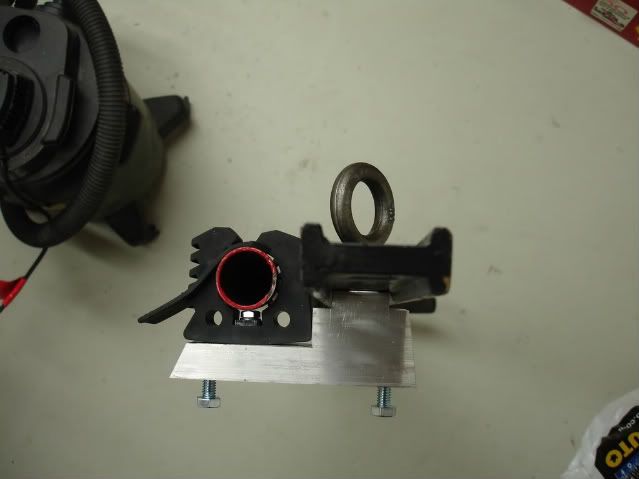
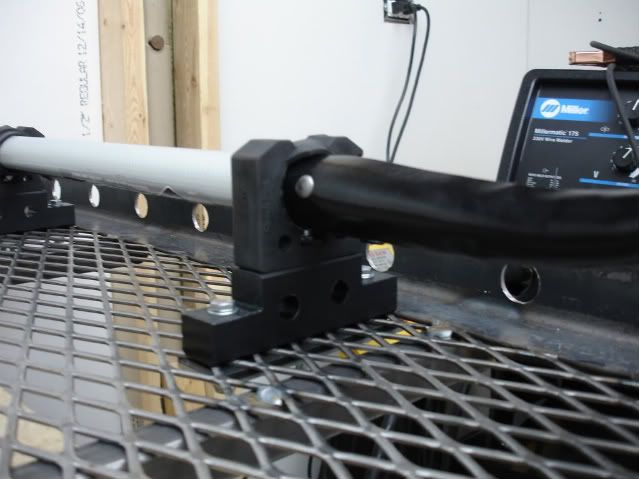
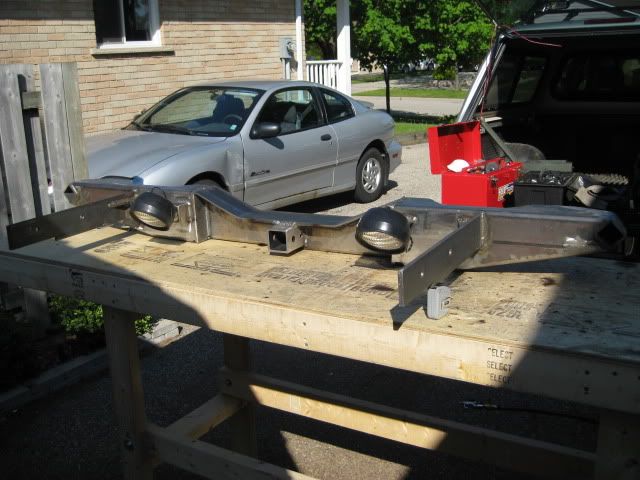
Located the light brackets on the backside of the bumper, allowing for full up / down and side to side rotations for setting the perfect spot light direction. The lights will be up high enough to be out of harms way. The lights I'm mounting are 55w tractor lights, found them at Princess Auto on sale for $7.

IMG_2777.jpg


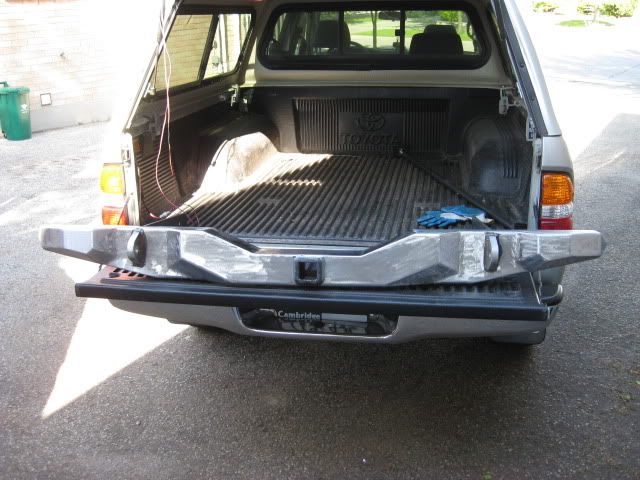
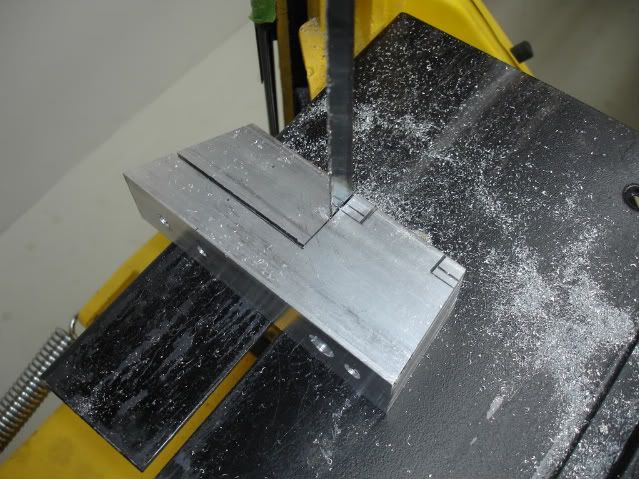
While I was at it, I welded the Chevy leaf spring hangers together....

IMG_2764.jpg


IMG_2765.jpg


Today I decided I'm building the swing out gate.... I ordered a pair of barrel hinges rated for 600lbs.

956f_1_b.jpg
 

4307

Adventurer
I managed to squeak some time in today. I managed to destroy the peaceful dinnertime of the neighborhood by grinding up a storm....... :D

I did a once over with a flap disk, removing weld berries, sharp and fugly features....

IMG_2781.jpg


IMG_2782.jpg


IMG_2783.jpg


IMG_2784.jpg


Next step is to fab some safety chain loops. I'll add them to the backside of the bumper to maintain high clearance....

so stay tuned. ;)
 

4307

Adventurer
Update: So! I finally got around to installing my Uniden 520XL CB radio, with the K40 Antenna.
The new home for the radio is the former ashtray location. The install was pretty straight forward, a beer from Devlin helped the motivation (Thanks Rob!)

The coax and wires are now protected with the automotive snap on wire harness, plastic protector.
The coax was zip tied along the truck frame. The CB wires are fed through the fire wall electrical wiring grommet and hooked up directly to the battery terminal lugs.
There's an inline fuse, to protect the radio from overload.

The former ashtray location needed some modification:
Cutting some plastic, and using the wifes scrap booking heat gun, to heat up and bend, the vent duct plastic, to make more room for the antenna socket in the back of the radio.
The only reason I did this was to have a cleaner mounting position deeper in the dash, otherwise the radio will stick out a little farther then I would have liked. Bending the vent plastic didn't change the air flow at all, the bend wasn't that big. Although I may need to bend it a little more. If I can move the radio in .25'' more that would be perfect. Another option would be replacing the straight coax connector with a right angle connector.

CB3.jpg


CB1.jpg


I used 2 brackets from a Thule Load Warrior roof rack basket to make a mounting platform, a piece of flat bar aluminum to bridge the 2 brackets. It seems to work well, super solid and removable.
The Antenna location may change, not sure yet, I have another project up my sleeve. :D

CB2.jpg


The ground plane seems to be pretty good, I get good reception. I still need to recheck the tuning between channel 40 and channel 1. so I don't damage the radio.
 

4307

Adventurer
Thanks!

The build has been extremely slow, sign of the times.

That being said, I'm tackling the little projects until I get my break lines, steel wheels and cash for alignment. I just landed a new job so I need to do some catch up, if you know what I mean... :violent-smiley-031:

Anyway...

another addition.... oooh exciting! :coffee:

A fire extinguisher and flashlight holder.
I was tired of the extinguisher and flashlight rolling around on the back seat floor.
I used 1/8 aluminum plate. The plate is mounted to the window frame using the frames existing mounting holes. It's pretty sturdy.
I used Quickfist clamps to hold the flashlight and fire extinguisher, these clamps are great.

http://www.endroad.com/page/page/711712.htm

here's my afternoon project...

Flashlightfireexting1.jpg


I left some plate length above the top of the window frame to possibly mount more junk, or possibly mount a light with a switch.
 
Last edited:

inked33

Adventurer
i really like your build, cant wait to see what you have comming next. now i just need to start a build thread to hopefully help motivate me into actually working on the truck. hard to get out there and weld/fabricate when i do it 10 to 12 hrs a day for a living. hope you dont mind if i steal a few of your ideas for my truck.....
 

4307

Adventurer
A new storage tube for my K40 CB antenna...

common plumbing parts...

IMG_3302.jpg


plastic hose runs the length to guide the antenna into the end cap nipple + it keeps the antenna from rattling around inside the pvc tube.

IMG_3303.jpg


the end cap keeps the grease from dust and crap..

IMG_3307.jpg


IMG_3309.jpg


The tube fits snug along the bed cap ledge...

IMG_3315.jpg
 

4307

Adventurer
I managed to finish the weld-on, rear shock, relocation hangers.
The corners are welded inside and out for strength. I managed to create a nice snug fit for the bushings. The bolt in the pic is not the bolt I'm using. I have fine thread bolts. The shocks are 10'' Bilstein 5150's. The hangers will be welded to the axle.


IMG_3321-1.jpg


IMG_3322-1.jpg
 

4307

Adventurer
Another project I'm working on is my Roof Rack Tray.

The purpose of the tray is:

1. a place to mount spot lights... I usually get into camp in the dark.. LOL

2. a place to mount my Hi-Lift, shovels and axe + collapsable kayak
paddles.

3. to level out the hight difference between the cabs Yakima racks and the
taller Thule racks mounted on the bed topper. The top of the tray is the
same hight as the Thule racks, I can throw a 4x8 sheet of plywood and
drywall on the top of the truck, to get them home from Home Depot, for
home reno's.

4. a place to strap down drybags for camp garbage and camping gear.

Because the tray and rear racks are level, I can still strap down 2 kayaks, a typical basket would prevent me from doing this.
I won't go up north without the kayaks.

I don't have a step by step build pics of the tray build, but you get the idea.
The tray is made of 2x2 angle iron, expanded steel, and 1x1 square cross support bars to brace and support the expanded steel.

Here is a step by step sequence of how I made the mounts for the Hi-Lift jack and shovel.
I'm also making one identical to the shovel mount for my axe and shovel #2.
The mounts are designed to bolt up the Quickfist tool clamps. Mounts are bolted to my roof rack tray.
The Hi-lift mounts are made from aluminum block. The shovel mounts are made from Delrin (plastic).

Hi-Lift mounts...

HiLiftMount1.jpg


HiLiftMount2.jpg


HiLiftMount3.jpg


HiLiftMount4.jpg


HiLiftMount5.jpg
 

4307

Adventurer
The mounts are bolted to the tray, with 1/8'' aluminum plate as a washer and a piece of mud flap, that acts as a anti-slip.
The Hi-Lift is bolted to the mount using ''eye bolts". I went with an eye bolt so I can use a piece of bar to tighten it down and lock it, so it doesn't disappear on me.

HiLiftMount6.jpg


HiLiftMountfit.jpg


The other mount....

HiliftMount8.jpg
 

4307

Adventurer
Shovel mount...

I used Delrin as a material because of it's weight, strength and ease for machining. It's also cheaper then aluminum.

ShovelMount1.jpg


ShovelMount2.jpg


ShovelMount3.jpg


ROOFRACK.jpg


I should add.. the hight of the Hi-lift and shovel mounts are level to the top edge of the tray. The Quickfist clamps are removable for transporting sheets like plywood and / or drywall. The wood/drywall would lay totally flat.

The next step was forming and welding the spot light protection bars.
The protection was formed out of 1/2'' I.D. electrical conduit.
Bolts are welded into the tube ends, so the protection bars can be bolted to the tray, just in case I decide to upgrade to different lights, and or size.
The rectangular Hella 500's still need to be lowered possibly 3/4'', but thats not a big deal.

IMG_3508.jpg


IMG_3510.jpg
 

michaels

Explorer
just curious why you've taken over a year to make all this stuff an none of it is on the truck yet? i thought i worked slow...
 

Forum statistics

Threads
188,470
Messages
2,905,507
Members
230,428
Latest member
jacob_lashell
Top