You are using an out of date browser. It may not display this or other websites correctly.
You should upgrade or use an alternative browser.
You should upgrade or use an alternative browser.
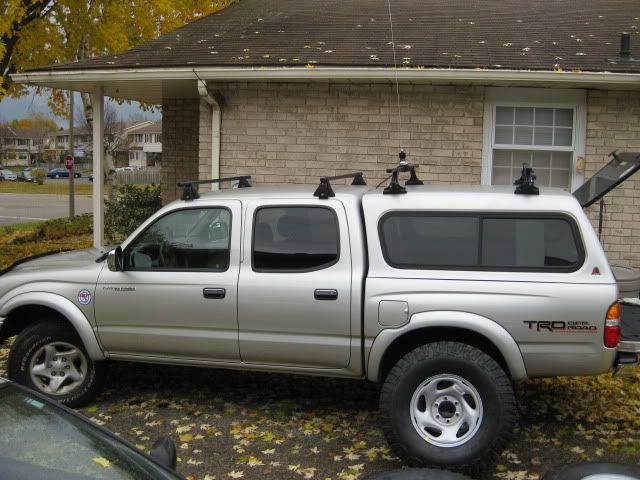
4307's Canadian Taco Build
- Thread starter 4307
- Start date
4307
Adventurer
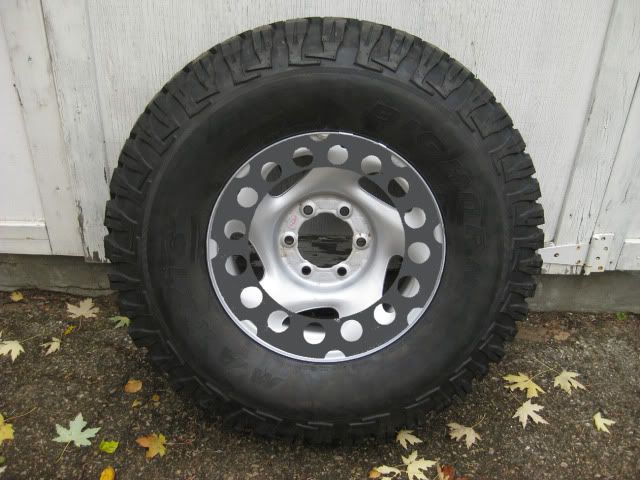
Not the steelies I was after, but they will do the job just fine.
At $305.05 after tax. Purchased, install and balanced, Its a good deal.
The wheels are 16''x 7'' Tundra factory steelies, priced at $55 per wheel. I'm actually thinking of getting one for the spare.
The wheels aren't the black winter steelies, or the Teflon Mojave's, or the new TRD wheels. But these wheels I can rattle can, beat up and paint them gold if I want, for a run, without caring too much.
The wheel looks better mounted than I expected. I'll rattle can them battleship gray or black.
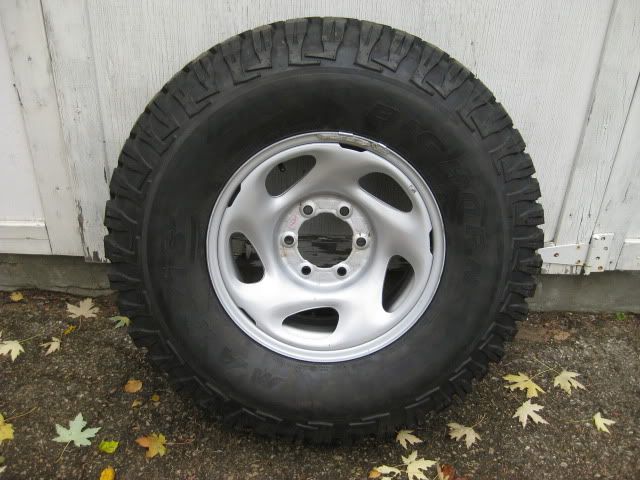
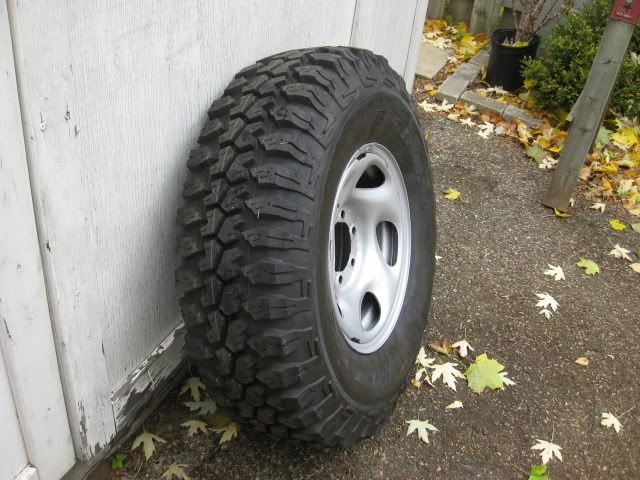
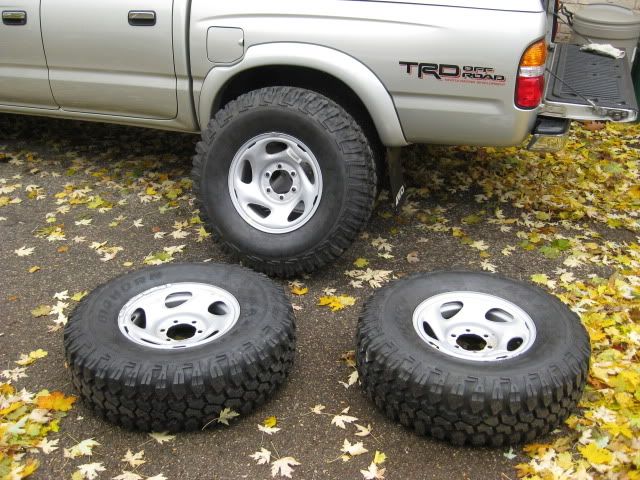
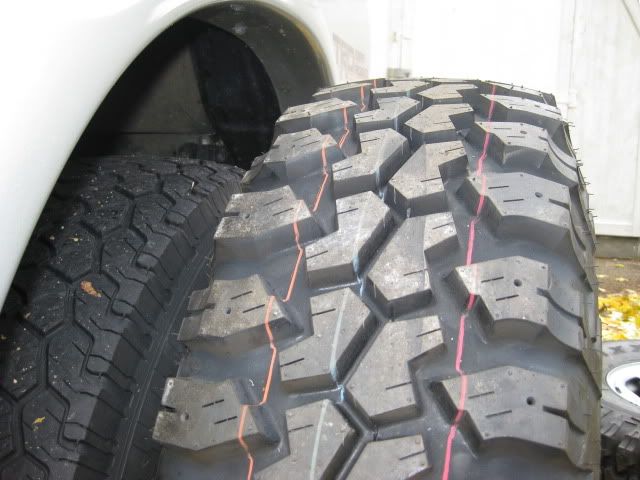
BFG RuggedTrails vs. Maxxis Bighorns, LOL.. no comparison!
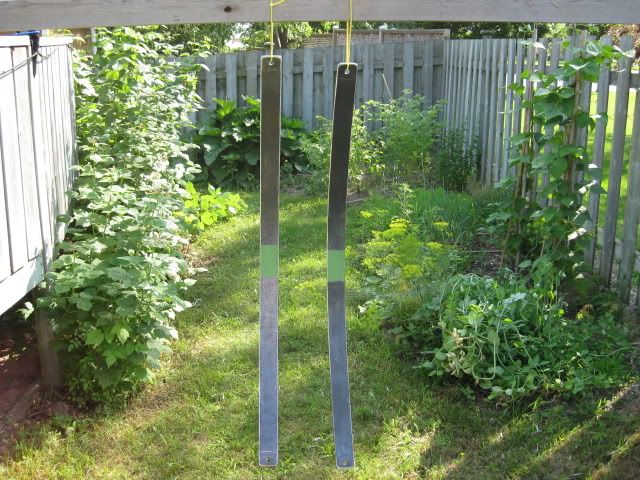
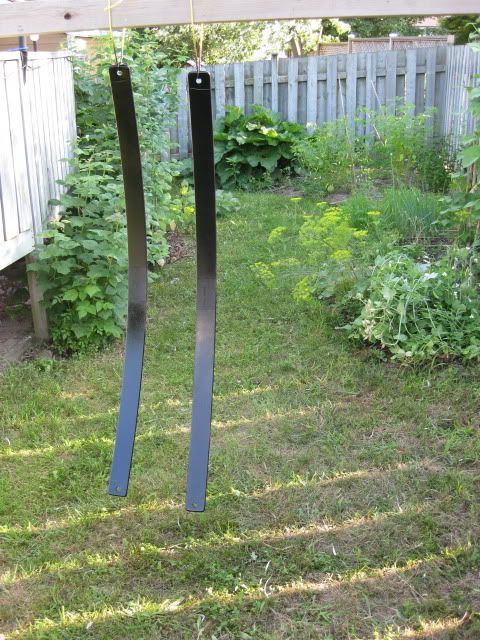
I did a quick photochop for our local club group buy . rock rings would look uber cool glued to my new wheels.
now it has me thinking! LOL... not good
At $305.05 after tax. Purchased, install and balanced, Its a good deal.
The wheels are 16''x 7'' Tundra factory steelies, priced at $55 per wheel. I'm actually thinking of getting one for the spare.
The wheels aren't the black winter steelies, or the Teflon Mojave's, or the new TRD wheels. But these wheels I can rattle can, beat up and paint them gold if I want, for a run, without caring too much.
The wheel looks better mounted than I expected. I'll rattle can them battleship gray or black.
BFG RuggedTrails vs. Maxxis Bighorns, LOL.. no comparison!
I did a quick photochop for our local club group buy . rock rings would look uber cool glued to my new wheels.
now it has me thinking! LOL... not good
4307
Adventurer
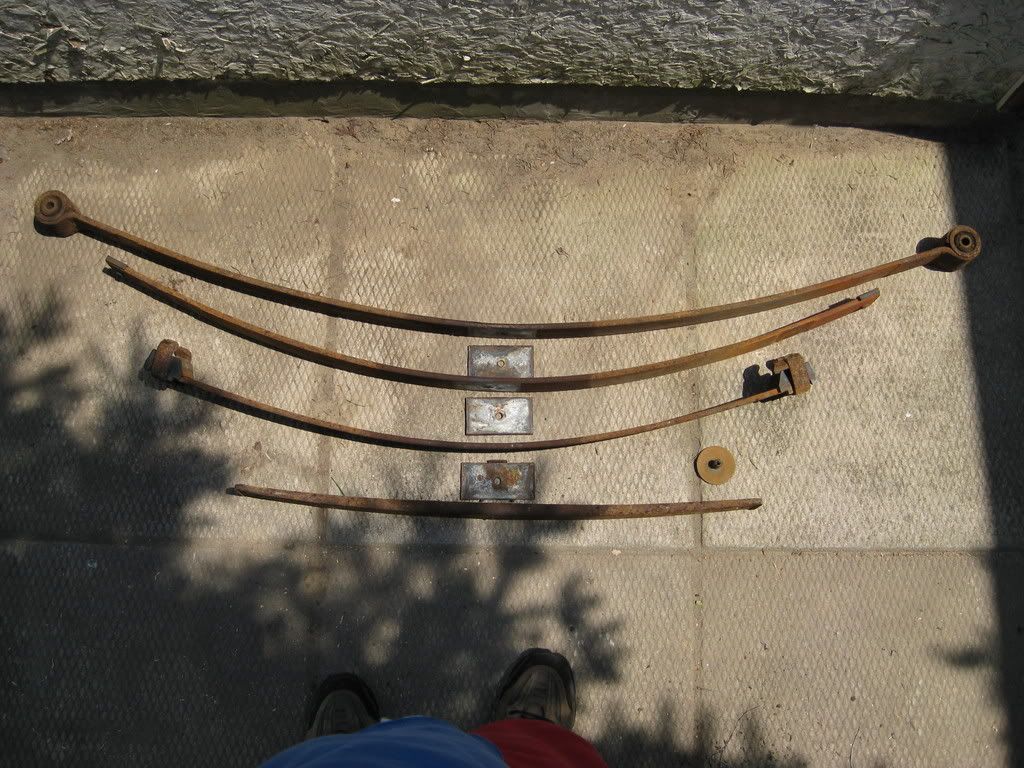
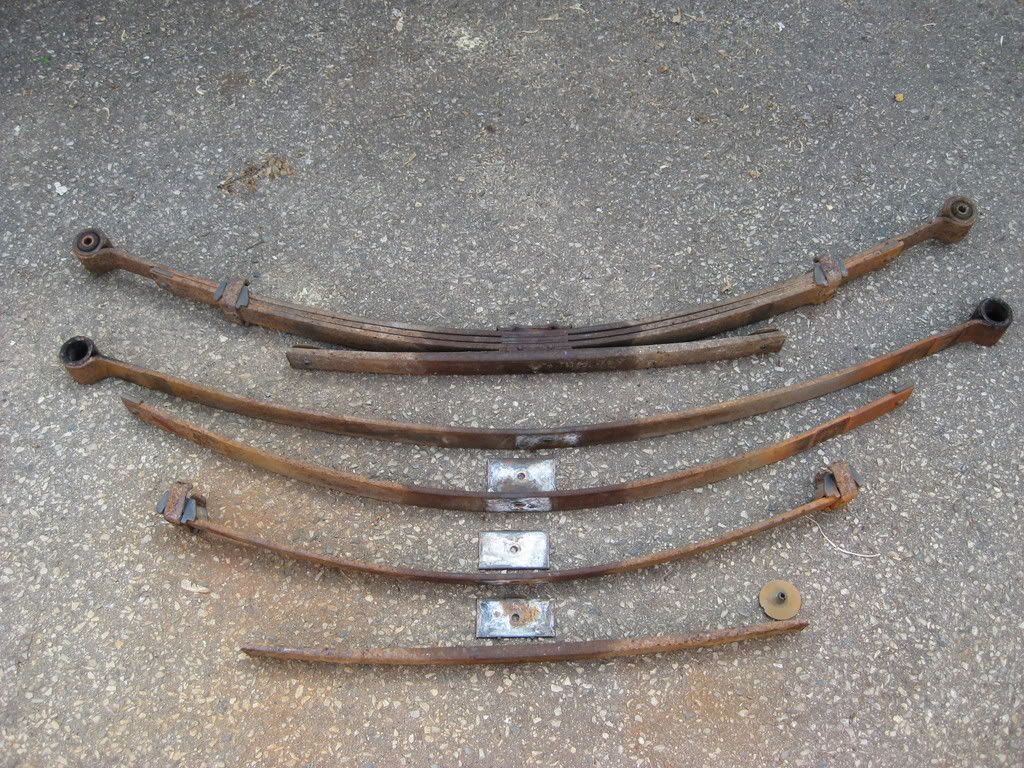
63'' Chevy leaf spring rebuild....
The reason I went with the Chevy's is, to reduce cost of the build and to take advantage of the flex these spring give in return.
If I need to replace a pack, the local wreckers are bound to have a replacement set at any given time.
I can also purchase a par of new, replacement leaf packs (non OEM) for $300 from Kitchener Spring. They also carry add-a-leafs.
In other words... they're affordable!
Originally I was going to order leaf packs from Deaver or Alcan.
The price was hard to swallow, considering the exchange rate at the time, duty charges, taxes and shipping. In the end, the shipped leaf packs would have cost me around- $1400- $1600.... eek!
The Chevy price point is a huge bonus, it's the most bang for the buck... IMHO. They're 1/2 ton springs, so they will carry the added weight of my rear bumper with tire swing out + all the camping and wheeling gear.
Side note... chevy truck years... 1988-98 1/2.
2wd Chevy trucks came with 3 leafs = overload spring
4wd Chevy trucks came with 4 leafs + over load spring
I'm running 3 leafs, ditching the overload.
Ghetto springs.... LOL
I have to admit, when we threw them into the truck, fresh off the donor, the springs looked rough... Although... There were 3, 2wd, Chevy trucks I had to choose from. The truck I picked had a clean, pretty much scratch free bed. It looks as if the truck was never used for heavy duty work. The springs off this truck most likely retain its factory spring rate or close to it. The last thing I want is well used flat spring packs... something to consider if your looking for Chevy's at the wreckers.
Another thing to consider.... price!
At first the wrecker wanted $120 for the pair. No way!
I told them, the packs are rusted, maybe cracked, and the original front hanger and shackles are still attached to the spring, making it harder for me to remove them.
the wrecker didn't put up a fight and dropped the price down to $80...
DON'T PAY MORE THAN $100 for these springs.
Here's more information on Chevy spring swaps......
http://www.pirate4x4.com/forum/showthread.php?t=20665
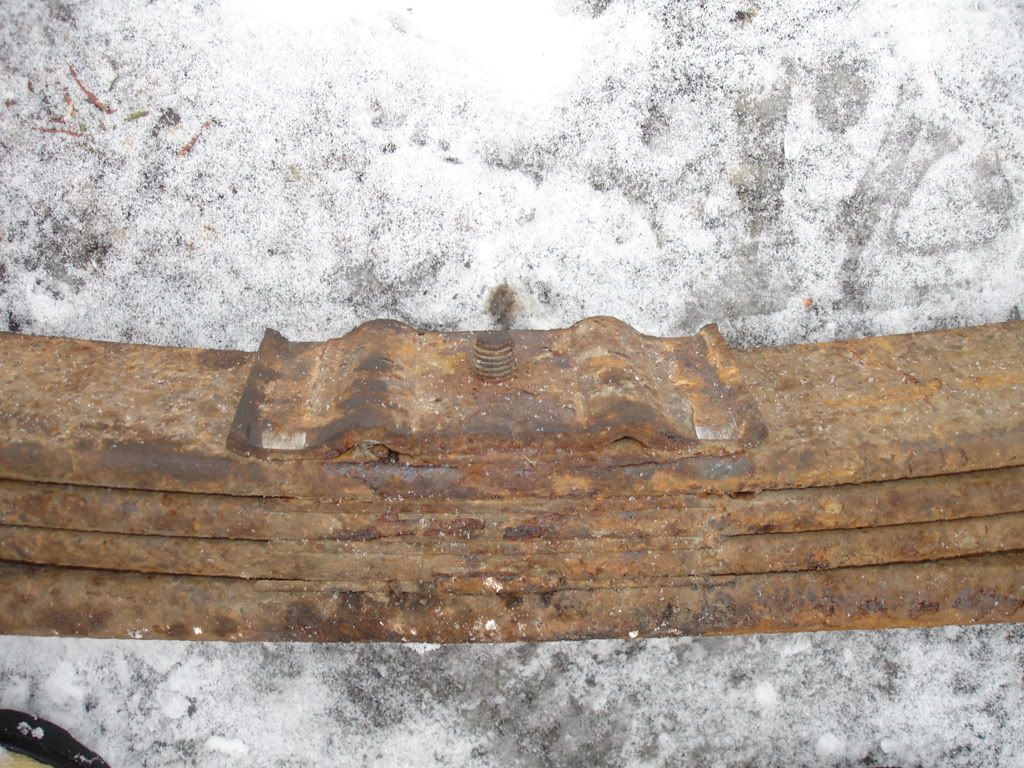
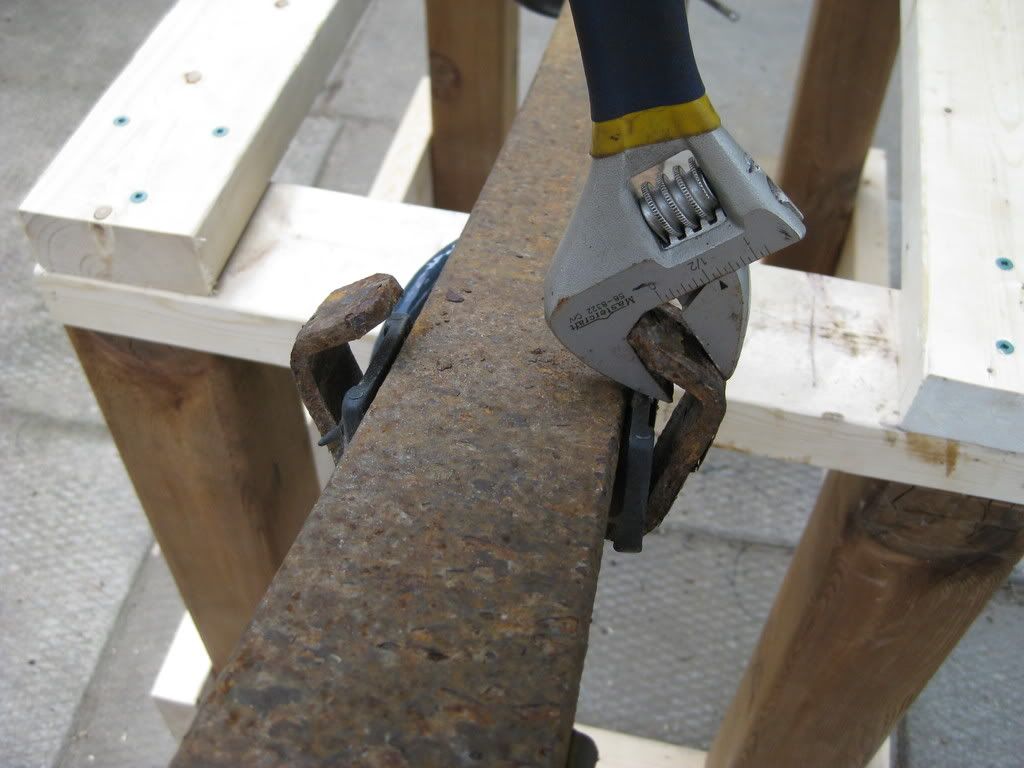
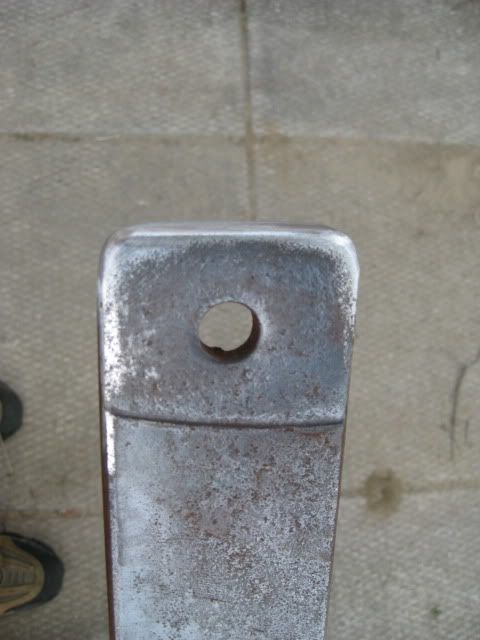
Fresh off the donor truck.... a little rusty! LOL
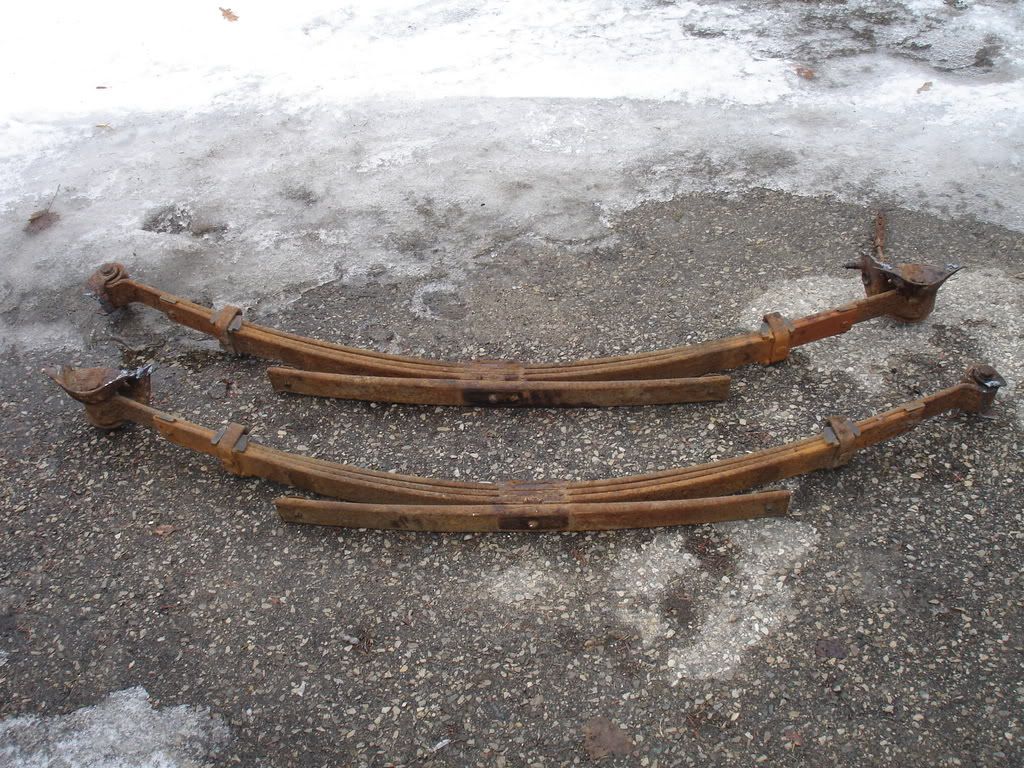
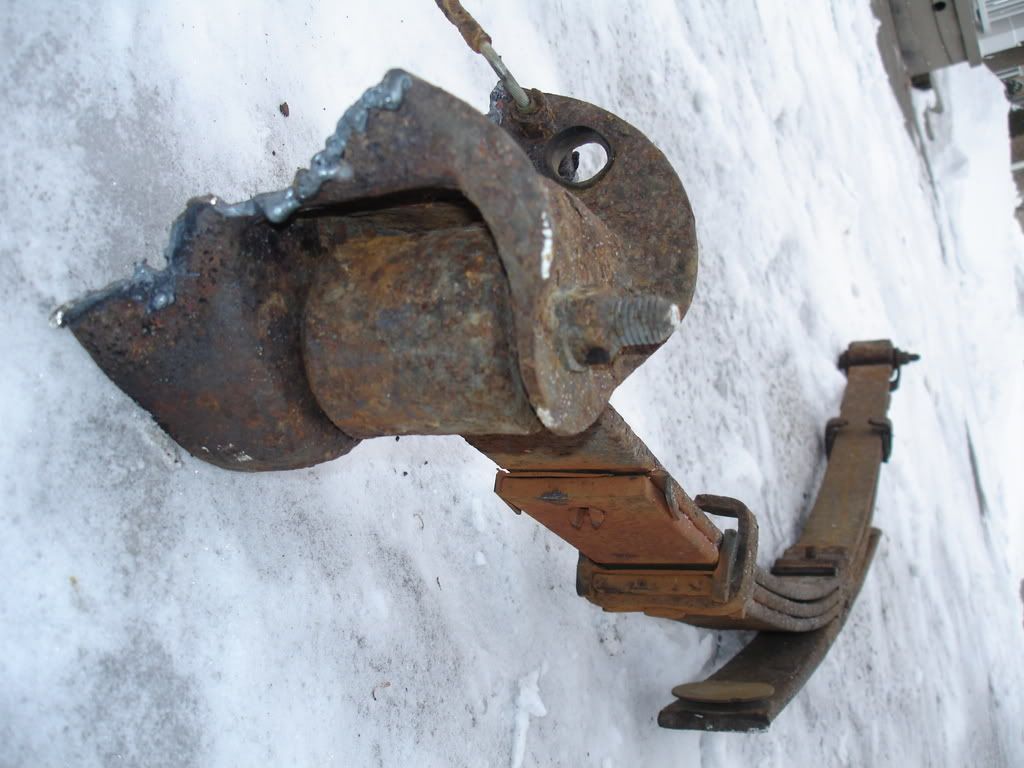
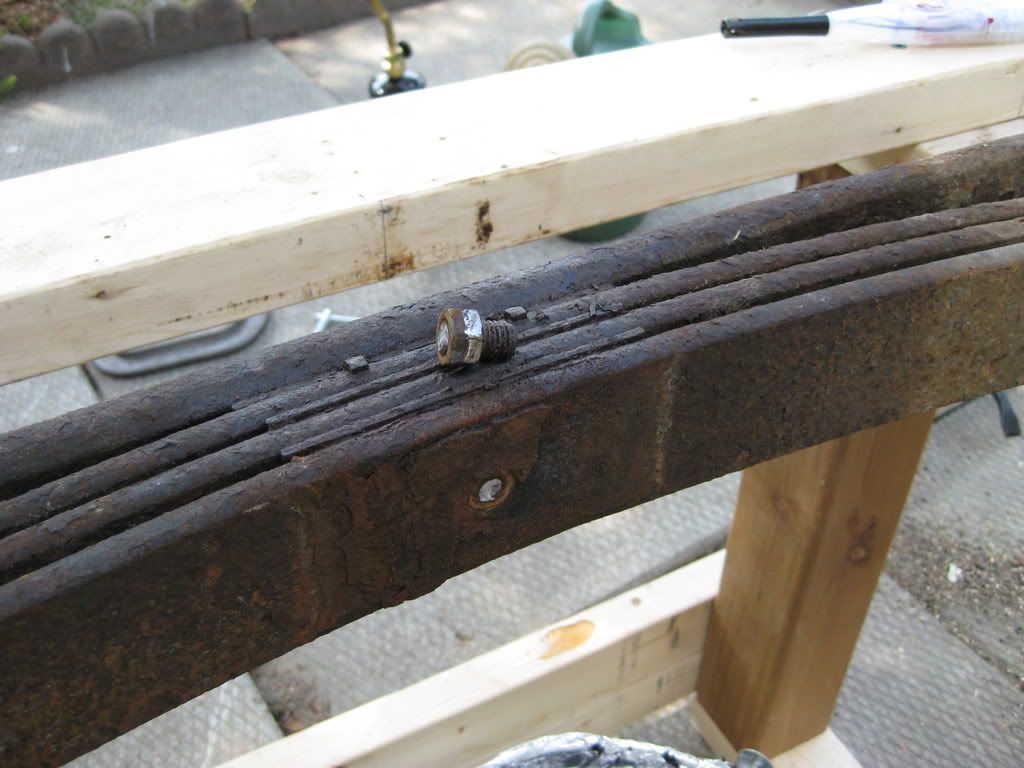
U- bolt plate still attached... rusted on. The plate is not threaded.
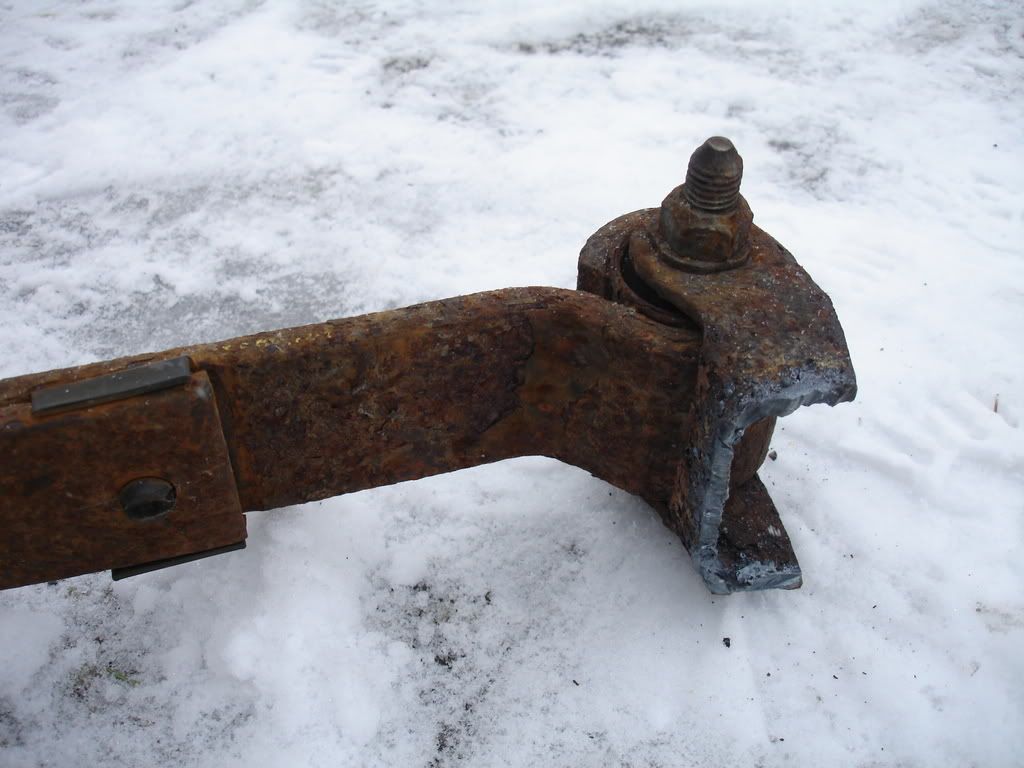
The wreckers cut the hangers and shackles off the truck...
I cut off the bolts to remove the hangers and shackles with a Porta-Band band saw.
I did a quick wire brush clean-up, removing some flaking rust.
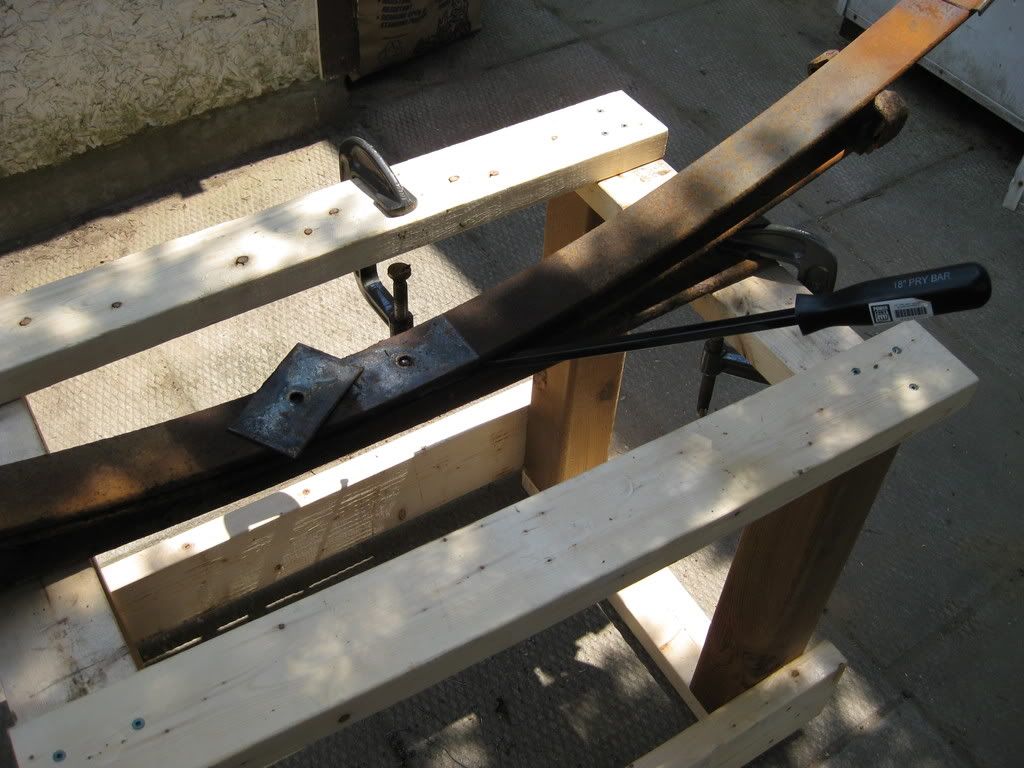
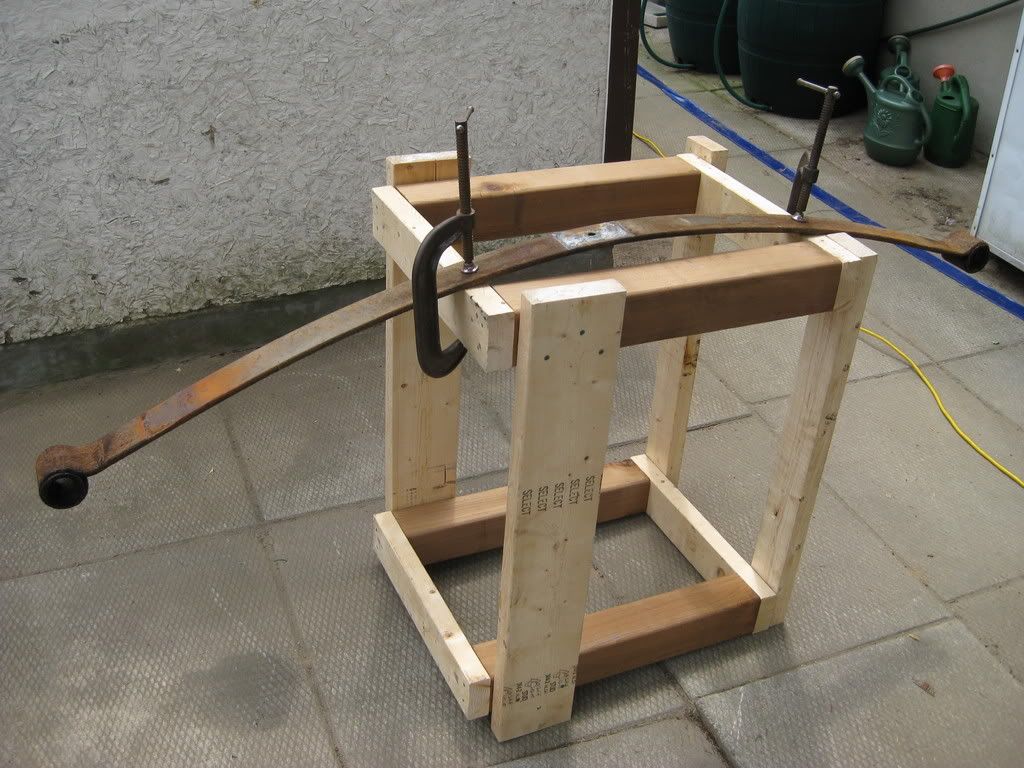
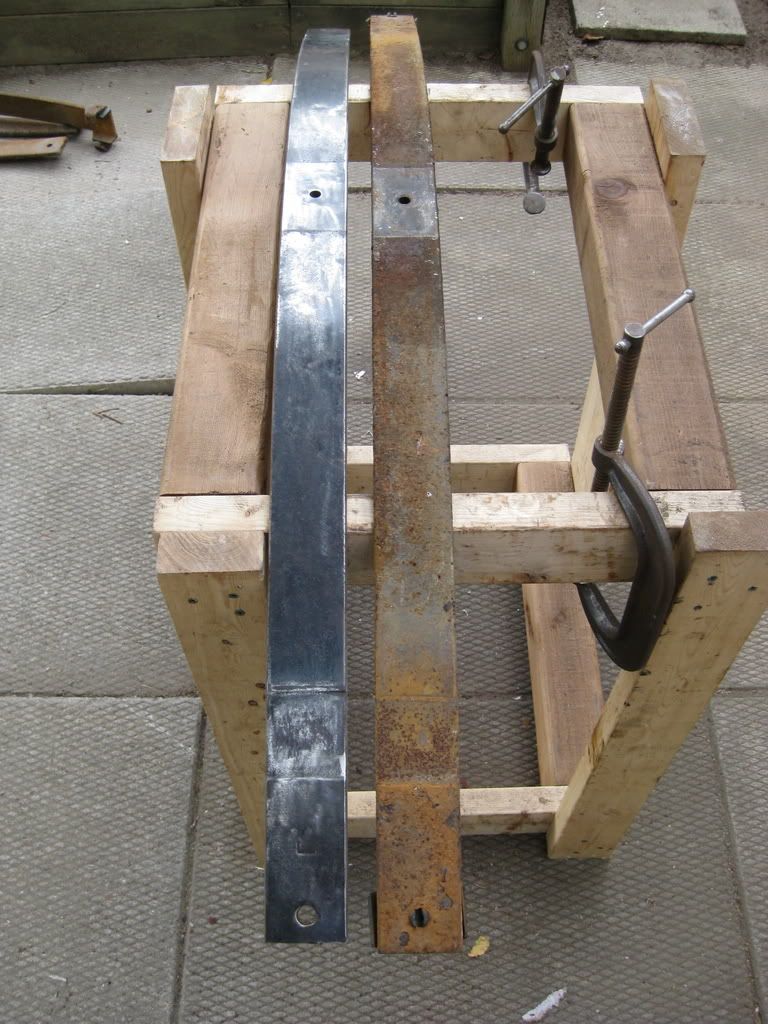
I made a work bench jig, so i can clamp, disassemble and grind the leaf pack.
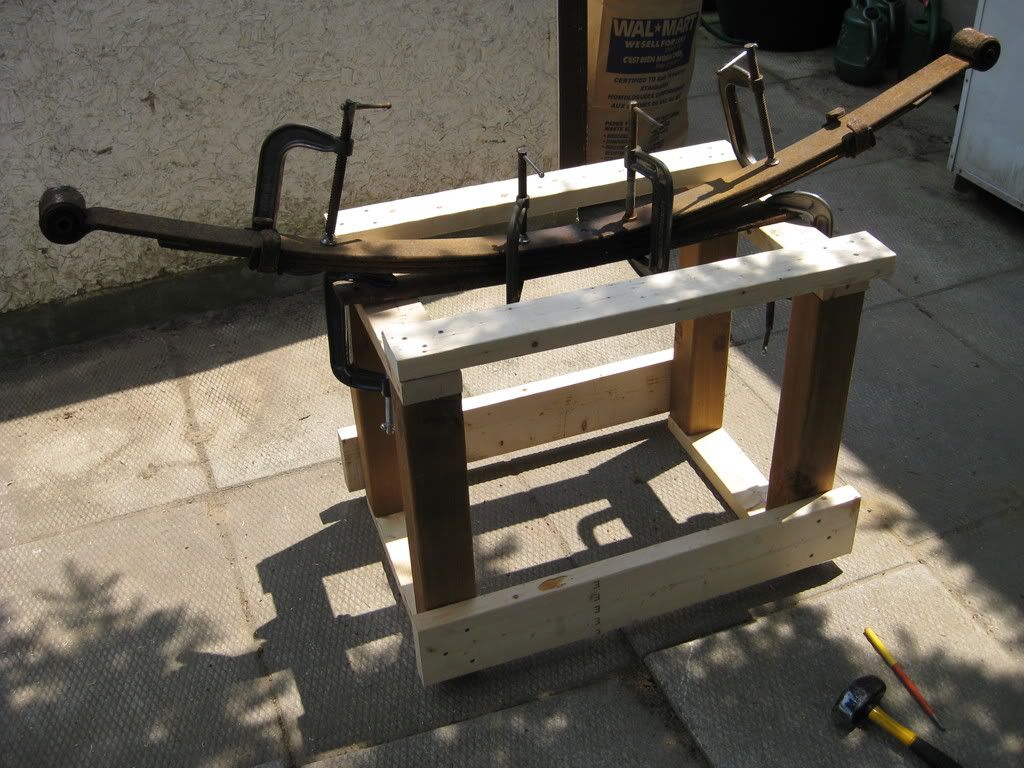
I used a wrench to bend the leaf clamps, too remove the leafs.
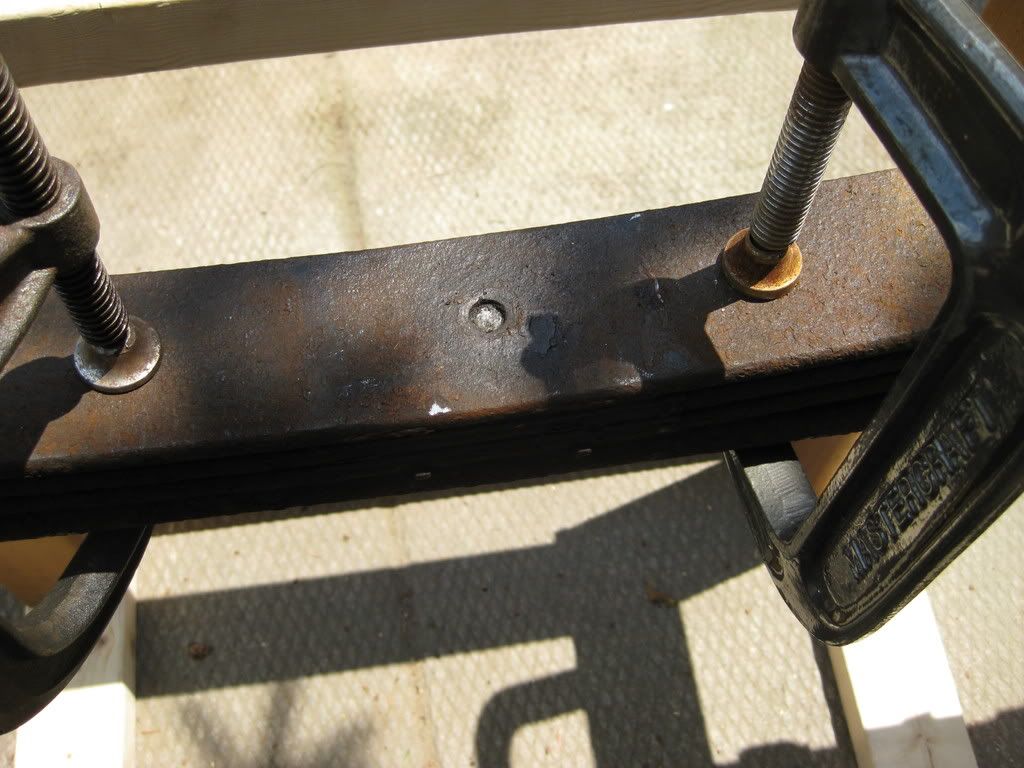
The U-bolt plate came off easily with a BFH and chisel.
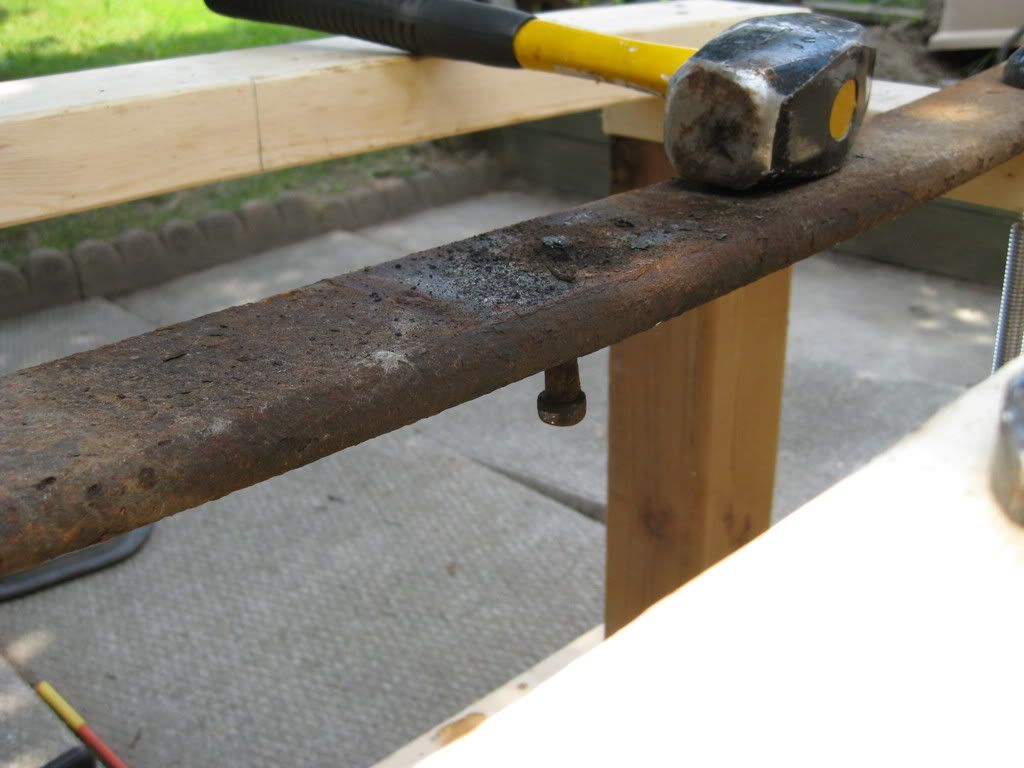
The centering pin for the leaf pack was so corroded, the nuts snapped off when I tried to loosen them with a socket wrench.
The reason I went with the Chevy's is, to reduce cost of the build and to take advantage of the flex these spring give in return.
If I need to replace a pack, the local wreckers are bound to have a replacement set at any given time.
I can also purchase a par of new, replacement leaf packs (non OEM) for $300 from Kitchener Spring. They also carry add-a-leafs.
In other words... they're affordable!
Originally I was going to order leaf packs from Deaver or Alcan.
The price was hard to swallow, considering the exchange rate at the time, duty charges, taxes and shipping. In the end, the shipped leaf packs would have cost me around- $1400- $1600.... eek!
The Chevy price point is a huge bonus, it's the most bang for the buck... IMHO. They're 1/2 ton springs, so they will carry the added weight of my rear bumper with tire swing out + all the camping and wheeling gear.
Side note... chevy truck years... 1988-98 1/2.
2wd Chevy trucks came with 3 leafs = overload spring
4wd Chevy trucks came with 4 leafs + over load spring
I'm running 3 leafs, ditching the overload.
Ghetto springs.... LOL
I have to admit, when we threw them into the truck, fresh off the donor, the springs looked rough... Although... There were 3, 2wd, Chevy trucks I had to choose from. The truck I picked had a clean, pretty much scratch free bed. It looks as if the truck was never used for heavy duty work. The springs off this truck most likely retain its factory spring rate or close to it. The last thing I want is well used flat spring packs... something to consider if your looking for Chevy's at the wreckers.
Another thing to consider.... price!
At first the wrecker wanted $120 for the pair. No way!
I told them, the packs are rusted, maybe cracked, and the original front hanger and shackles are still attached to the spring, making it harder for me to remove them.
the wrecker didn't put up a fight and dropped the price down to $80...
DON'T PAY MORE THAN $100 for these springs.
Here's more information on Chevy spring swaps......
http://www.pirate4x4.com/forum/showthread.php?t=20665
Fresh off the donor truck.... a little rusty! LOL
U- bolt plate still attached... rusted on. The plate is not threaded.
The wreckers cut the hangers and shackles off the truck...
I cut off the bolts to remove the hangers and shackles with a Porta-Band band saw.
I did a quick wire brush clean-up, removing some flaking rust.
I made a work bench jig, so i can clamp, disassemble and grind the leaf pack.
I used a wrench to bend the leaf clamps, too remove the leafs.
The U-bolt plate came off easily with a BFH and chisel.
The centering pin for the leaf pack was so corroded, the nuts snapped off when I tried to loosen them with a socket wrench.
4307
Adventurer
I removed the c-clamps slowly expecting the pack to separate... LOL
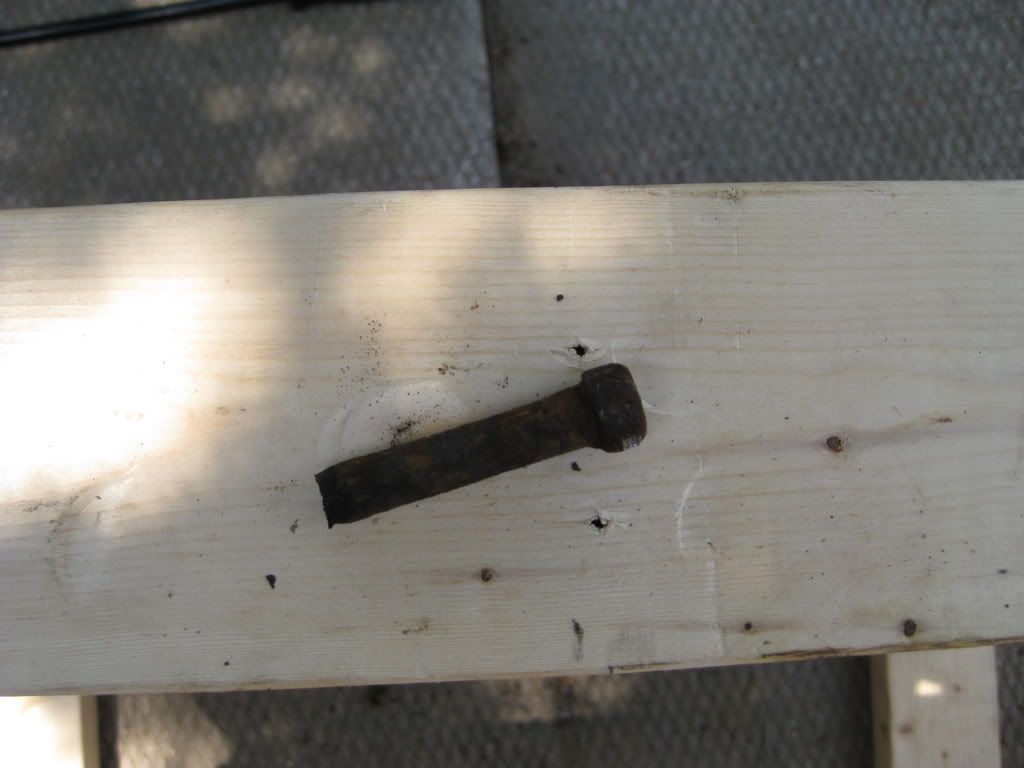
The centering pins on both packs were corroded to the leaves. I used a pry bar to pop the leafs off the pin. PB blast is a huge help, I highly recommend that stuff.
The centering pin was removed from the overload spring using a BFH and a blunt punch. I'm not using the overload spring, but who knows. I'm keeping them just in case. The old centering pins were tossed, replacing them with new ones
I bought new ones from Kitchener Spring.
The leaves were separated, saving the separation plates sandwiched between the leaves.
The separation plates are galvanized. All I did was washed and scrubbed them with Gojo hand cleaner... done!
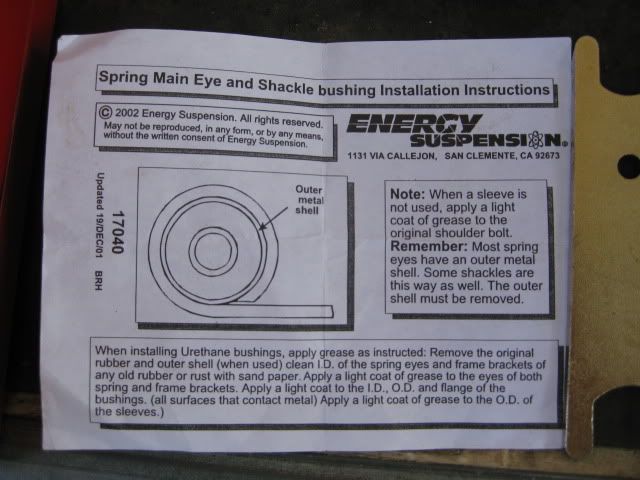
Instructions come with the Energy kit.
Energy Suspension kit # 3.2128R
R= red
G= black
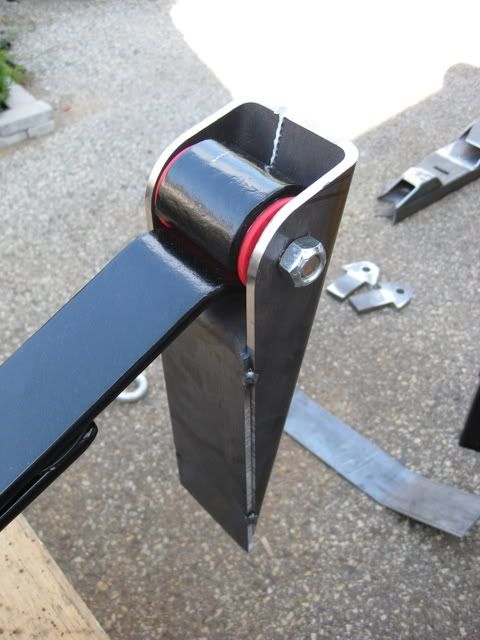
The kit, also comes with Chevy- shackle hanger bushings - which I used with my rear hanger swap.
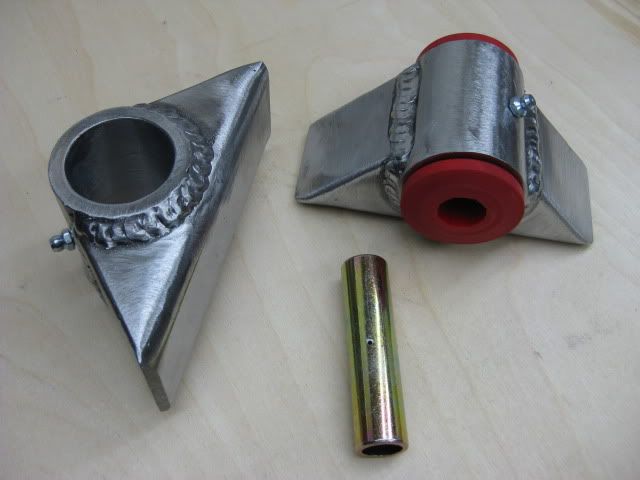
The leaf eye bushings installed, leaf bolted to the new front hangers...
In the end, the work I put into these springs, it was worth the effort.
Hope this writeup helps.
The centering pins on both packs were corroded to the leaves. I used a pry bar to pop the leafs off the pin. PB blast is a huge help, I highly recommend that stuff.
The centering pin was removed from the overload spring using a BFH and a blunt punch. I'm not using the overload spring, but who knows. I'm keeping them just in case. The old centering pins were tossed, replacing them with new ones
I bought new ones from Kitchener Spring.
The leaves were separated, saving the separation plates sandwiched between the leaves.
The separation plates are galvanized. All I did was washed and scrubbed them with Gojo hand cleaner... done!
Instructions come with the Energy kit.
Energy Suspension kit # 3.2128R
R= red
G= black
The kit, also comes with Chevy- shackle hanger bushings - which I used with my rear hanger swap.
The leaf eye bushings installed, leaf bolted to the new front hangers...
In the end, the work I put into these springs, it was worth the effort.
Hope this writeup helps.
4307
Adventurer
Next step was removing the stock bushings and sleeves....
This is not easy. You may be able to press them out, but that could get dangerous.
Cutting the rubber out is a huge PITA!
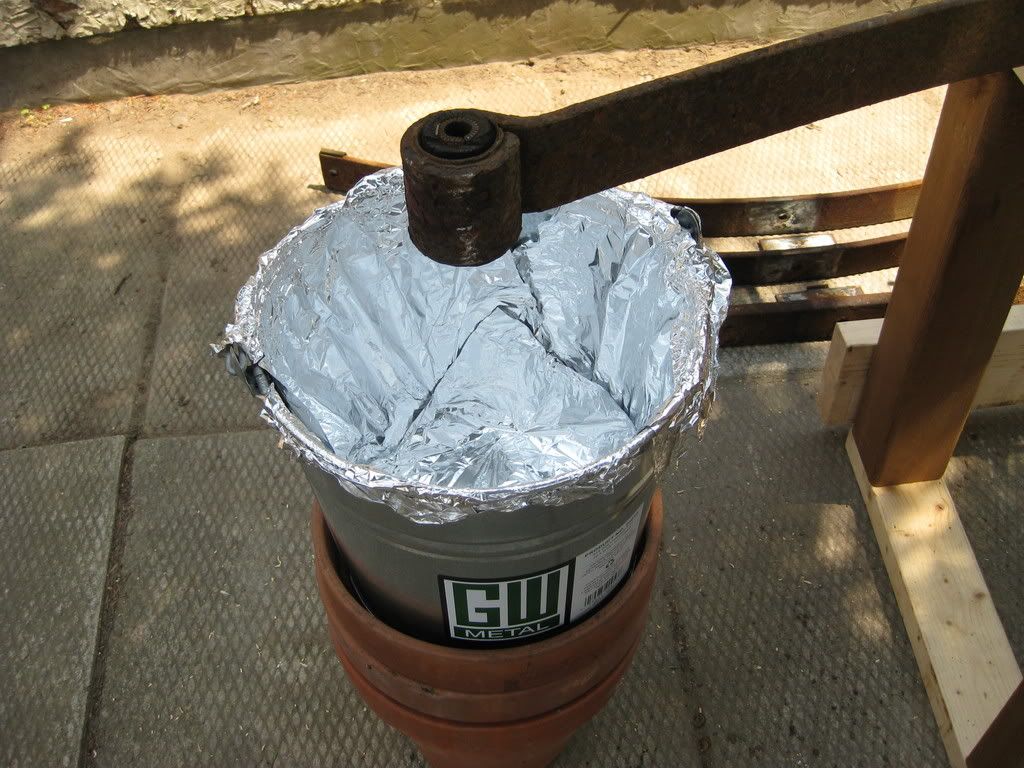
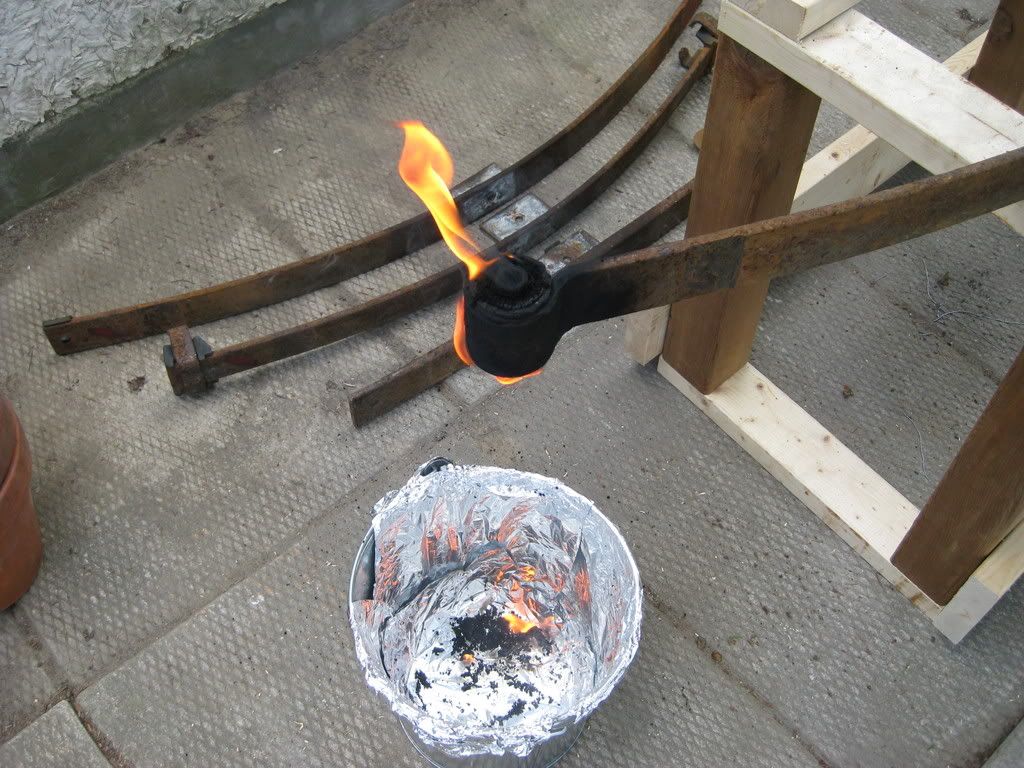
I decided to burn them out.
I used a propane torch to burn out the bushings.
Thick black smoke and burning rubber smell made the neighbors nervous.
Next thing I knew a couple of them were standing there making sure the house wasn't burning down. I was doing this in my back yard.... LOL.
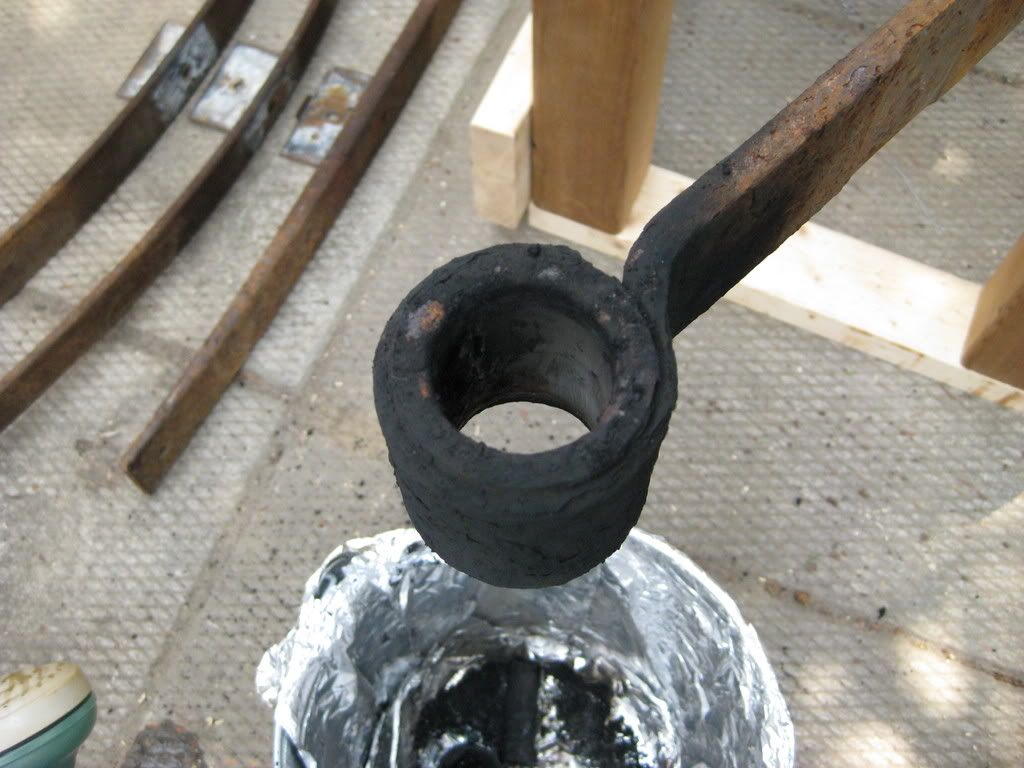
Anyway... the bushings fell out in a burning goo. I lined a metal bucket with tin foil for easy cleanup.
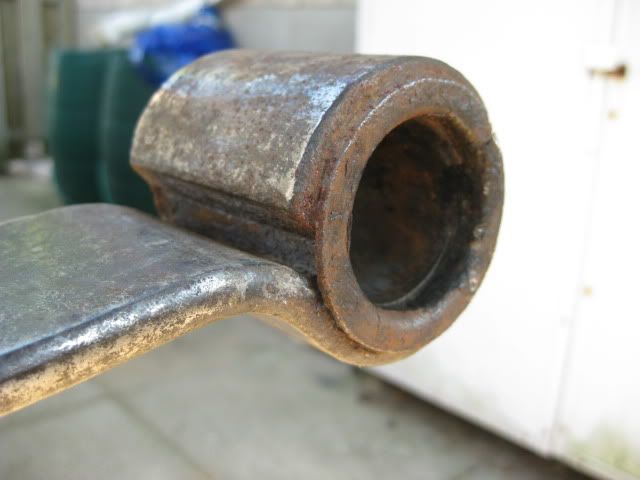
A metal sleeve is left behind, in the spring eye.
The metal sleeve will need removing to fit the new Energy Suspension bushings into the spring eye. I used a pair of pliers, Sawsall and a big screw driver to pry them out.
Energy Suspension instructions...
The metal sleeve is pictured in the spring eye....
This is not easy. You may be able to press them out, but that could get dangerous.
Cutting the rubber out is a huge PITA!
I decided to burn them out.
I used a propane torch to burn out the bushings.
Thick black smoke and burning rubber smell made the neighbors nervous.
Next thing I knew a couple of them were standing there making sure the house wasn't burning down. I was doing this in my back yard.... LOL.
Anyway... the bushings fell out in a burning goo. I lined a metal bucket with tin foil for easy cleanup.
A metal sleeve is left behind, in the spring eye.
The metal sleeve will need removing to fit the new Energy Suspension bushings into the spring eye. I used a pair of pliers, Sawsall and a big screw driver to pry them out.
Energy Suspension instructions...
The metal sleeve is pictured in the spring eye....
4307
Adventurer
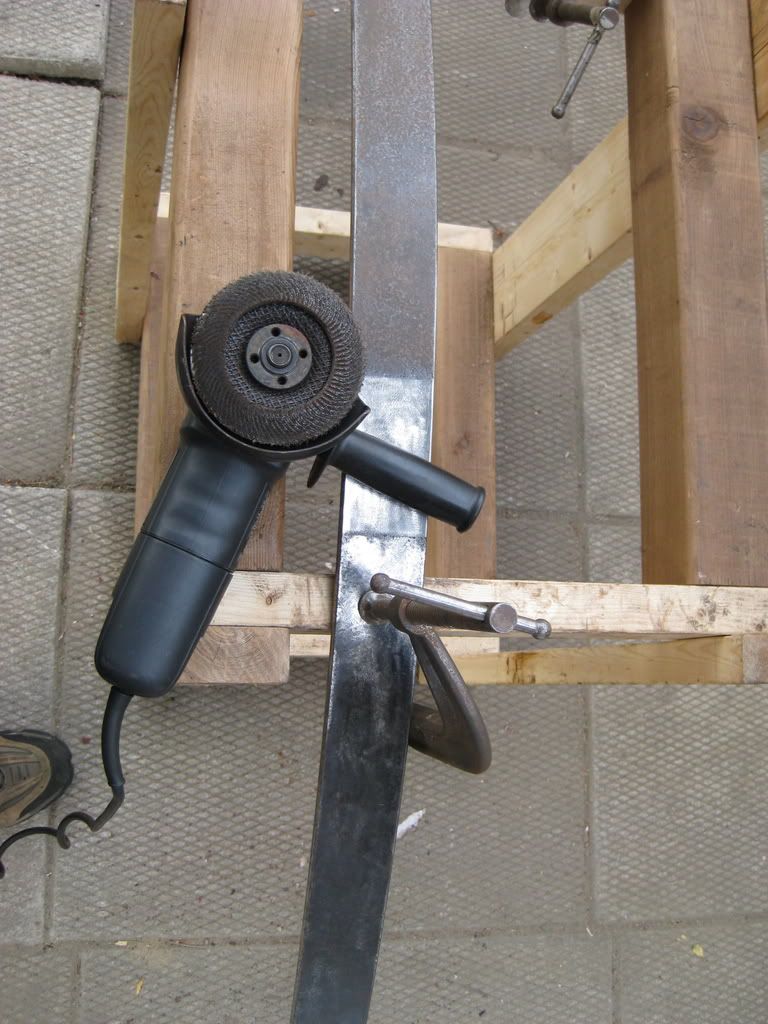
The next step is rust removal.
I clamped each leaf down, and used a grinder with a wire wheel and flap disk to remove the rust... Messy job!
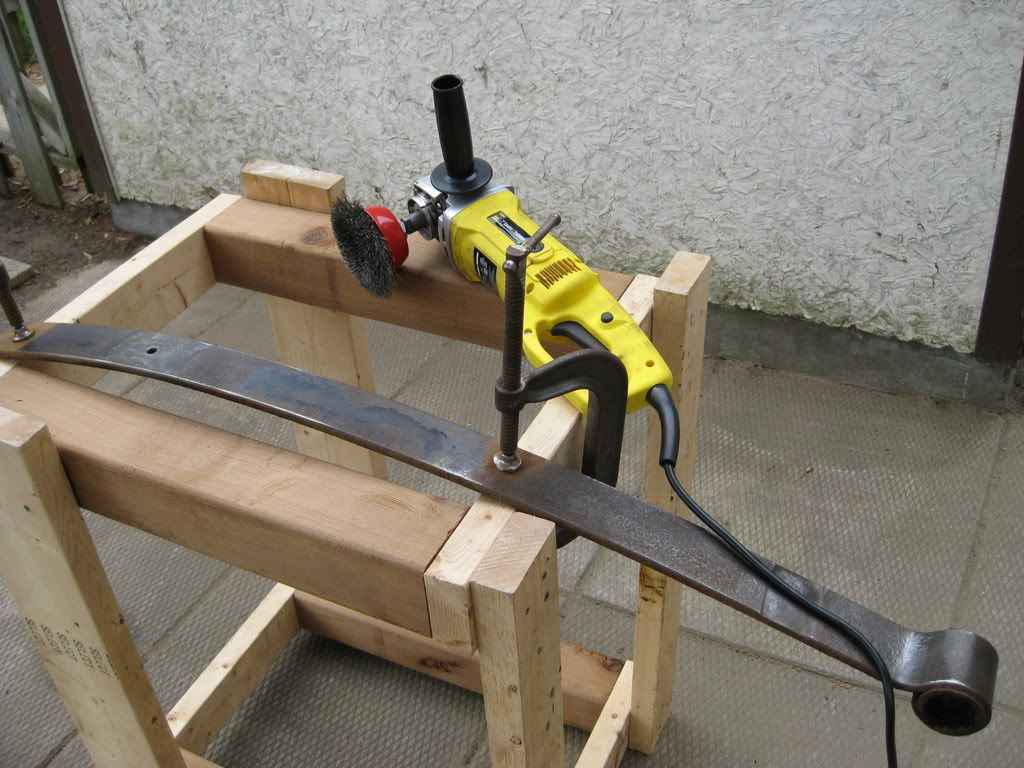
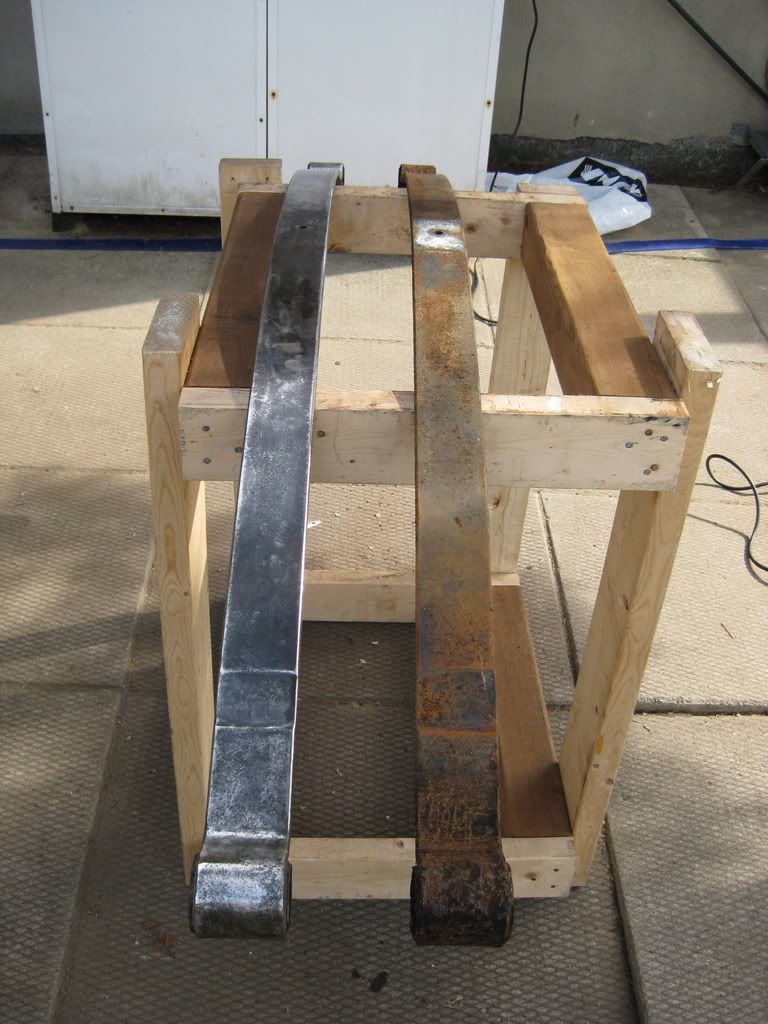
In the end, I was left feeling pretty rusty...
If you decide to grind the rust off, wear a good dust mask, not the thin paper ones. Glasses are also a must, especially when using a wire wheel.
I clamped each leaf down, and used a grinder with a wire wheel and flap disk to remove the rust... Messy job!
In the end, I was left feeling pretty rusty...
If you decide to grind the rust off, wear a good dust mask, not the thin paper ones. Glasses are also a must, especially when using a wire wheel.
4307
Adventurer
I decided to add new anti-friction pads to the second and third leaf.
Some will argue, anti-friction pads are not nessesseary. You can run a leaf pack without anti-friction pads, make sure the ends of the leafs are tapered or or rounded
to keep sharp edges from cutting or rubbing into the other leaf springs.
I decided to add friction pads... personal choice.
The original anti-friction pads, were worn down.
Kitchener spring carries generic round anti-friction pads.
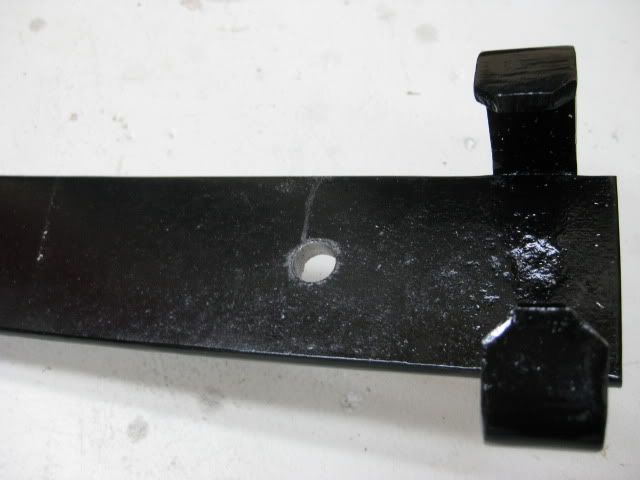
The second leaf accepted the pads.
The original third leaf clamps are rectangular and wrap around the leaf spring.
New anti- friction pads. 2.5'' diameter.

Original second leaf anti friction pad hole..
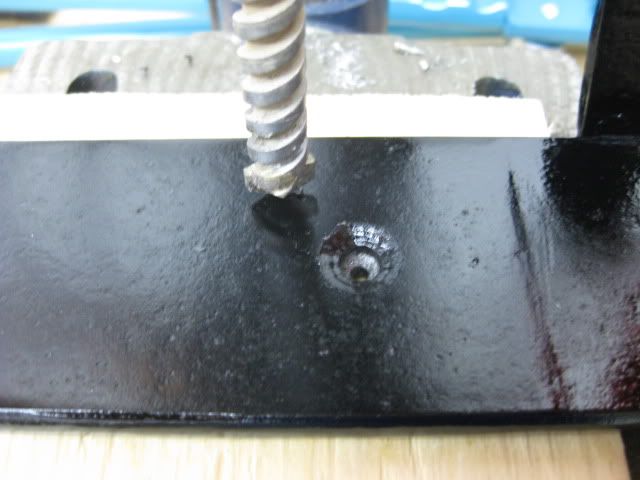
I drilled through the third leaf to install anti-friction pads using a 5/8'' cobalt concrete drill bit.
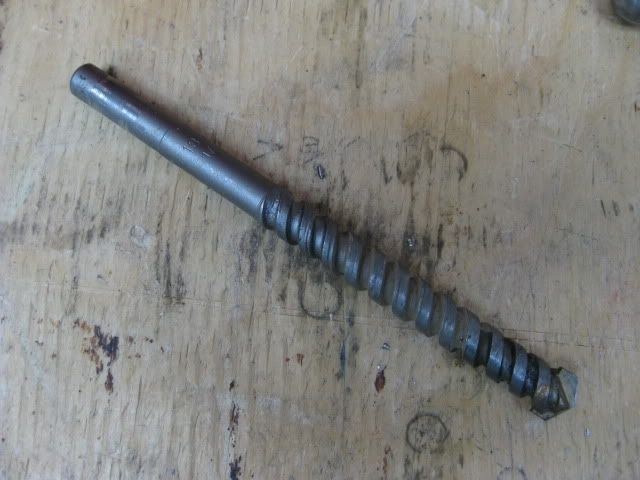
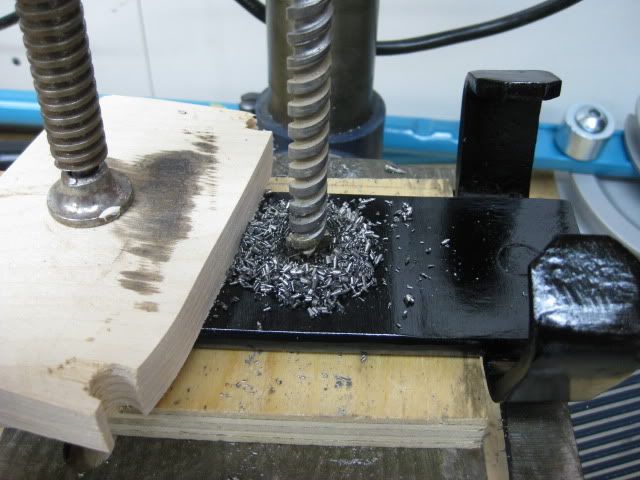
You can't drill spring steel with a standard metal cutting bit, It will dull down within minutes.
Standard bits....
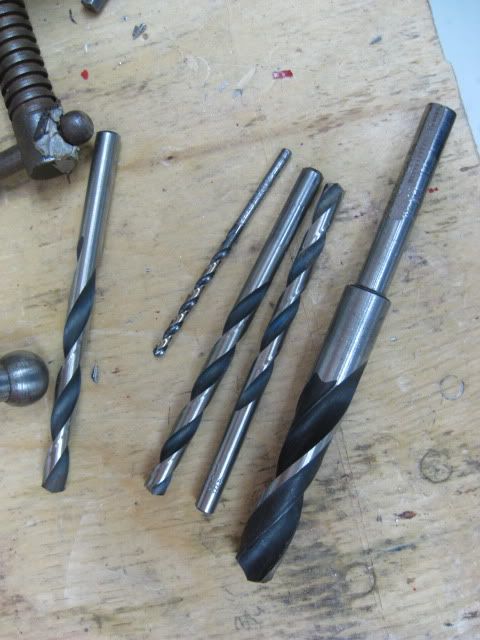
The concrete bit cuts holes fast and leaves a nice finish.
After drilling 4 holes the concrete bit was still sharp.
Painting....
I researched painting leaf springs. I found this information......
http://www.t-springs.com/prep.html
(This is the text, just incase the link disappears)
-------------------------------------------------------------------------------------
Prep and Painting Procedures
Proper procedures to prep and paint all leaf springs.
ASSEMBLED SPRINGS
Painting assembled springs:
1 Clean springs thoroughly with wax and grease remover or Pre-Kleener
2 Mask off shackle bushings
3 Spray spring with one medium coat of self etching primer (RM 834 ZIP Primer). This is a rust inhibitive, self etching primer with excellent adhesion properties.
4 Allow at least 30 to 60 minutes for "flash" time after prime coat has been applied.
5 Spray spring with 2 (Two) medium coats of black single stage urethane paint (PPG Concept 9000 is an excellent, high quality single stage paint for this type of application.)
6 Unmask bushings and install after paint has dried.
PAINTING OF DISMANTLED SPRINGS
PLEASE READ CAREFULLY!
Prior to painting prep I highly recommend removing ALL sharp edges from the factory sheered tips of all the leaves, both top and bottom sides. I also recommend the areas at the tips of the undersides to have a gentle "sweep" so that scaring or gouging will be kept to a minimum when your spring has been painted and installed.
The cleaning, masking, priming and painting procedures are the same as the assembled springs. However, extreme care must me taken NOT to paint the contact surfaces where the leaves lay on top of each other. Only a very light "fogging" layer is acceptable. The reason for this is that any build up of paint between the leaf springs will eventually pulverize over time and the leaves and center bolt can end up loose and potential failure may occur.
Use a light coat of EP (extreme pressure) grease on the underside of each leaf prior to assembly. This will allow for a smoother action between the leaves and provide for a softer ride.
Clean excess grease off after assembly with a wax grease remover and CLEAN towels.
Assemble all pre-prepped leaves and follow the instructions 2 - 6 on the ASSEMBLES SPRINGS painting.
-------------------------------------------------------------------------------------
When I assembled the leafs, at the time of install, I ran one separation plate in each pack, after 2 went missing.
I put the plates between the first and second leaf, on each pack.
If I find the missing plates, I may install them.
Again, it's fine if the pack is missing these plates, it's not critical.
At the time of painting. I masked the area where the separating plate seat.
The masking tape came off at the time of assembly.
Before painting...
After painting....
After the paint dried, the Energy Suspension bushings were installed.
Lithium grease is used on the springs inner eye surface, so the bushings are easier to install. Lithium grease was also used on the sleeve and inner eye of the bushings.
Some will argue, anti-friction pads are not nessesseary. You can run a leaf pack without anti-friction pads, make sure the ends of the leafs are tapered or or rounded
to keep sharp edges from cutting or rubbing into the other leaf springs.
I decided to add friction pads... personal choice.
The original anti-friction pads, were worn down.
Kitchener spring carries generic round anti-friction pads.
The second leaf accepted the pads.
The original third leaf clamps are rectangular and wrap around the leaf spring.
New anti- friction pads. 2.5'' diameter.
Original second leaf anti friction pad hole..
I drilled through the third leaf to install anti-friction pads using a 5/8'' cobalt concrete drill bit.
You can't drill spring steel with a standard metal cutting bit, It will dull down within minutes.
Standard bits....
The concrete bit cuts holes fast and leaves a nice finish.
After drilling 4 holes the concrete bit was still sharp.
Painting....
I researched painting leaf springs. I found this information......
http://www.t-springs.com/prep.html
(This is the text, just incase the link disappears)
-------------------------------------------------------------------------------------
Prep and Painting Procedures
Proper procedures to prep and paint all leaf springs.
ASSEMBLED SPRINGS
Painting assembled springs:
1 Clean springs thoroughly with wax and grease remover or Pre-Kleener
2 Mask off shackle bushings
3 Spray spring with one medium coat of self etching primer (RM 834 ZIP Primer). This is a rust inhibitive, self etching primer with excellent adhesion properties.
4 Allow at least 30 to 60 minutes for "flash" time after prime coat has been applied.
5 Spray spring with 2 (Two) medium coats of black single stage urethane paint (PPG Concept 9000 is an excellent, high quality single stage paint for this type of application.)
6 Unmask bushings and install after paint has dried.
PAINTING OF DISMANTLED SPRINGS
PLEASE READ CAREFULLY!
Prior to painting prep I highly recommend removing ALL sharp edges from the factory sheered tips of all the leaves, both top and bottom sides. I also recommend the areas at the tips of the undersides to have a gentle "sweep" so that scaring or gouging will be kept to a minimum when your spring has been painted and installed.
The cleaning, masking, priming and painting procedures are the same as the assembled springs. However, extreme care must me taken NOT to paint the contact surfaces where the leaves lay on top of each other. Only a very light "fogging" layer is acceptable. The reason for this is that any build up of paint between the leaf springs will eventually pulverize over time and the leaves and center bolt can end up loose and potential failure may occur.
Use a light coat of EP (extreme pressure) grease on the underside of each leaf prior to assembly. This will allow for a smoother action between the leaves and provide for a softer ride.
Clean excess grease off after assembly with a wax grease remover and CLEAN towels.
Assemble all pre-prepped leaves and follow the instructions 2 - 6 on the ASSEMBLES SPRINGS painting.
-------------------------------------------------------------------------------------
When I assembled the leafs, at the time of install, I ran one separation plate in each pack, after 2 went missing.
I put the plates between the first and second leaf, on each pack.
If I find the missing plates, I may install them.
Again, it's fine if the pack is missing these plates, it's not critical.
At the time of painting. I masked the area where the separating plate seat.
The masking tape came off at the time of assembly.
Before painting...
After painting....
After the paint dried, the Energy Suspension bushings were installed.
Lithium grease is used on the springs inner eye surface, so the bushings are easier to install. Lithium grease was also used on the sleeve and inner eye of the bushings.
4307
Adventurer
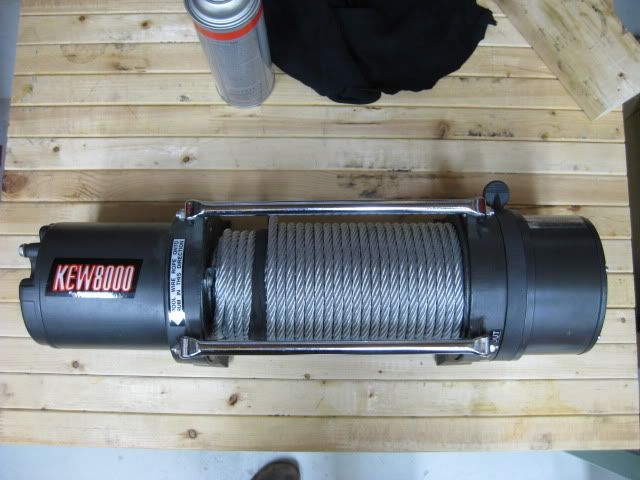
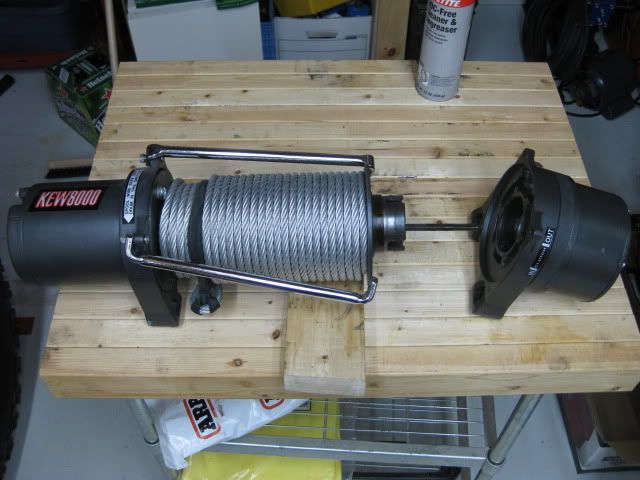
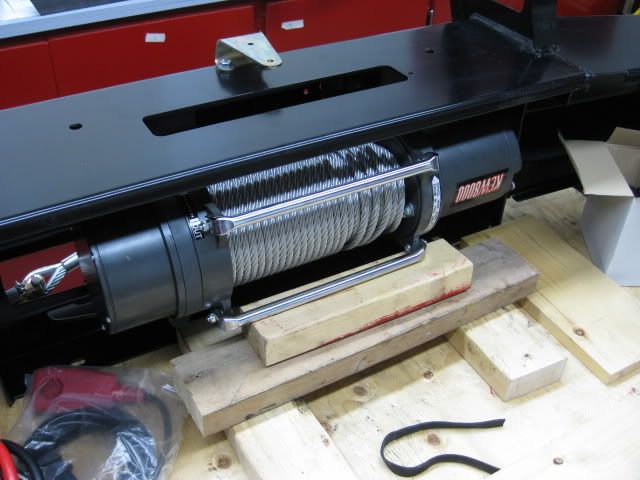
So, I finally decided to mount the winch in the ARB, assembled as much as I could, lights and hardware. I then gave the winch a "bench test"
The winch worked perfectly.
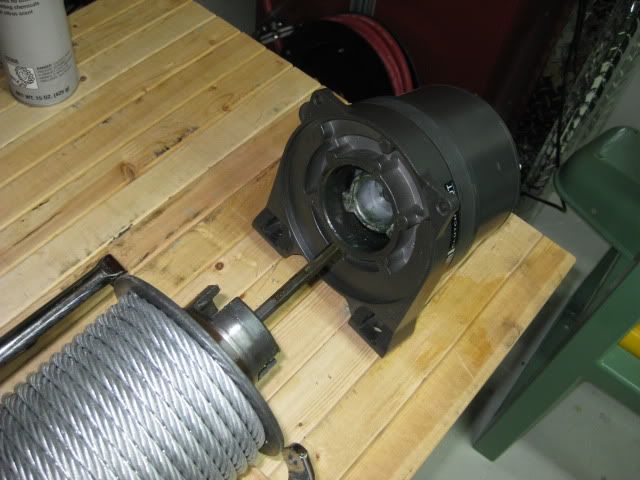
Before I could mount the winch, I had to clock the clutch handle.
This winch is not like a Warn winch, in the way you clock the handle.
This winch is a generic winch identical to the Ramsey REP 8000, and the Mile Marker PE 8000.
In order to clock this winch the gear assembly was dismantled to access and loosen plate bolts. The clutch can then be rotated.
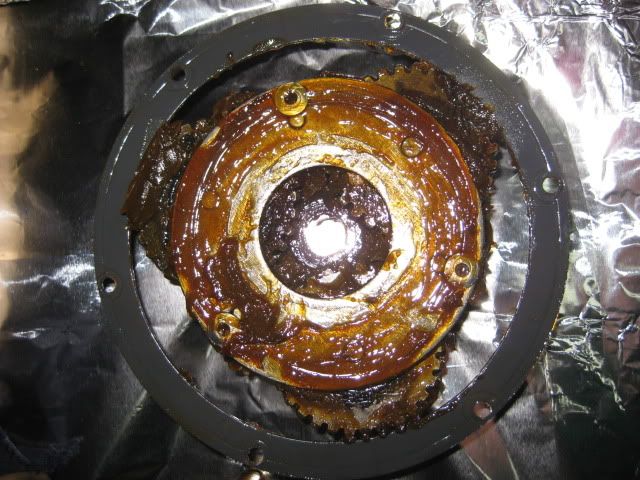
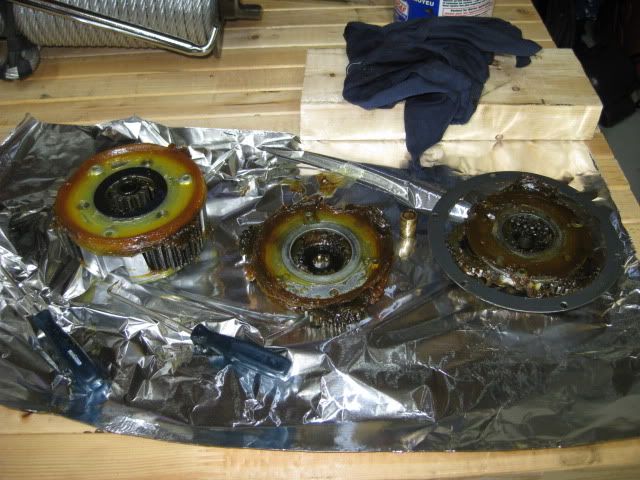
The gears came apart easily in 3 main sections. The grease held most of the smaller bushings gears and seals in they're relative location. Messy job....
There are 6 clocking positions. I clocked the handle to face the ground,so it's easier to get at.
Here are the main steps...
The KEW 8000 winch with the factory clutch position

After clocking....
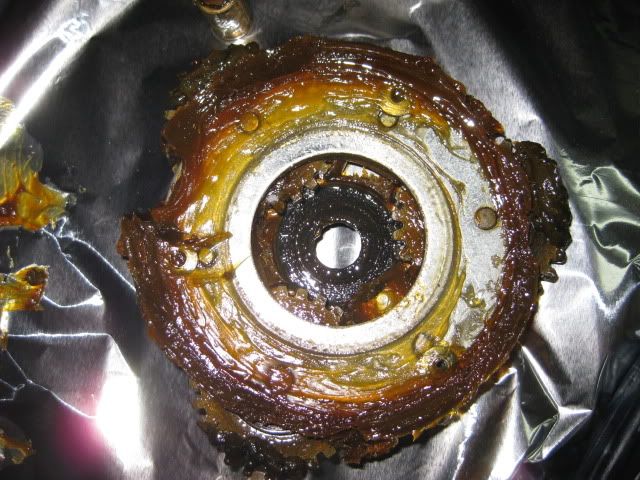
First the end cap on the housing had to come off. After that it just a matter of pulling gears out keeping track of the sequence....
Gear side of the housing end cap....
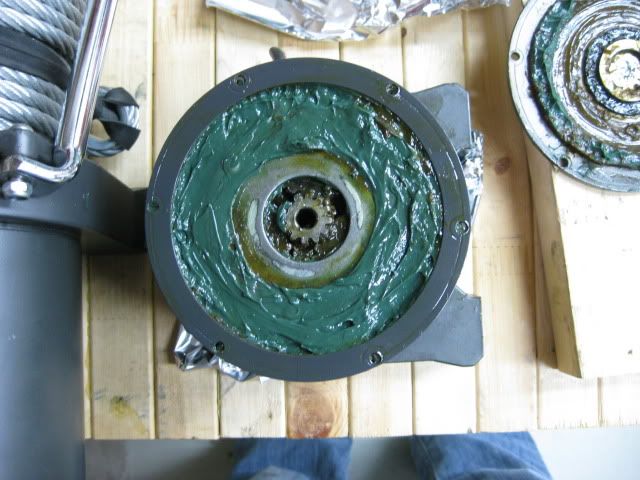
(this pic was actually the last pic I took after I repacked the gear set with grease.)
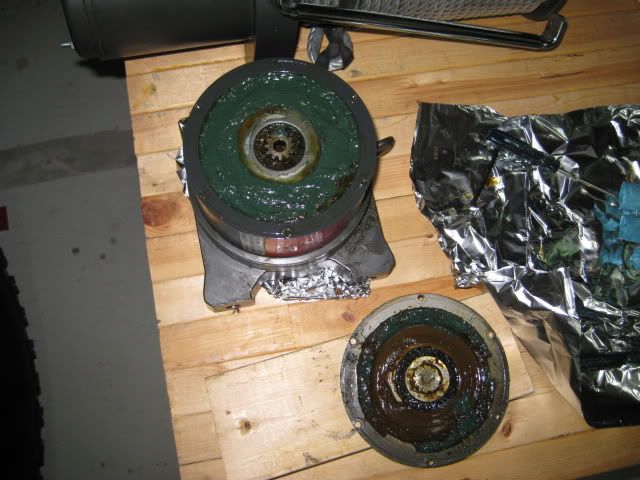
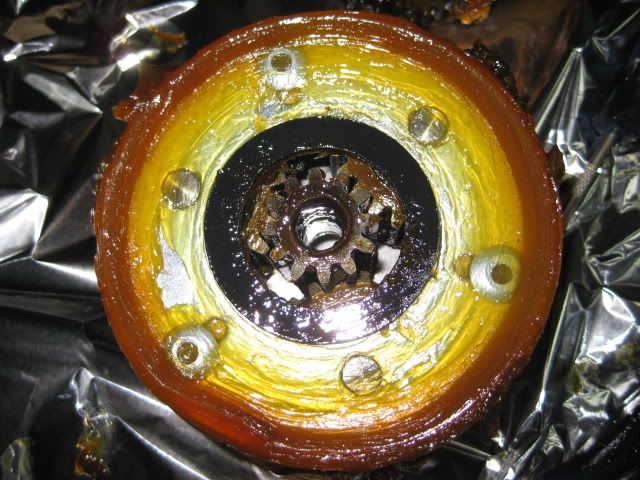
The first gear set with seal....
Second gear set...
Third gear set....
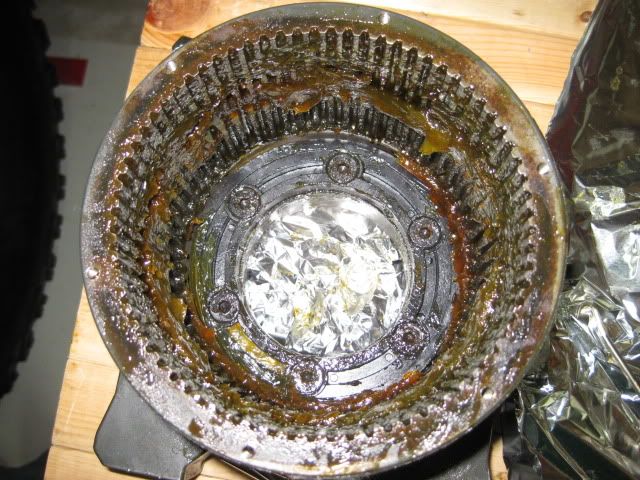
The housing...
in order to clock the clutch the 6 bolts at the bottom need to be loosened. The clutch can be rotated 360* around in the set 6 positions. It would have been better if the were 12 positions... oh well.
The winch worked perfectly.
Before I could mount the winch, I had to clock the clutch handle.
This winch is not like a Warn winch, in the way you clock the handle.
This winch is a generic winch identical to the Ramsey REP 8000, and the Mile Marker PE 8000.
In order to clock this winch the gear assembly was dismantled to access and loosen plate bolts. The clutch can then be rotated.
The gears came apart easily in 3 main sections. The grease held most of the smaller bushings gears and seals in they're relative location. Messy job....
There are 6 clocking positions. I clocked the handle to face the ground,so it's easier to get at.
Here are the main steps...
The KEW 8000 winch with the factory clutch position
After clocking....
First the end cap on the housing had to come off. After that it just a matter of pulling gears out keeping track of the sequence....
Gear side of the housing end cap....
(this pic was actually the last pic I took after I repacked the gear set with grease.)
The first gear set with seal....
Second gear set...
Third gear set....
The housing...
in order to clock the clutch the 6 bolts at the bottom need to be loosened. The clutch can be rotated 360* around in the set 6 positions. It would have been better if the were 12 positions... oh well.
Last edited:


4307
Adventurer
The next step in this program... installing the winch.
Pretty straitforward operation. The winch and fairlead line up perfectly with the mounting holes on the bumper. The ARB is designed to accommodate a Warn winch, other brands the bumper mounting holes may need modification. In all honesty I was prepared to modify, I even whipped out the tools to do it... LOL. No need for modification...
For those interested in the Ramsey or Mile Marker version of this winch... it bolts up nicely to the ARB Bull Bar.
I wired up and tested the winch to make sure the solenoid was working properly. The solenoid housing could be better designed, it took a little fiddling to feed the wires in the right direction. I had to drill new holes in the bottom of the solenoid chassis to accommodate the mounting bracket.... not a big deal.
In the end everything fits, the winch works..... bench tested... LOL
I mounted as much hardware as I could that came with the bumper, minus mounting brackets crossmember and the rad deflection plate.
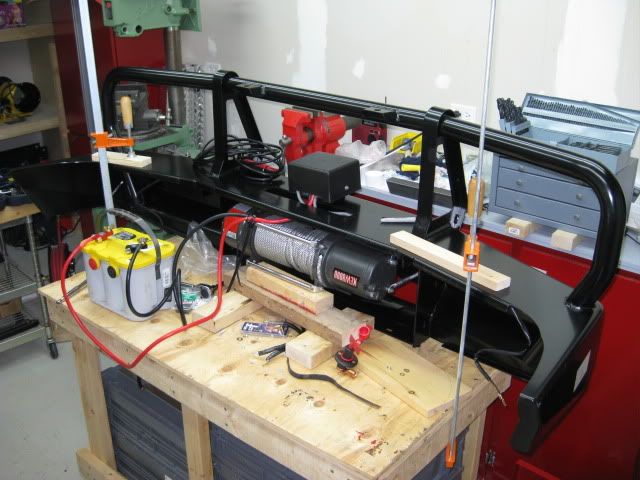
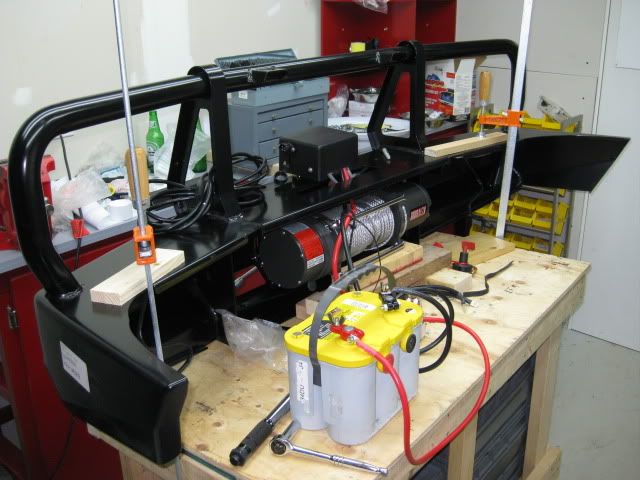
Ready for install! :sombrero:
Pretty straitforward operation. The winch and fairlead line up perfectly with the mounting holes on the bumper. The ARB is designed to accommodate a Warn winch, other brands the bumper mounting holes may need modification. In all honesty I was prepared to modify, I even whipped out the tools to do it... LOL. No need for modification...
For those interested in the Ramsey or Mile Marker version of this winch... it bolts up nicely to the ARB Bull Bar.
I wired up and tested the winch to make sure the solenoid was working properly. The solenoid housing could be better designed, it took a little fiddling to feed the wires in the right direction. I had to drill new holes in the bottom of the solenoid chassis to accommodate the mounting bracket.... not a big deal.
In the end everything fits, the winch works..... bench tested... LOL
I mounted as much hardware as I could that came with the bumper, minus mounting brackets crossmember and the rad deflection plate.
Ready for install! :sombrero:
007
Explorer
Subscribed:victory:
You have a very unique set of skills in that you can imagine, design, and then build some amazing things. Most people can't do even one of those things to your capabilities. You sir are a metal savant!
I was a little disappointed that you didn't opt to make a front bumper, but I'm also glad because I would have wanted it!!
Anyway, did you bolt those tires up yet?
4307
Adventurer
Subscribed:victory:
You have a very unique set of skills in that you can imagine, design, and then build some amazing things. Most people can't do even one of those things to your capabilities. You sir are a metal savant!
I was a little disappointed that you didn't opt to make a front bumper, but I'm also glad because I would have wanted it!!
Anyway, did you bolt those tires up yet?
Thanks!
Well, I have a design for a front bumper, I sure I'll end up building it... I can't stop myself....LOL!
4307
Adventurer
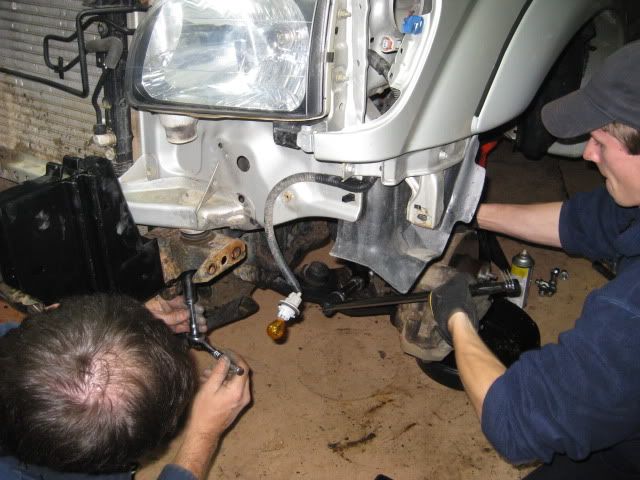
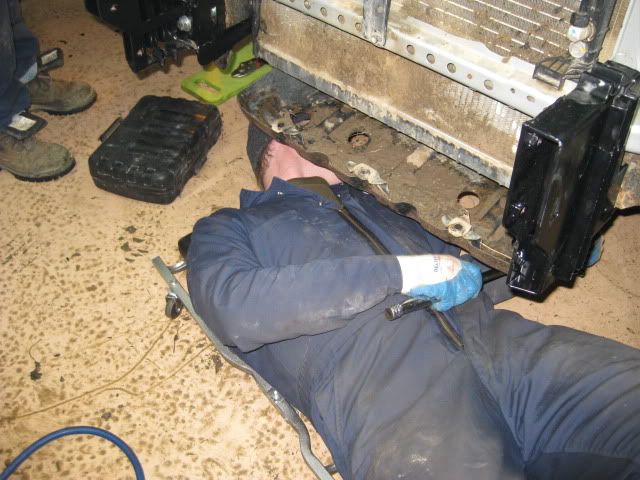
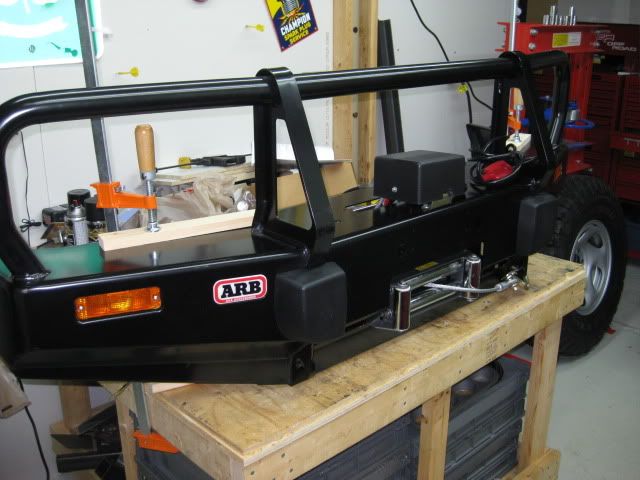
OK!..... "Epic" update!
I finally put the lift on. :wings:
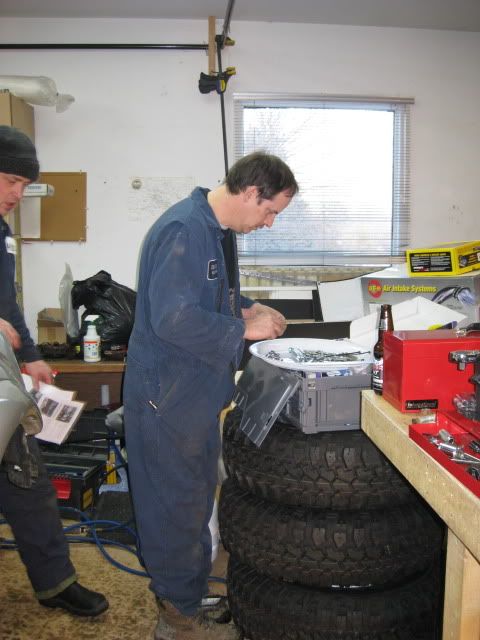
I had an opportunity to use the garage at Overdrive Automotive. The build took 6 days, moving tools included.
Alex and Fjttse (Kev.) from SONTT (Southern Ontario Toyota Trucks), lent a big hand in the build. The three of us made some good headway.... Thanks guys! I greatly appreciate your time and knowledge.
Dave and Tyler (SONTT) were nice enough to lend a hand, drop in, and hang out.
Sarah (my better half) hung out for quite a while, brought some food and drinks. :sombrero:
Hazel (Kev's wife) It's always a pleasure when Hazels around.... Hi Hazel!
I'd like to thank Mike at Overdrive Automotive Kitchener, for the opportunity to use his garage. Thanks Mike!
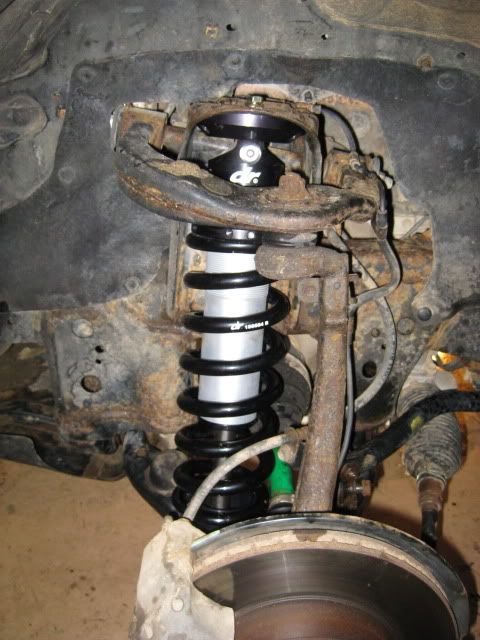
Install list...
- Tranny Cooler
- ARB Bull bar (winch pre-installed)
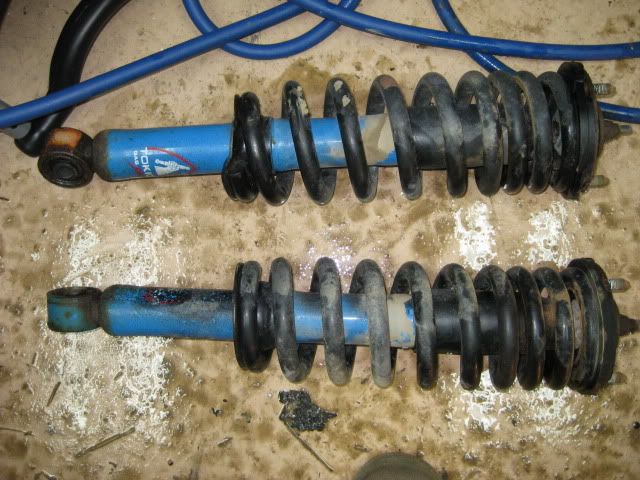
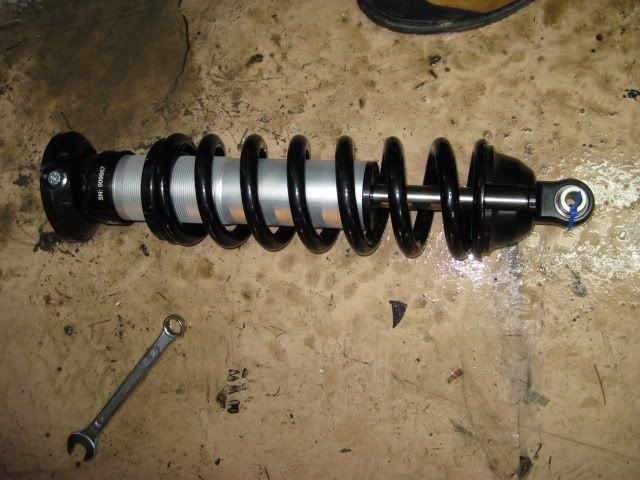
- Donahoe Coilovers
- 63'' Chevy leaf swap.
- rear differential breather
- extended BPV bracket
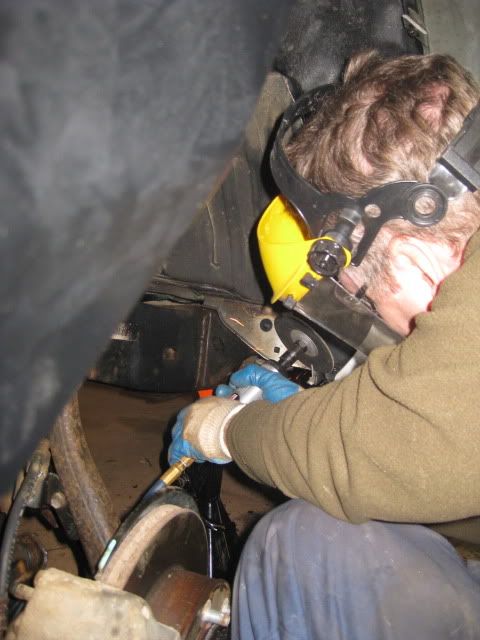
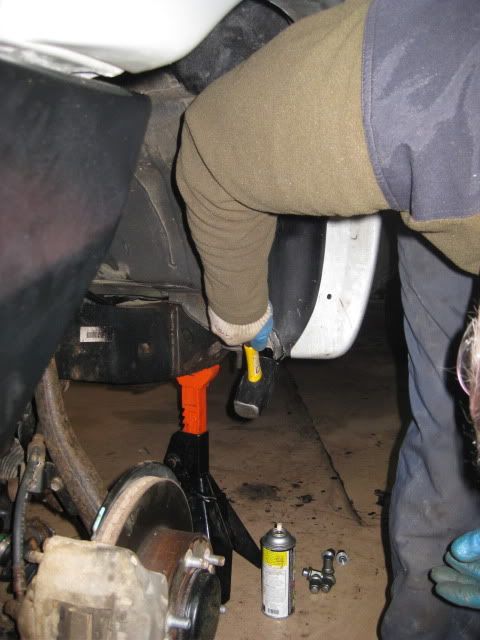
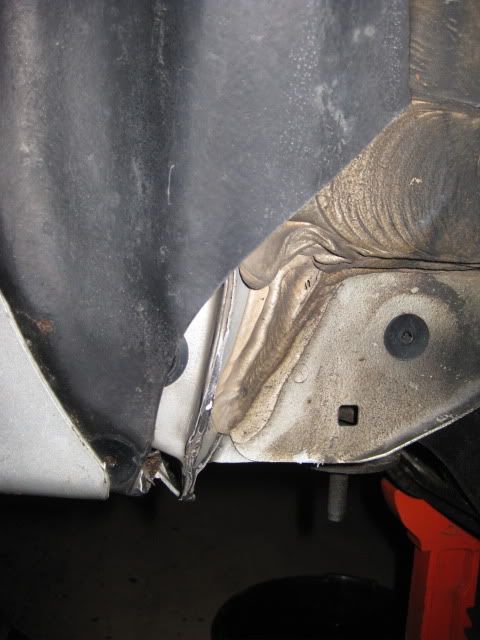
- pinch weld mod + trimming
- extended brake lines front and rear
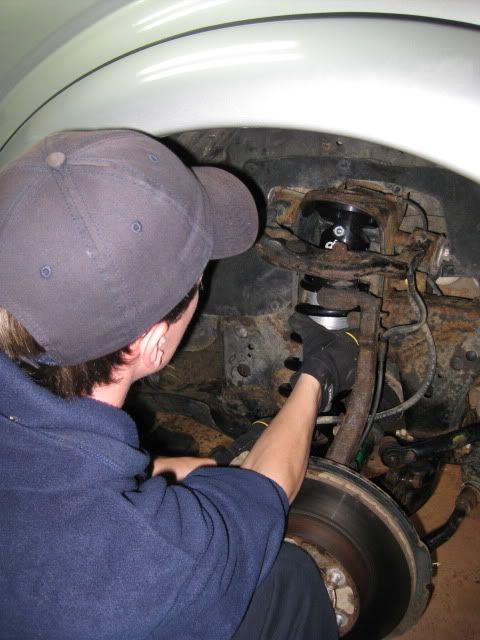
The first order of business was dismantling the front end tupperware.
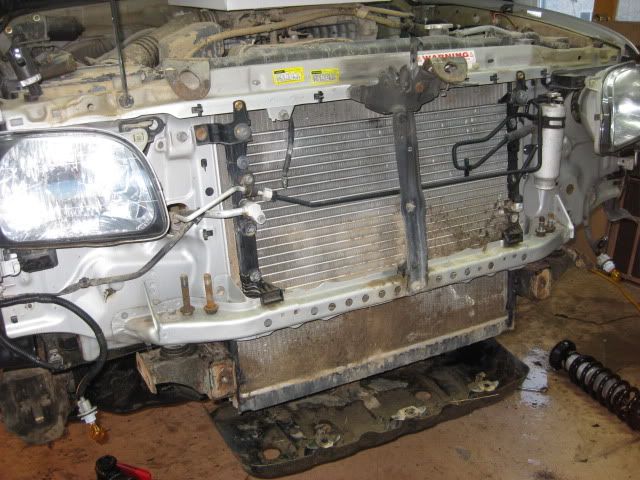
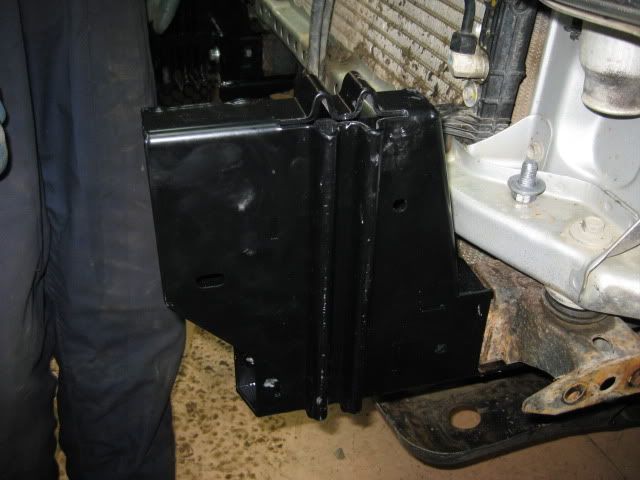
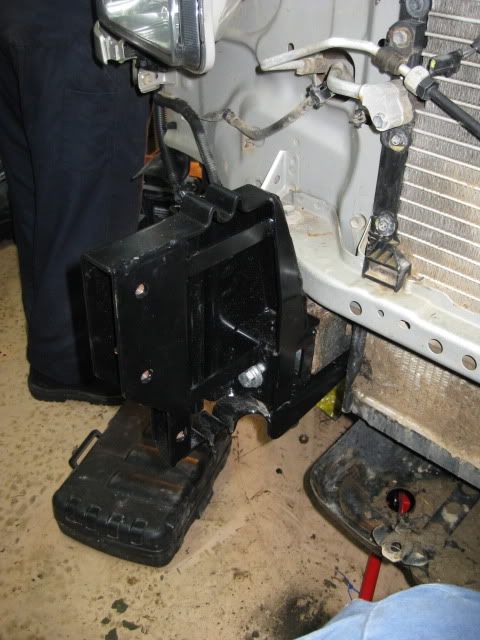
Kevin started with mounting the ARB brackets.
I finally put the lift on. :wings:
I had an opportunity to use the garage at Overdrive Automotive. The build took 6 days, moving tools included.
Alex and Fjttse (Kev.) from SONTT (Southern Ontario Toyota Trucks), lent a big hand in the build. The three of us made some good headway.... Thanks guys! I greatly appreciate your time and knowledge.
Dave and Tyler (SONTT) were nice enough to lend a hand, drop in, and hang out.
Sarah (my better half) hung out for quite a while, brought some food and drinks. :sombrero:
Hazel (Kev's wife) It's always a pleasure when Hazels around.... Hi Hazel!
I'd like to thank Mike at Overdrive Automotive Kitchener, for the opportunity to use his garage. Thanks Mike!
Install list...
- Tranny Cooler
- ARB Bull bar (winch pre-installed)
- Donahoe Coilovers
- 63'' Chevy leaf swap.
- rear differential breather
- extended BPV bracket
- pinch weld mod + trimming
- extended brake lines front and rear
The first order of business was dismantling the front end tupperware.
Kevin started with mounting the ARB brackets.