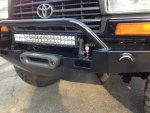
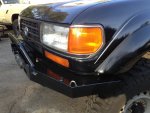
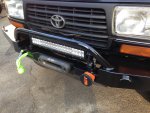
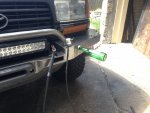
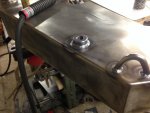
A fabricators 80 series build. Starting with the front bumper

RDC76

Adventurer
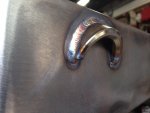
More close ups. The round threaded inserts on the outer parts of the wings are for optional attachments. Like threading rods on each end for wrapping the winch line around so you don't have to respool if you are doing a lot of winching. Or cb antennas. Or fishing rod holders.endless options. This bumper is designed to be more than just a winch and light hanger. It's designed to be clean and multifunctional. The canoe tie downs on the back of the main hoop can also be used the hold additional lights If so desired. And the tie downs on the end of the wings are perfect for hanging a ruck sack or camera bag on if the ground condition is not ideal. Or anything you can think of setting up camp.This bumper adds more function to the front of the vehicle.
Let me know what you guys think. And more to come.

Thanks.
 

Attachments

  • image.jpg
    image.jpg
    552.7 KB · Views: 76
  • image.jpg
    image.jpg
    549.2 KB · Views: 74
  • image.jpg
    image.jpg
    573.9 KB · Views: 78
Last edited:

RDC76

Adventurer
I still have to machine the 7/8" stainless pins for the recovery pockets. I ordered the 17-4 stainless rod today.
 

RDC76

Adventurer
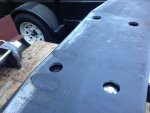
The recessed winch mounting bolts. And a couple more before paint.
 

Attachments

  • image.jpg
    image.jpg
    539.2 KB · Views: 62
  • image.jpg
    image.jpg
    518.9 KB · Views: 64
  • image.jpg
    image.jpg
    545.7 KB · Views: 64

RDC76

Adventurer
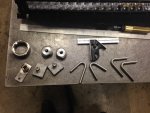
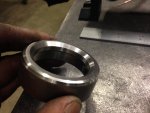
And some more. I turned the threaded inserts from round stock. And the threaded center runs through the bumper. There's about 3/4-1" of thread. I can't remember exactly. And the bottle opener was machined from just a piece of 2" x .25" stainless tube.
 

Attachments

  • image.jpg
    image.jpg
    545.7 KB · Views: 60
  • image.jpg
    image.jpg
    527.6 KB · Views: 62
  • image.jpg
    image.jpg
    520.6 KB · Views: 67
Last edited:

thecriscokid

Explorer
Nicely Finished!! I like the polished accents, great personal touch that I have never seen before. Are the attachment points planned for something? canoe ?
Well Planned and executed.:sombrero:
 

RDC76

Adventurer
Nicely Finished!! I like the polished accents, great personal touch that I have never seen before. Are the attachment points planned for something? canoe ?
Well Planned and executed.:sombrero:
Thanks. And yes canoe tie downs or what ever you might have a use for. And the two on the back of the main hoop can also be used to mount lights.
 

zelatore

Explorer
A thing of (functional) beauty.

I think that bottle opener qualifies as the most HD bottle opener I've ever seen. Definitely 'overland rated' when your bottle opener can double as a lift point for your high-lift!
 

Mako1114

Adventurer
And a close up of how the Prolink fits. The top and bottom of the pockets match the contour of the Prolink to minimize possible wear on the link and the sides of the pockets are 1/4 round to give a nice surface for the soft shackle to be used for angular pulls. Or if one wants to keep the Prolink shiny and new just use the soft shackle all the time. As it was designed to be used with/on the Prolink by bubba rope.

Very nice! Is the bottom interior of the pocket threaded to accept a shackle pin? I can't tell how the ProLink is held into the pocket?

Cheers
 

RDC76

Adventurer
A thing of (functional) beauty.

I think that bottle opener qualifies as the most HD bottle opener I've ever seen. Definitely 'overland rated' when your bottle opener can double as a lift point for your high-lift!
Thank you!
And that's hilarious.... I'll have to use that quote.
 

zelatore

Explorer
Thank you. I don't just make yota parts. I'll build anything. I was just commissioned by a land rover specialty shop in my area to build a custom roof rack system for a soft top defender 90 from you side of the country. It's what I do for a living.and in two weeks I'm doing an under body resto on a 74 Alfa Romeo. It's tough to throw a number out. I've never done an lr3. I don't know whats behind all your plastic. And depends on the level of detail. But to throw a number , 1500. Give or take.

Somehow I missed this post. $1500.....I said I'd cry about the price - I'd gladly pay that for an LR3 bumper even though I've already got an ARB installed. Of course, I'm on the left coast and the LR3 is pretty complicated so I don't think anything is going to happen. Not bad enough you have to tease me with a bumper build but then you go and mention Alfas....(ex Alfa racer myself)

If we were on the same coast I'd have to consider dropping the LR3 off to see what you can come up with. Heck, I'd just come hang out and watch you work - very nice job there. Makes me realize just how much of a welding hack I am!
 

RDC76

Adventurer
U
Somehow I missed this post. $1500.....I said I'd cry about the price - I'd gladly pay that for an LR3 bumper even though I've already got an ARB installed. Of course, I'm on the left coast and the LR3 is pretty complicated so I don't think anything is going to happen. Not bad enough you have to tease me with a bumper build but then you go and mention Alfas....(ex Alfa racer myself)

If we were on the same coast I'd have to consider dropping the LR3 off to see what you can come up with. Heck, I'd just come hang out and watch you work - very nice job there. Makes me realize just how much of a welding hack I am!

Lol thanks again Don. I find myself looking at LR3's now in traffic and thinking about how I would build a bumper for it. if you click on my Facebook link you can see some pics of the Alfa for your enjoyment.
 

Forum statistics

Threads
188,062
Messages
2,901,761
Members
229,415
Latest member
Gatofoamball
Top