AmboLander

rlrenz

Explorer
A long time ago, one of my guys was doing a tune up to one of our forklifts, and he managed to drop a stainless screw down the carb throat. The simple job he had been doing turned into removing the head to find the screw. One hour became one day.

It takes a very small mistake to result in a whole lot more work.
 

FDM2012

Adventurer
Decided to step back and think about things before I just started putting in the batteries and mounting components.
I didn't want to find out later that my sink and stove needed more clearance and whatnot.
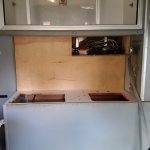
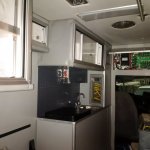
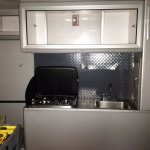
So, I did some cutting and drilling today and got the sink in. (not plumbed), and the stove will be here in a couple of days.
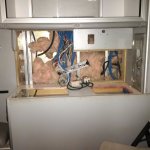
Turns out that there is about a 4'' gap between the bottom of interior counter and top of exterior box. That made my day.
So far, I have only had to cut out a 3'' hole for the drain access, and I should be able to have the supply lines hidden in the gap.
I am pretty confident the stove line (propane) will work out that way, as well. I will stroll through Lowes tomorrow and try to decide
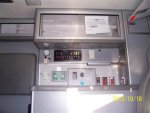
what I want to use the cover the countertop, backsplash, and the panel where the switches and O2 guage is.
(That board will still be used, but will be out of sight, and with only some of the switches being used, with some pigtails.
Same as I will do with the cockpit switches.) And I will definitely be relocating the 110v outlets.......
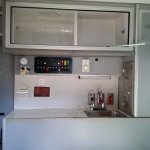
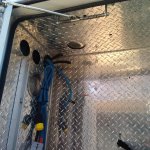
IMG_20160925_173110.jpg
IMG_20160925_173154.jpg
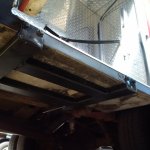
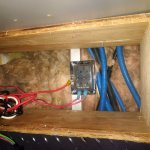
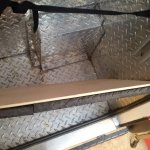
I had some metal supports that I took off the solar panels that I scored a couple of weeks ago, so I used it to build a bottom bracket
for that box, before I put in all of those batteries. It worked out well. A 90 degree drill makes all the difference when drilling through the
frame. No injuries (bashed/broken fingers or wrist) to report, thankfully. Wish is amazing, because I have always been very injury prone! lol
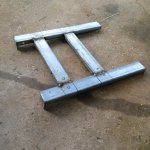
IMG_20160920_160110.jpg
IMG_20160925_151131.jpg
Earlier in the week, I got the panels topside and the cables run down to what I will now dub as "The Juice Box".
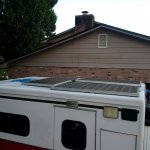
IMG_20160925_180238.jpg
I figure while waiting on the stove, I will go ahead and rebuild my fuel bowl and up my fuel pressure with a
billet regulator and spring kit. Hoping for 65psi-ish.

I also got embarrassed in front of some of my friends at a charity skeet shoot yesterday when it wouldn't start.
My starter relay is not receiving power and it will not turn over. The relay, starter solenoid, and starter are working fine,
just no power to energize the relay. I went old school and did the screwdriver trick to get it home.

I have been all through it yesterday afternoon and for a couple more hours today. I think it might be the switch.
So, I am opting for a cool Red "Engine Start" push button. Already ordered it. It's on the way. A done deal.
And yes, I checked out all of my fuses, looked for burnt wires, and my checked my shifter linkage....to know avail.
s-l400.jpg

Anyways, even thought I am bouncing around a bit, I still feel like I am gaining on it.
 
Last edited:

FDM2012

Adventurer
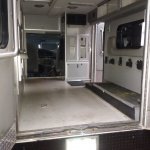
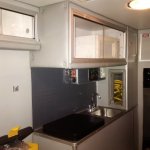
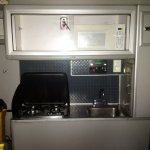
So, this is what I have been doing. I still need to put the trim on the protruding box,
and put the thermostat and some led lighting in. I am planning on hiding the panel inside the box,
and making some pigtails for the switches that I want to use.

And, I was able to easily relocate one of the 110v boxes to the above cabinet, for the microwave.


untitled.jpg
IMG_20160930_193138.jpg
IMG_20161002_170931.jpg
IMG_20161002_190625.jpg
IMG_20161002_190607.jpg
IMG_20161002_190713.jpg
IMG_20160723_225618.jpg
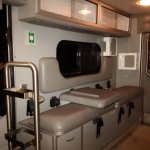
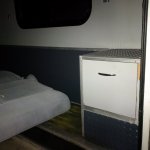
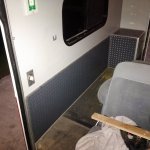
I chopped up the old bench so that I could achieve a rear drawer cabinet. And a place to sit my beer
while watching movies and whatnot on a rainy day. And of course, a hot pocket.

IMG_20160930_193102.jpg
 

Attachments

  • IMG_20160908_194031.jpg
    IMG_20160908_194031.jpg
    512.2 KB · Views: 40
  • IMG_20160930_193126.jpg
    IMG_20160930_193126.jpg
    511.9 KB · Views: 41
Last edited:

huskyhauler

Adventurer
Very nice. Have you made plans for the tall, skinny storage box behind the driver's seat (the one with the pass-through window)? I always thought that would make a good trash shoot but need the space to store tents and chairs.
 

FDM2012

Adventurer
@HuskyHauler - Actually, I will use it as an access door to reach my propane bottle valve and hot water heater on/off switch (arriving Wednesday).
Today's progress:

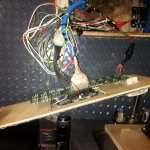
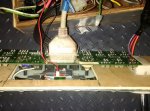
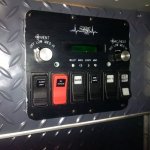
I only intended on a couple of hours of trimming out what I had already built, but I made the mistake of breaking out my meter to test a couple of circuits. Next thing I knew, I was cutting the circuit board faceplate apart, adding a fused gang box and a 12 volt meter, and some wiring for the light and the first of the 12v sockets.
Before I knew it, it was dark and raining, and the ZIKA Bombers were attacking me. But not before I re-purposed a few of the switches and got the trim done.

Without further adieu, here are some pics:

IMG_20161003_203224.jpg
IMG_20161003_170424.jpg
IMG_20161003_203211.jpg
IMG_20161003_205535.jpg
IMG_20161003_205917.jpg
IMG_20161003_210021.jpg
 
Last edited:

FDM2012

Adventurer
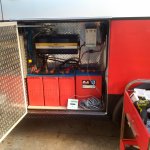
Finally got most of the solar system installed today to put those 3x150w panels to work.

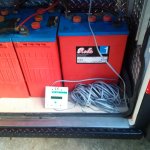
I still need to secure the batteries, route and install the remote monitor in the box somewhere,
and lower the fill levels to prevent spillage while driving. (They are overfilled right now)


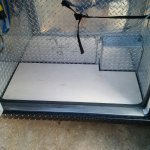
I already posted about how I mounted a support to help carry the weight (500+ lbs), but I still wanted to do
something to help cushion them. So, I had some of those 3/4'' interlocking floor mats left over from a spare
room I have my seldom used weight bench in, and decided to use them in the very bottom. Then, I used a piece if
1/4'' birch panel left over from the sink/stove/cabinet mod over the weekend. I figure it will help to spread the
pressure a bit, and to soak up and the occasional splash of battery acid.... lol

IMG_20161005_142527.jpg
IMG_20161005_143119.jpg
IMG_20161005_190050.jpg
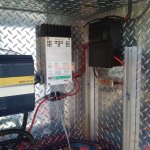
3000 watt Marine Grade Modified Sine Wave Inverter from my parts boat, 40amp charge controller,
20amp battery breaker/disconnect, quick disconnect box for the panels, and a fuse block for the roof top panels and
the future folding suitcase panels.
IMG_20161005_190034.jpg
IMG_20161005_190017.jpg

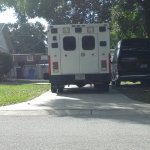
How much did that make it lean, do you ask? I dunno. By the time I finished, the ZIKA Bombers were
beginning their evening assault, so I bailed......

I will put it on the most level part of my driveway tomorrow and break out the tape measure. Unfortunately,
the best place to put my propane and water heater is also on the driver side, so between that set up, gear and whatnot,
and 200 pounds of me, (ok, 227lbs....) it will definitely be a requirement to lean my glass so as not to spill my tea. Ok, you
got me again, so as not to spill my Crown/Coke......

On the passenger side, I will be adding a 13 gallons water tank (from my boat), air compressors/tank, tools, and gear. So,
along with the 2 chassis batteries over there, the future solar panel storage area is just behind the passenger, and the bench
seats will be just right of center. It will be close......
Maybe I need a chunkier girlfriend to even out the load?
 
Last edited:

patoz

Expedition Leader
That's a good idea using that pad and plywood as a 'whole bank shock absorber'. I'll have to remember that trick!

Here is something I've read, and you may want to consider since you seem to have the room to do it. The batteries should never touch each other when installed to prevent heat built up when charging. Generally, a .5" spacer is used between them to maintain an equal air space, but make sure they are vertical so as not to block the rise of hot air.

I'll be using a Magnum Energy MS2012 2000W Inverter/100A Charger, and it came with a temperature sensor that gets attached to the Negative terminal of the battery bank. The sensor sends info to the Charger which regulates the charging rate to keep the batteries from overheating. Overheating the batteries can shorten the life of the batteries considerably.

Overall, the installation looks great!
 
Last edited:

FDM2012

Adventurer
Yeah, I was looking at the pic earlier and thinking before I latch them down, that I should spread them.
I have plenty of that pad left, so I will make some vertical pieces for doing that. And, between the
2nd and 3rd batts, I have the temp sensor, which plugs into the charge controller. Hence, the wad of
wire currently laying on top of the inverter.

That will be a great inverter for your rig. For now, I am just trying to use what I have on hand, and will upgrade
later on, as needed. If I had another month, I would have gone to the Expo, but alas, time and crappy weather
slowed me down... Oh well. I do hope the rain holds off for them, though. Sounds like a fun experience.
 

patoz

Expedition Leader
I was hoping to make it this year also, but the rain and unbelievable heat this summer has kept me from making much progress on my rig, so I'm hoping to get a lot done on it this winter as soon as it cools off some. And if I don't make it next year, then there is always the one after that...

Have you checked the latest forecast for Matthew? Now they are saying it may go up the coast, turn out to the east, and loop back down and hit Florida again. A 'Double Wammy'!

Getting hit once is bad enough, but twice?
 

FDM2012

Adventurer
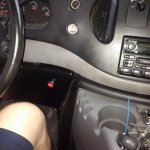
After a couple of weeks of dinking with the interior and solar stuff, I finally wired in my start
switch and took it for a spin. (added a 4 gang fuse block under the hood)
The air has bleed from high pressure crossover oil line install, and it is running
pretty stout, even as the weight is climbing rapidly. I am guessing to be around 11k by now. I will hit the
scales pretty soon.
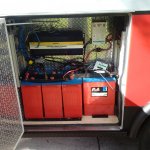
I got the batteries cushioned, separated and secured.
And dang, it has a serious lean to it now!!
IMG_20161007_184540.jpg
IMG_20161014_161949.jpg
IMG_20161014_161923.jpg
 

Forum statistics

Threads
188,399
Messages
2,906,847
Members
230,176
Latest member
Arcadia1415
Top