Ambulance Camper/ Expedition Rig Conversion FAQ

Bikersmurf

Expedition Leader
Comercial building. 'Armacell' or something like that. I used it for insulating the brass lines going to the rear heater in my Fj40 when the pipe insulation from Home Depot was just melting. It wasn't split, and was available in different sizes. Homedepot.com seems to have it availible in split lengths, but I'm not sure if it's the stuff I bought or more like the cheaper garbage I bought in the store.
 

groverdisco

New member
Well I went with the 2000 type 3 with a Crestline body. Got home with it late last night and doing some more research on it now. It has the 158" which rides quite good. Needs some freshening up here and there but I guess that's part of the project. I'll start a build thread latter and post some pictures of it. Kids have named it the clambulance, don't know if any of you guys watch Adventure Time? Lol. Anyways I look forward to all the knowledge you guys have to help out with this build!
 

FDM2012

Adventurer
Sweet. Look forward to following your build out.
2000 is one of the best years for the 7.3 PSD. Depending how much torque/HP you plan on generating.
Split Shot Injectors, forged rods, and the 4R100. But, be sure and change out the trans cooler and add
an inline 1/2'' Magnefine ' filter!

How many miles on it?
 

groverdisco

New member
It's got just over 200k miles on it. As for performance mods I'd like to add a tuner and just the basic upgrades to make it perform well and increase the mileage as best I can. Reliability will be key as I plan on taking this thing around the world ( or North America for now! ) My main focus right now will be getting my UJOR kit installed and converting the back to a livable, self contained RV. I'll look into that filter and cooler as you say as well, thinking the transmission has to come out to install the back transfer case section anyways? Good time to service and or overhaul it too I guess! Lots of cleaning up to do on it and then get it up on blocks!!
 

Bikersmurf

Expedition Leader
The bearings for the idlers and tensioner for the serpentine belt are easily replaced and readily available. I replaced all 3 for about $20 vs $25-50x3. All 3 are good as new.
 

FDM2012

Adventurer
Yes, I believe the tranny does have to come out to change the tail shaft, in order to
mate the T-case. Change the torque converter to a triple disc while it is out.

I will be doing mine eventually. The TC and the coolers are the weak links......
That, and the restrictive air intake box.
I am DETERMINED to make mine breath better, to get the EGT's lower, with all the power mods I have done.
 
Last edited:

groverdisco

New member
I'll pull the tensioners and idlers off and check them out when I pull the bumper off, think I'll change out the white grill as well. I emailed Chris at ujoint to see if I can send back some parts as I was originally going to install this kit in my V10 Motorhome. I need a different trans, transfer case adapter and some shift linkage parts.

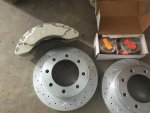
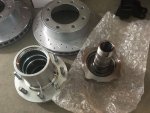
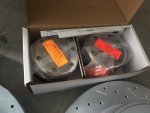
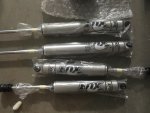
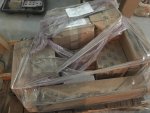
I just unwrapped my pallet of parts that I got back in February and wow this stuff is nice! I'll put up a few pics of the awesomeness that UJOR supplies with their kits!!

image.jpgimage.jpgimage.jpgimage.jpg
image.jpg
 

Bikersmurf

Expedition Leader
I'll pull the tensioners and idlers off and check them out when I pull the bumper off, think I'll change out the white grill as well. I emailed Chris at ujoint to see if I can send back some parts as I was originally going to install this kit in my V10 Motorhome. I need a different trans, transfer case adapter and some shift linkage parts.

I just unwrapped my pallet of parts that I got back in February and wow this stuff is nice! I'll put up a few pics of the awesomeness that UJOR supplies with their kits!!

View attachment 361843View attachment 361844View attachment 361845View attachment 361846
View attachment 361842

Purdy. I'd love to get my hands on a set of shocks like those... from what I've seen they're about the same price as a set of stockers here.
 

lockedwheels

Adventurer
I am terrible at navigating this site through the app. Is there anymore type II build threads? The only one I can find is O'billy's.


Sent from my iPhone using Tapatalk
 

Bikersmurf

Expedition Leader
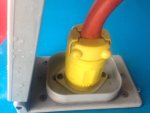
Plugging in

image.jpg

Leviton 'Dust Proof' ends fit very well with the receptacle Crestline equipped my Ambo with. I'd call it more water resistant than proof, but it does seal to the cord and the receptacle. Short of submersion, it'll do the job (since it's not a boat).
 
Last edited:

rlrenz

Explorer
Ambulances usually use a "weather-resistant" power inlet instead of waterproof or even water-resistant. I've used a Hubbell marine inlet plus a standard 30 amp twistlock connector on my power cord in my ambulance for several years with no problems. The old power inlet I had was a standard 15 amp inlet, and that was showing some corrosion, but still functioning after 15 years.

One thing to watch out for is that ambulance manufacturers usually use standard SO power cable for any internal 120 volt wiring. It does fine when a crimped terminal is used, but after a few years, a wire-nut joint can be easily pulled apart. The ONLY reliable long-term connection with stranded wire is a crimped connector. Some ambulance electricians use a crimped-on ferrule when they have to terminate stranded wire under a clamp-type connection, such as a circuit breaker - I do the same.

Depending on the ambulance maker, some do a better job of wiring than others. Oddly enough, some ambulance brands that are popular with EMTs are hated by the electricians who have to repair them.

Happily, ambulances are built with standardized parts - the marker lights, the interior lighting, the switches, the flooring, the door locks, and such are all off the shelf. The big GOTTCHAs are proprietary solid state controls. Some were designed by builders who are gone, such as Medic Master, and others have been obsoleted and replaced by a new generation that isn't interchangeable. Even if the maker is still around, re-programming is impossible in the field without buying a unique programmer. Several makers use a solid state control made by Weldon, but the components run into money very fast.

Some buyers are smart enough to specify conventional relay logic instead of solid state. A few relays and some diodes can do the same as a solid state package, and a new relay runs well under $10 at NAPA. That way, a repair can be done in a few hours versus ordering high cost parts from the ambulance manufacturer.
 

BaseCamp

Observer
Always wanted to raise the roof and put a bed over the cab, the first one I saw was the e350 bigfoot hunter on "Rock my RV", then i just found this guys on craigslist(too expensive for me and half the fun is the build):
http://tampa.craigslist.org/pnl/rvs/5677811491.html
2003 Ford E350 with McCoy Miller ambulance body.
7.3L Powerstroke Diesel with 390,xxx miles on it.
The ambulance body is all aluminum with stainless steel hardware.
The entire exterior of the rig was paint with Al's Liner heat and noise reduce, then 8 gallons of bedliner.
Three windows were added bring the total to six plus the two van windows.
The interior was fully gutted, all insulation and electrical removed.
The roof was cut off and raised a foot in the rear and two feet in the front. Interior height inside goes from 77" to 89".
A bed was added over the cab that holds a full size mattress and has under bed storage.
All new 110 volt and 12 volt electrical was run.
Fiberglass insulation was added to all walls and ceiling.
Ceiling panels and walls were made from 1/4 underlayment, carpet padding, and grey vinyl.
Custom cabinets built from 3/4 sand ply and select pine used for door frames.
Kitchen has a tiled backsplash and a sink with a washboard.
Plenty of interior and exterior cabinet storage.
TV with Sony Blue Ray Surround Sound system in the main area.
TV with Blue Ray DVD player in the bed area.
Frigidaire 4.5 Cu Ft refrigerator and a microwave.
LG window shaker for A/C.
Under cabinet lighting and an LED flood light above outside door.
All exterior cabinets are diamond plate except for one.
All exterior cabinets are lockable and have 12 volt lighting.
There is a 16 gallon fresh water tank and a 16 gallon grey water tank.
It is plumbed for city water or potable water.
Power supplied via shore power or an Airpax 1800 watt pure sine wave inverter
Currently has one house battery since we never boondock.
Installed an Automatic Transfer Switch so I would not have to manually switch between shore and inverter power.
Two inch leveling lift installed in the front to allow for 235/85/16 BFG Rugged Trail tires.
Custom built rear bumper houses the spare tire and grill.
The grill is mounted in an Army medial box on a draw slide as well as a swinging arm. This allows you to rotate the grill parallel to the passenger side of the rig so you can socialize while grilling.
HID headlights and billet grille in the front.
Brand new steering box just installed along with all new ball joints and tie rod ends two years ago.
The entire interior of the van cab was insulated with DynaMat.
The grey leather front seats were purchased of Ebay brand new from a 2012 Nissan van. image.jpegimage.jpegimage.jpegimage.jpegimage.jpegimage.jpegimage.jpegimage.jpeg
 

huskyhauler

Adventurer
He has a for sale listing here on the portal. It's very custom, but he's asking A LOT for it. I think HDRV's rig went for less than what he's asking if it gives any referene.
 

BaseCamp

Observer
Yeah I think the price would be right with less miles and a 4x4 conversion, but anything is only worth what someone will pay for, and you never know what someone will pay until you ask. Would have been great had he done a build thread.
 

Forum statistics

Threads
188,399
Messages
2,906,844
Members
230,176
Latest member
Arcadia1415
Top