Get your tickets to THE BIG THING 2026!
You are using an out of date browser. It may not display this or other websites correctly.
You should upgrade or use an alternative browser.
You should upgrade or use an alternative browser.
"Arctica" 2015 Crewmax Platinum Tundra Build
- Thread starter wikid
- Start date
wikid
Adventurer
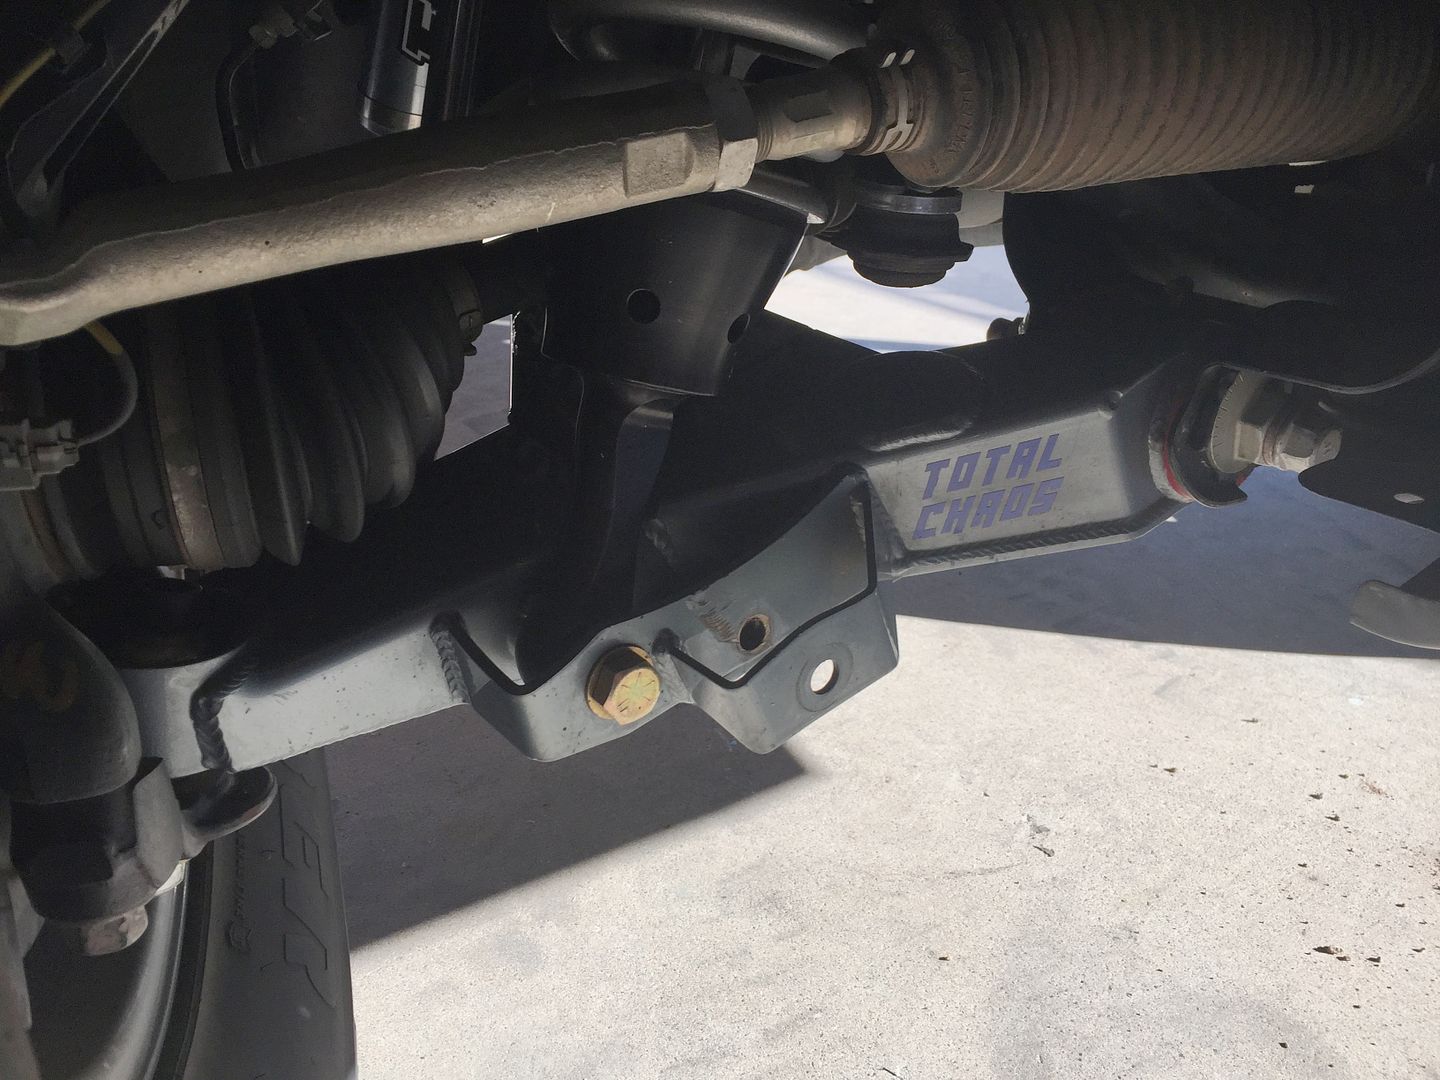
I have had a few folks ask about pictures of the new lowers , so I thought I would post a few shots
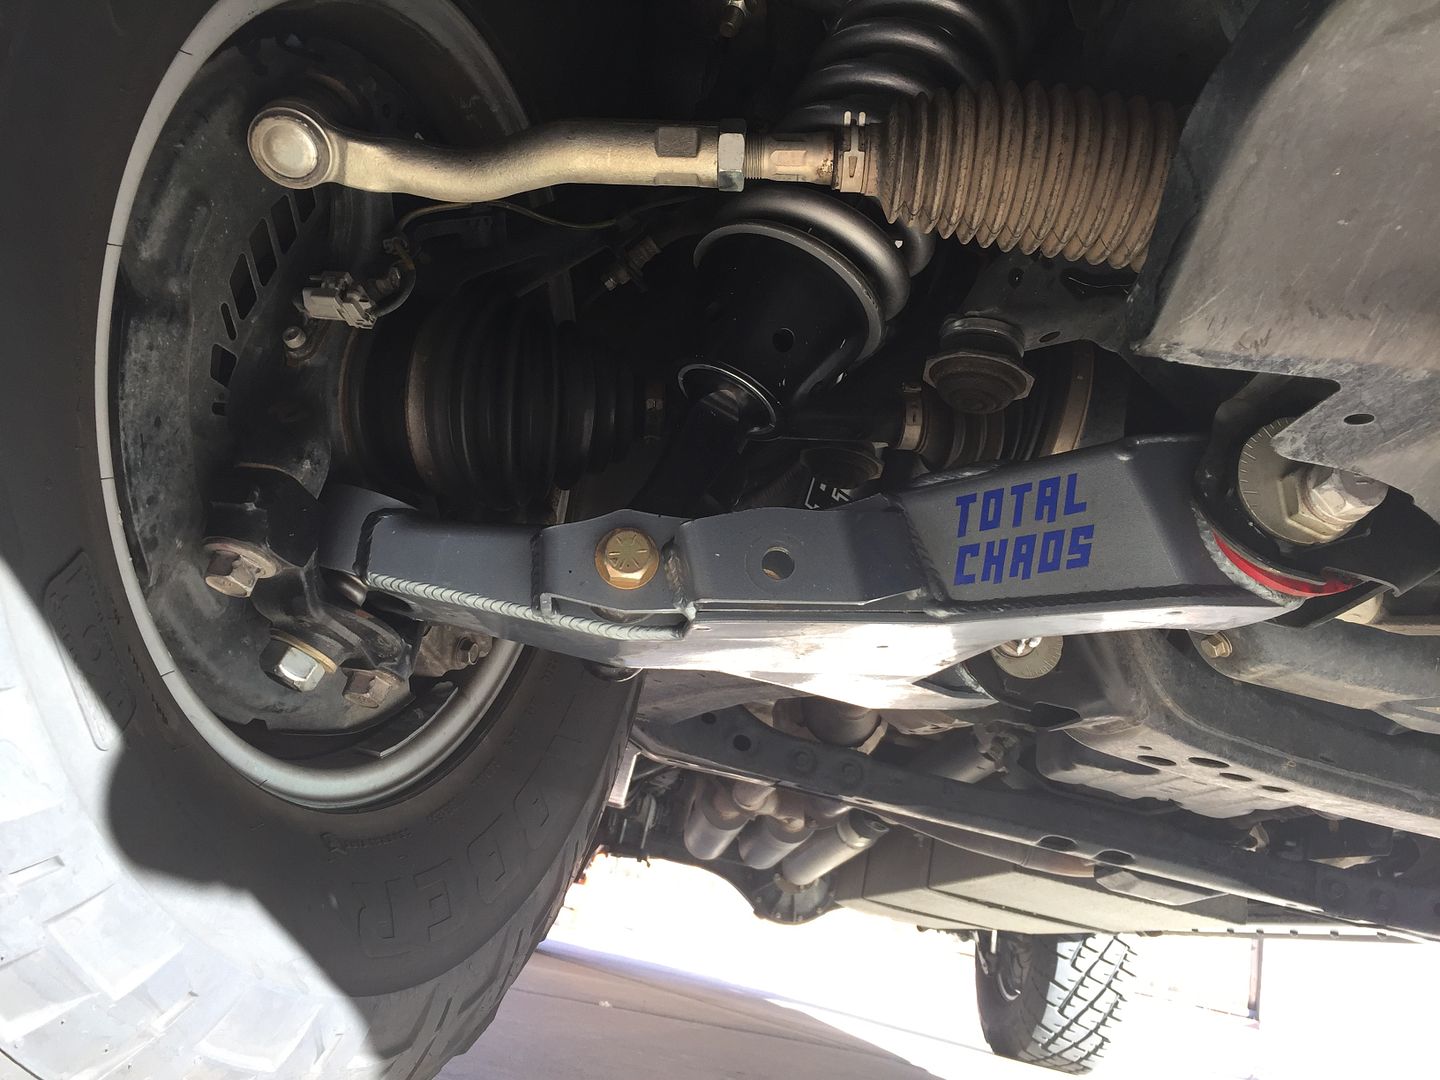
I obviously have removed my swaybar. I can barely tell it isn't there with this suspension. I see no need to put it back on
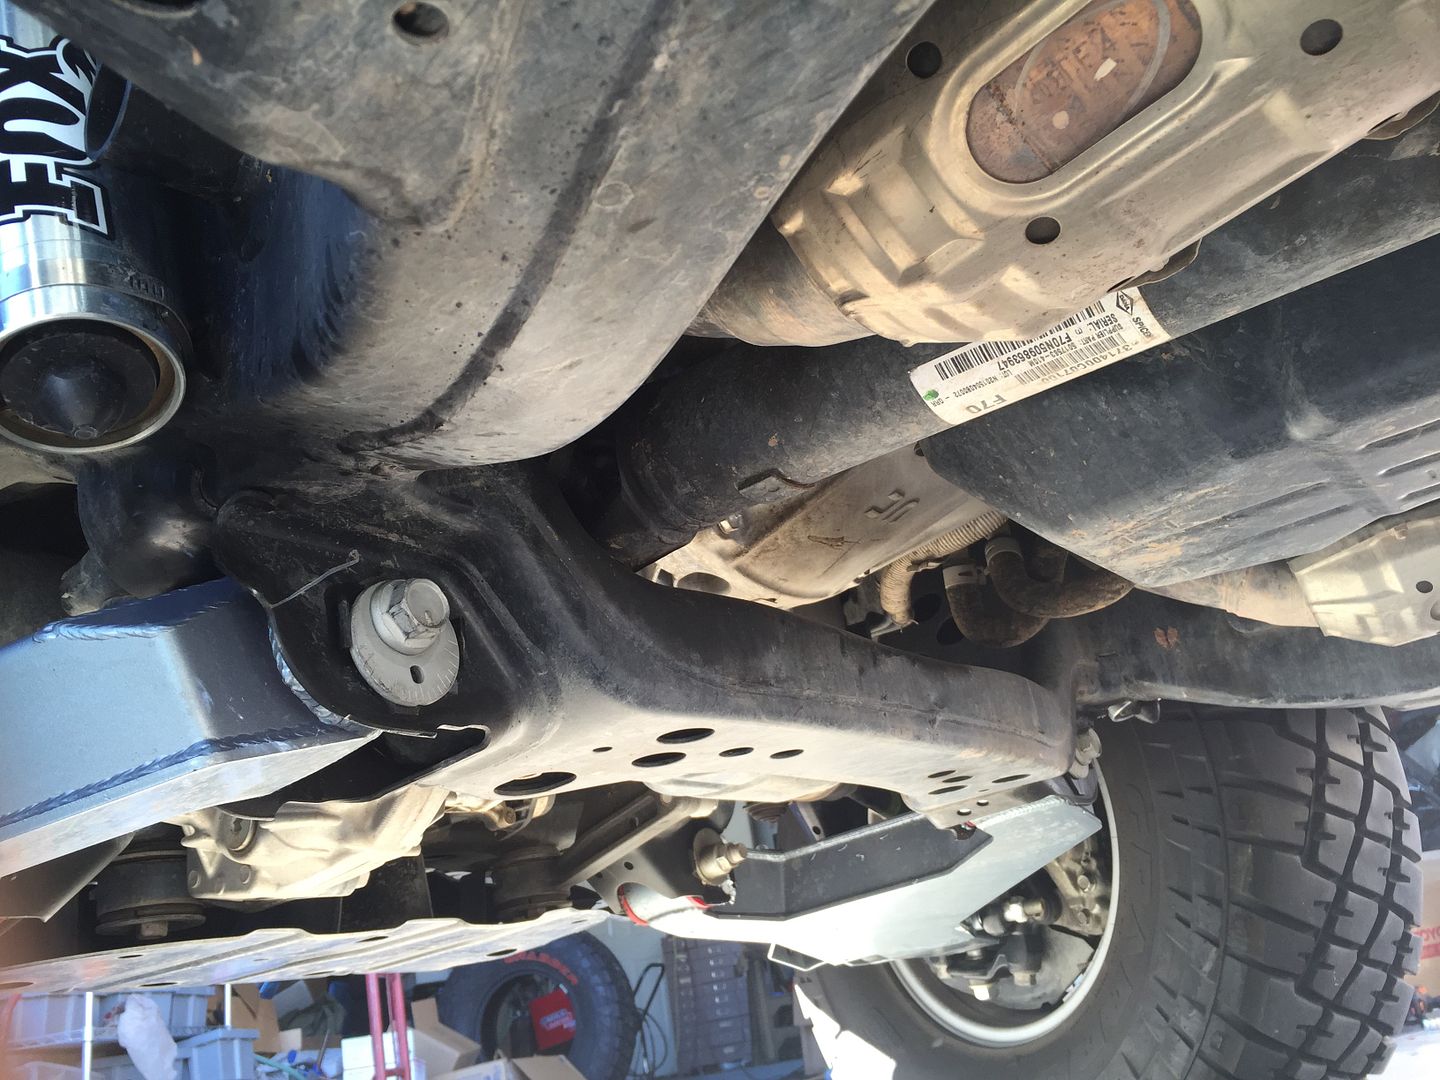
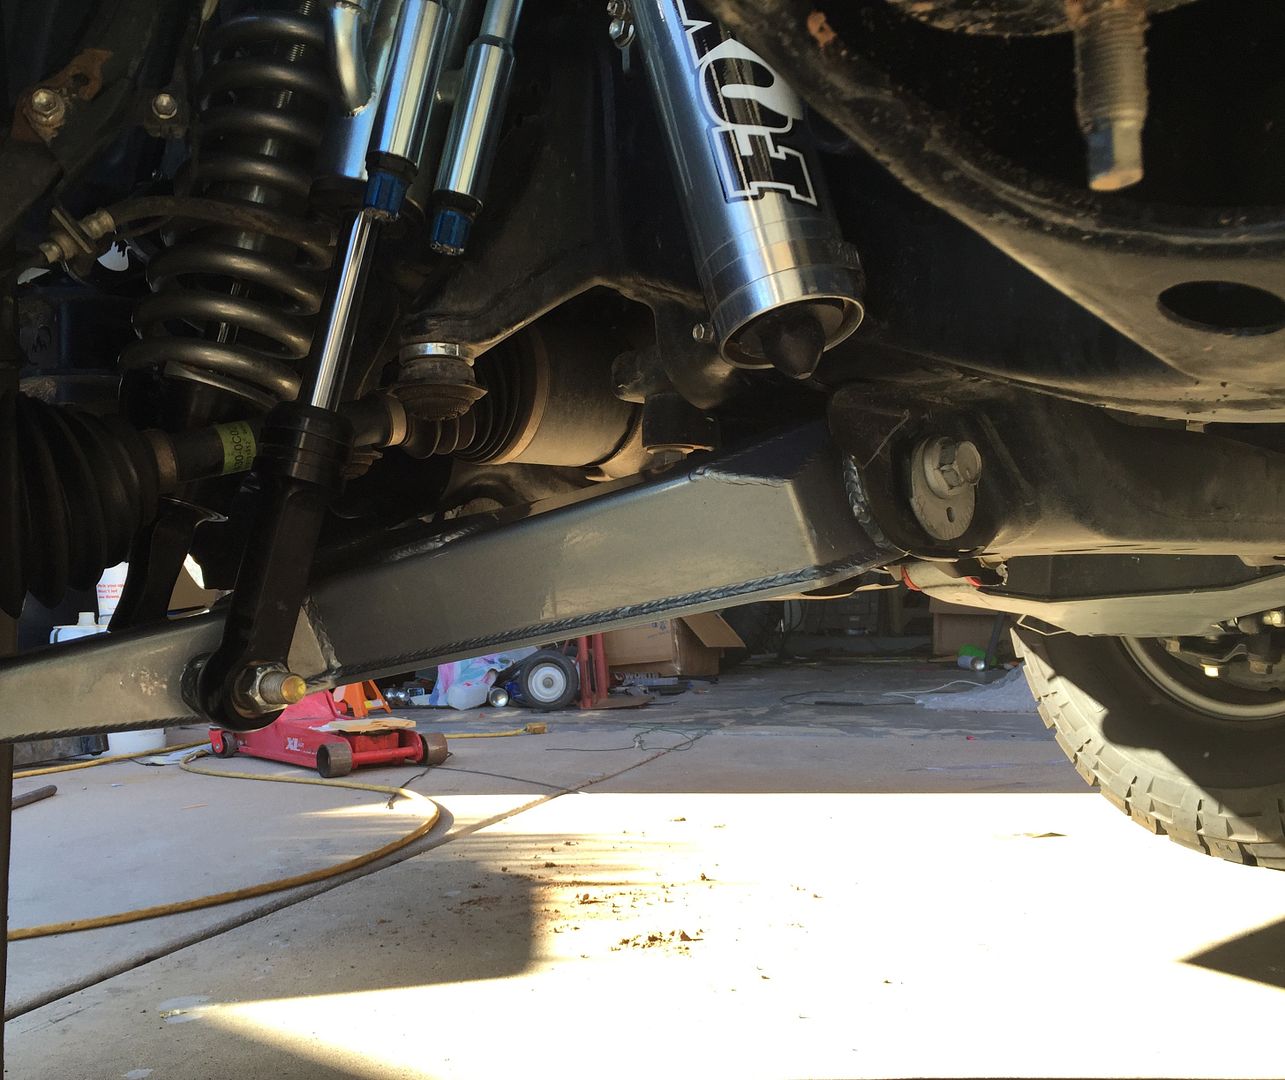
Next up
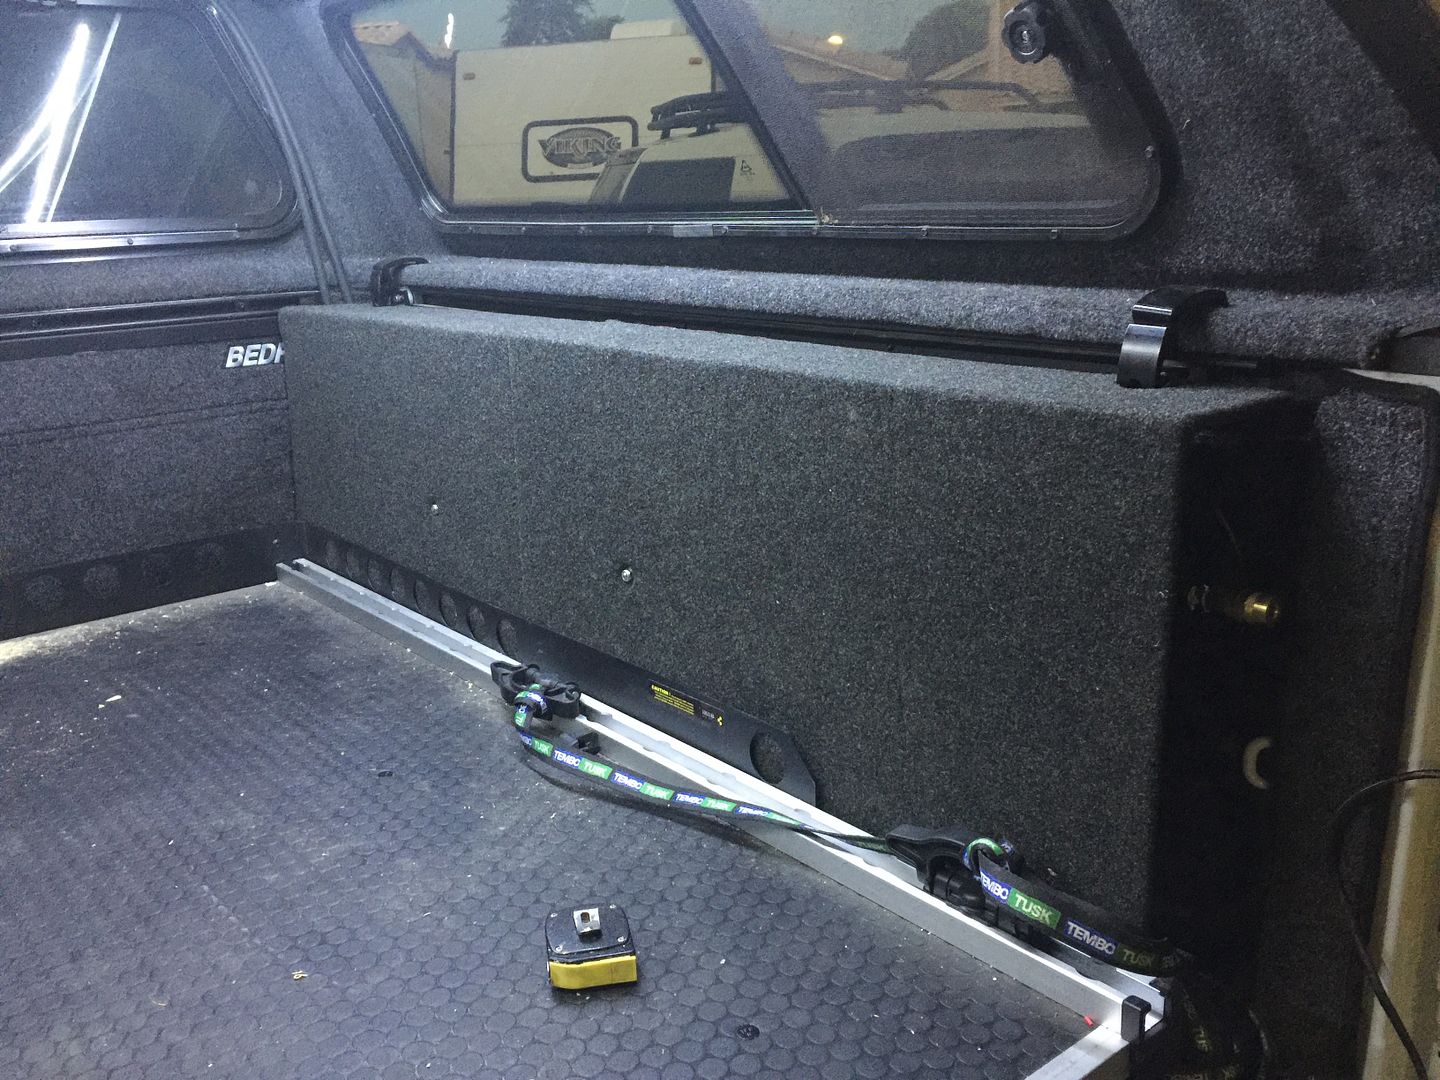
Limited time has caused a delay in actual progress, but I managed to build an enclosure, over my electrical system in the bed. It just looks a little more "finished" this way.
Before
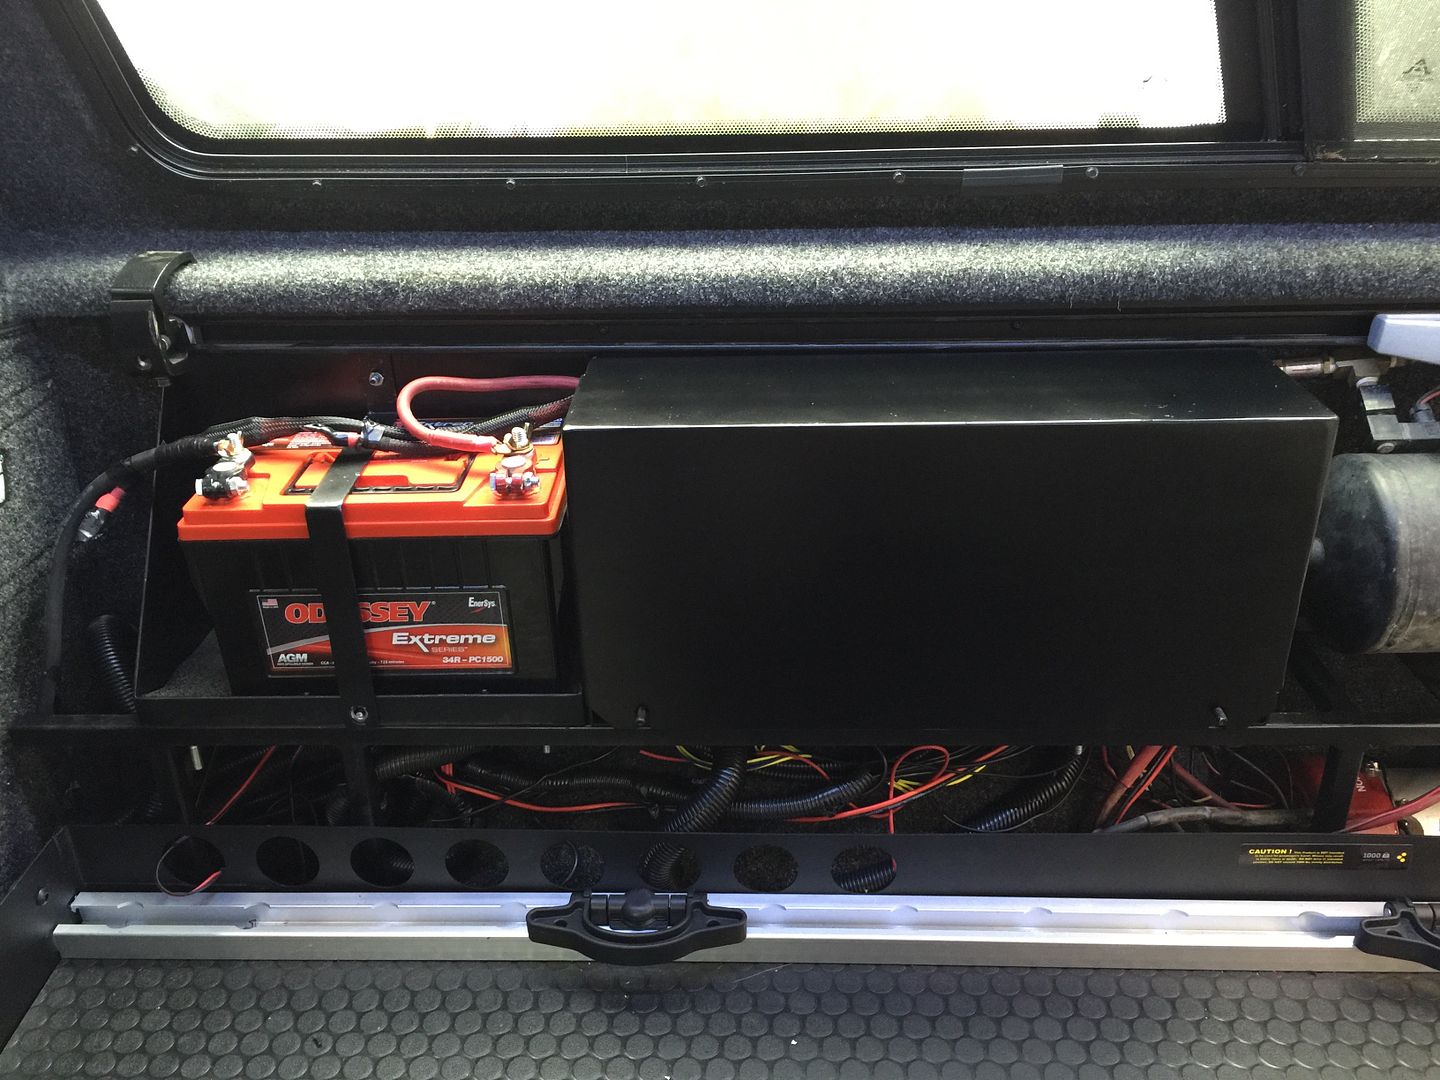
After
I used 1/4 inch MDF with support built in and covered it with speaker carpet. it's close to the look of the other carpet, but not exact. I think it will be ok though
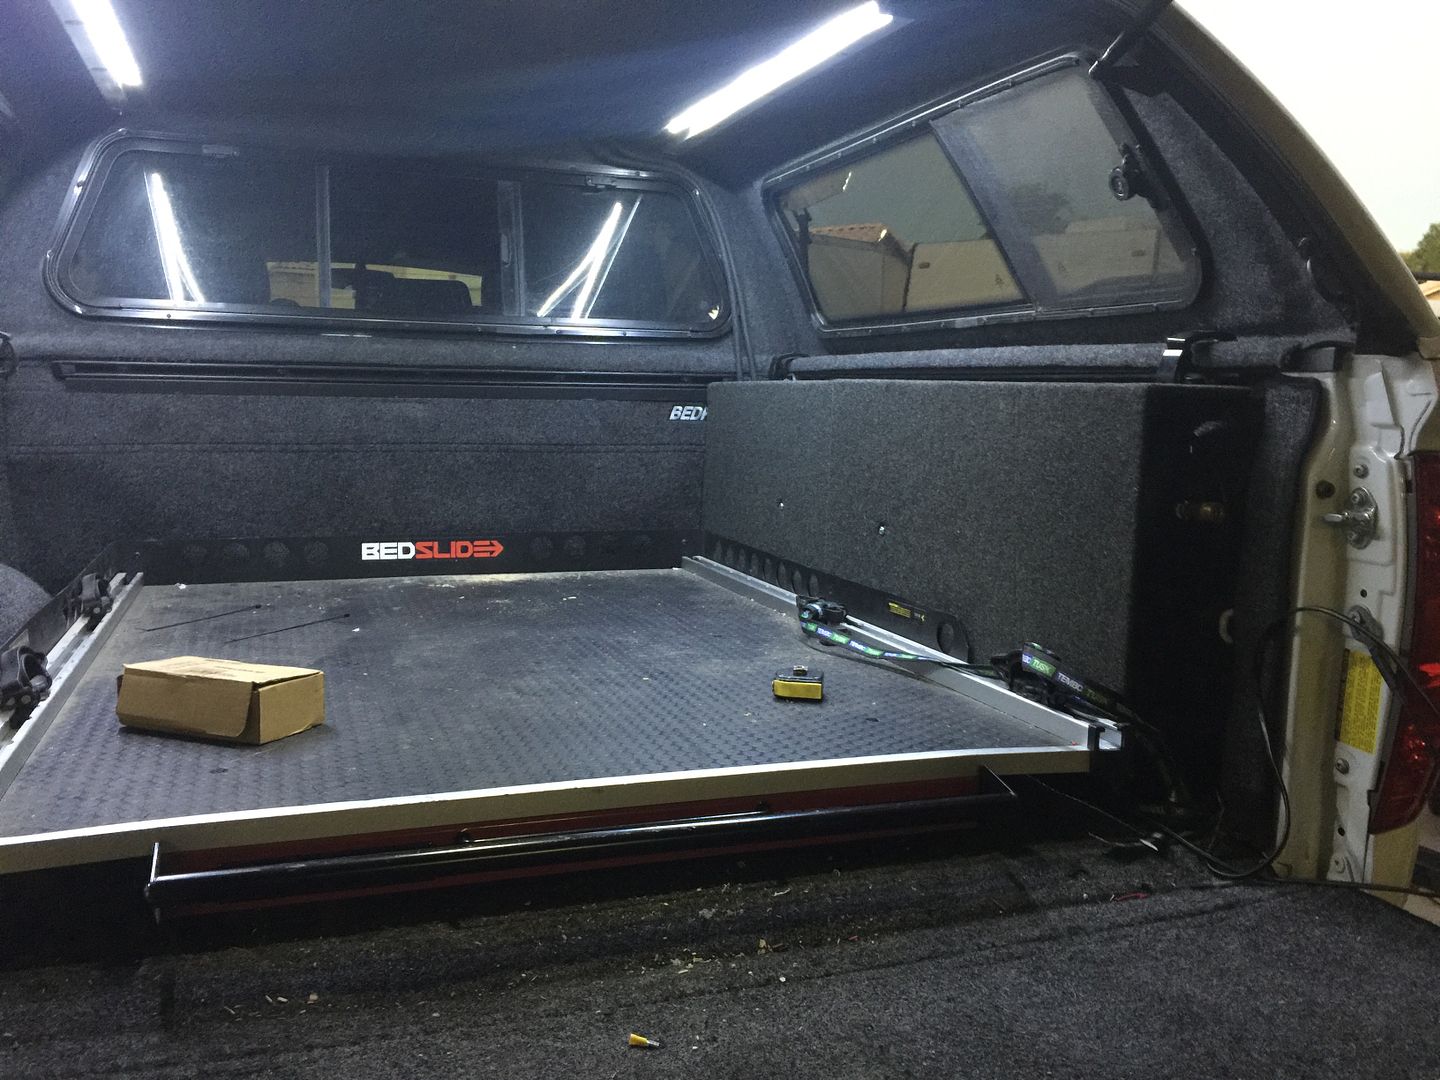
I have been holding off actually mounting the Bedslide, until the electrical phase of the project was complete. I just didn't want to work around the actual frame of it, while working in close quarters

I obviously have removed my swaybar. I can barely tell it isn't there with this suspension. I see no need to put it back on


Next up
Limited time has caused a delay in actual progress, but I managed to build an enclosure, over my electrical system in the bed. It just looks a little more "finished" this way.
Before

After
I used 1/4 inch MDF with support built in and covered it with speaker carpet. it's close to the look of the other carpet, but not exact. I think it will be ok though

I have been holding off actually mounting the Bedslide, until the electrical phase of the project was complete. I just didn't want to work around the actual frame of it, while working in close quarters

D
Deleted member 9101
Guest
Love the bed man!
Littlehouse
Adventurer
Have you tried using a loaded bed on any sort of a slant? Driveway, hill, etc? I've always wondered if some sort of return mechanism would be helpful on something like that.
wikid
Adventurer
Thank you it finally looks like its almost finished LOLLove the bed man!
Have you tried using a loaded bed on any sort of a slant? Driveway, hill, etc? I've always wondered if some sort of return mechanism would be helpful on something like that.
What I think you are saying is having the Bedslide loaded and extended. on a slanted driveway. No I havent tried it, but it rolls really easy. It would take a little strength, but it would be doable to push back in, without killing yourself
wikid
Adventurer
This has been Driving me nuts, since I bought my truck. I never understood why Toyota didn't do something to the embossed emblems . I wanted to do something custom, but for now, this was the best solution I could find. it's actually a vendor, that does work for Toyota . I looked on fleabay and didn't like what I saw, so I ponied up for the high dollar stuff
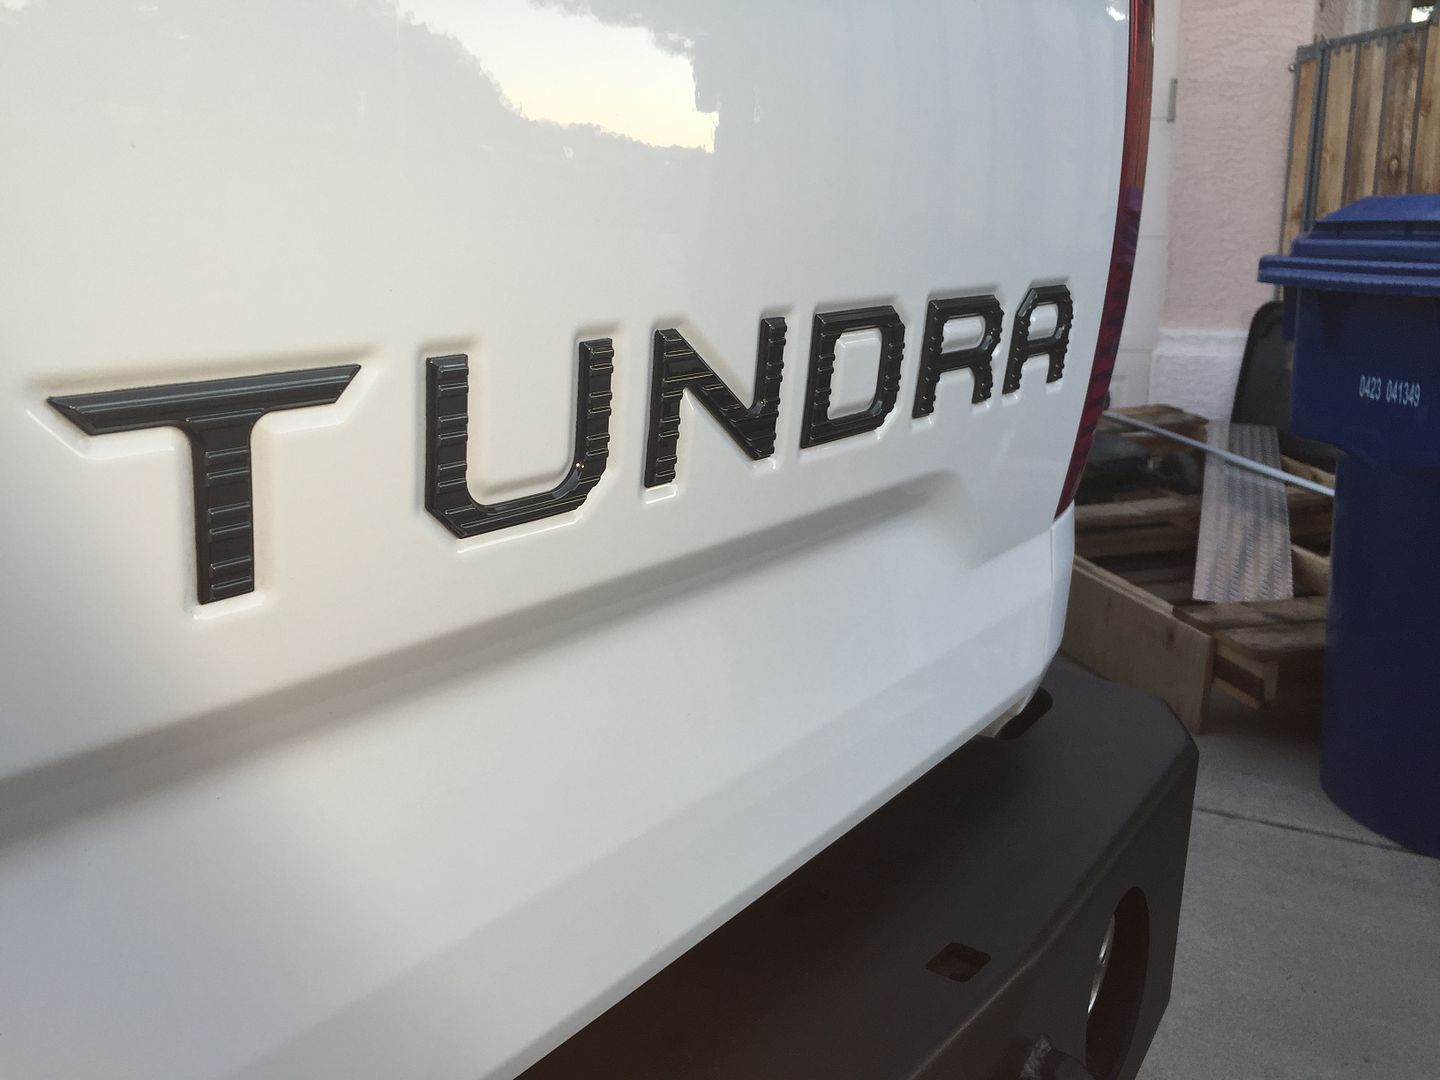
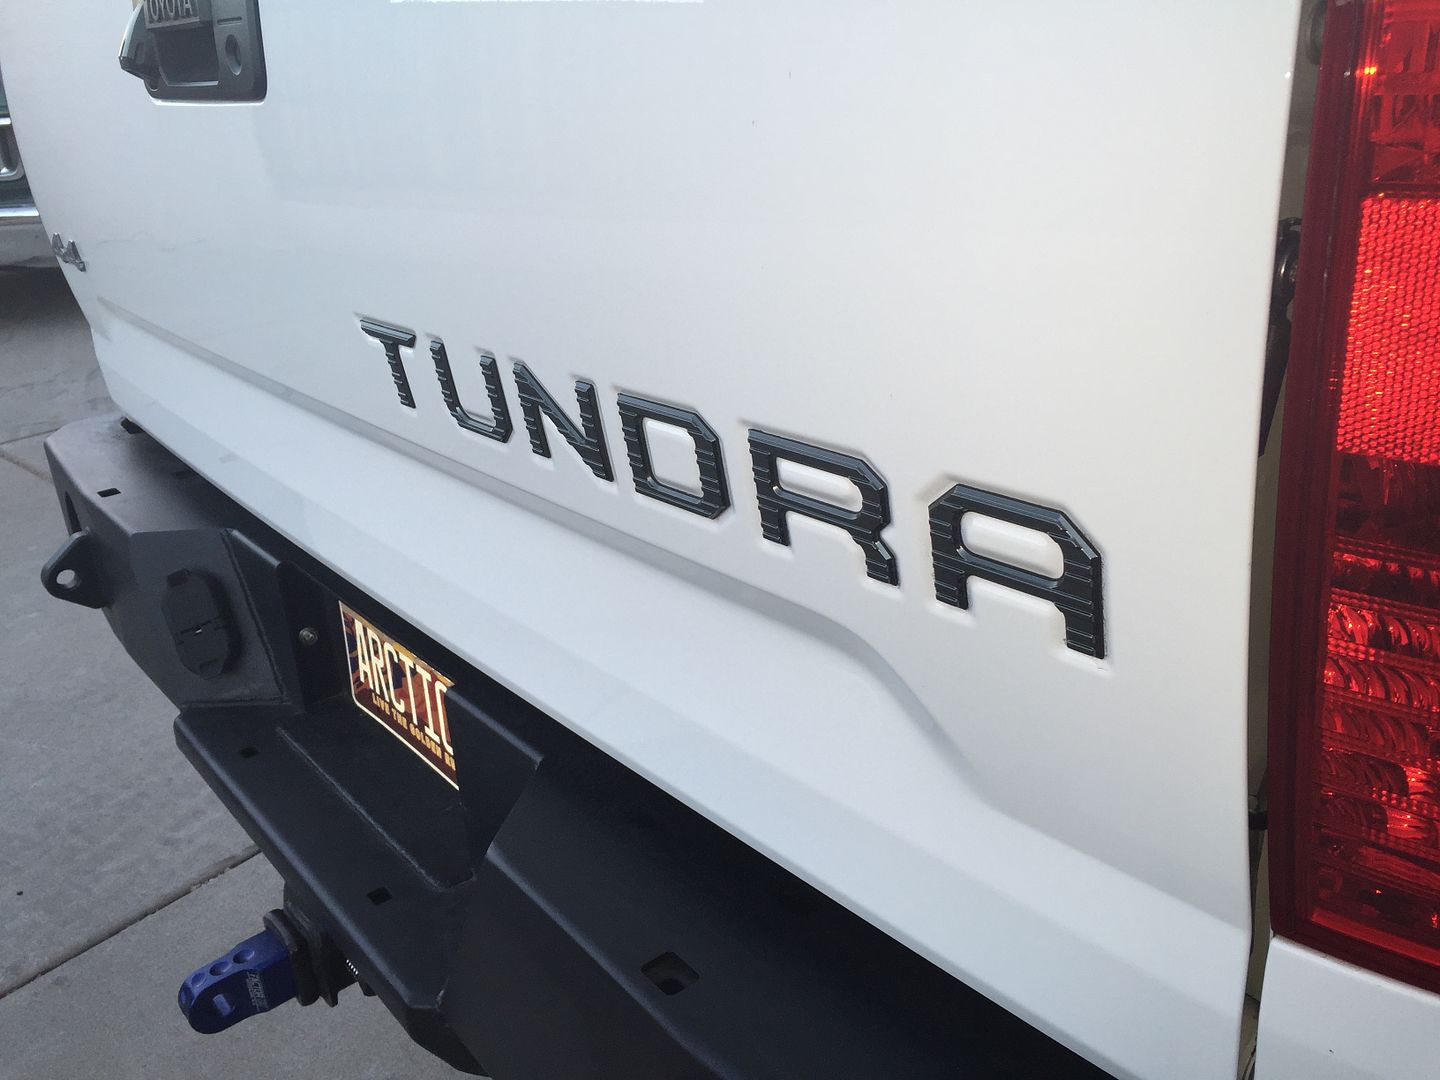
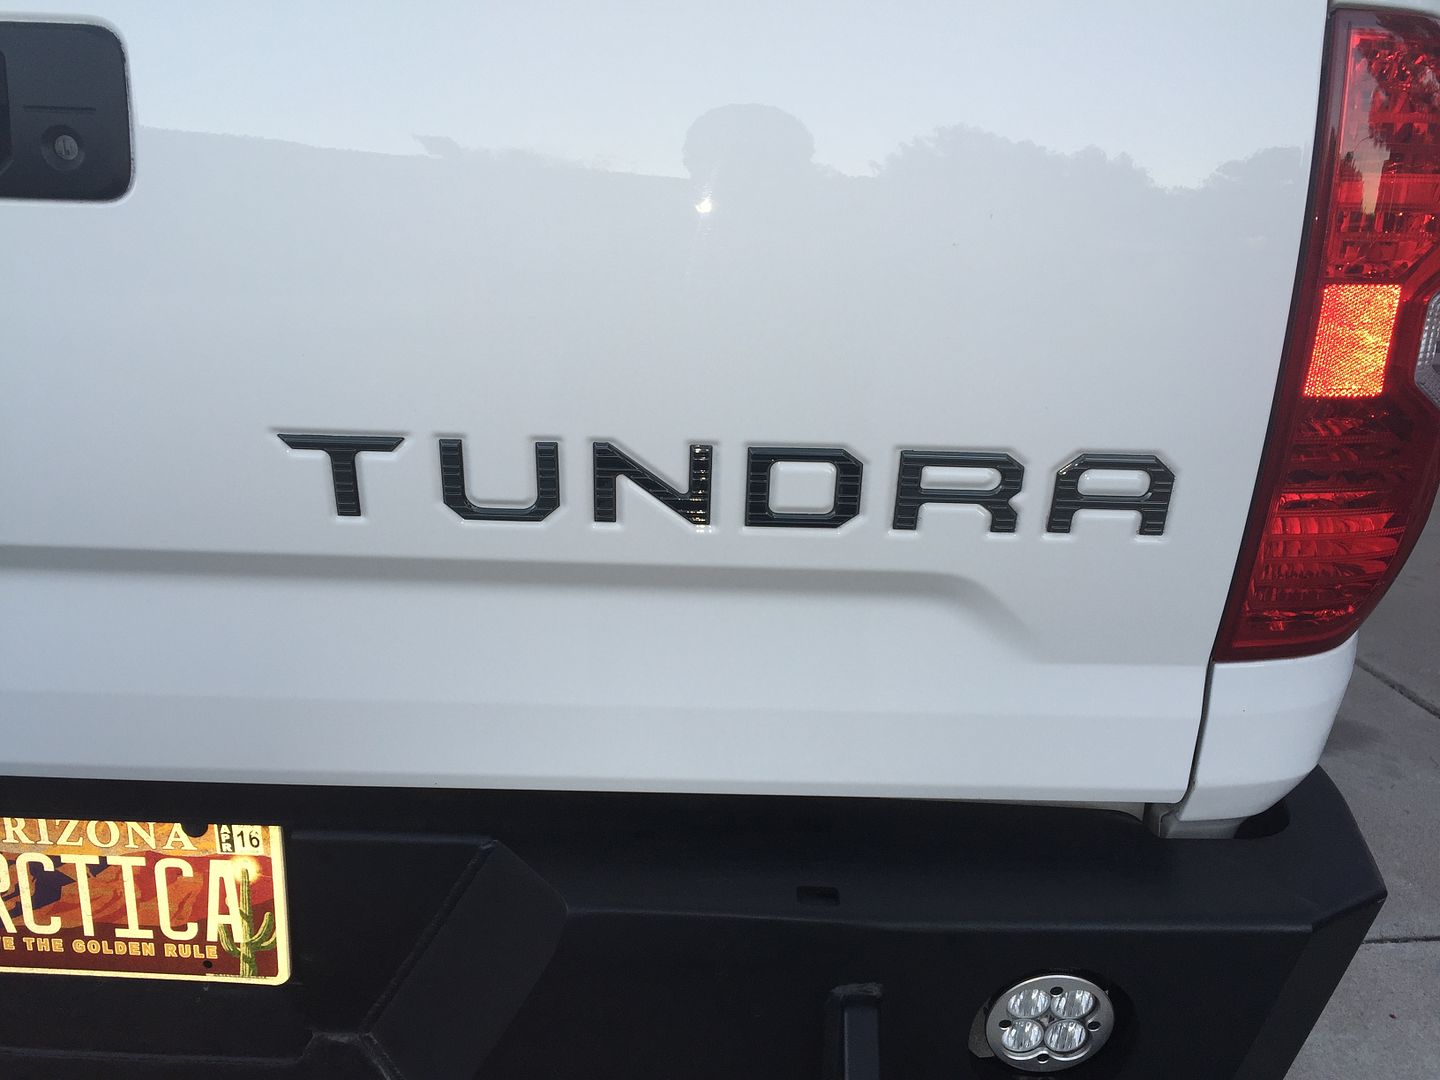
These are considered black Chrome and they actually are high quality


These are considered black Chrome and they actually are high quality
zscott
Adventurer
Have you tried using a loaded bed on any sort of a slant? Driveway, hill, etc? I've always wondered if some sort of return mechanism would be helpful on something like that.
I have been in that situation with my bedslide. It definitely makes it harder and some sort of return help would be good but the bearings are pretty good and I have been surprised out how easy it is to push a heavy load back into the bed. A simple remedy is just to park to avoid those types of situations. 99% of the time it is easily possible.
wikid
Adventurer
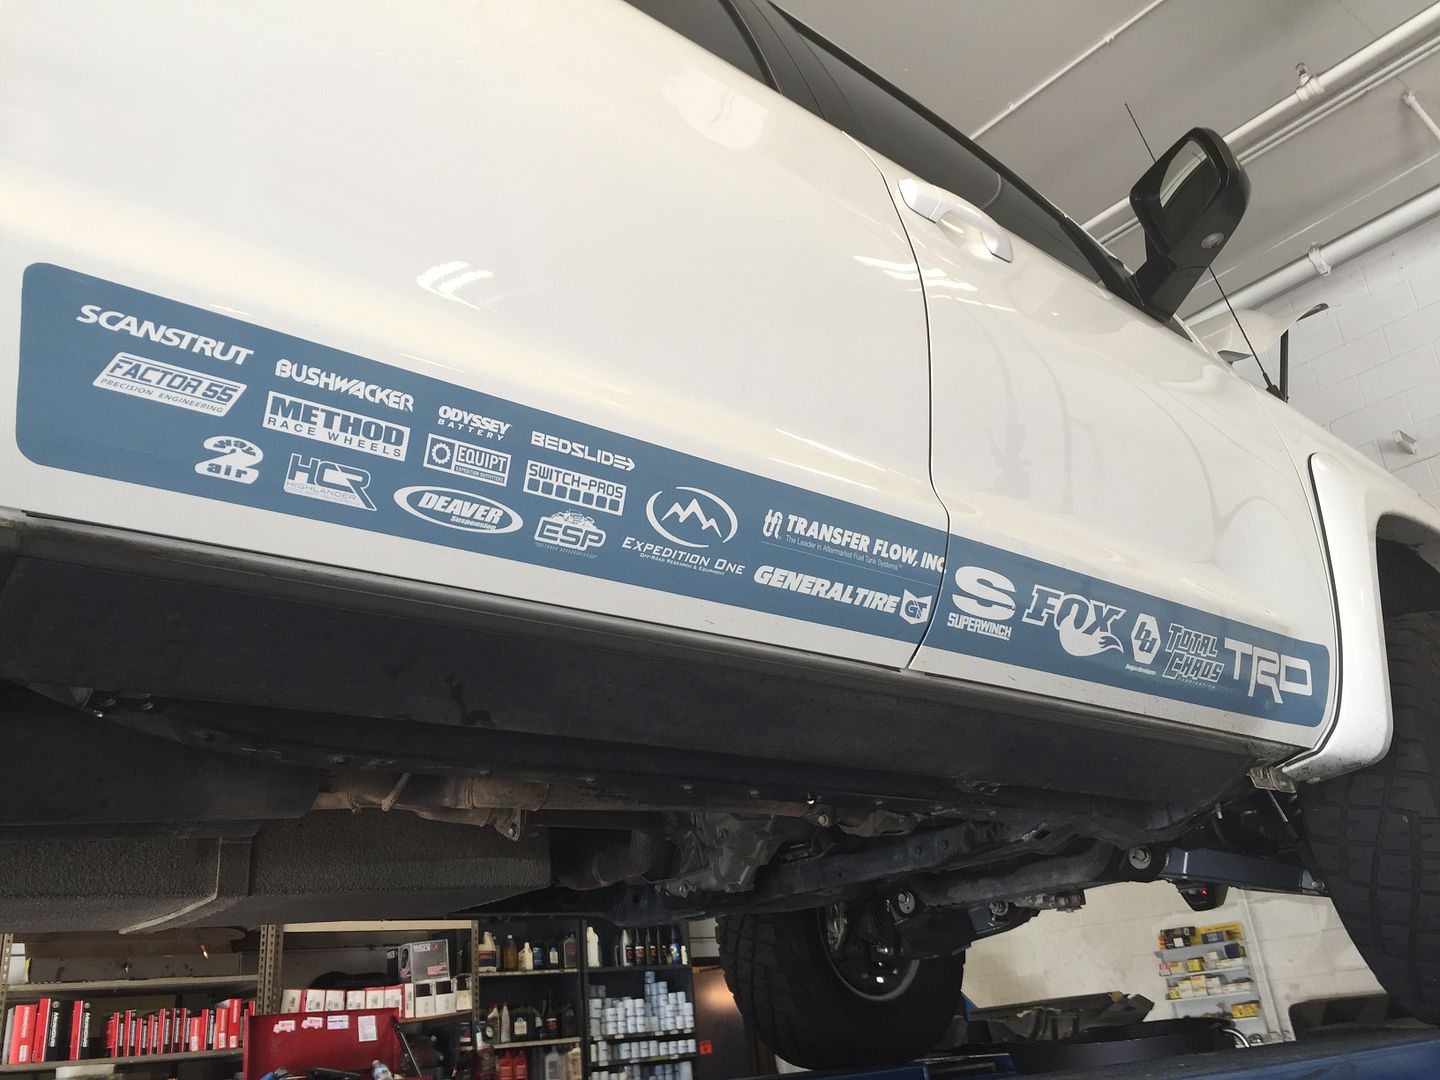
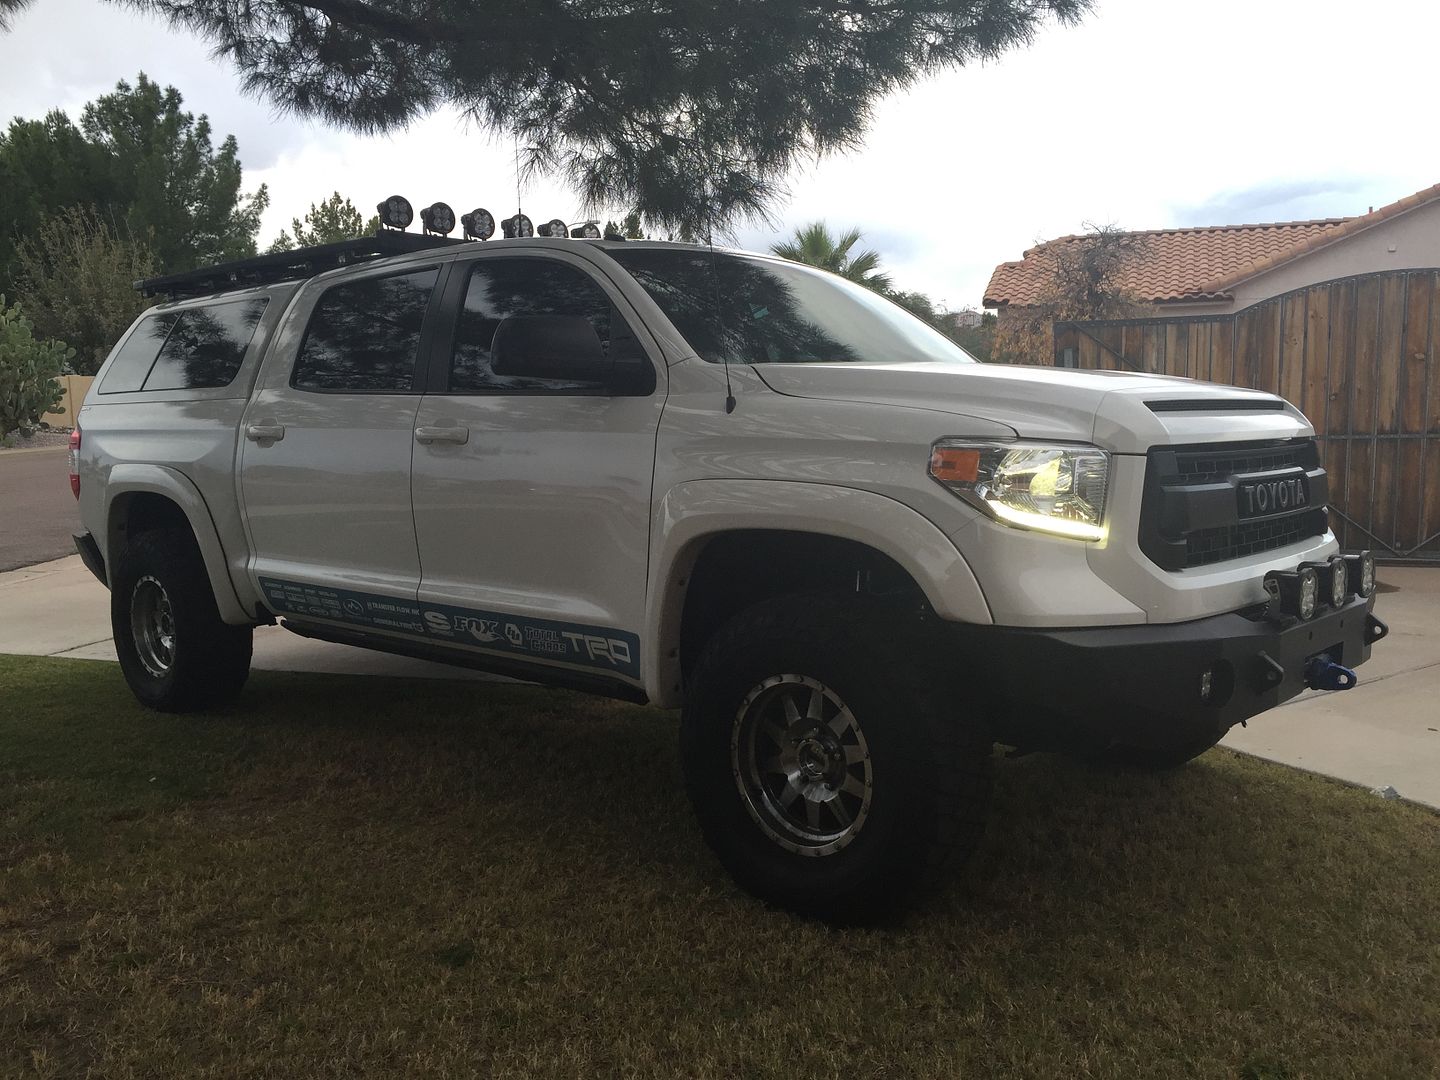
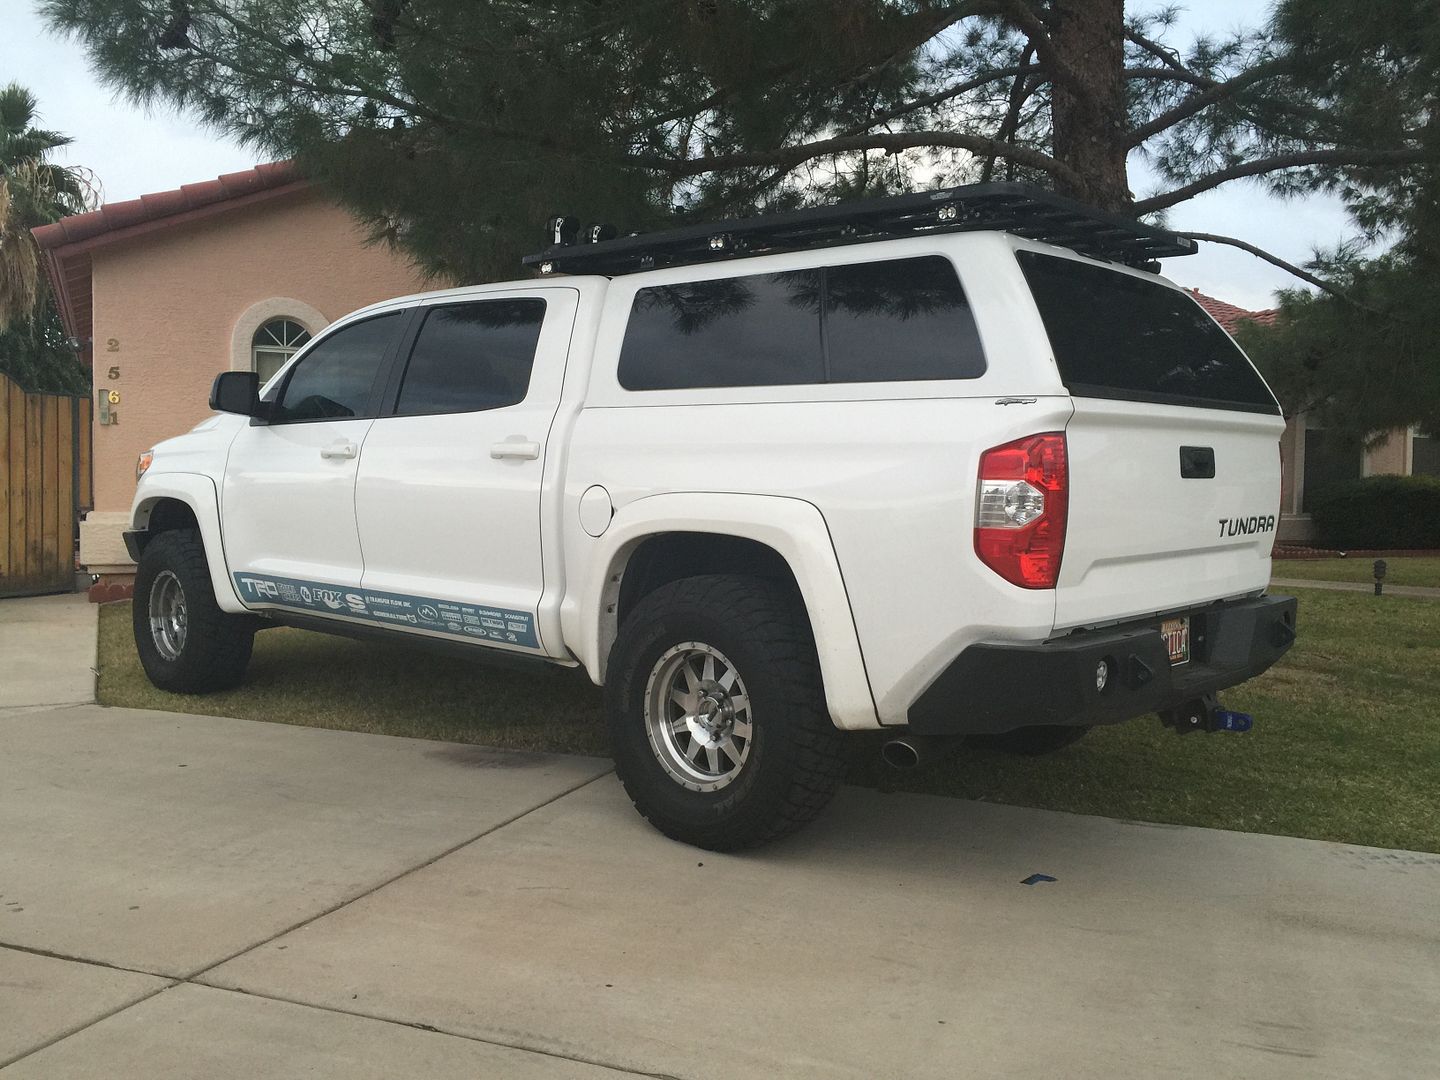
Well. ..after several months of planning figuring, changing plans and all the other things that goes with building something, Its finally to the stage where almost should be.  The wrap and the Roof Top Tent, would have been the final pieces
My goal was to get in a SEMA booth , but fell short. Not for the fact that it isn't worthy, but because it's difficult to be an independent builder and get recognized. Corporate, most of the times, trumps individual builds. I was given the best possible endorsement, from the head of marketing, at Toyota, so much so, that he sent an email, with all of my information and pictures, to the SEMA planning team. The direct quote was " We need to have this truck in our booth, this year" Unfortunately, big corporations have many divisions and teams that don't always listen to other departments and make their own decisions
It wasn't the only build snubbed and it was more of a corporate build that also got good hopes. I could have campaigned more, to get in someone elses booth, but then If Toyota said "we want you" I didn't want to drop a different commitment. Toyota is notoriously late in making final decisions and this year was no different. It was late August when the "no" given. By that time, booths were filled.
In retrospect, I should have campaigned harder for another booth spot and also bought an outside spot early on. I would have just had to give the "I'm sorry" speech . This would have insured I would have been somewhere . Lessons learned, for sure.
Arctica, will still get the exposure I wanted for sponsors and from media coverage. TCT Magazine invited me to a photo shoot, the day after SEMA, in the Las Vegas desert. There are also requests to be in booths, for other events. I even got a prospective interested party, that would like me to build a truck , with them. This has a direct impact on many Toyota's. After I looked over my truck at Off=Road Expo his comment was. "it's obvious , you know how to build a nice truck". So all is not lost.
I will attend SEMA on Friday.
The plan is still to wrap it, so I can see my project all the way through, but it's north of $3000.00. This could be money I use to build my wheeling truck, to be trailer ed behind my Tundra. I probably will still get the RTT
In conclusion, I love my truck and how it turned out. My reality did not stray too far away from what my vision was, so I consider it a success. I get twisted neckers and comments, about it daily. It rides and performs awesome. It will take me to many places besides the branded carpets and the trailers so many travel on.
I will still continue to build Arctica, until I think its far as I want it.
Thank You,, for all of your nice comments and support !!!
I also want to thank all the awesome companies, that believed in me and the project itself.


wikid
Adventurer
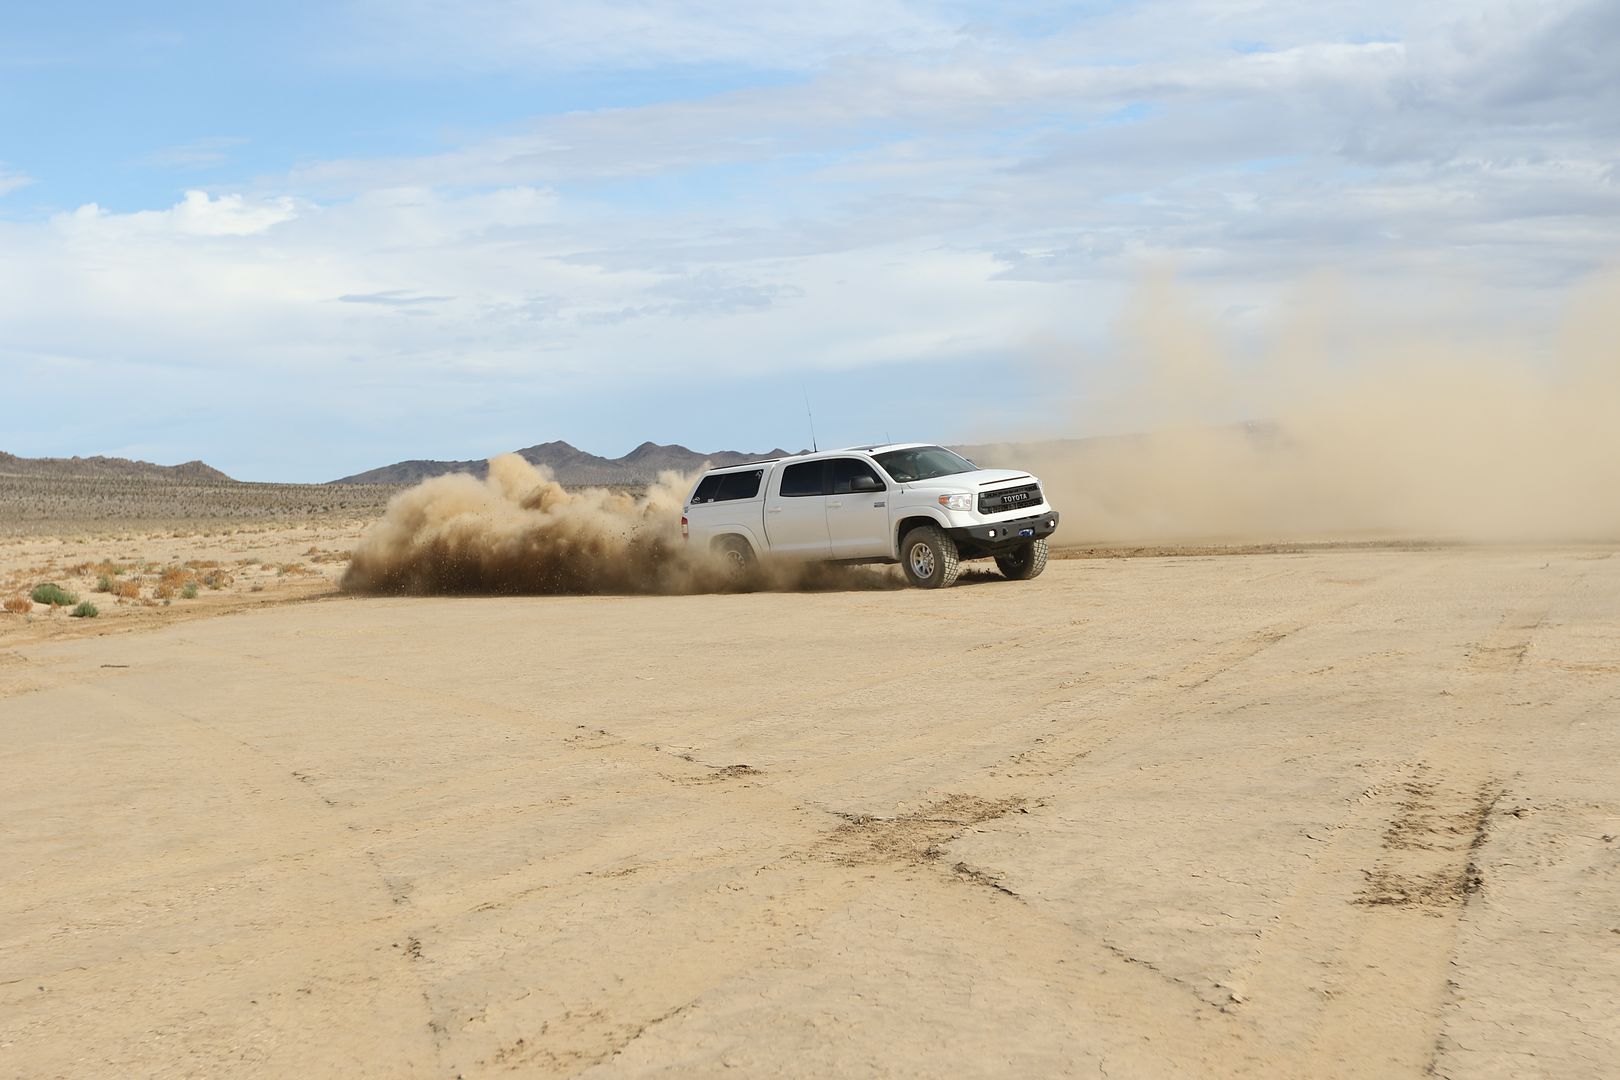
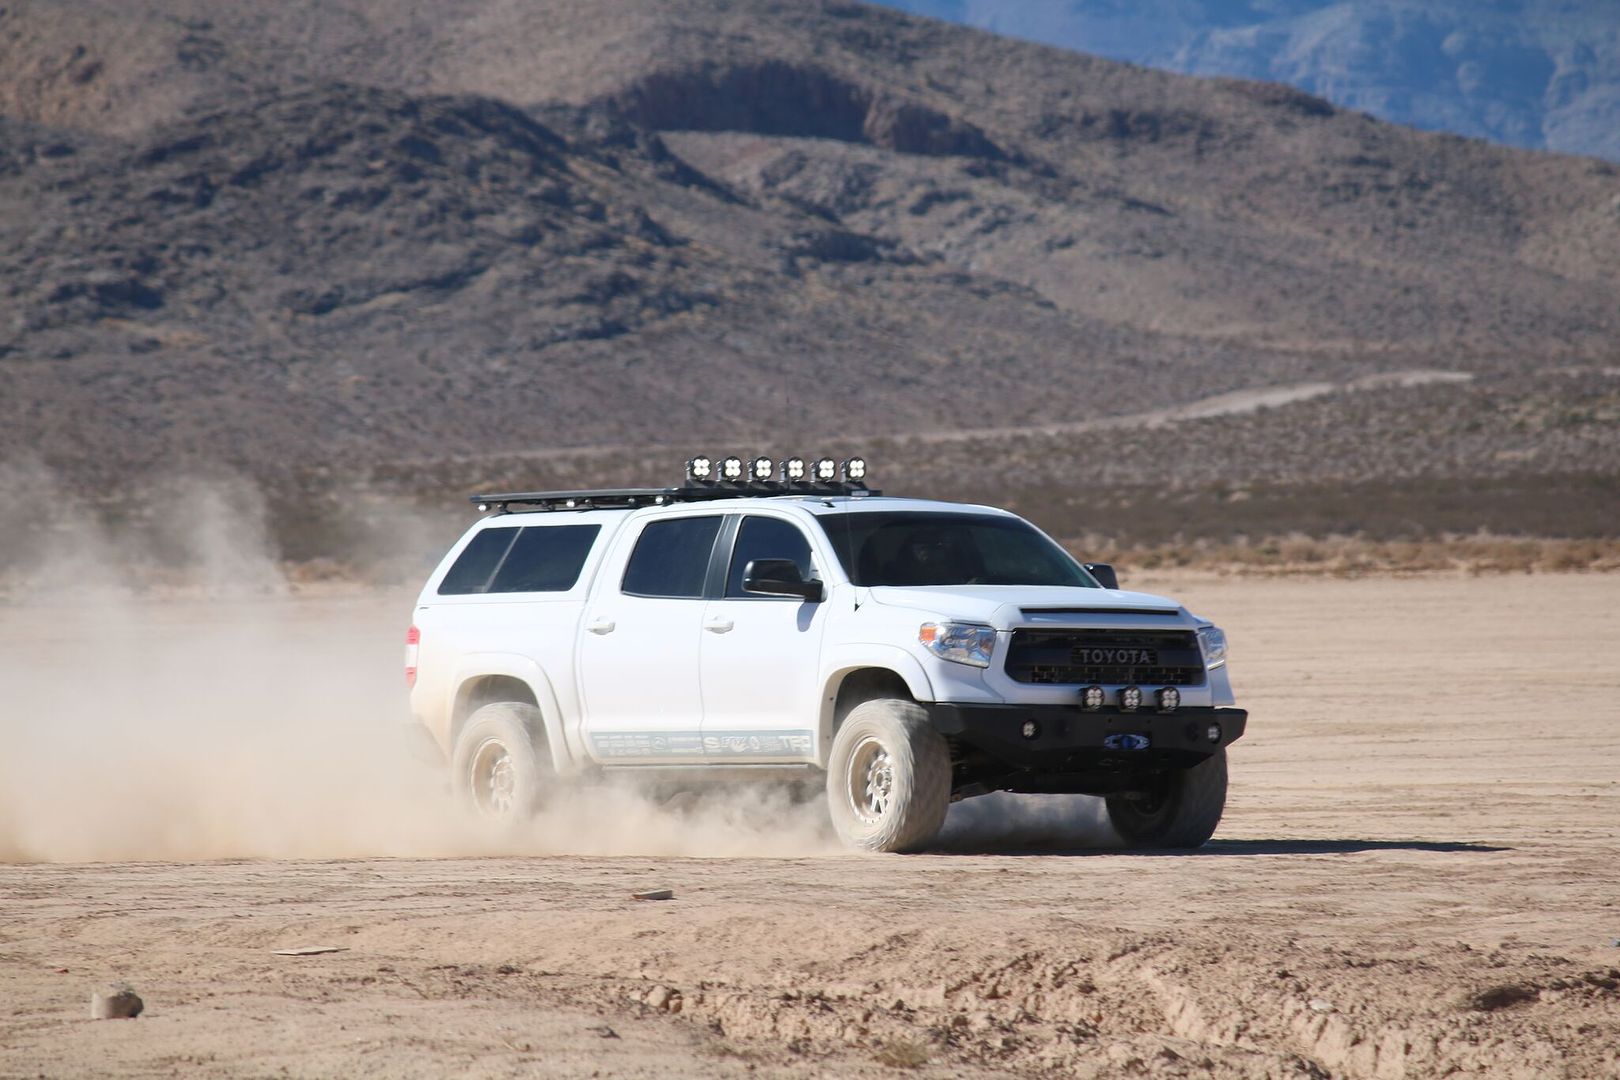
Just back from Vegas and SEMA. I actually got in Toyota's booth for the afternoon, on Saturday, then did the Cruise afterwards. TCT had the photo shoot on Saturday, then I got word that one of the Las Vegas groups were going out to a dry lake bed, about 30 minutes outside of the city on Sunday morning. I joined in for some fun.
Teaser pic of one of my speed runs.
One of these I hit 122 mph verified by GPS . The speedo was at about 111, but the tires add 10% . I could have actually gone faster, but that was a quick glance, then I had to start finding the brakes . I suppose if I decided to find the very beginning of the lakebed, I could have found top speed, but this felt pretty good . I did tune up the bypasses, before I did this.. They were set pretty soft from the highway. Not many places to actually . let it rip, without law consequences, so this was a treat

wikid
Adventurer
I am beginning the install of my Rocksmasher, 2 way air system.
It's a universal kit that you can adapt to any truck including the Tundra.
Typical installation would have all the control features under the hood, since some actually mount compressors there. I will be doing it slightly different and hard line the compressed air into the system from the bed. You can just use a CO2 tank as well Its just a typical comressor quick disconnect, to air up, if you don't hardpipe a compressor in That valve is to the right, on the bulkhead with one shrader valve
Here is what the system looks like before install
I have some additional stuff besides the universal, which can also be acquired from Rocksmasher.
The gauge is and some fittings are extra. You can also use just a tire pressure gauge for pressure checks
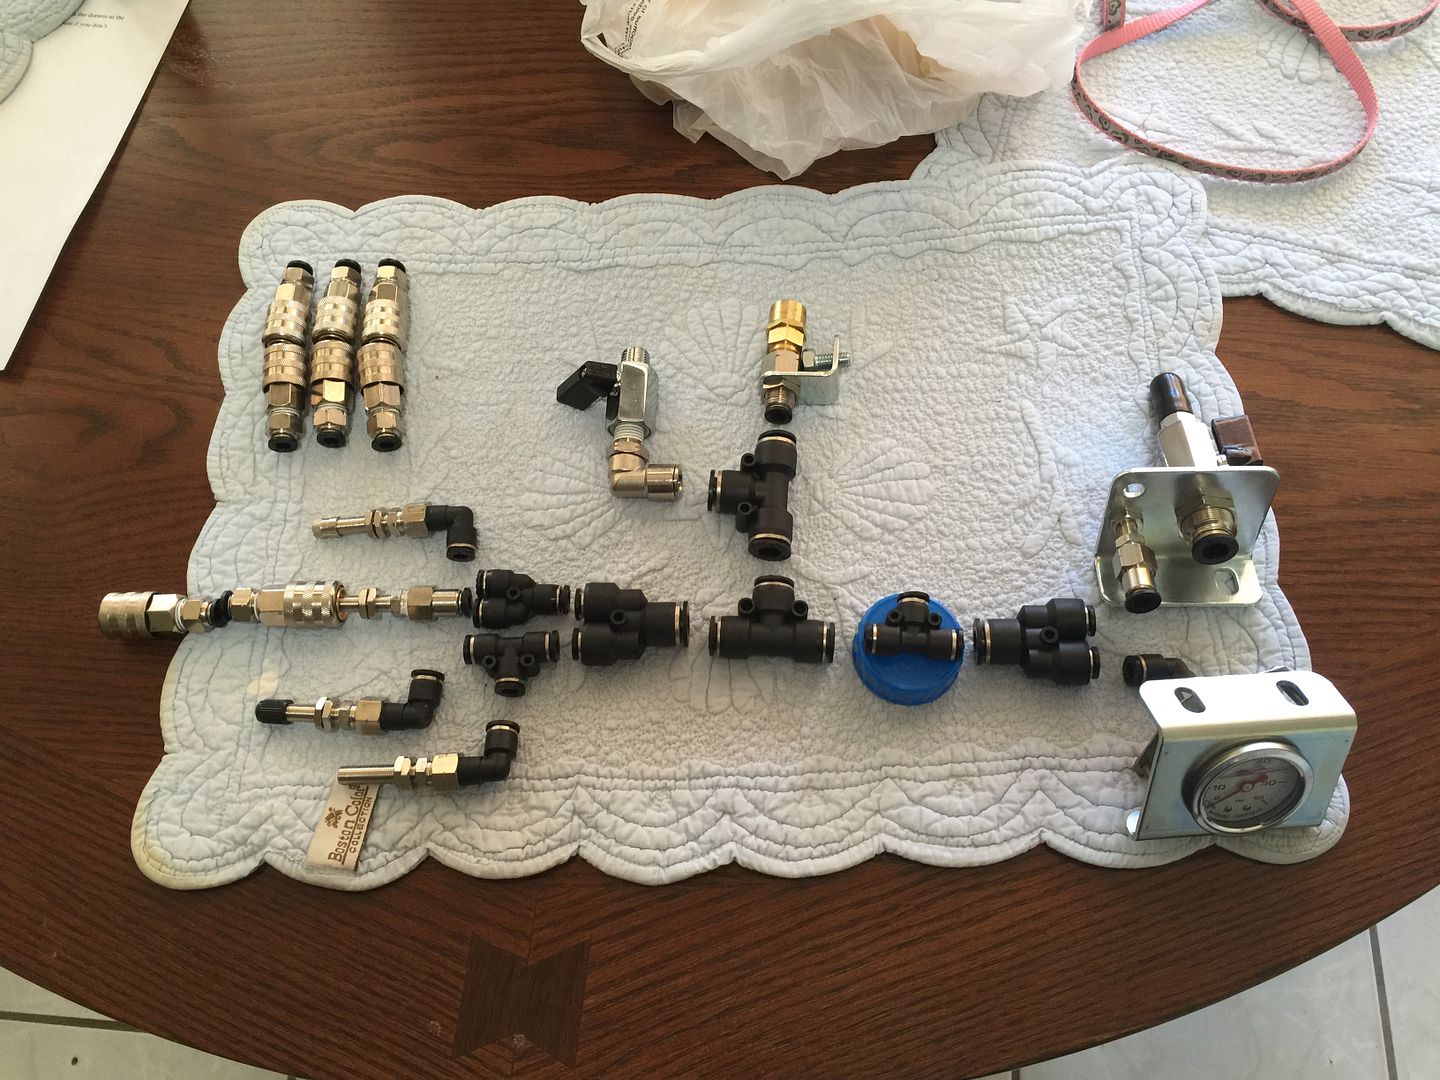
There are 5 tire shrader valves. One for each corner and one on the the bulkhead for pressure checks.
One pressure valve (Brass) , that is adjustable to whatever you air up to. Even if the compressor keeps going, the valve will just blow off the over pressure until you stop it
The quick connect fittings on the left are to attach to the corners with some quarter inch hose, not shown in the picture .
I have one extra valve , with fittings to go into the compressor
Plenty of 3/8th air line already protected with convoluted tubing. Then plenty of 1/4 air line to plumb into the vehicle.
T's and connectors to make all the connections and even a plastic pipe cutter for clean cuts
All fittings are high quality
The fittings are laid out in the schematic, that it will be plumbed in.
I need to acquire one more 3/8th tee fitting that will replace the 1/4 inch that the blue cap is sitting on .
The idea is that install the valves in the fenderwells, that also have protective slip on caps. You can quickly connect all of your tire hoses, that are about 30 inches, each then air up and air down, right from where you place the bulkhead, either under the hood, or in my case in the bed. You always air up evenly and always air down evenly. Since there are schrader valves, you could also air up or down another vehicle, 2 tires at a time . Or a trailer too . You can make this system work for as many tires as you have. Even rv's and semi's use them . You just need to add hardware to expand it
I will write a more detailed post when I actually install it. Then do some real world air sessions, to show you all how it works. At first it sounds like lots of fussing with hoses and stuff, but actually it will make this task much faster and you can enjoy talking with others or having a cold beverage, while doing the task.
Here is a link to the system
http://2wayair.com/
It's a universal kit that you can adapt to any truck including the Tundra.
Typical installation would have all the control features under the hood, since some actually mount compressors there. I will be doing it slightly different and hard line the compressed air into the system from the bed. You can just use a CO2 tank as well Its just a typical comressor quick disconnect, to air up, if you don't hardpipe a compressor in That valve is to the right, on the bulkhead with one shrader valve
Here is what the system looks like before install
I have some additional stuff besides the universal, which can also be acquired from Rocksmasher.
The gauge is and some fittings are extra. You can also use just a tire pressure gauge for pressure checks

There are 5 tire shrader valves. One for each corner and one on the the bulkhead for pressure checks.
One pressure valve (Brass) , that is adjustable to whatever you air up to. Even if the compressor keeps going, the valve will just blow off the over pressure until you stop it
The quick connect fittings on the left are to attach to the corners with some quarter inch hose, not shown in the picture .
I have one extra valve , with fittings to go into the compressor
Plenty of 3/8th air line already protected with convoluted tubing. Then plenty of 1/4 air line to plumb into the vehicle.
T's and connectors to make all the connections and even a plastic pipe cutter for clean cuts
All fittings are high quality
The fittings are laid out in the schematic, that it will be plumbed in.
I need to acquire one more 3/8th tee fitting that will replace the 1/4 inch that the blue cap is sitting on .
The idea is that install the valves in the fenderwells, that also have protective slip on caps. You can quickly connect all of your tire hoses, that are about 30 inches, each then air up and air down, right from where you place the bulkhead, either under the hood, or in my case in the bed. You always air up evenly and always air down evenly. Since there are schrader valves, you could also air up or down another vehicle, 2 tires at a time . Or a trailer too . You can make this system work for as many tires as you have. Even rv's and semi's use them . You just need to add hardware to expand it
I will write a more detailed post when I actually install it. Then do some real world air sessions, to show you all how it works. At first it sounds like lots of fussing with hoses and stuff, but actually it will make this task much faster and you can enjoy talking with others or having a cold beverage, while doing the task.
Here is a link to the system
http://2wayair.com/
wikid
Adventurer
Thank you . it's still in the works (sort of)Wowza this whole build thread is inspiring and the truck came out drool worthy, great stuff all around!
Truck looks great. Makes me wish I had special ordered a non-FFV... but my purchase was whimsical, so it's irrelevant. lol
These things have plenty of power with or without the s/c
I still haven't had time to finish the air system, primarily because I want to build a control panel on on the back end of my control box area.
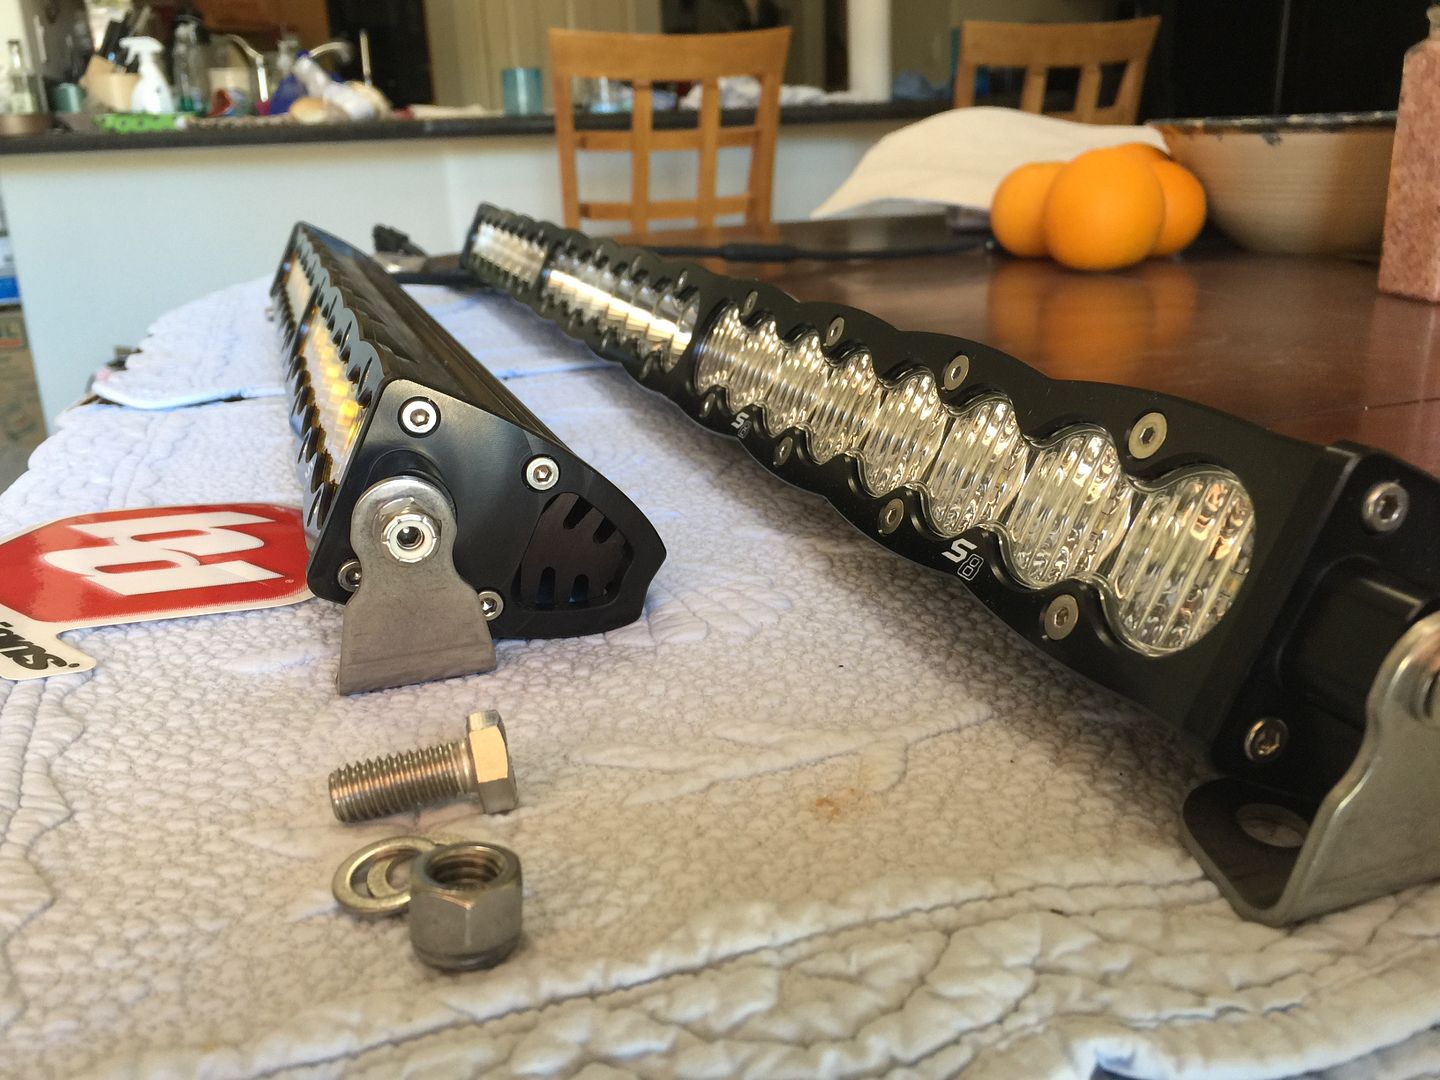
I have a few pieces of the puzzle that will almost complete my lighting system. I have been waiting for these since July, when I saw the first prototype at the FJ Cruisers Summit. some delays on manufacturing caused some delay, but here they are. Baja Designs S8's
20" of the rear rack in amber combination pattern and 30" for the hood bulge, or grill. At this point I think it will end up in the grill. The housing is bigger than the opening and would cause lots of custom fab work.
The scallop housing and the back lit feature make this a really cool addition
The lenses for for the 30", will be switched to amber too
DB Customs is working on a grill design that will incorporate the new design. I may have a pro grill up for grabs if this works out the way I think it will. Plan be would be to incorporate it into the pro grill
20"
S8, 20" Driving/Combo LED Light Bar
30"
S8, 30" Driving/Combo LED Light Bar
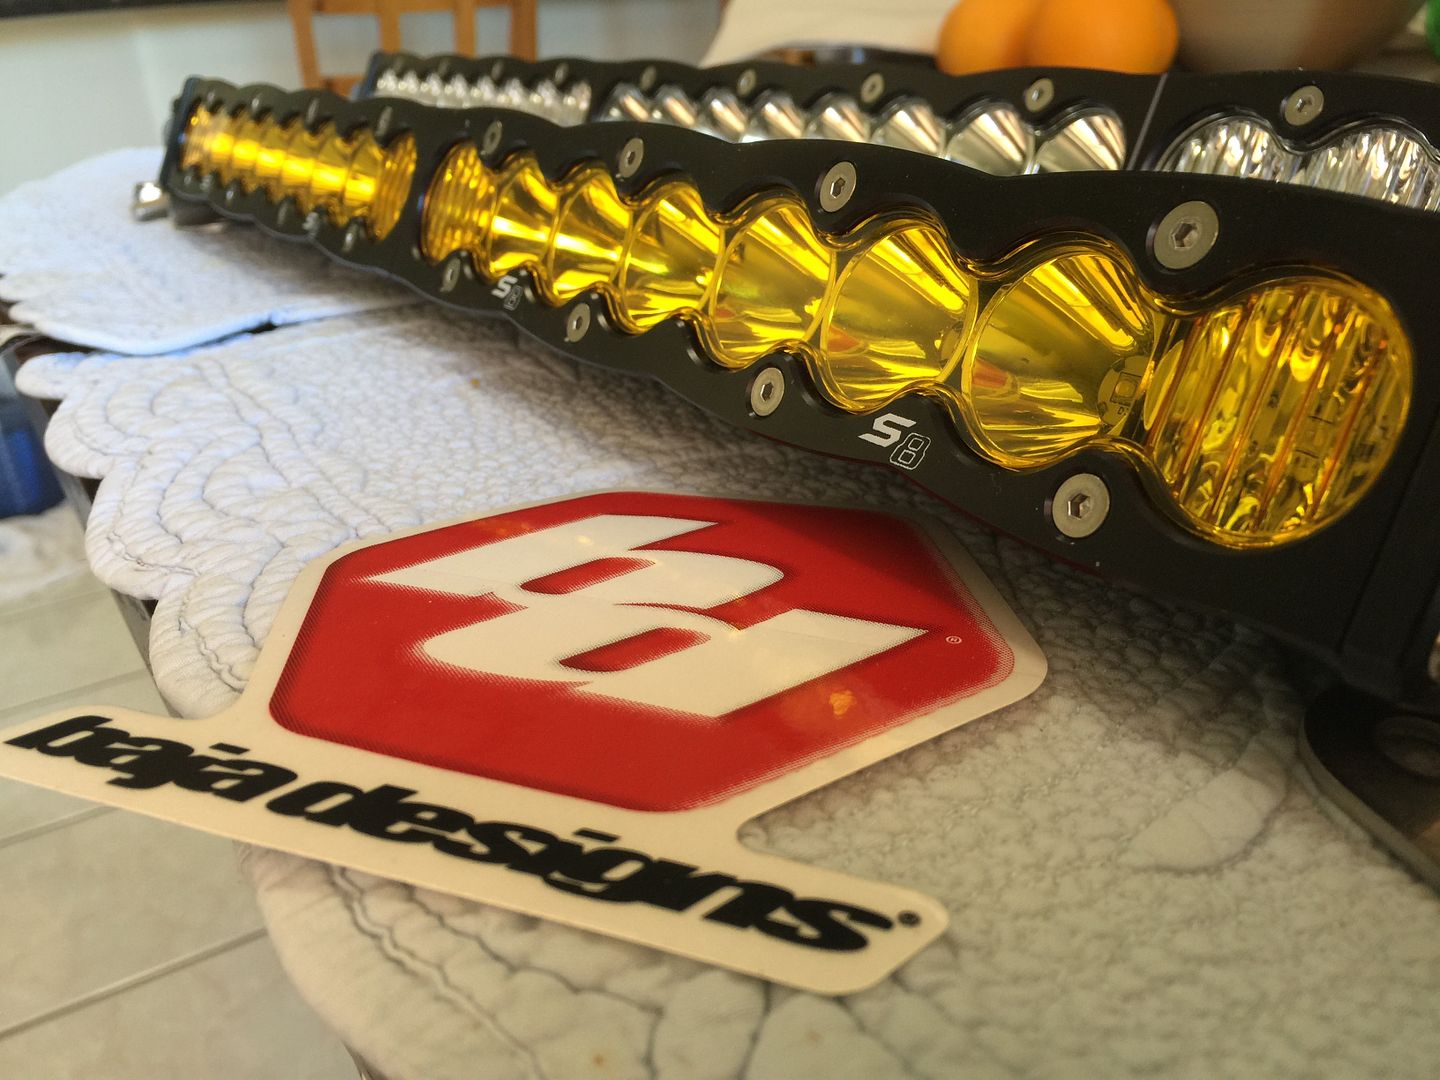
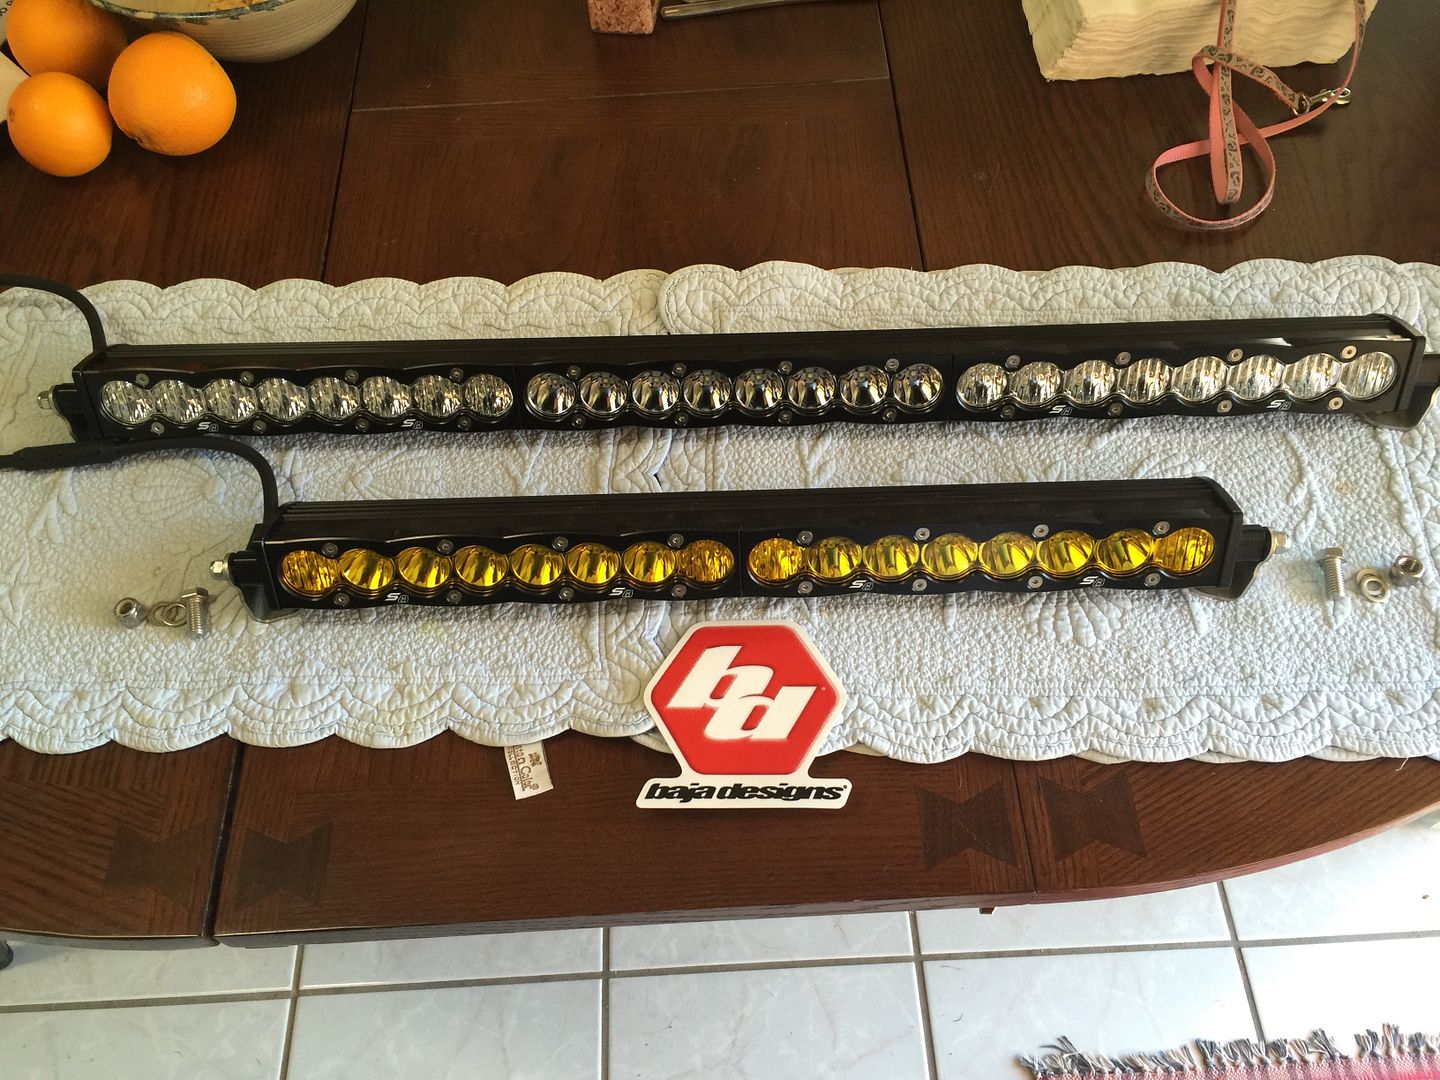
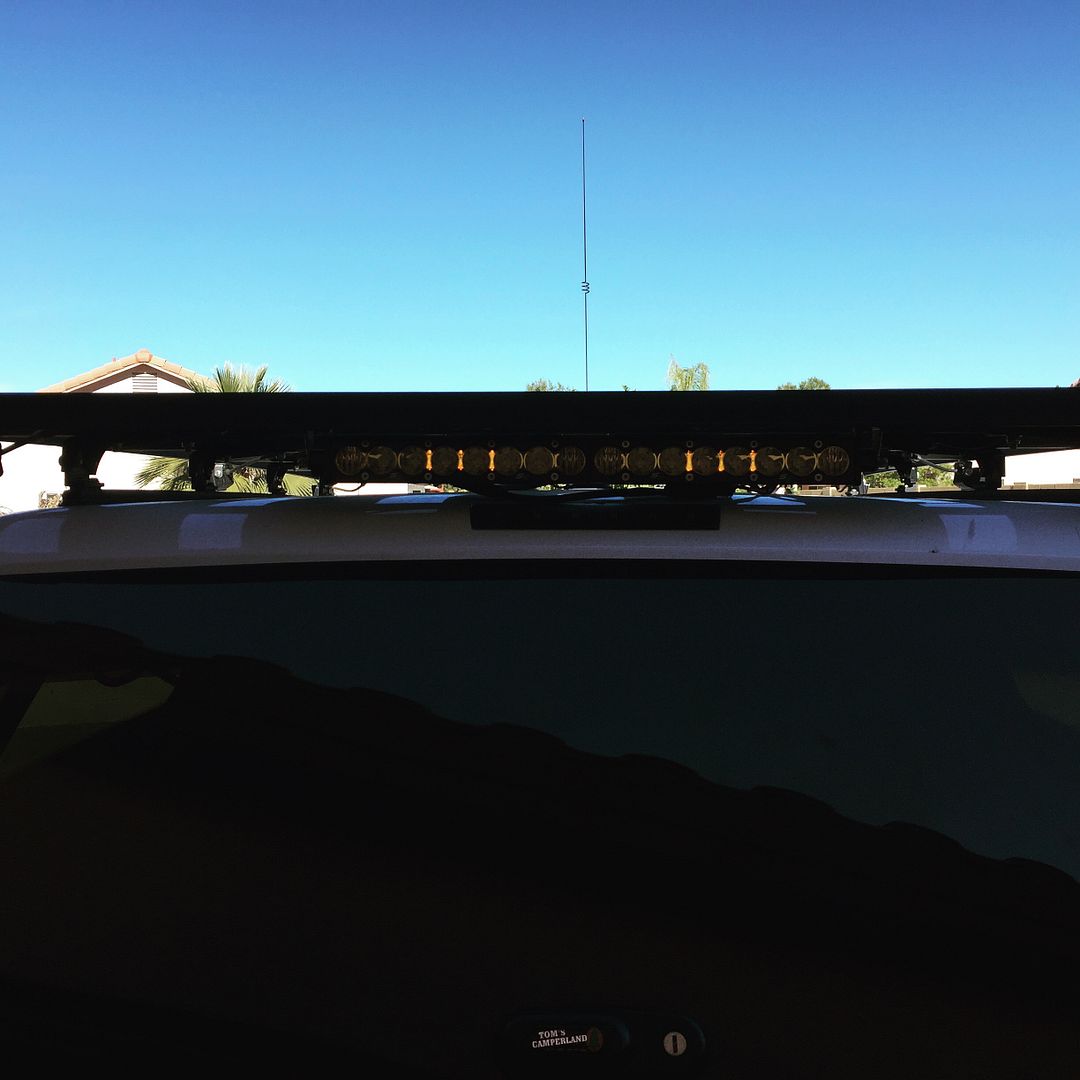
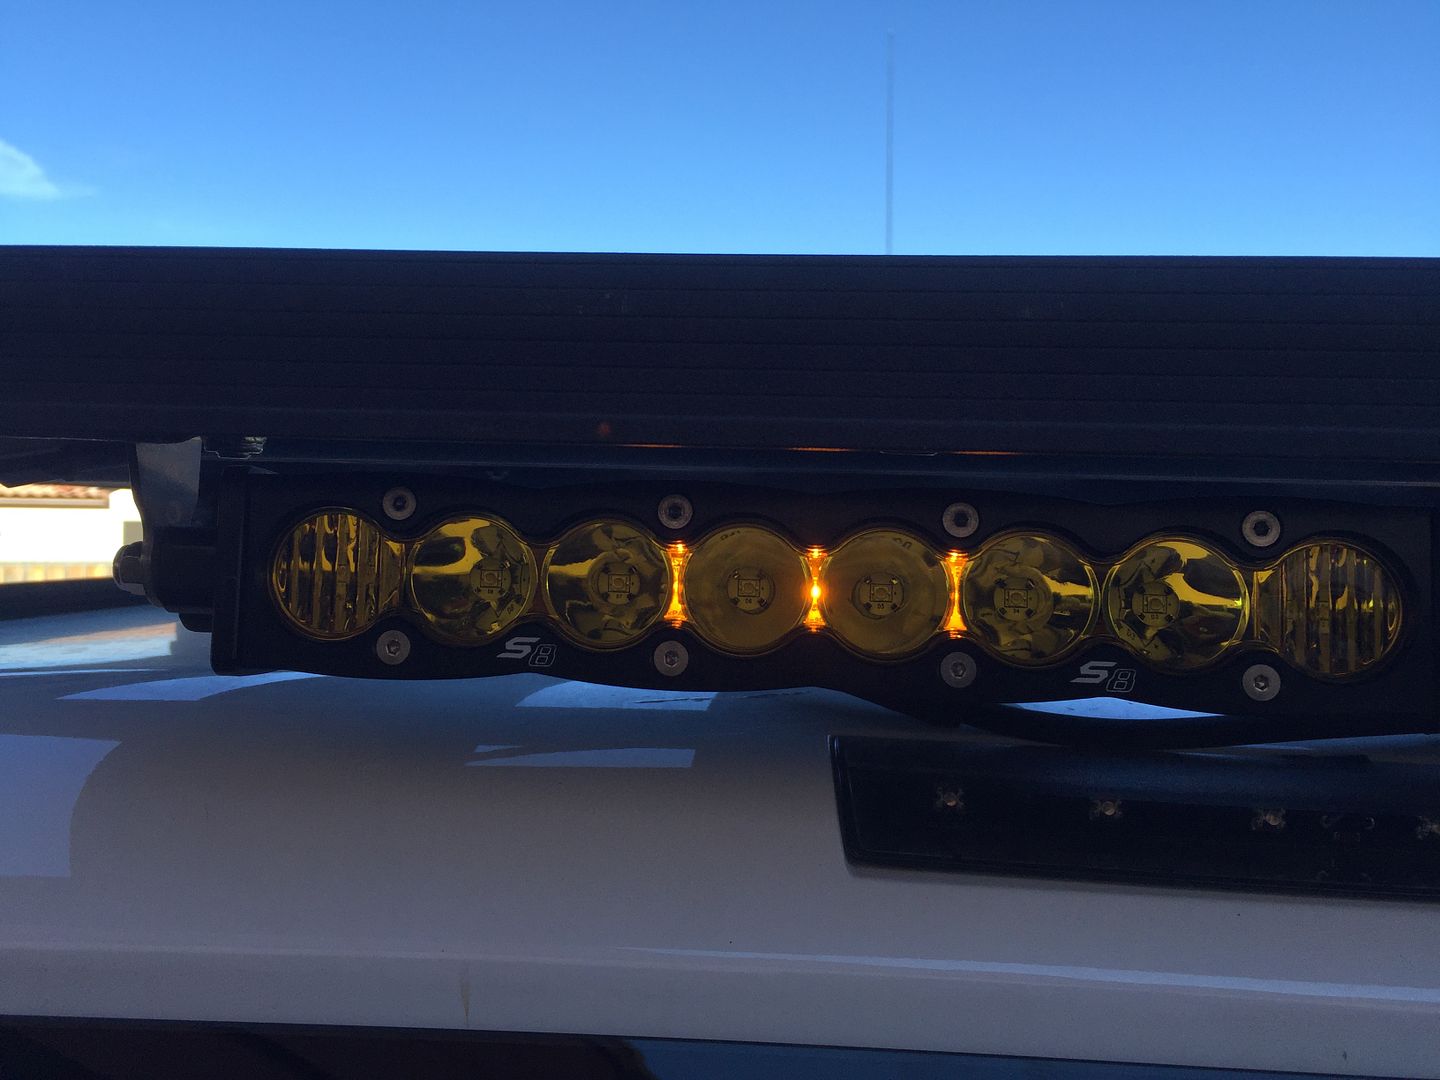
The next weekend I went ahead and mounted it. It was already pre wired. I just had to make a bracket and use the track system to mount the bracket
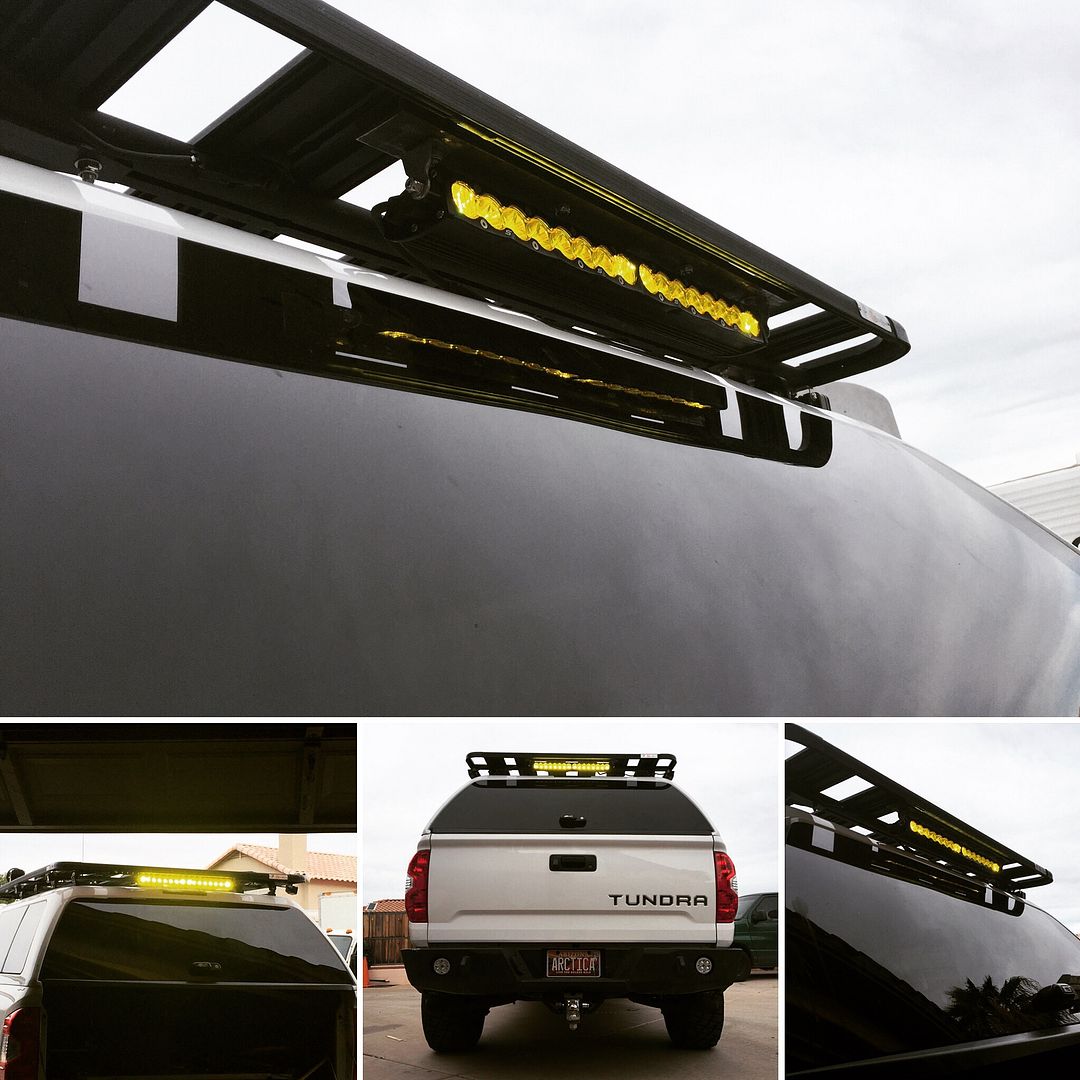
A daytime shot of the backlit feature I had to ship the light out immediately after installing it to Dbcustomz, to fit in a grill . I actually sent him both lights. One for my new grill and the 20" so he could use it to fit in a Tacoma grill
wikid
Adventurer
Wheels of progress have slowed with business stuff and delays, until last week. One of the projects that has been hanging out there is the front grill project that will house my 30" S8 . I have had that light in my office for an eternity, it seems, but I finally have something to show now.
The idea was to create a grill that will accommodate the light, along with adding a little "unique" , to the project. DBCustomz, http://dbcustomz.com/ has been great to work with . A hard working guy that created some unique products and now it is beginning to ramp up.
Here is the direction I went with the grill .
The base grill is made , then the overlay is a piece of aluminum, water jetted, with this specific font and identity
Here it is raw
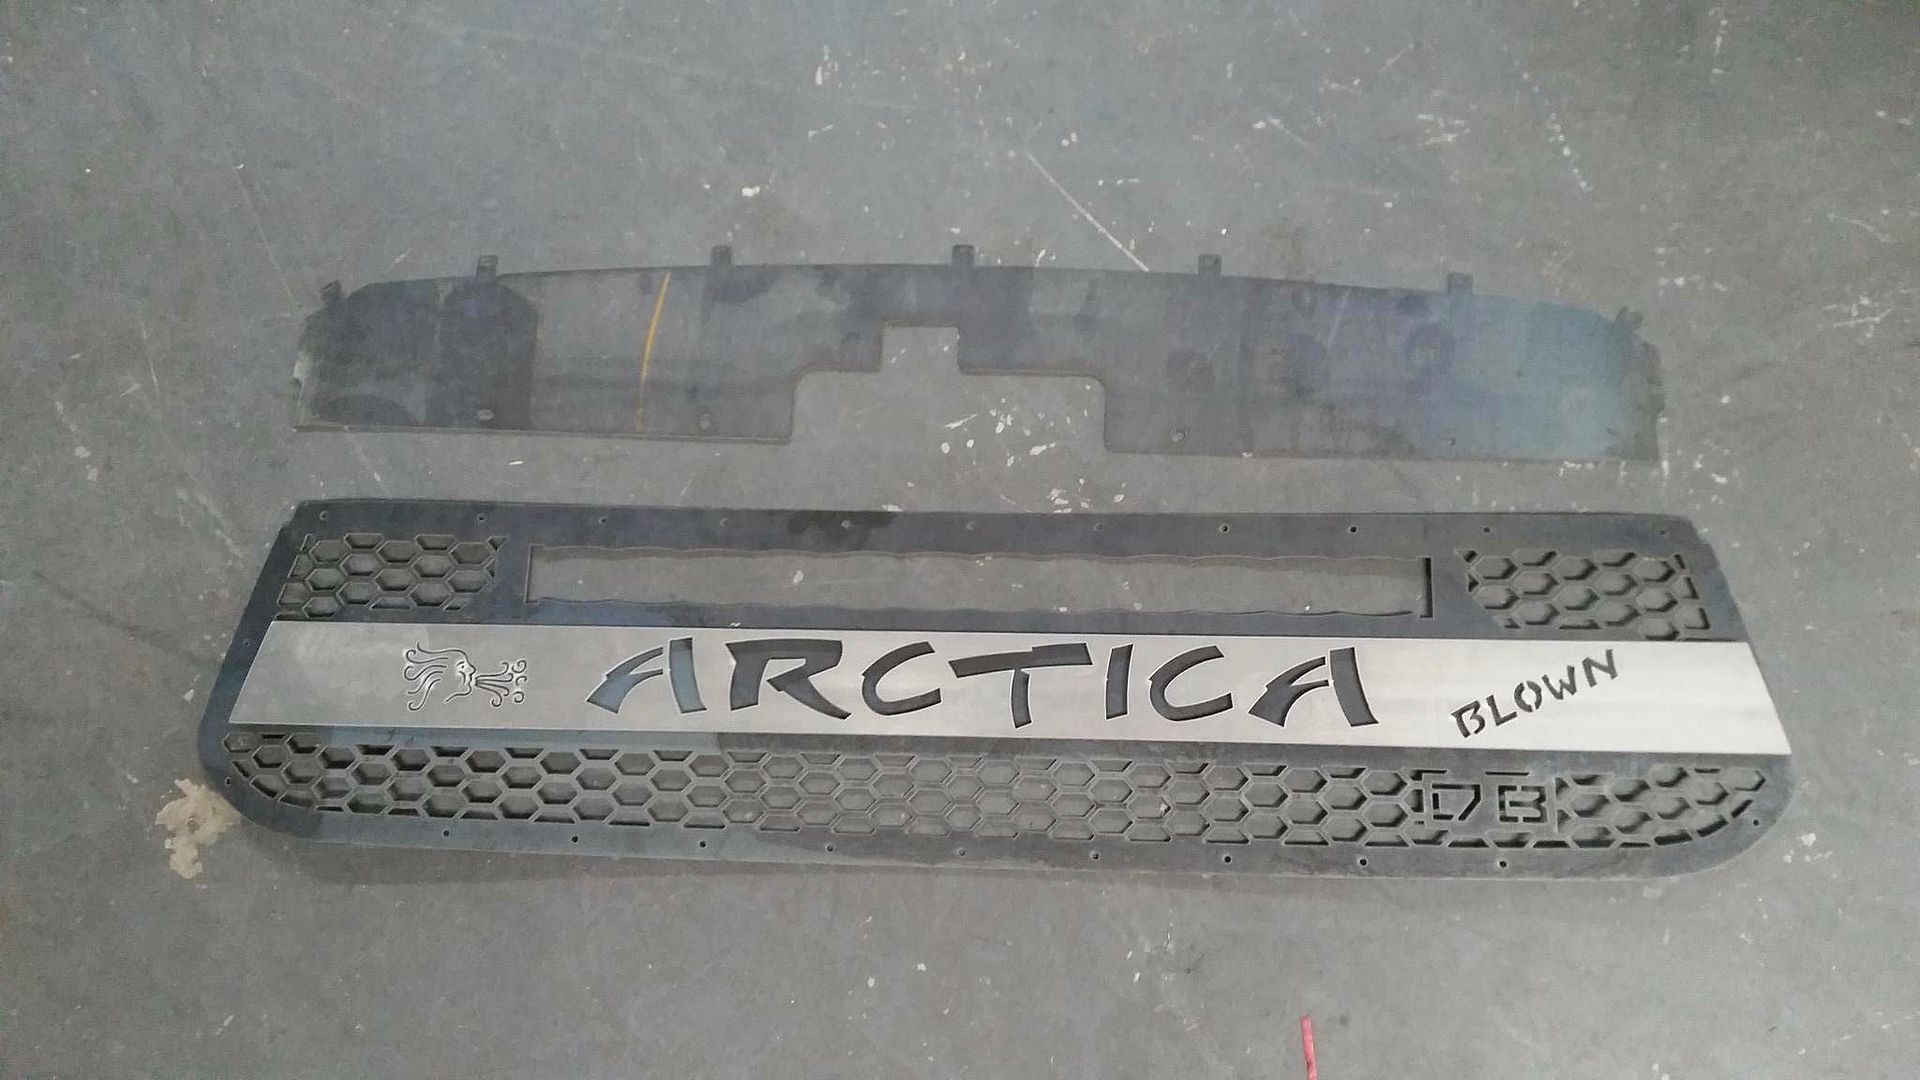
The S8's shape was scalloped into the upper portion of the grill. Then the overlay was done with the name of my truck , of course . I picked a special font to give it the look I wanted. I also asked for it to show it was Supercharged, then he added the little man on the left, blowing air. I liked it.
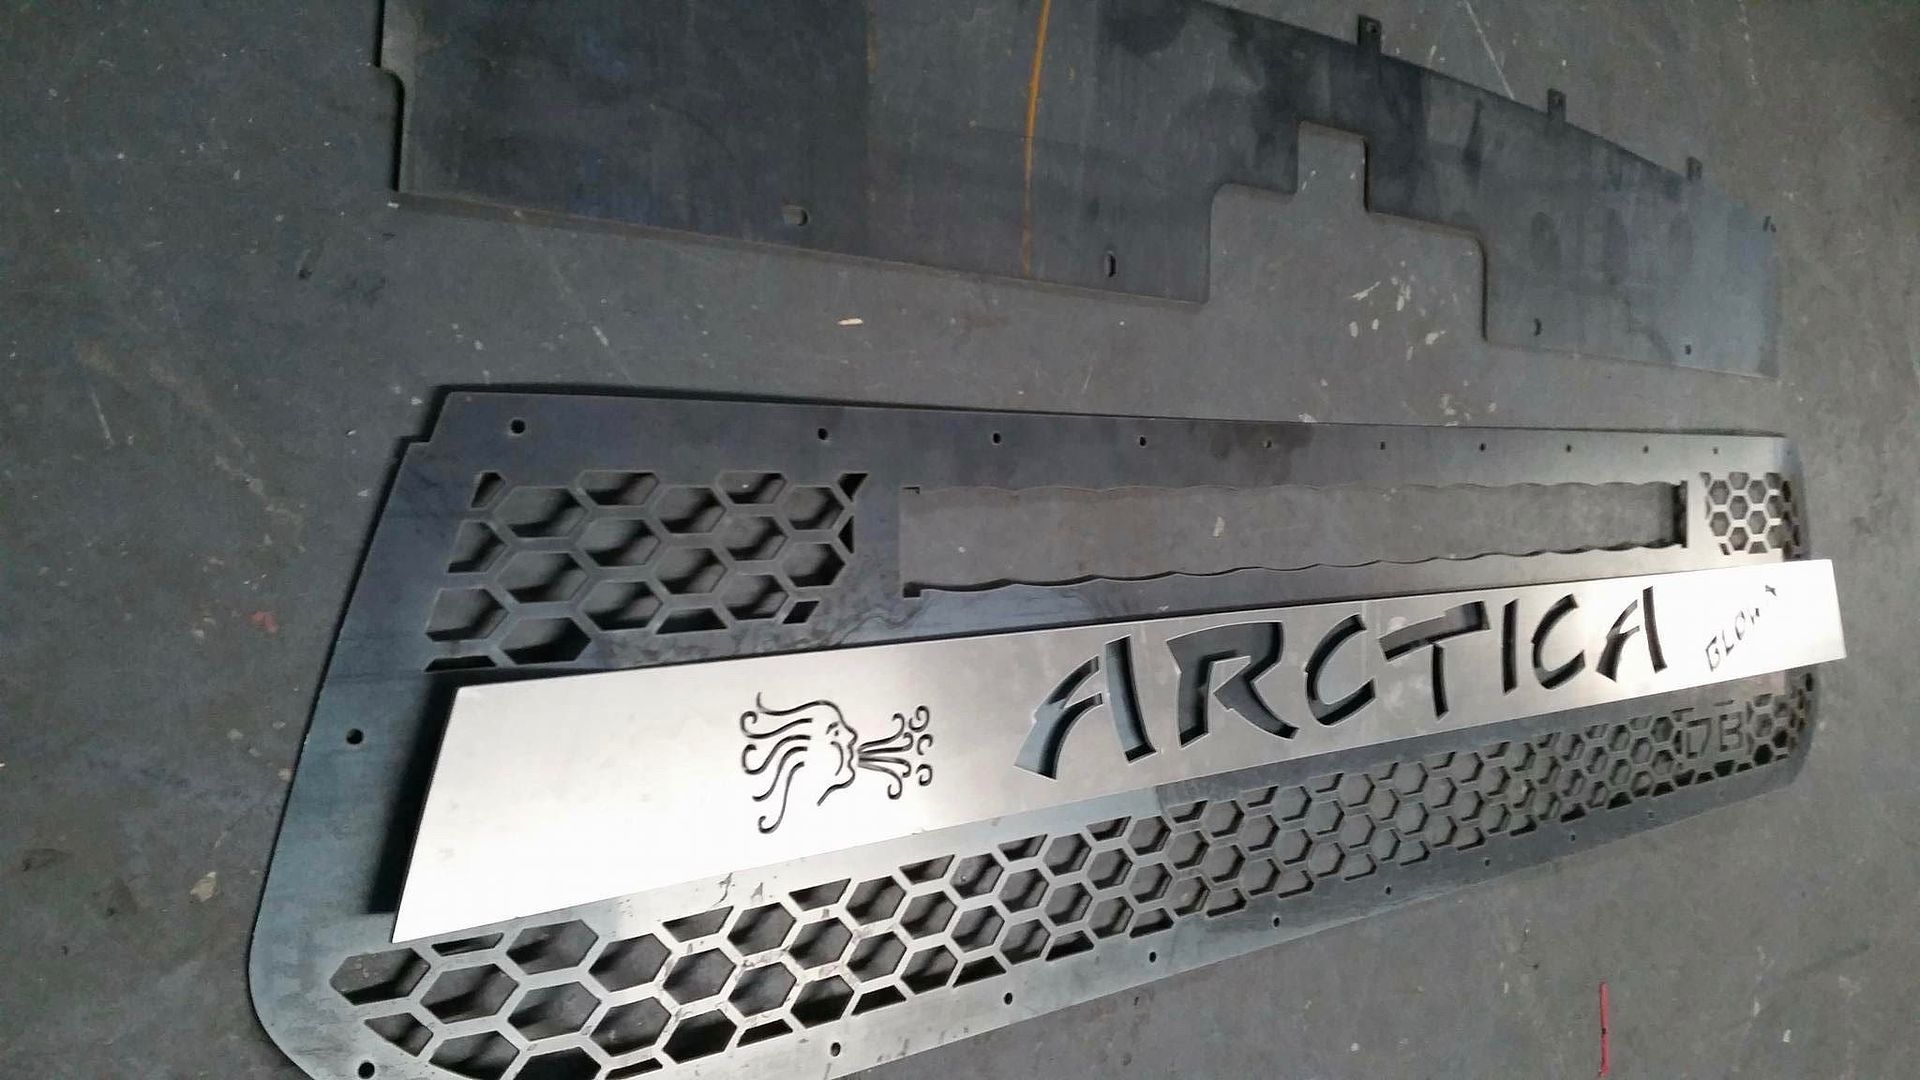
It arrived Thursday Evening, but my truck was suppose to be displayed at the Super Cross Event in the pits on Saturday . Needless to say , since it was a custom install and the first one off, it took Friday and early Saturday to finish it up. Here is the direction I went with it
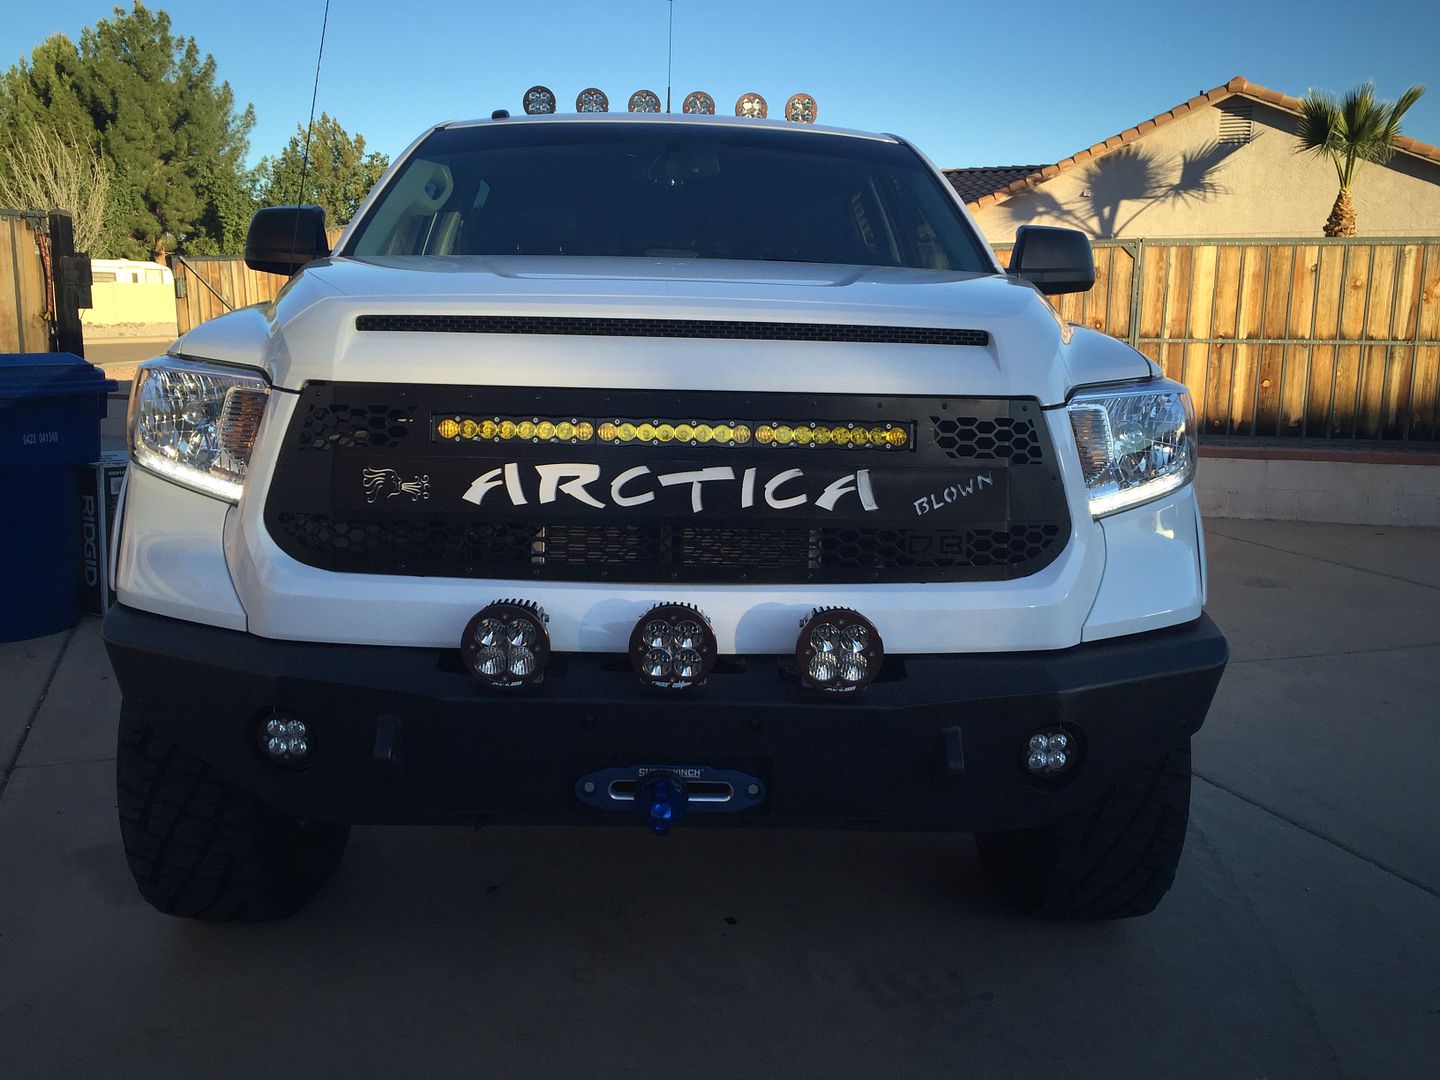
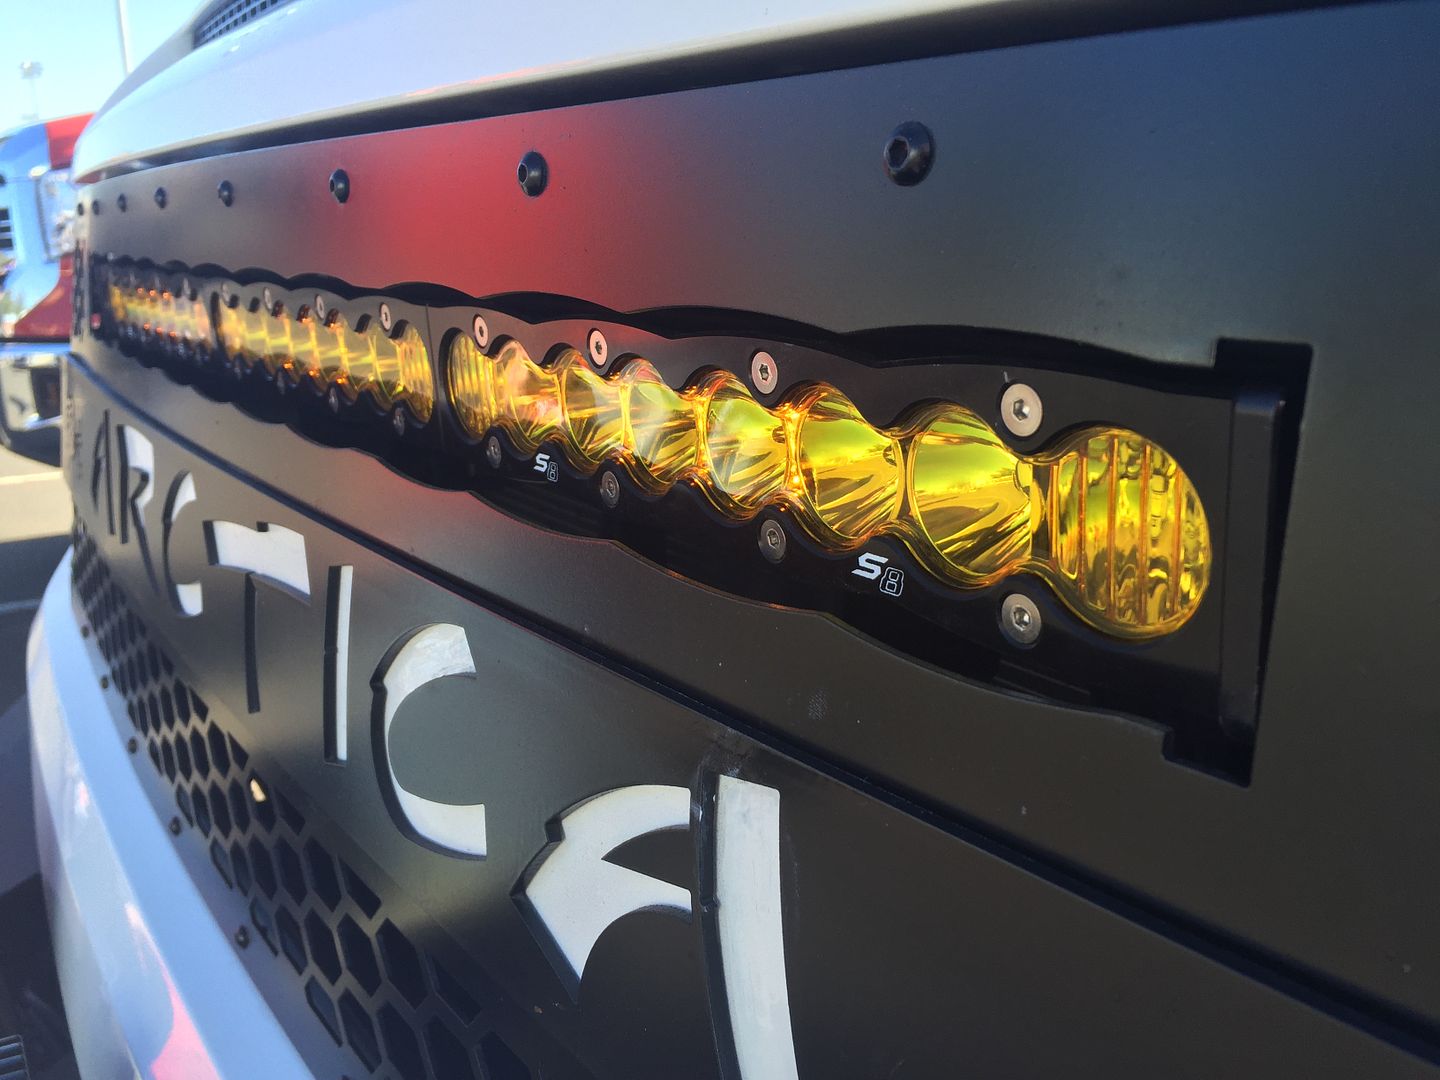
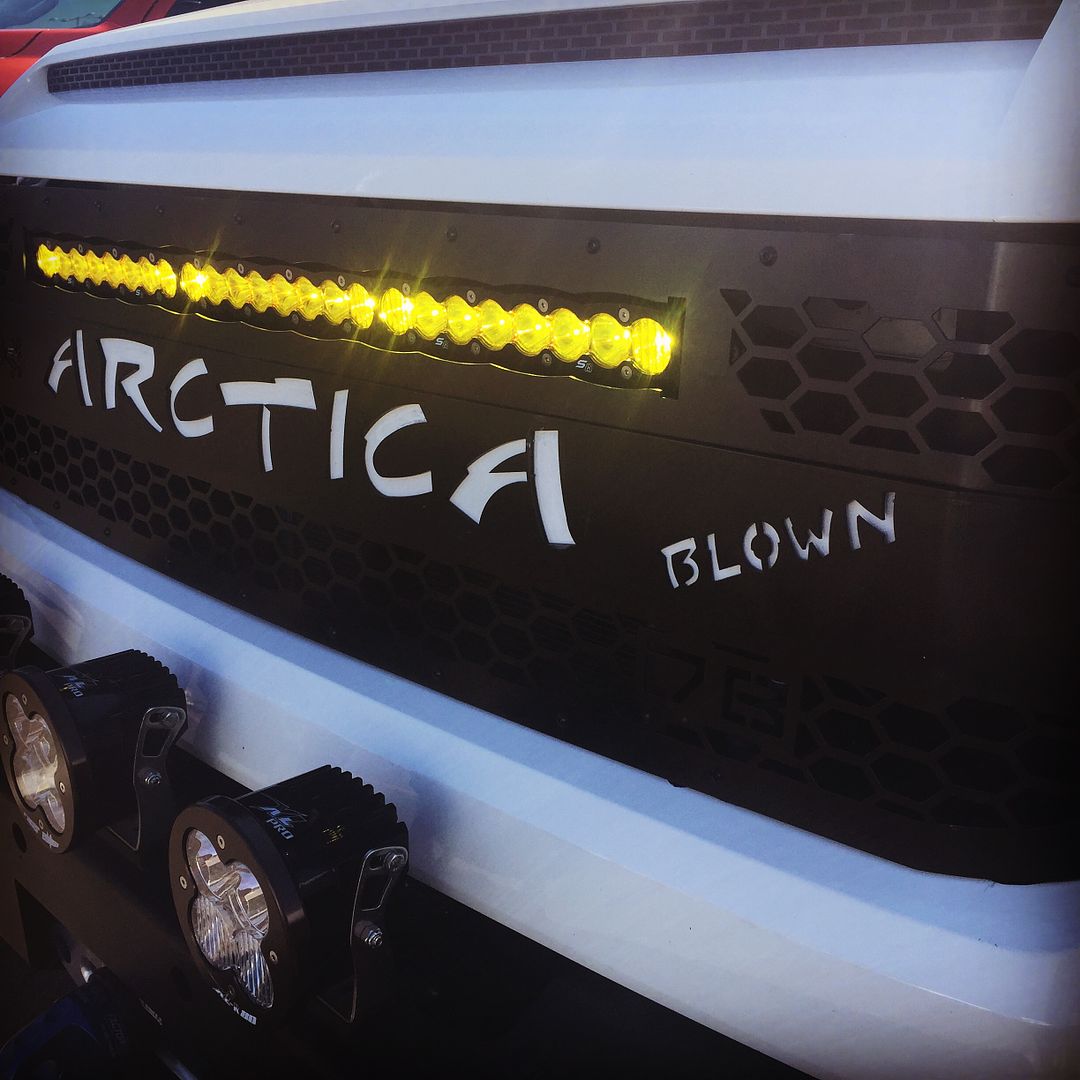
I love the back lit feature
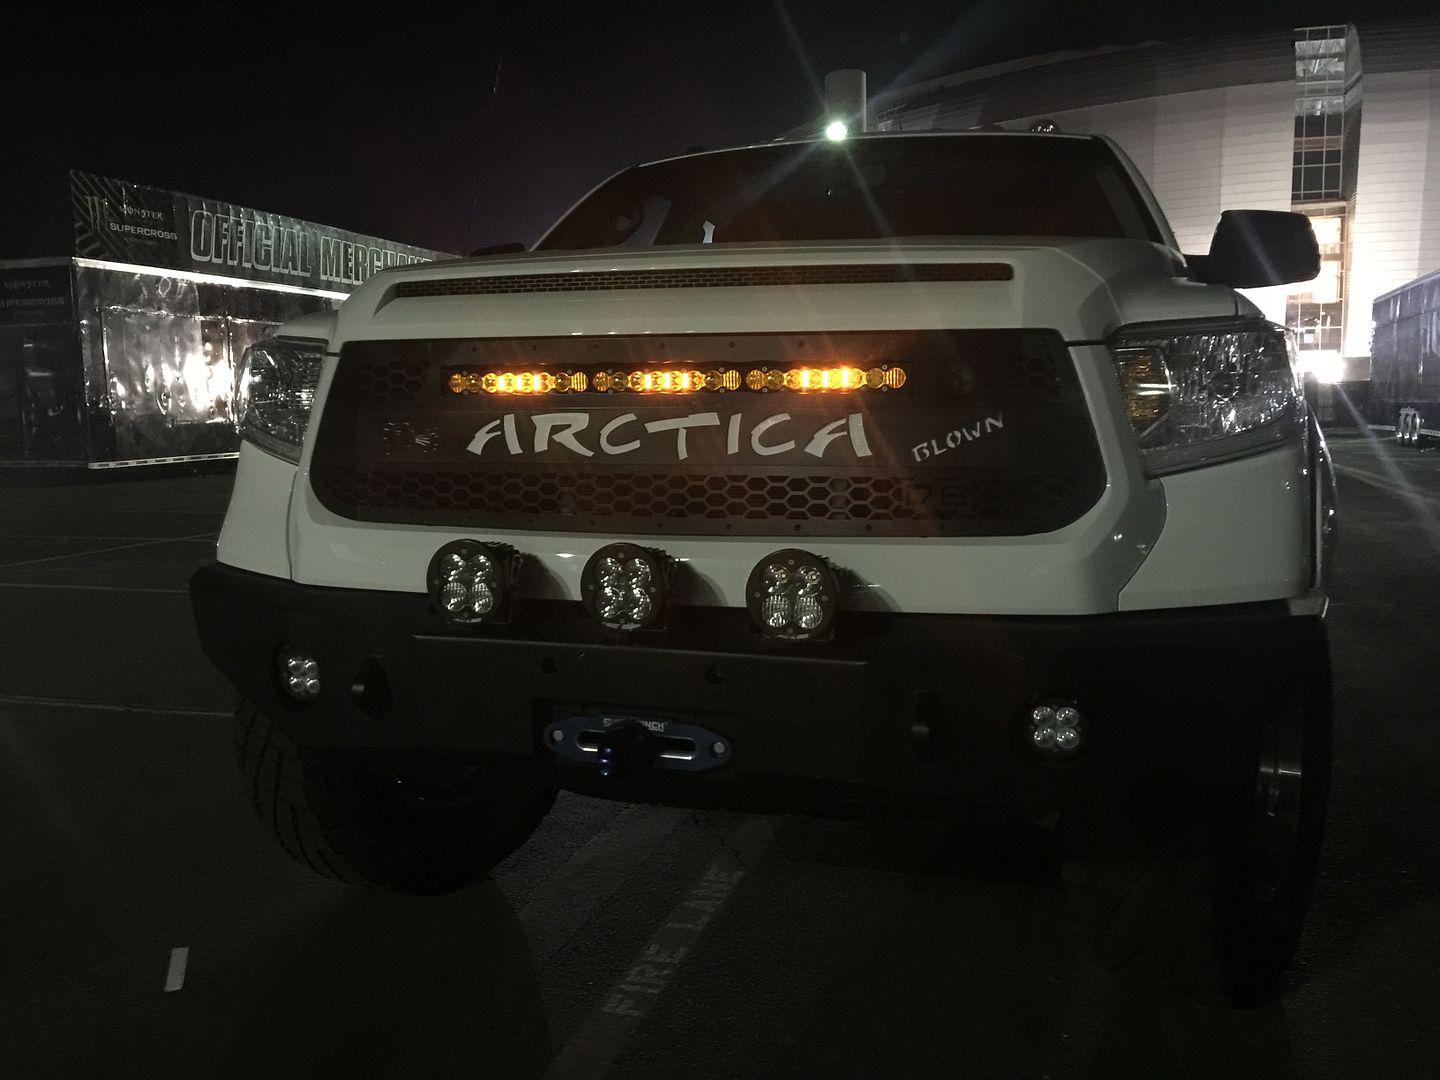
A little montage, to show the different scenarios.
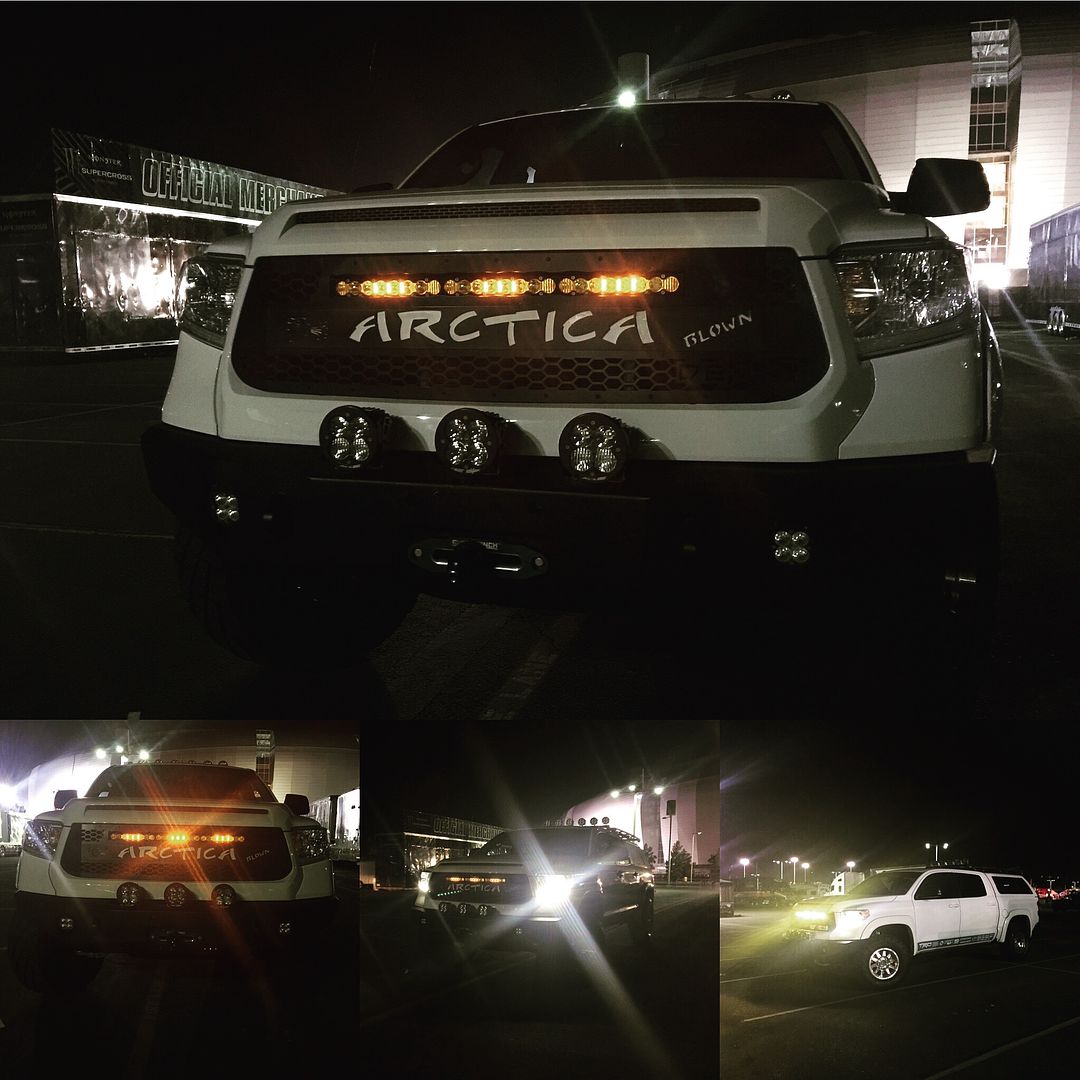
The fact that it accomplished getting my light, where I thought it should be, then added some flare to the project, was a bonus . The back lit feature is tied into the back lit circuit on the rear S8. I feel like it came out better than I pictured it. In the panic to get it done for Saturday and also wanting to see how the color layout would look. I painted it. When I decide if this is how I want to look, it will be removed and powder coated. I may anodize the aluminum face piece. I just don't know yet
The idea was to create a grill that will accommodate the light, along with adding a little "unique" , to the project. DBCustomz, http://dbcustomz.com/ has been great to work with . A hard working guy that created some unique products and now it is beginning to ramp up.
Here is the direction I went with the grill .
The base grill is made , then the overlay is a piece of aluminum, water jetted, with this specific font and identity
Here it is raw

The S8's shape was scalloped into the upper portion of the grill. Then the overlay was done with the name of my truck , of course . I picked a special font to give it the look I wanted. I also asked for it to show it was Supercharged, then he added the little man on the left, blowing air. I liked it.

It arrived Thursday Evening, but my truck was suppose to be displayed at the Super Cross Event in the pits on Saturday . Needless to say , since it was a custom install and the first one off, it took Friday and early Saturday to finish it up. Here is the direction I went with it


I love the back lit feature

A little montage, to show the different scenarios.

The fact that it accomplished getting my light, where I thought it should be, then added some flare to the project, was a bonus . The back lit feature is tied into the back lit circuit on the rear S8. I feel like it came out better than I pictured it. In the panic to get it done for Saturday and also wanting to see how the color layout would look. I painted it. When I decide if this is how I want to look, it will be removed and powder coated. I may anodize the aluminum face piece. I just don't know yet
Similar threads
- Replies
- 7
- Views
- 1K
- Replies
- 2
- Views
- 1K
- Replies
- 0
- Views
- 431
- Replies
- 67
- Views
- 7K

