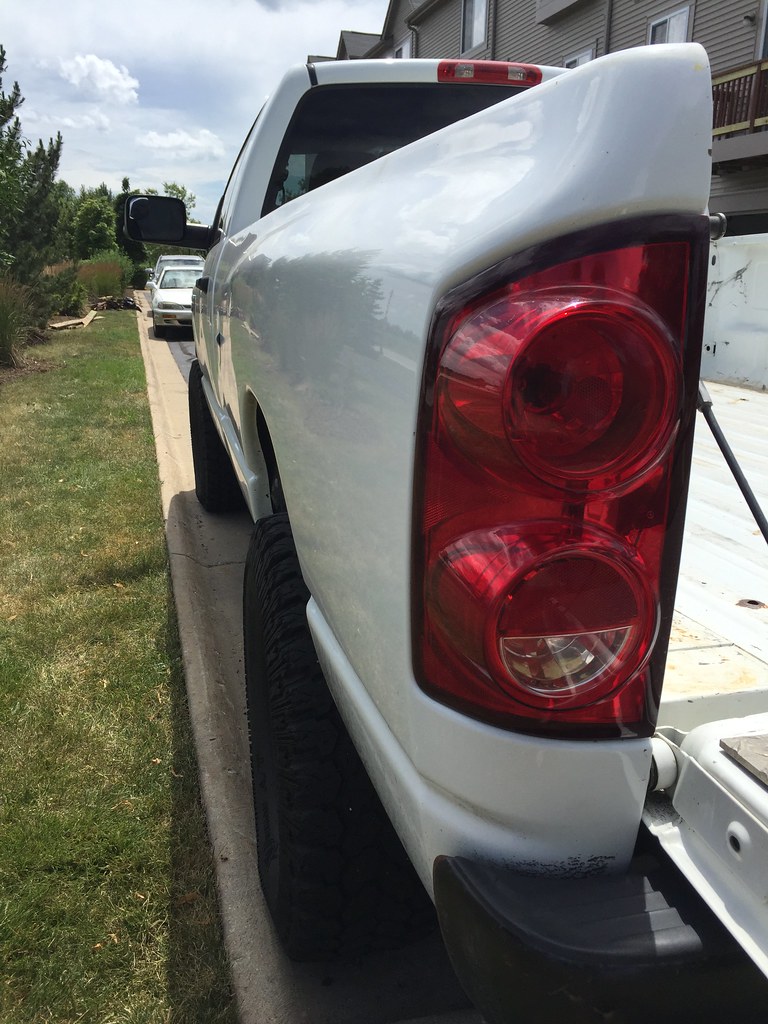
Atl-atl's Dodge Ram 2500 Regular Cab Long Bed "documentation" thread.

Colorado_Outback

Adventurer
Thanks for the compliments. After camping this weekend and using it all I like it with one exception. Don't use the mesh panel they sell at harbor freight! It barely pulled the thing tight and 3 grommets ripped right out of the panel. Im going to return it today and probably buy something more like a sailcloth panel that is built to handle the tension of pulling it really tight.

Good to know thanks for the update.

Now you need some camper tie downs!
 

Atl-atl

Adventurer
Good to know thanks for the update.

Now you need some camper tie downs!


I actually have a set but I don't want to bolt plates to the bedsides, rust is so rampant here Id like to get my truck back to Colorado with minimal body damage. My last camper was bolted through the top of the bedsides because the bumpout on either side of the camper sat almost exactly on top of the bed, it was perfect, WAY sturdier than straps or tie downs. Held up to some serious wheeling and washboards. This camper has two layers of 2x4 underneath the floor which I could remove and probably bolt the camper down. I just don't know if I want to go through all that work at the moment. Im pretty seriously considering going flatbed. I need to get a job!
 

Colorado_Outback

Adventurer
I actually have a set but I don't want to bolt plates to the bedsides, rust is so rampant here Id like to get my truck back to Colorado with minimal body damage. My last camper was bolted through the top of the bedsides because the bumpout on either side of the camper sat almost exactly on top of the bed, it was perfect, WAY sturdier than straps or tie downs. Held up to some serious wheeling and washboards. This camper has two layers of 2x4 underneath the floor which I could remove and probably bolt the camper down. I just don't know if I want to go through all that work at the moment. Im pretty seriously considering going flatbed. I need to get a job!

I hear ya, I'd like to do an Aluminum flat bed for mine.
My truck had hauled a large camper for a lot of miles and the front of the bed had 10" vertical cracks from the bolt in front anchors. I welded them up and its better but I really need to get some frame mounts and move the fronts down to the frame. Bolting to the body(bed) in the front and the frame in the back is no bueno for sure.
 

Atl-atl

Adventurer
So I took the camper off the truck today. My intent was to remove two layers of 2x4" that are fastened to the bottom of the camper. I think a previous owners truck had really high bedsides so they built this platform to accomodate. Well it makes the camper sit about 4 inches above my bedsides. Got the camper out of the truck and floating on the jacks to discover the 2x4"s are REALLY on there. I got the first layer off and thats the end of it. I would absolutely mangle the floor of the camper if I tried to remove the second layer so it stays. This will make my plans for mounting the camper to the bed rails have to change but thats OK. Ill figure out some kind of spacer to put in there. Since I had the camper out of the truck I decided to try a little something...


IT FITS! I cant believe this monster on 37s fits inside the garage with the camper and plenty of room to spare! Bikes, grille, toolbox, shelving all included with room to walk around. There is probably even some room to build the workbench Ive been thinking about. Also per the measuring tape my fiancés car will fit with about 12" to spare. I think we can cram everything in this two car garage, just have to get the leftovers from moving out of the way. This makes me incredibly happy for when stormy weather and winter approach.

27650438364_770a78bc58_b.jpg


27985033950_1105b7d158_b.jpg


27650546093_7777691488_b.jpg
 

Atl-atl

Adventurer
Ive decided to sell my bed and try to subsidize some of the cost of a flatbed. Im dumping the pics here to save for the CL post. Anybody want a decent shape rust free white 2008 8 foot ram bed/tailgate/tail lights? Ill make a special expedition portal deal!

27653361273_56a5f75e4e_b.jpg


28190516161_2a8a5515ef_b.jpg


28268667905_8ebaf8ff10_b.jpg


28165008822_debb5dfca9_b.jpg


28234507456_a4c3914ca8_b.jpg


28268663655_3f71ddaa90_b.jpg


27653365713_c3aacb2113_b.jpg


28190513581_63036aa0e6_b.jpg


28190510961_f785890152_b.jpg


28268665405_5e846144b6_b.jpg
 

Atl-atl

Adventurer
Very cool thread mate.

Love the truck. Does a 37" tire fit in the spare location?

Thanks! Nope I have a 35" tire in the stock spare location, and that barely fits!!! Its close enough in size that it will get me to a safe place if I were to get a flat. I would love to modify the frame so a 37 would fit but that is pretty far down the list right now!
 

Atl-atl

Adventurer
Since I have a little free time on my hands. Ive decided to start tackling some projects Ive been wanting to do since I bought this truck a few years ago. One of them is the faded headlights. Ive been reading reviews on headlight restoration kits for decades. Most of them with raving reviews and then a mix of "3 months later they turned yellow again" or something along those lines. So I went out and got a kit that comes with all the fancy gadgets: drill attachments, sanding discs, polishing ball, UV protectant wax goop etc. Both headlights on my truck have the typical 06-08 Ram "top of the headlight looks like fries from the bottom of the basket" look and the drivers side light has a pretty significant scratch from the previous owners encounter with something.

The kit came with enough sanding discs to do just about one 4x6" headlight. Two tiny little 1000 grit discs, two tiny little 1500 grit discs and a 2000 grit pad. My trucks headlights have, well, roughly 100 times the square footage this kit can handle. I used the entire kit on one headlight and while it did a decent job, the one light I worked on still has a decent amount of fog. So I went out in search of more sanding discs. I have a 3" and 5" drill attachment. I went to the auto parts store, home depot and harbor freight and I found nothing. No round sanding discs with a higher grit than 240. Anyone have suggestions? Anyway I got some sheets of 800 and 1500, cut them into circles and did another round of wet sanding. Im still not completely happy with it. The round I did with the sheets of sand paper introduced some "new" fog that I need to figure out.

Im not to the point of regretting this and wishing I would have bought replacement headlights, because I believe there is a distinct quality difference between OEM and pretty much anything aftermarket, but this is a lot of work.

Before
27676843743_11e28d5c5b_b.jpg


After
28258426666_3d0da6b34d_b.jpg
 

Atl-atl

Adventurer
Have you tried Eastwood.com ?

Thanks for the suggestion. I looked on their site but they only list up to 180 grit for the smaller velcro backed discs. Oh well, I just got some sheets of 800 and 1500, cut them into circles and taped them to used pieces of sandpaper from the kit. Worked like a charm!
 

Atl-atl

Adventurer
Finished up the passenger headlight and painted the grill and lower metal part of the bumper. Looks WAY better than the weird purplish grey stock color. Now I need to back to black the plastic upper bumper piece. Think Ill try the blowtorch trick.

After
28231550921_39682b9231_b.jpg


Before, really looks terrible comparatively!
28258423526_895f4bc5fc_b.jpg


During :sombrero: I hit the rusty stuff with some gloss black while I was under there.
28231549451_683c5841b3_b.jpg


She's really coming along nicely this week. Still on the fence about just going to get a bedliner and keeping the bed/getting a cap. I went to a body shop down the street for ******ts and giggles, they wanted $1500 to fix the dent in my bedside!!! :Wow1:
28231552351_c4d35f5646_b.jpg


28231551141_cb3fe2ae31_b.jpg
 

Buddha.

Finally in expo white.
I did the 3M headlight restore thing on my girlfriend's old Malibu. It took the whole package to do one headlight. After that I tried to get some sanding discs that would work on my orbital sander but I never really found anything that works right.
 

Atl-atl

Adventurer
I did the 3M headlight restore thing on my girlfriend's old Malibu. It took the whole package to do one headlight. After that I tried to get some sanding discs that would work on my orbital sander but I never really found anything that works right.

Cutting sandpaper and putting it on the discs seemed to work just as well as the ones supplied with the kit. Although I had to use a lower grit to get it to look how I wanted.
 

Atl-atl

Adventurer
I did some more today. Including the blow torch trick to turn the grey plastic back to black and it worked really well. Except for the spot where I got the headlight UV goop on it. I cant get that ******** off. Tried heat, dish soap, scrubbing etc.

28044857370_9508307fcb_b.jpg


Also painted more stuff under the front of the truck. Looks friggin new in the pictures haha. Threw a fresh coat on the wheels too, just because.

28292578396_05cfc004f1_b.jpg
 

Atl-atl

Adventurer
Looks so much better for ten minutes of work and the cost of $0 since I already had a torch. :sombrero:

28327225535_5ceeba04b9.jpg

28327224455_f8d4286b42.jpg
 

Forum statistics

Threads
188,060
Messages
2,901,729
Members
229,411
Latest member
IvaBru
Top