You are using an out of date browser. It may not display this or other websites correctly.
You should upgrade or use an alternative browser.
You should upgrade or use an alternative browser.
Barn Door for JK factory hardtops
- Thread starter jscherb
- Start date
jscherb
Expedition Leader
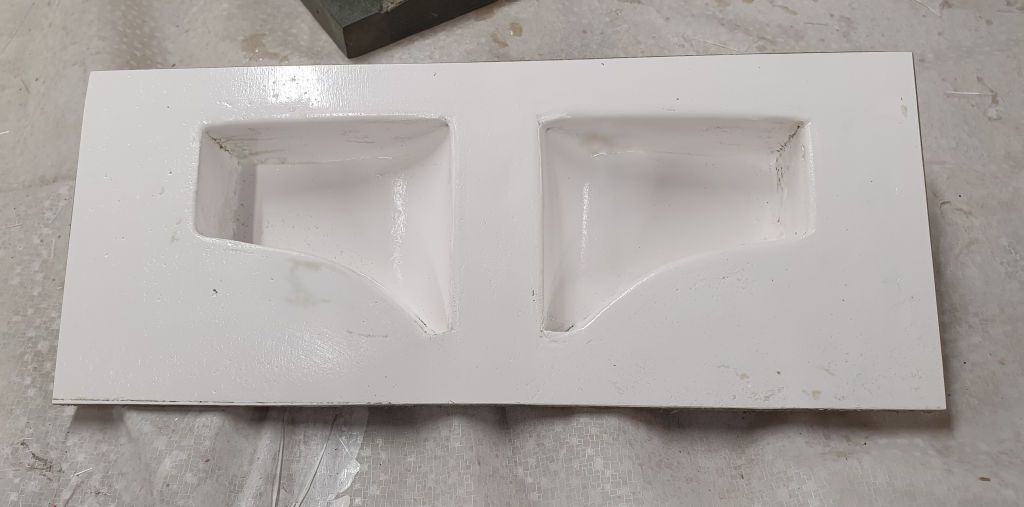
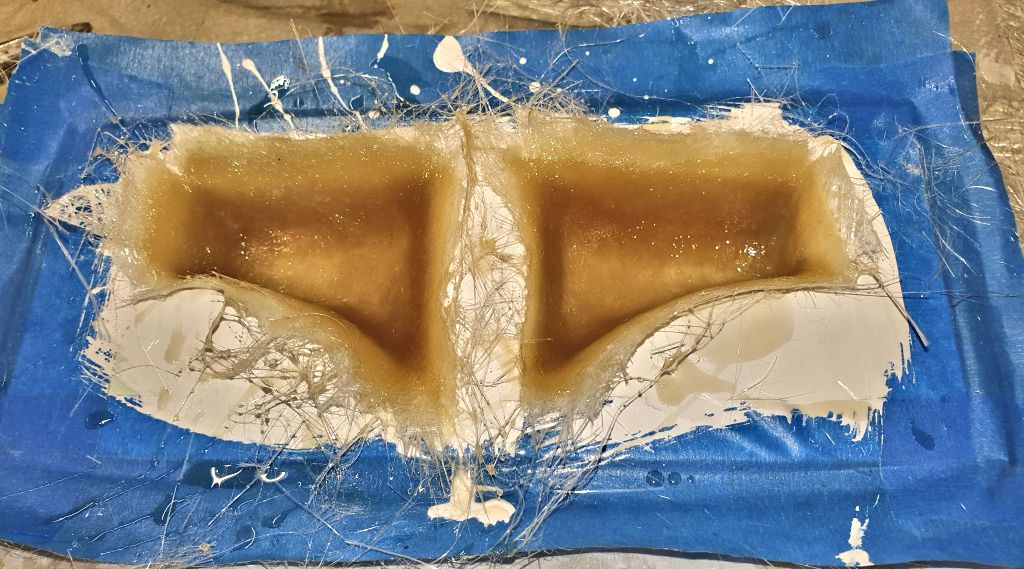
First thing this morning I popped the power connection housings out of the mold and trimmed the rough ends of the fiberglass off. They need some cleanup and final trimming - I made the mold so they're too tall and can be trimmed to the exact height of the roof rack ends and fitted to the recessed ribs in my JKU Safari Cab roof.
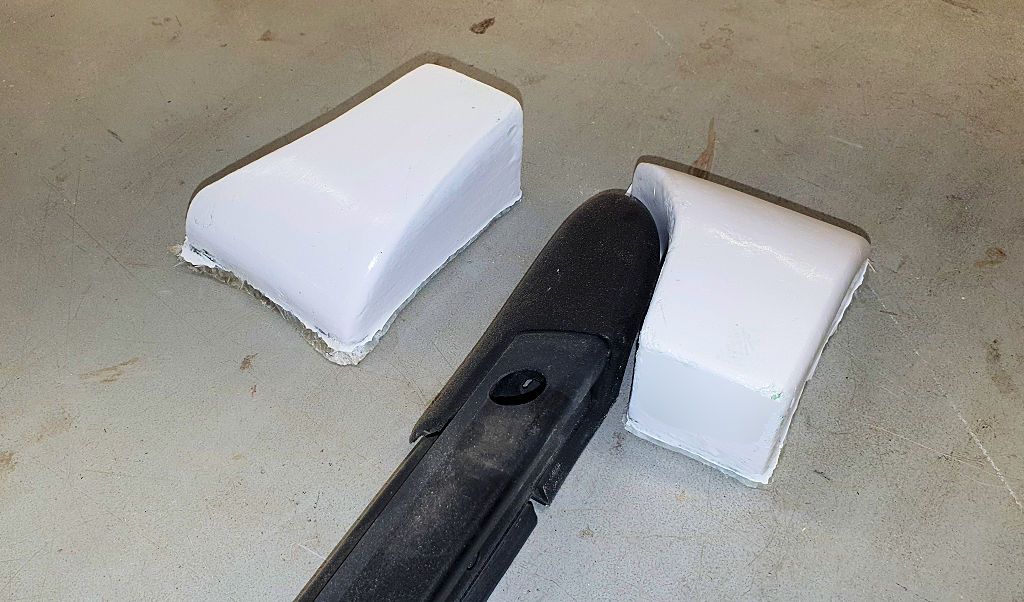
I'll probably mold a few more before I put the fiberglass materials away - because the Cherokee roof rack uses the same plastic pieces on both ends, these can be mounted in the front or the back of the rack, so 4 could be installed if I wanted power connections in both the front and the back of the rack; also I have the same Cherokee rack on my LJ and use the same Garvin rack basket there so I should make some for that Jeep as well.
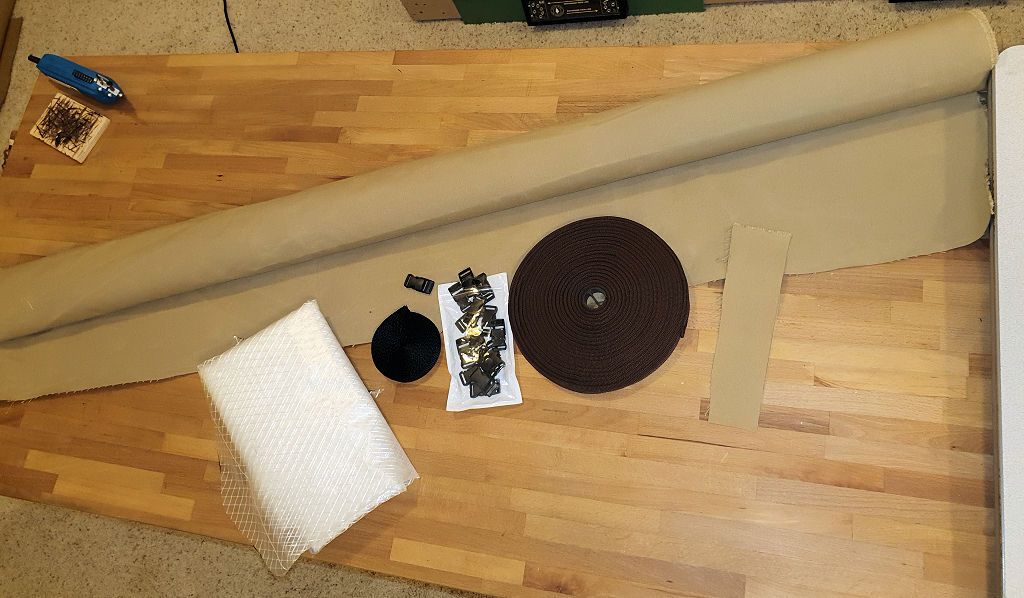
Probably won't get to trimming these and mounting the connectors in them today though, I've got to make some progress on the seat cover project today now that I've got all the materials here. Several yards of the heavy water-resistant fabric have arrived, as well as webbing and parachute buckles for attachment. The folded white thing in the photo is something called Dura-Skrim, it's used for making patterns. I'll post about that when I use it to make the patterns...

jscherb
Expedition Leader
Thank you very much. Projects this size are really pretty simple to do in fiberglass and would make a good first project for someone who wants to try getting into fiberglass work. No special tools are required for something like this, and a minimal amount of materials so initial investment would be small. The only tool I used was a spray gun for applying the PVA mold release but for a simple project like this a household spray bottle, perhaps one from window cleaner, could be used to spray the PVA. I also used a bandsaw to cut the master parts out of a 2x4, but a hand coping saw and some sanding would do just fine.@jscherb Once again amazing work. I've really enjoyed your posts of the years, amazing ideas/craftsmanship. Keep them coming!
I had time for a quick trim and test fit on the LJ.
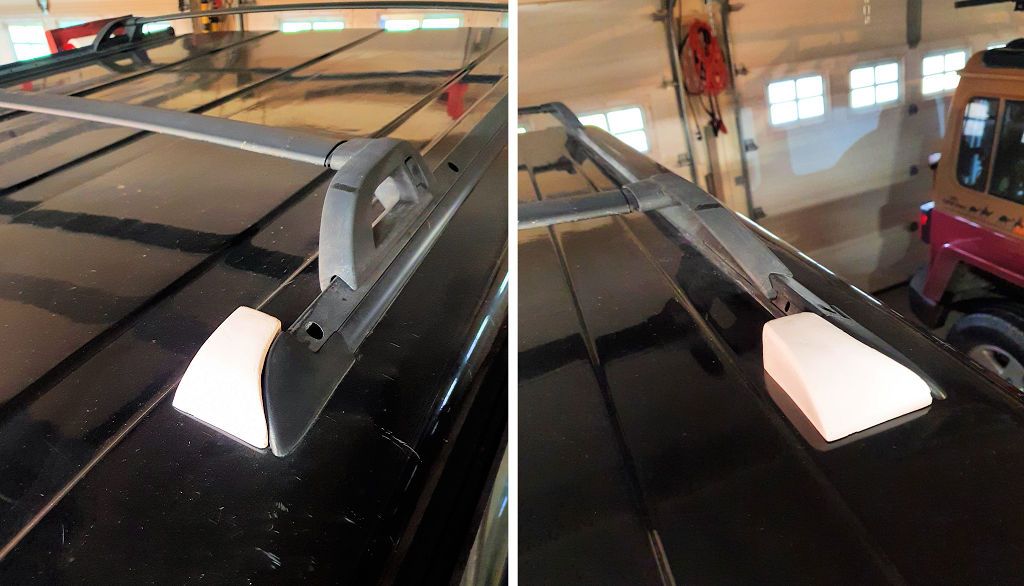
A little more trimming to do, but the fit is pretty good already. It'll look like it's an original part of the roof rack when it's painted black and installed.
jscherb
Expedition Leader
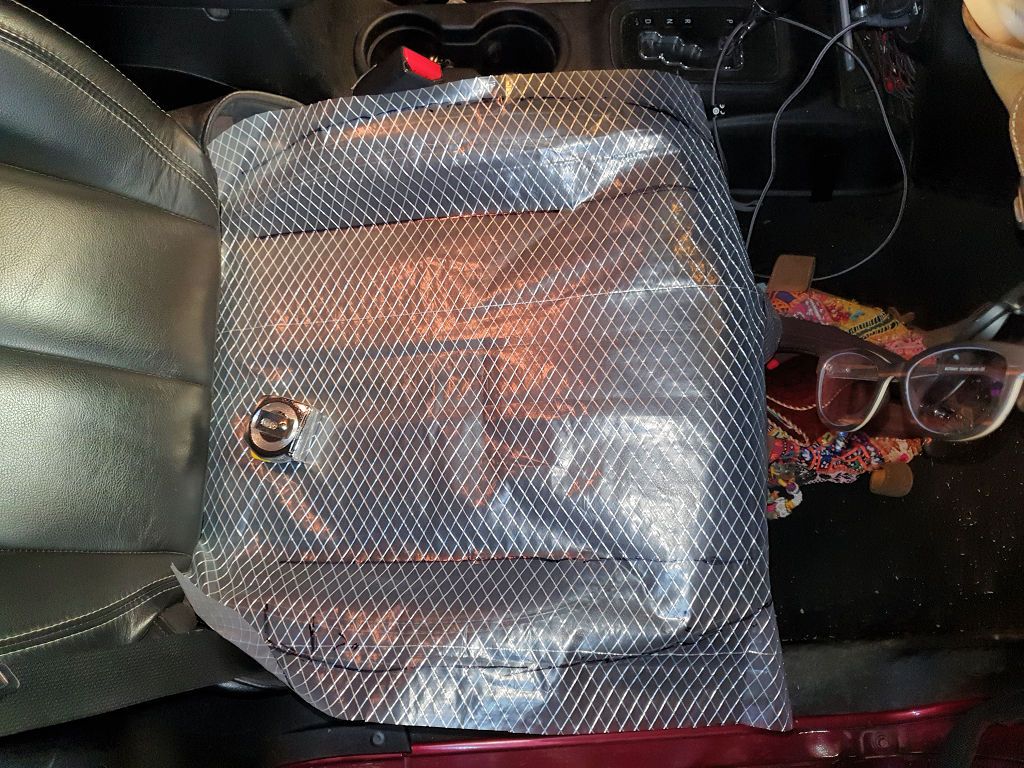
I've started on the seat cover project... the first step in making something fitted like a seat cover is a preliminary pattern. I use a material called Dura-Skrim, it's a reinforced clear plastic. It can be put over the item to be patterned and a Sharpie marker is used to draw the contours. In this photo, I've drawn the outline of the seat base and the locations of the center recess:
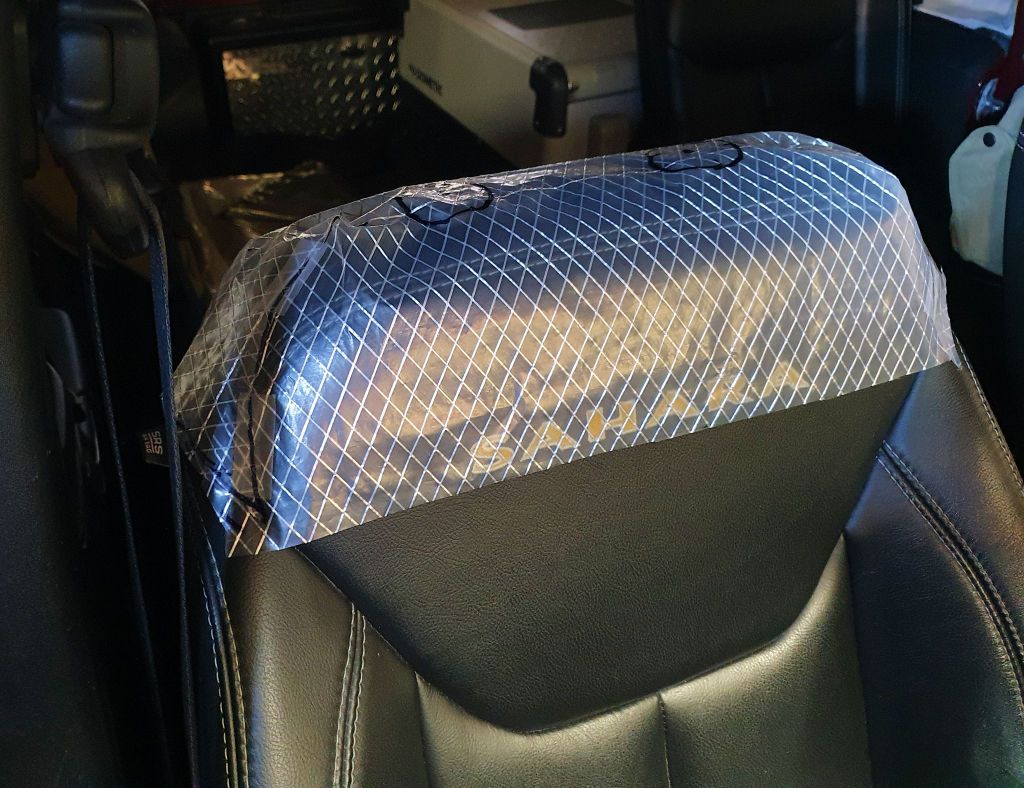
I did the same for the seat back, and then I patterned a "cap" for the top of the seat. In this case, the skrim is cut to fit, seams are cut at the corners and clear tape is used to secure the seams.
The preliminary pattern laid out on the fabric:
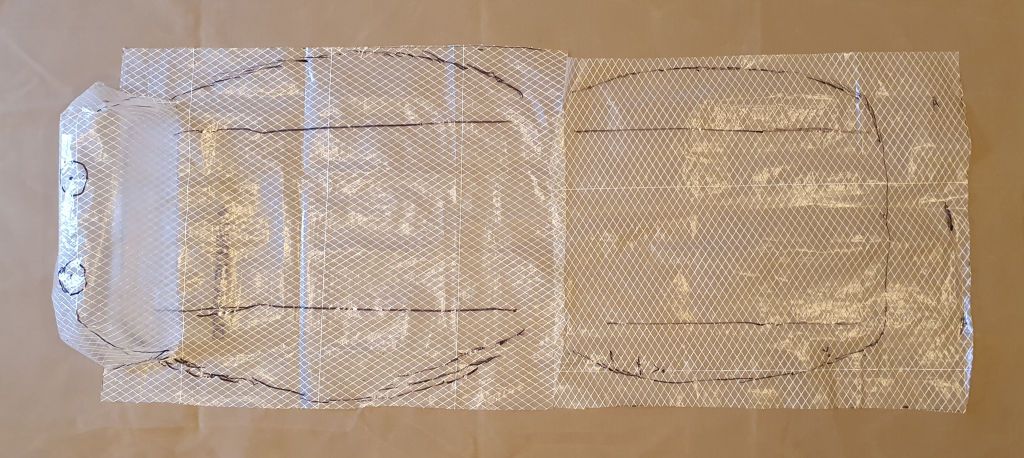
The next step is to take these preliminary patterns down to the Jeep dealer and check them against a JL/JT seat. I'll use a different color sharpie marker to trace any differences and they I can make decisions on how to best do a one-size-fits-both-well pattern.

I did the same for the seat back, and then I patterned a "cap" for the top of the seat. In this case, the skrim is cut to fit, seams are cut at the corners and clear tape is used to secure the seams.

The preliminary pattern laid out on the fabric:

The next step is to take these preliminary patterns down to the Jeep dealer and check them against a JL/JT seat. I'll use a different color sharpie marker to trace any differences and they I can make decisions on how to best do a one-size-fits-both-well pattern.
jscherb
Expedition Leader
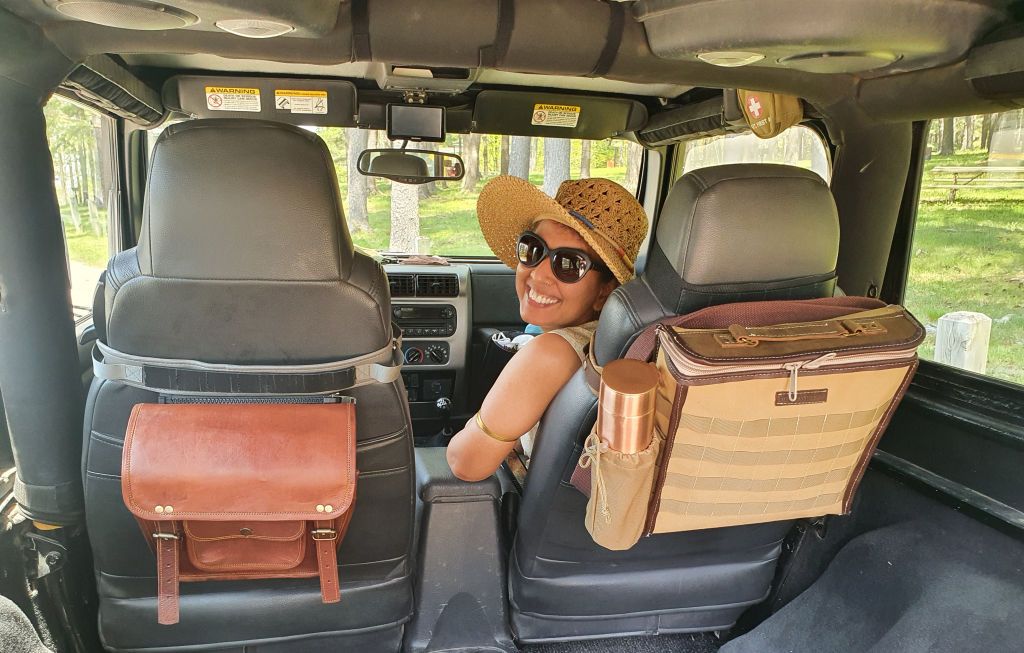
Today I received a preproduction sample "Cool Bag". This is a design I did earlier this year, it's an insulated bag sized to hold a picnic lunch for two people - for example 2 12" subs, two drinks plus some snacks, and with PALS grids on the front and sides MOLLE pouches and bottle holders can be added to expand its carrying capacity. It's got a shoulder strap for carrying away from the Jeep, and a Zip & Go zipper on the back to hang it on a seat back.
On the back of the JKU driver's seat:
.jpg)
And on the LJ seat, this time with a MOLLE bottle holder on the side PALS grid to carry another drink:
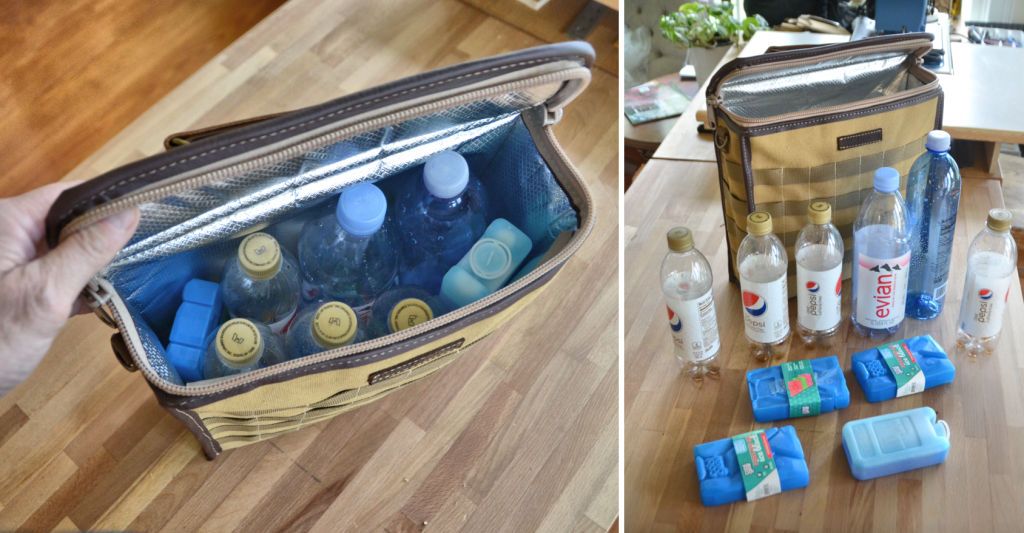
Inside the bag, testing how many drinks plus cold packs it can carry:
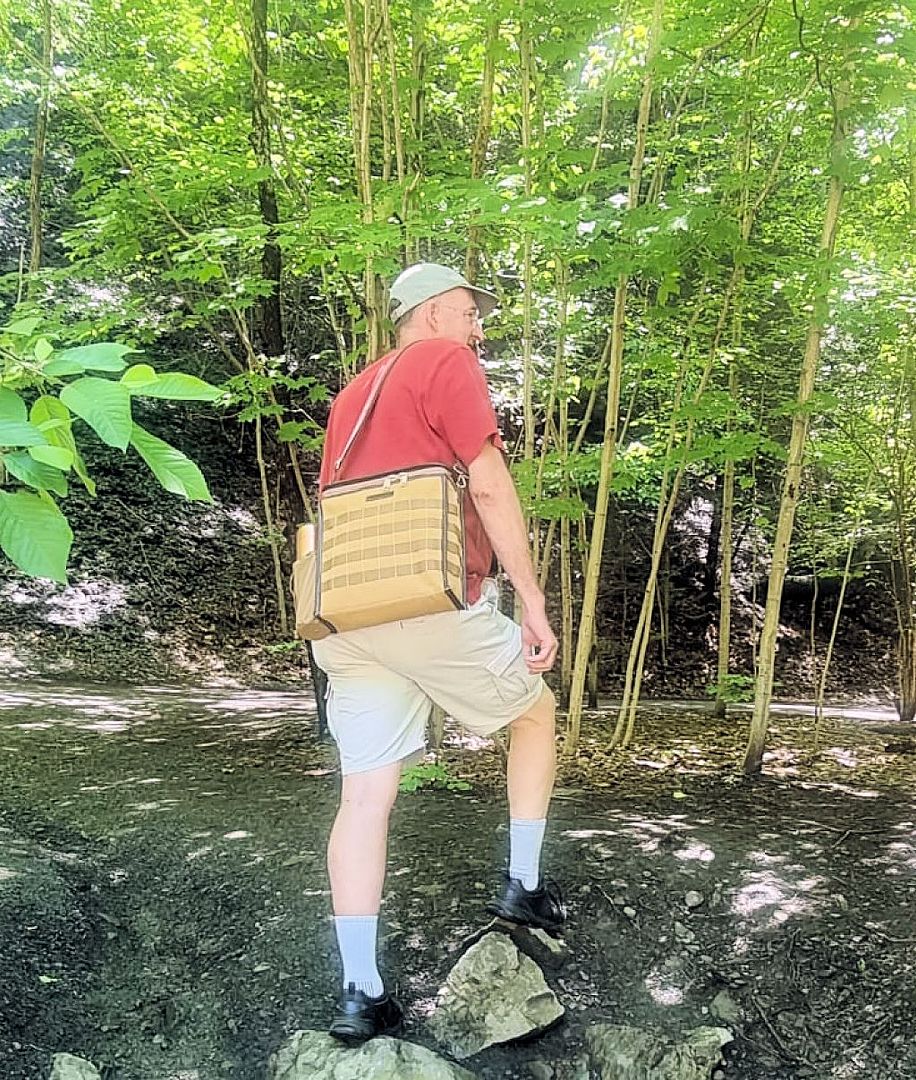
On the way to a picnic spot:
All of the photos above are of the prototype that I sewed; we've used it many times this year for our picnics.
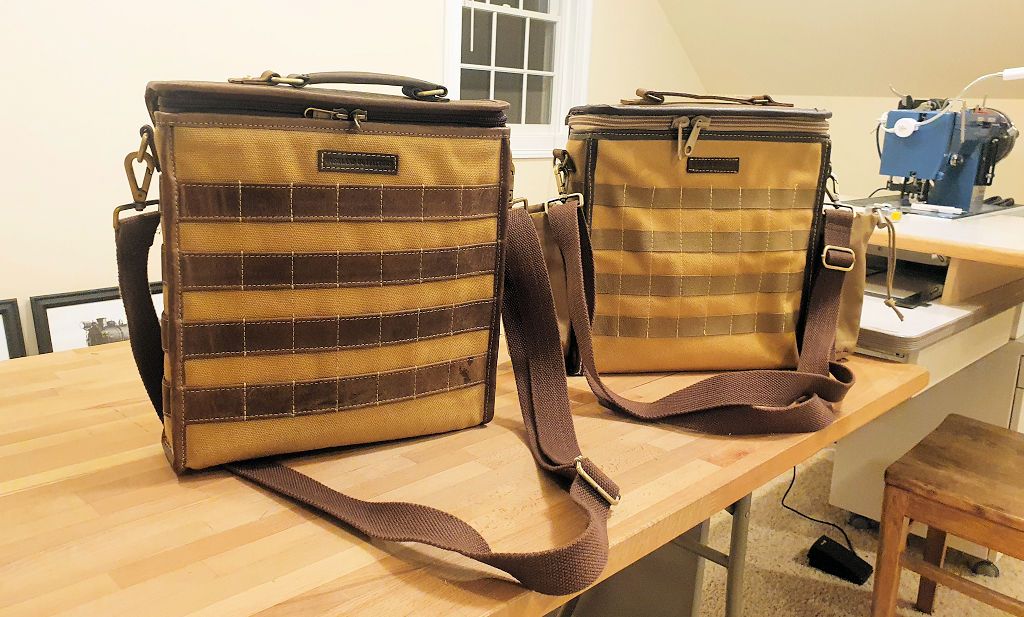
It'll be in production very soon; here are some photos of the preproduction sample that arrived today (my prototype is on the right in the next two photos):
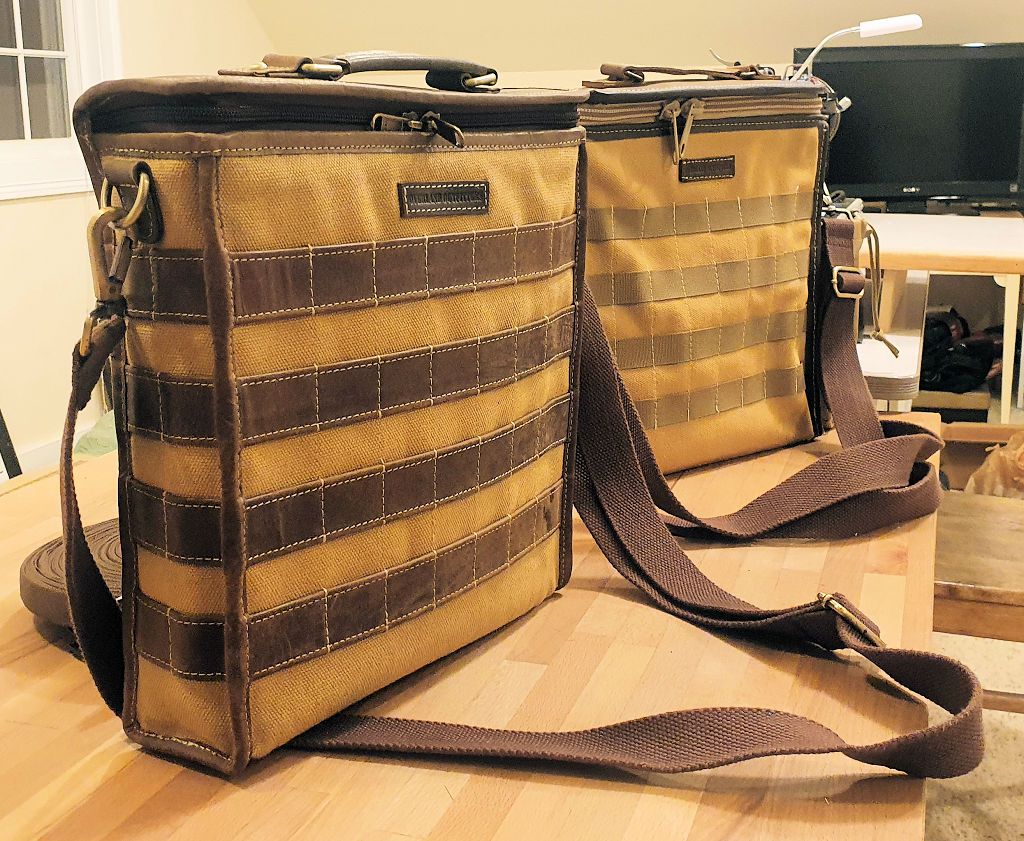
Inside:
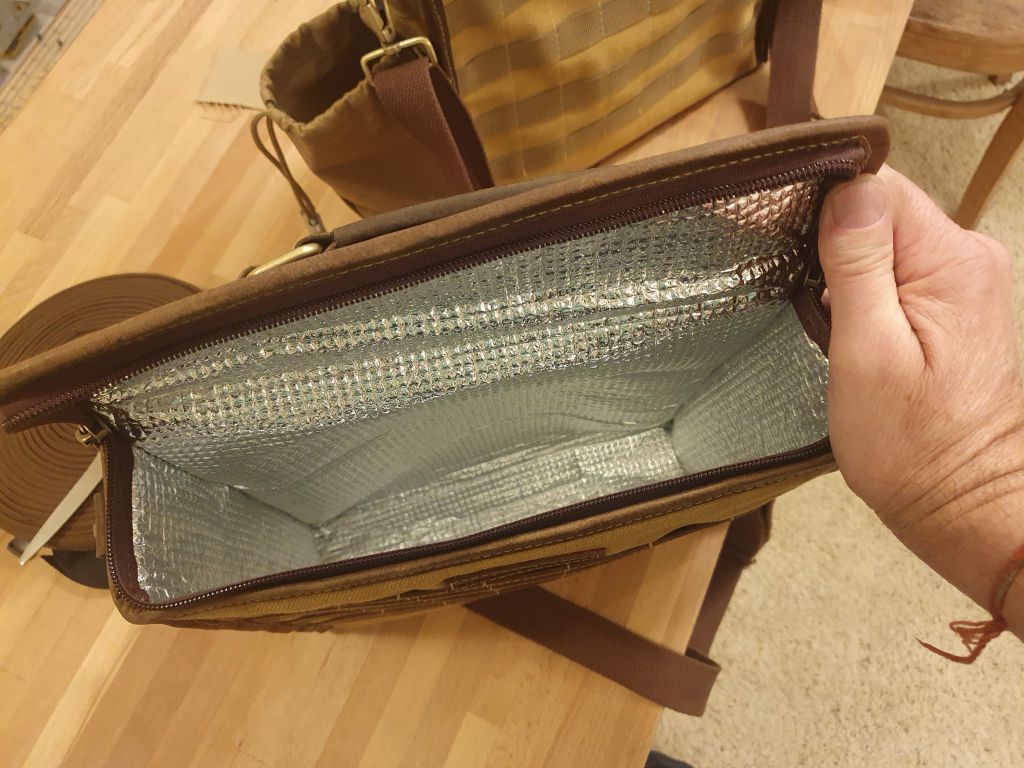
The PALS grids on this sample are leather; I plan to tell the company these can be webbing as on my prototype instead of the leather on this preproduction sample but it's their call (it's a cost decision they can make).
The craftsmen at OO did a nice job on this one, hopefully someday I'll have reach their sewing skill level .
.
On the back of the JKU driver's seat:
.jpg)
And on the LJ seat, this time with a MOLLE bottle holder on the side PALS grid to carry another drink:

Inside the bag, testing how many drinks plus cold packs it can carry:

On the way to a picnic spot:

All of the photos above are of the prototype that I sewed; we've used it many times this year for our picnics.
It'll be in production very soon; here are some photos of the preproduction sample that arrived today (my prototype is on the right in the next two photos):


Inside:

The PALS grids on this sample are leather; I plan to tell the company these can be webbing as on my prototype instead of the leather on this preproduction sample but it's their call (it's a cost decision they can make).
The craftsmen at OO did a nice job on this one, hopefully someday I'll have reach their sewing skill level
jscherb
Expedition Leader
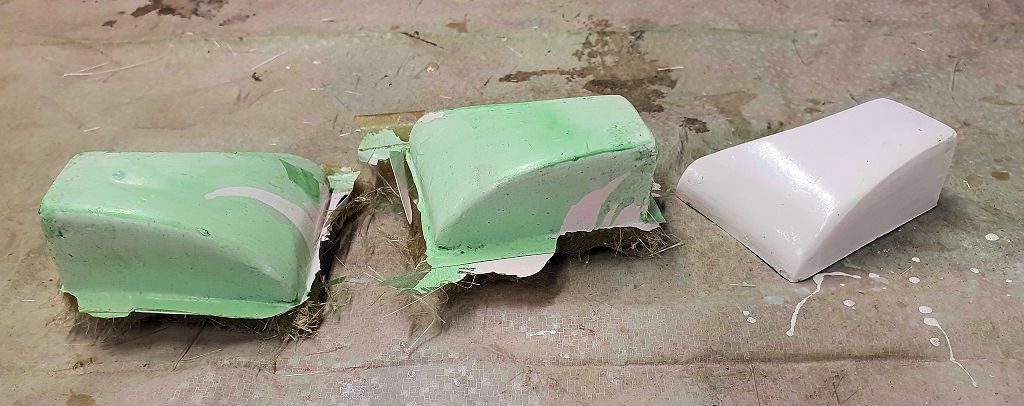
In case you're wondering what fiberglass parts look like just out of the mold, I molded another set of power connection housings and popped them out of the mold this evening. The green is PVA mold release, it washes off with water. On the right is one of the ones I made the other day, it's washed and trimmed.

jscherb
Expedition Leader
Yesterday I did a quick test of the seat cover pattern fit in a JL at the local Jeep dealer:
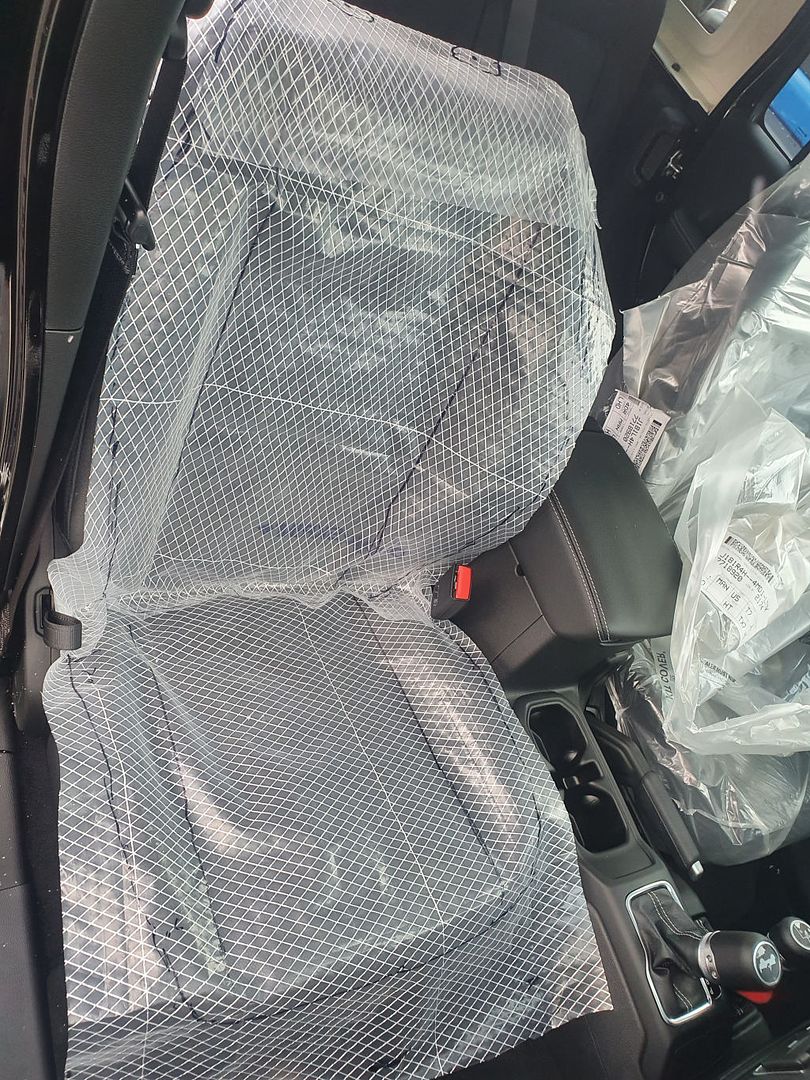
The test showed two very minor tweaks necessary to the pattern to fit the JL and JT well, so making one-size-fits-both-well seat covers for the JK and JL/JT will be very possible.
There's one more thing to accomodate, which as far as I know no seat covers on the market do well. My JKU and many other JK's and JL's have air bags in the side of the seats:
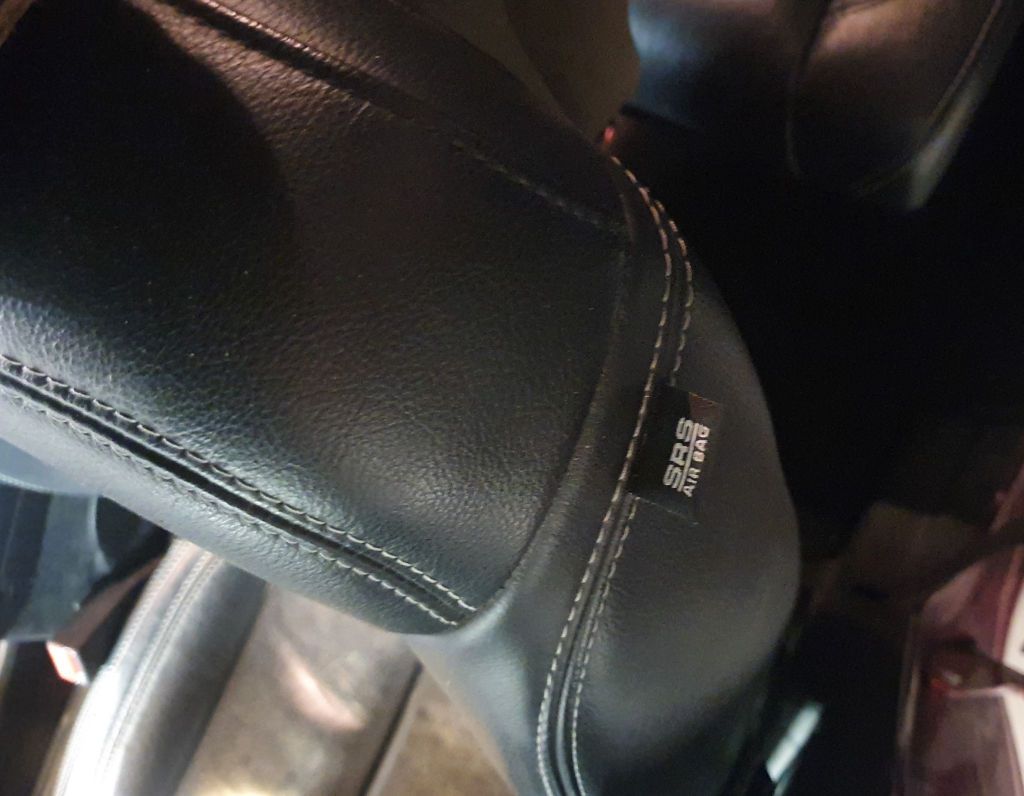
My design for the seat covers does allow the side air bags to deploy properly.
Now that I've verified the pattern on the JK and JL, it's time to sew a first prototype. I'll probably start after Thanksgiving.

The test showed two very minor tweaks necessary to the pattern to fit the JL and JT well, so making one-size-fits-both-well seat covers for the JK and JL/JT will be very possible.
There's one more thing to accomodate, which as far as I know no seat covers on the market do well. My JKU and many other JK's and JL's have air bags in the side of the seats:

My design for the seat covers does allow the side air bags to deploy properly.
Now that I've verified the pattern on the JK and JL, it's time to sew a first prototype. I'll probably start after Thanksgiving.
jscherb
Expedition Leader
I'm on the Indie Campers mailing list and I just got an email - they're having a Black Friday sale. Rentals on JLU's with roof top tents and full Trail Kitchens on sale for $76 per night. Seems like a good way to try out overland camping before you invest a fortune in your own gear.
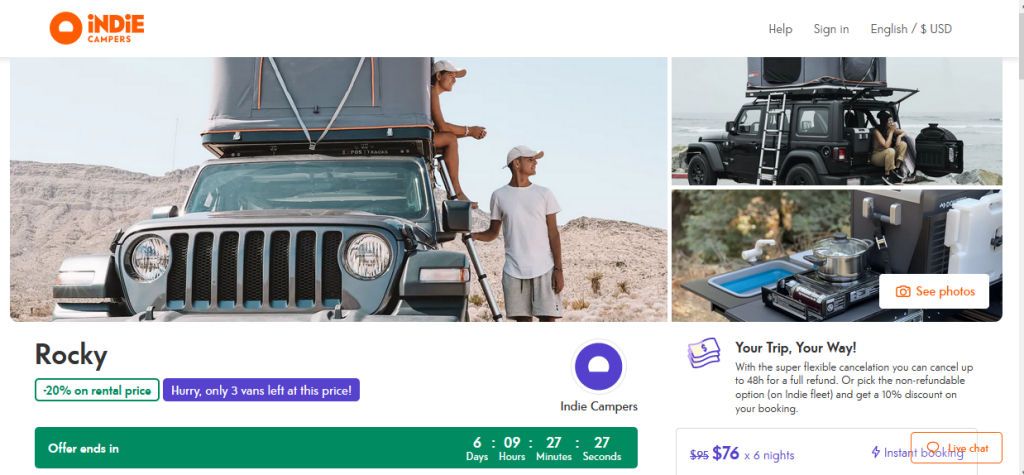
BTW the only way I know about Indie is because MORryde told me they sold a bunch of Trail Kitchens to them, before MORryde told me that I had never heard of them.

BTW the only way I know about Indie is because MORryde told me they sold a bunch of Trail Kitchens to them, before MORryde told me that I had never heard of them.
jscherb
Expedition Leader
Haven't had too much time to work on the rooftop power connection project but I got a few minutes yesterday so I fitted the power connectors into the housings:
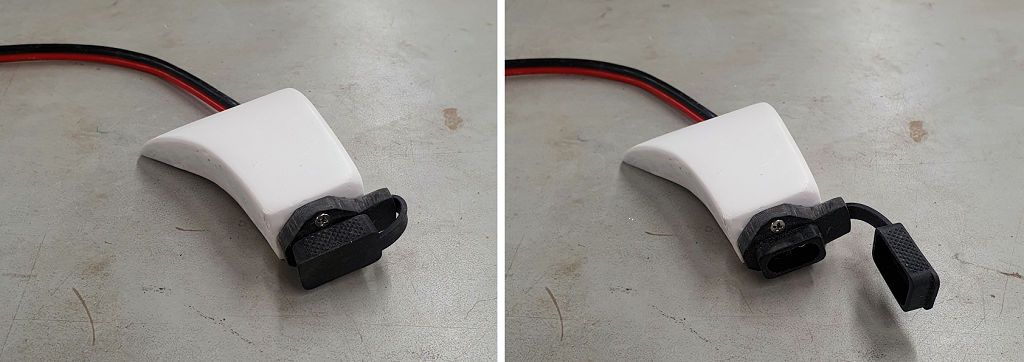
And finished trimming the housings to fit the roof. A few photos of the housings in place (without the connectors).
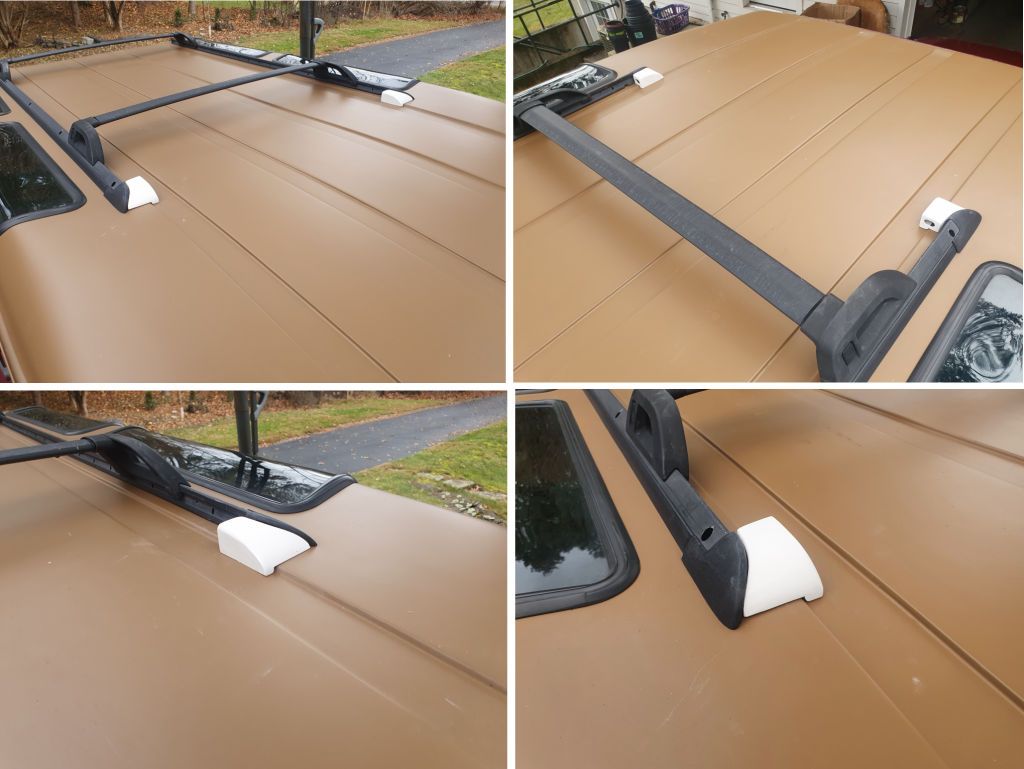
Between the housing and the roof will be an EPDM rubber gasket to seal the holes in the roof. The housings will have two studs on the bottom that will be used to attach them to the roof, and to pass power through the roof - the ends of the studs inside the roof will be where connections will be made. Using the studs to pass power means I won't have to drill holes for the wires to pass through, all I'll need to drill are two smaller holes for the mounting studs.

And finished trimming the housings to fit the roof. A few photos of the housings in place (without the connectors).

Between the housing and the roof will be an EPDM rubber gasket to seal the holes in the roof. The housings will have two studs on the bottom that will be used to attach them to the roof, and to pass power through the roof - the ends of the studs inside the roof will be where connections will be made. Using the studs to pass power means I won't have to drill holes for the wires to pass through, all I'll need to drill are two smaller holes for the mounting studs.
Last edited:
jscherb
Expedition Leader
OO just sent me this video - they've had a deal for a while that if one of their customers posts a review OO will send them an Amazon Gift card. I don't think too many people have taken advantage of that offer, but this guy did:
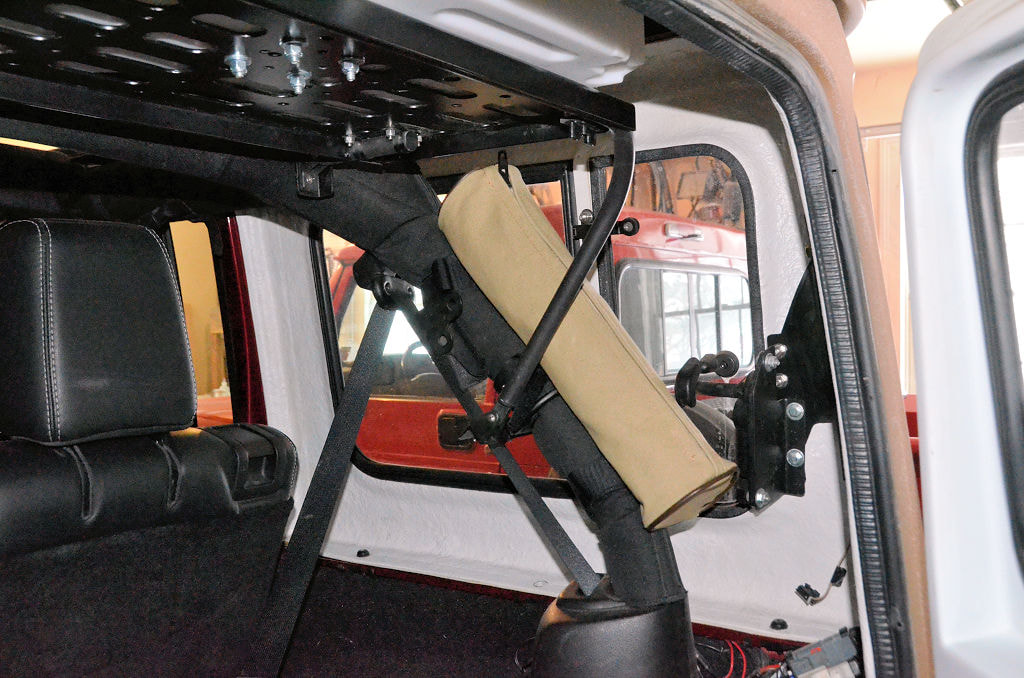
I can't use one of these on my JK Tailgate because I have a MORryde Storegate storage compartment on the tailgate instead of one of those tables, but I do use one rolled up in an OO Roll Bar Bag.
Recently, at the request of OK4WD (a Goose Gear reseller) I did a design for a Cutlery Keeper for the new Goose Gear tailgate table, so now OO has these for JK and JL Trailgaters and for Goose Gear.
I can't use one of these on my JK Tailgate because I have a MORryde Storegate storage compartment on the tailgate instead of one of those tables, but I do use one rolled up in an OO Roll Bar Bag.

Recently, at the request of OK4WD (a Goose Gear reseller) I did a design for a Cutlery Keeper for the new Goose Gear tailgate table, so now OO has these for JK and JL Trailgaters and for Goose Gear.
jscherb
Expedition Leader
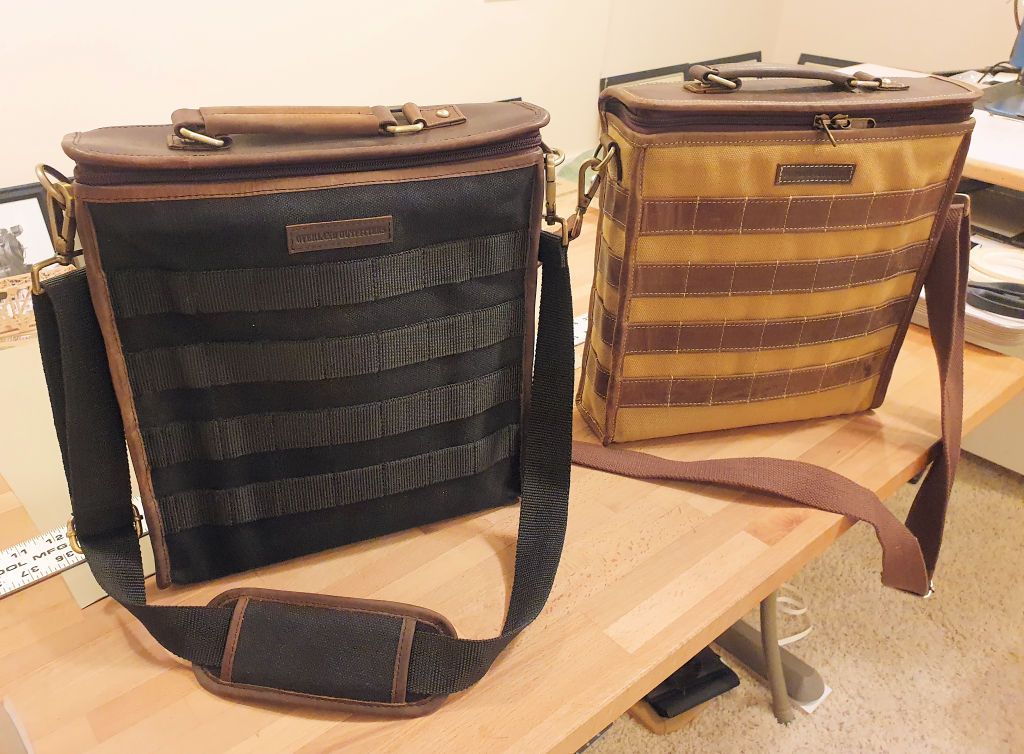
Today one of the first production Cool Bags arrived. Shown next to the last preproduction version they sent me, they made the few minor tweaks I suggested so I'll tell them I think these are ready to go. They plan to offer them in both black and tan; both with PALS/MOLLE grids in webbing as on this black one rather than the leather as on the last preporduction one (webbing on the tan version will be tan).Today I received a preproduction sample "Cool Bag". This is a design I did earlier this year, it's an insulated bag sized to hold a picnic lunch for two people - for example 2 12" subs, two drinks plus some snacks, and with PALS grids on the front and sides MOLLE pouches and bottle holders can be added to expand its carrying capacity. It's got a shoulder strap for carrying away from the Jeep, and a Zip & Go zipper on the back to hang it on a seat back.
On the back of the JKU driver's seat:
.jpg)
And on the LJ seat, this time with a MOLLE bottle holder on the side PALS grid to carry another drink:

Inside the bag, testing how many drinks plus cold packs it can carry:

On the way to a picnic spot:

All of the photos above are of the prototype that I sewed; we've used it many times this year for our picnics.
It'll be in production very soon; here are some photos of the preproduction sample that arrived today (my prototype is on the right in the next two photos):


Inside:

The PALS grids on this sample are leather; I plan to tell the company these can be webbing as on my prototype instead of the leather on this preproduction sample but it's their call (it's a cost decision they can make).
The craftsmen at OO did a nice job on this one, hopefully someday I'll have reach their sewing skill level.
Pretty cool (pun intended
jscherb
Expedition Leader
Also arrived yesterday - production Roll Bar Buddies and TJ seat back Zip & Go/Molle attachments (probably not production packaging though, the plastic bags seem too big). And a new catalog:
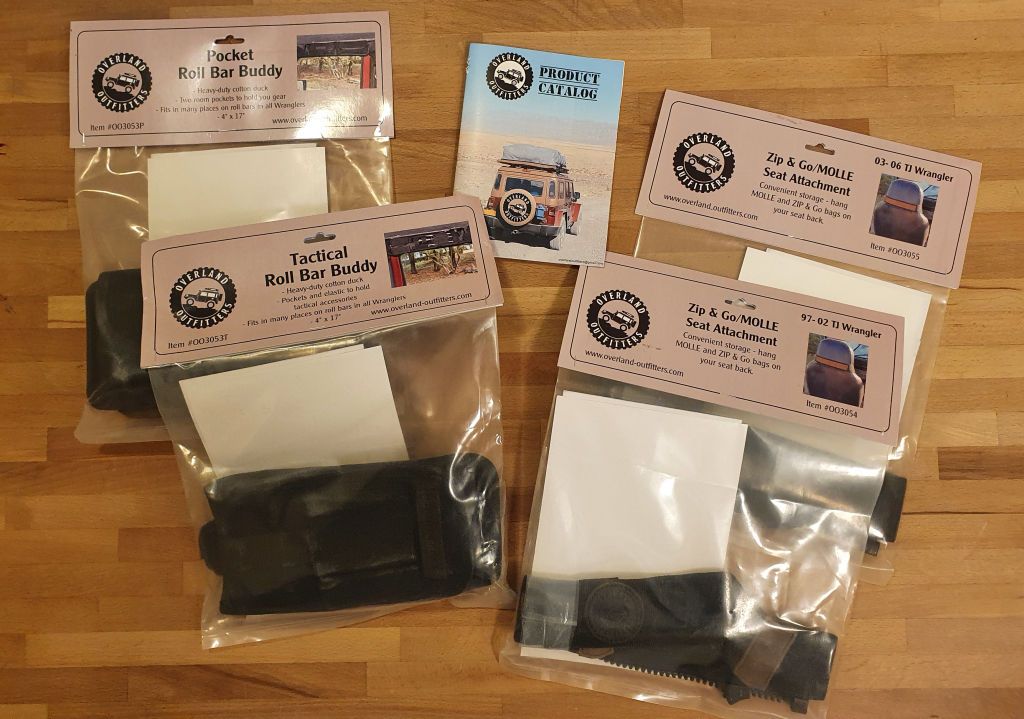
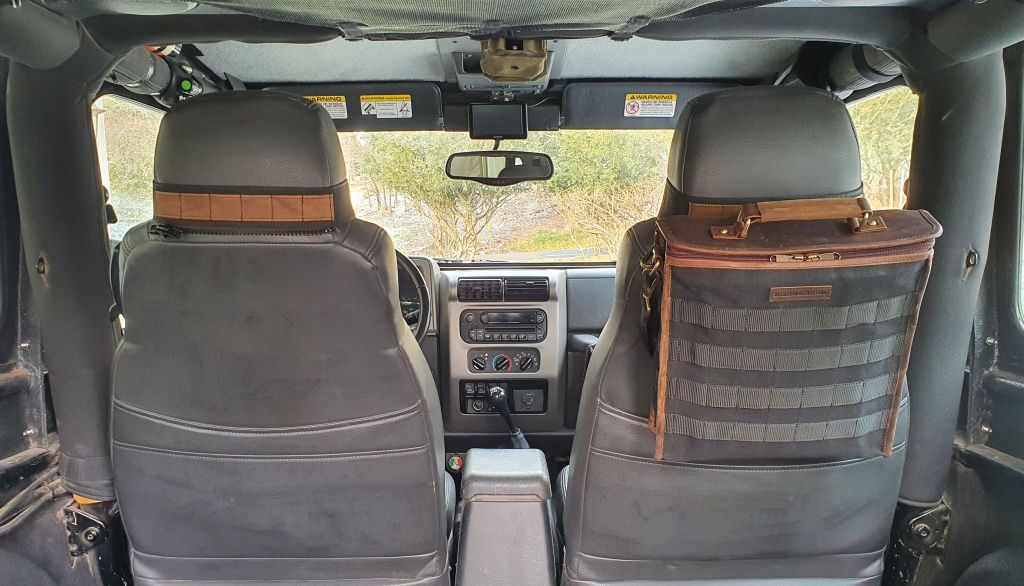
There are two versions of the TJ seat back attachments - '97-'02 and '03-'06. I checked out the later model version in my LJ this morning. Empty on the left., you can see the PALS/MOLLE strip and the zipper; on the right the black production Cool Bag is zipped in place:
I've been using preproduction Roll Bar Buddies in all 3 of my Jeeps for a few weeks now. I've got the tactical version on the driver's side and the pocket version on the passenger side. I've got them all outfitted like this:
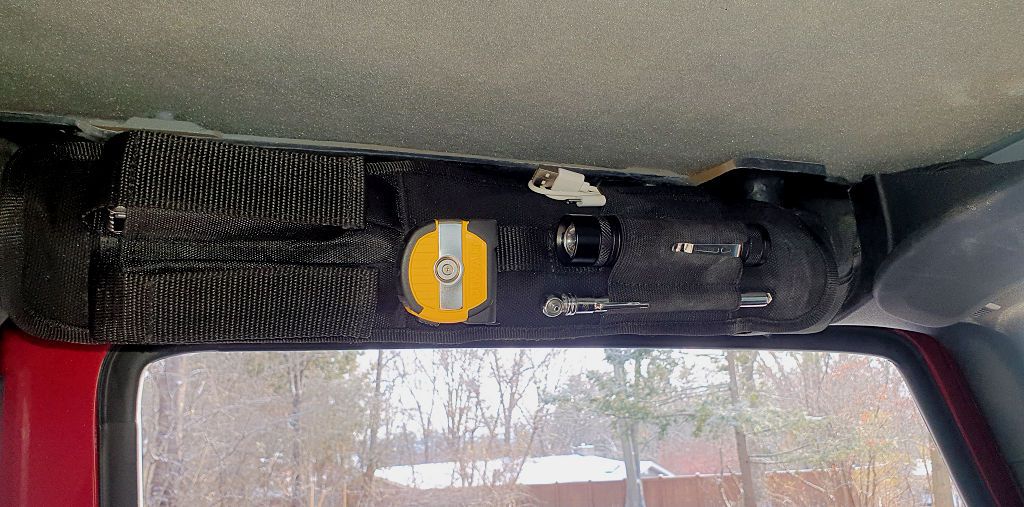
In each Jeep there's a multitool, a pocket knife (both in the pockets), a flashlight, a tape measure (I often need to measure something when I get a design idea ), a tire pressure gauge and a charge cable for the flashlight all conveniently accessible above the driver's door. On the passenger side pocket version my copilot keeps her sunglasses, extra masks and I don't even know what else.

There are two versions of the TJ seat back attachments - '97-'02 and '03-'06. I checked out the later model version in my LJ this morning. Empty on the left., you can see the PALS/MOLLE strip and the zipper; on the right the black production Cool Bag is zipped in place:

I've been using preproduction Roll Bar Buddies in all 3 of my Jeeps for a few weeks now. I've got the tactical version on the driver's side and the pocket version on the passenger side. I've got them all outfitted like this:

In each Jeep there's a multitool, a pocket knife (both in the pockets), a flashlight, a tape measure (I often need to measure something when I get a design idea
jscherb
Expedition Leader
I finally had some time to finish the rooftop power pods, they're now ready to install.
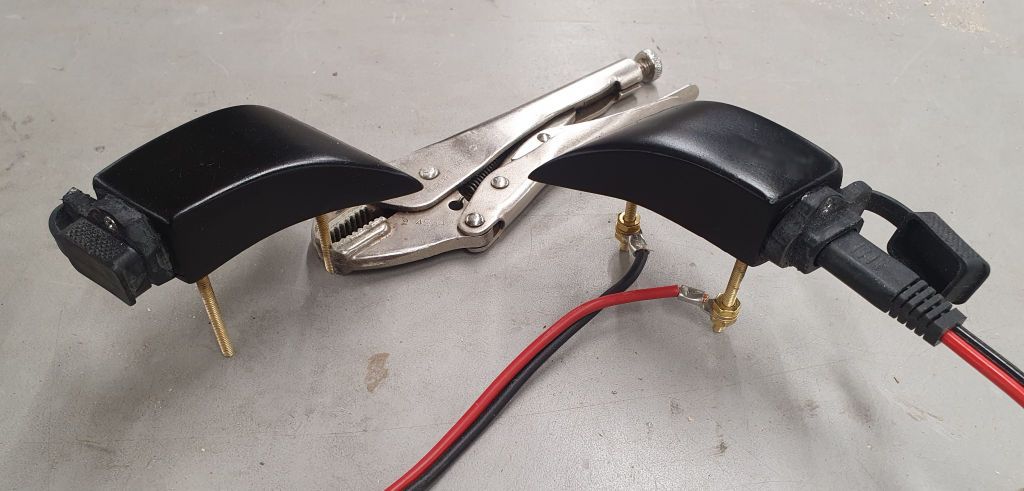
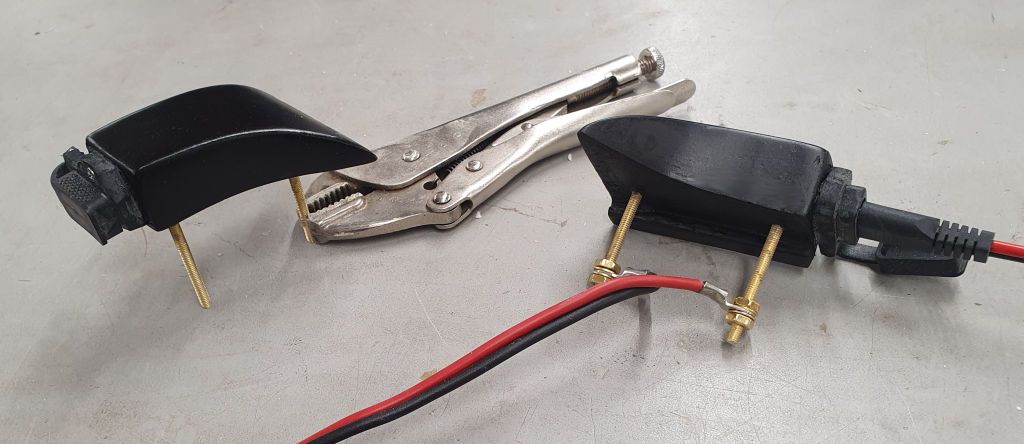
The studs on the bottom are both to secure the pod to the roof and to conduct power through the roof - I'm using them as conductors to minimize the number of holes to make (and seal) in the roof. I've left the studs long for now but I'll trim them to the right length when I install them.
A couple of photos of the mold master I took early in the project, to show where these pods will install, the photo at left was edited to "install" the connector:

This set is for the JKU and I molded a second set for the LJ because both have XJ Cherokee racks on the roof. Haven't worked on the ones for the LJ yet.


The studs on the bottom are both to secure the pod to the roof and to conduct power through the roof - I'm using them as conductors to minimize the number of holes to make (and seal) in the roof. I've left the studs long for now but I'll trim them to the right length when I install them.
A couple of photos of the mold master I took early in the project, to show where these pods will install, the photo at left was edited to "install" the connector:

This set is for the JKU and I molded a second set for the LJ because both have XJ Cherokee racks on the roof. Haven't worked on the ones for the LJ yet.
Similar threads
- Replies
- 7
- Views
- 3K
- Replies
- 2
- Views
- 2K
- Replies
- 1
- Views
- 2K
- Replies
- 2
- Views
- 2K

