Barn Door for JK factory hardtops

Jurfie

Adventurer
Most of that doesn't apply to the rear window (except the option of just letting it hang down inside), but the main reason I decided to make it go down is because the visibility out the back of a JK is already poor and a rolled down window won't be in the line of vision. A rolled up window pretty much always hangs down a bit in the window opening, no matter how tight you try to roll it.

Maybe I'll change my mind after sewing a prototype to test, but that's why I designed it to roll down.

Roll down side doors make sense, for the reasons you mentioned. The factory rear window rolls up; probably mostly because it then tucks inside the roof nicely when you put the soft top down. Not an issue with the soft barn. I guess the more I think about it, the more it doesn't really matter how it rolls, because the whole door and window opens together with your design (which is awesome, BTW).

Spice fabric looks great, too!
 

jscherb

Expedition Leader
Roll down side doors make sense, for the reasons you mentioned. The factory rear window rolls up; probably mostly because it then tucks inside the roof nicely when you put the soft top down. Not an issue with the soft barn. I guess the more I think about it, the more it doesn't really matter how it rolls, because the whole door and window opens together with your design (which is awesome, BTW).

When I get a prototype sewn I'll post photos and videos of it and people can tell me if they think that the window rolling down is the right way to go. I'll probably get to the sewing by the end of the week.

Spice fabric looks great, too!

I really happy with it - what a great color match, and the denim texture is really nice too.
 

jscherb

Expedition Leader
Getting the Spice fabric today and seeing what a great match it is with the paint made me do a few new color renditions this afternoon - here are a couple with matching Spice soft sides rolled up and rolled down.

SpiceSoftSides1_zpswagmqkzd.jpg


SpiceSoftSides2_zpseyjxbrf4.jpg
 

jscherb

Expedition Leader
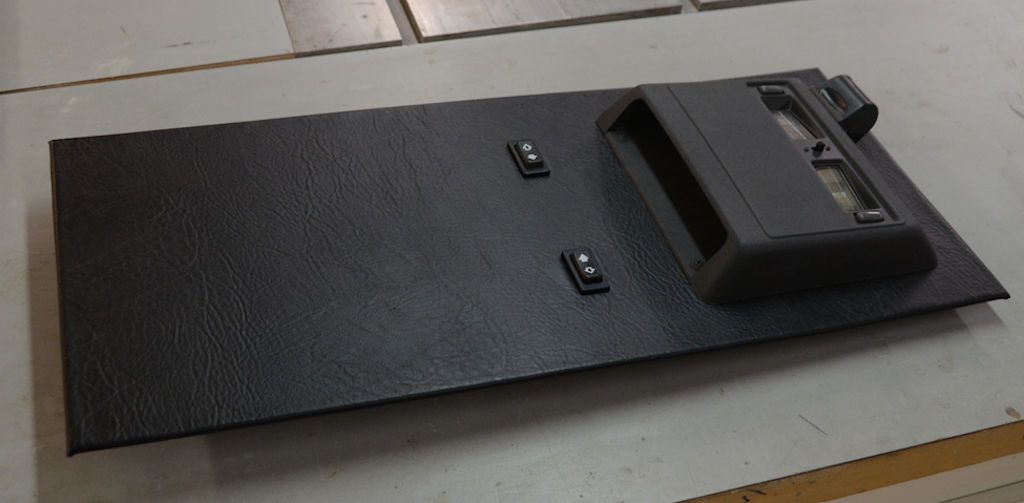
I made up the overhead console section of the roof interior yesterday. It's got a console with overhead lights and a small storage compartment, a power outlet, and the switches for the power vent windows.

OverheadConsole2_zpsgbqekdqp.jpg


The small switch between the lights in the center of the console changes the behavior of the power outlet from unswitched power to switched power.

I've wired everything in this unit, so the only wiring I have left to do are the extensions that go from this to the plug that I've already installed at the back of the tub, and two extensions to go from here to the power vent window motors. All of that will be done and tested within the next few days.

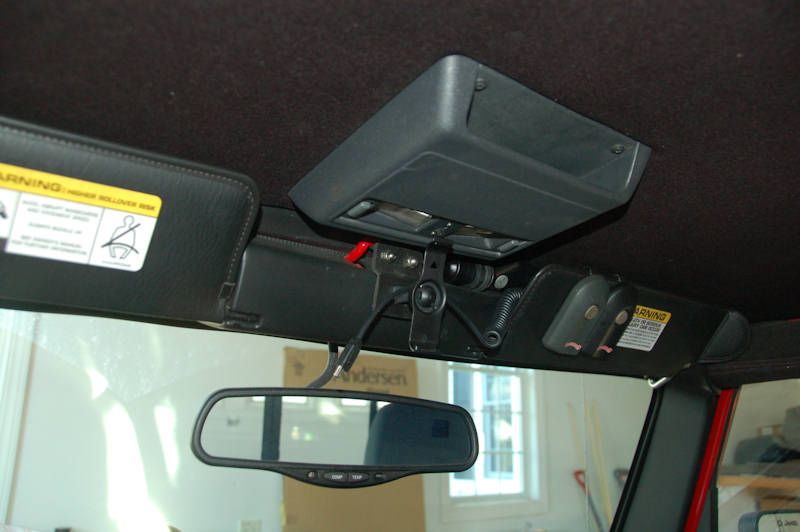
This next shot shows it being test fit it in the roof; the full headliner is still to be done.

OverheadConsole3_zpswegcypr3.jpg
 

jscherb

Expedition Leader
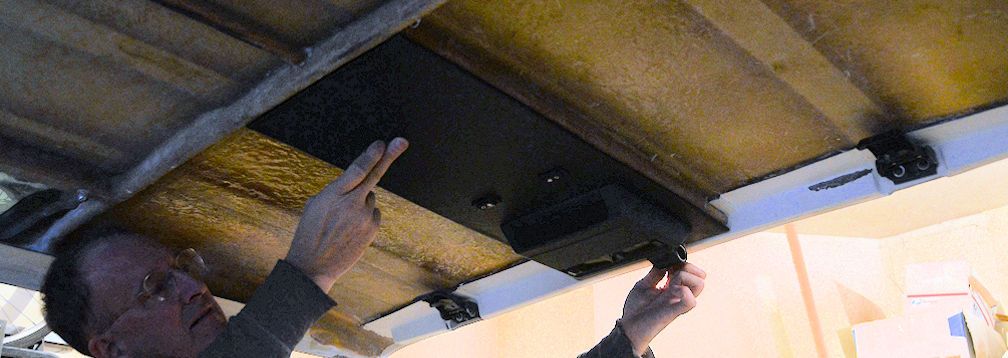
Here's a view of the JK Safari Cab I haven't shown yet... I'm finalizing the wiring inside the hardtop, so I've got the hardtop assembled and upside down on sawhorses.

HardtopWiring1_zpsfpnnzlbz.jpg
 

jscherb

Expedition Leader
Always liking your designs Jeff. Just curious what you anticipate charging from above?
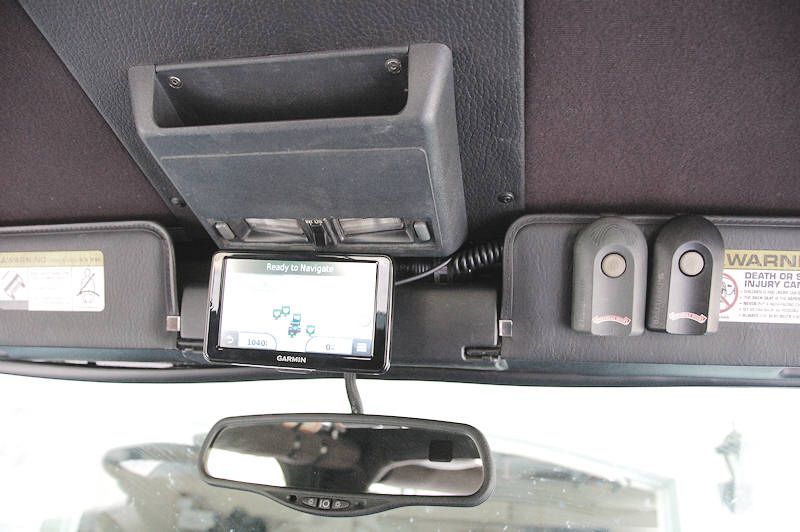
In my LJs I mount my GPS up there, it's a very convenient place for it - out of the line of visibility but easily seen and reachable.

GPSMount13_zps396490a6.jpg


GPSMount12.jpg
 

Comanche Scott

Expedition Leader
Here's a view of the JK Safari Cab I haven't shown yet... I'm finalizing the wiring inside the hardtop, so I've got the hardtop assembled and upside down on sawhorses.
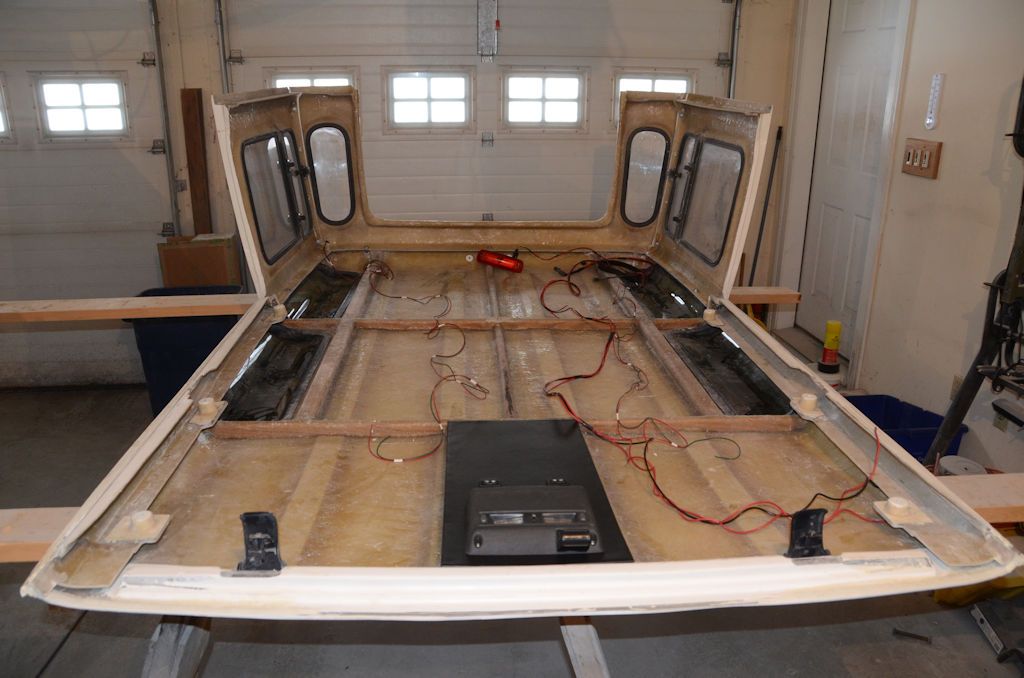
HardtopWiring1_zpsfpnnzlbz.jpg

My favorite part of this view, is that the Jeep isn't attached. :beer:

I need to "borrow" your idea on the center console for another build I'm doing. That is great! :)
 

jscherb

Expedition Leader
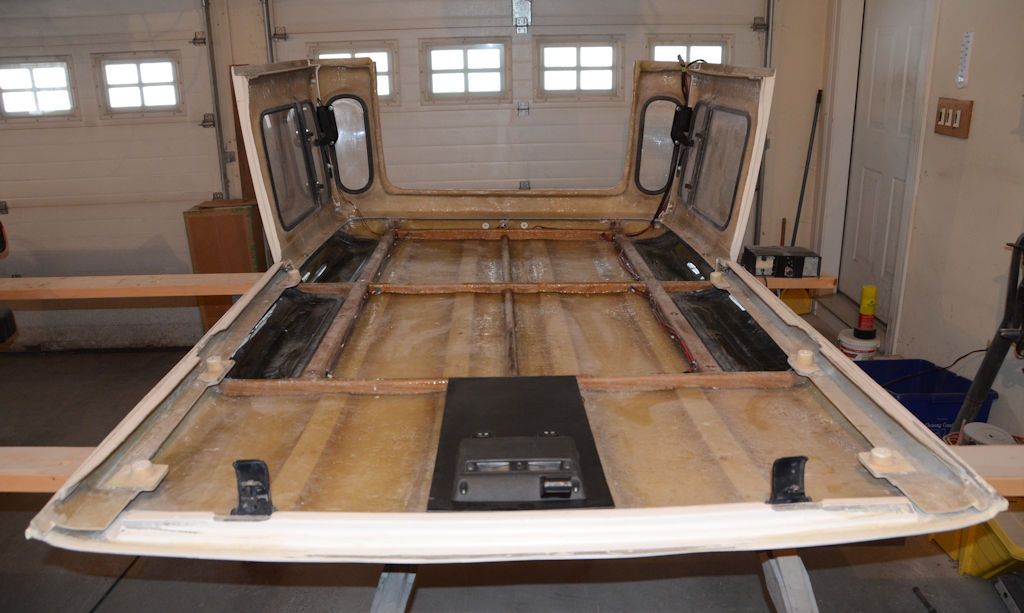
Wiring inside the hardtop is all done and all the wires are routed so they'll be under the headliner when the headliner is installed. The plugs to connect it to the Jeep are at the bottom passenger corner of the hardtop (top right in this photo since it's upside down). I've got it connected to a 12v power supply for testing, but the necessary wiring/plugs is all in the Jeep so when the hardtop goes back on it'll all plug in. The power vent motors are installed and working.

HardtopWiringDone_zpsna6r4pd8.jpg


Here's a video showing to operation of the vent windows. Because of the lighting you may have to look closely to see the vents opening and closing...


jscherb

Expedition Leader
Since I've made a few minor adjustments to the fit of some of the parts, I'm verifying the fit once more of the alternate side options.

Cargo door side:

SidePanelsCargo_zpsf4ugkspt.jpg


The rear door jambs for the soft sides (maybe I should call them "c-pillars"):

SidePanelsSoftSides_zpspcqlydgy.jpg


And back to the vent window sides.

SidePanelsVents_zpsmur1f2p9.jpg
 

jscherb

Expedition Leader
Looking good Jeff.

So are you doing separate connectors that tuck into the headliner for the powered vent windows?
If so, and you haven't already bought connectors, Deutsch has some nice mounting tabs for the AT/DT series that would make a very clean install.
here is an example:
http://www.deutschconnector.com/pro...ories/deutsch_connector_mounting_accessories/

Thanks. I'm using the connectors that came with the vent motors - when I grabbed the motors out of the Chevy minivan in the junkyard I got both sides of the connectors. That way the Chevy motors are direct bolt-ins, so if I ever need a new motor I can just get the Chevy part and swap it in.
 

Comanche Scott

Expedition Leader
Good idea. Pretty sure Chevy and aftermarket have pigtail/connector repair kits as well.
I like the idea of fixing one side of the connector with the mounting tab. It makes it easier to plug, and unplug, the connectors once installed.
 

Forum statistics

Threads
188,026
Messages
2,901,338
Members
229,411
Latest member
IvaBru
Top