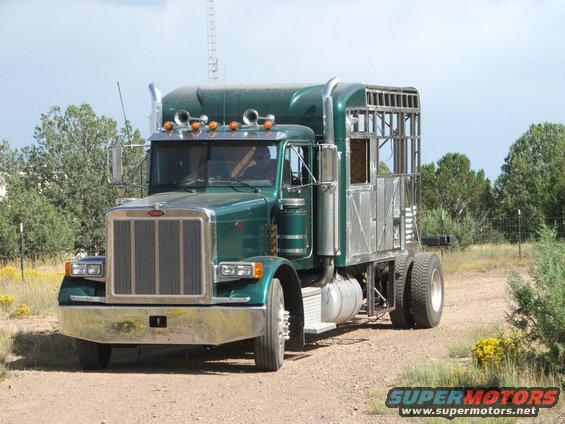
BIG TRUCK - little budget

apexcamper

Carefully scripted chaos
Voltage voltage voltage

@RoosterBooster
I too really want to keep the CG low, Going for all composite box, nothing above the waistline except some overhead cabinets, and only solar on the roof. No heavy pop-top or anything. May have a roof rack on the cab. I am also trying to keep the box as low as possible and still remain flexible. I'm sketching up my idea for the camper frame, I'll post that tomorrow.

@naterry
Great info, I am going to try and get some closer photos of the confusing joints, if you get bored, I would appreciate you giving them a look.

@desertrover
I am so glad we hit on this subject before I spent too much money. I get the benefits to 24v in terms of battery banks, wiring, and the such, running longer distances without much loss...the problem I am finding is that the world doesn't run on 24v.
Every time I start making my shopping list, the mobile appliances and gadgets are all in 12v. Frig/freeze - 12v...hot water heater, works off 12v and propane or 110v...no 24v. The 24v stuff I have found has been marine grade, awesome, but PRICEY.
I want to do this truck right, and I really believe 24v for house batteries is the way to go, but I am open to suggestions after that.

Do high-amp (2500 watt) 24v to 110v inverters have a lot of loss?
How does it compare to 24v to 12v converters?

I welcome suggestions. My current plan it to use small, cheap, low amp 24v to 12v converters attached to all my 12v items. All the lines will be 24v from the circuit breakers (had breakers in my Pinzgauer, can never go back to fuses) to the appliance, with a converter right at the appliance matched to the amp draw. Breaker open, no vampire draw. This will allow each appliance to have it's own breaker and only bleed power when needed. I am going for the same plan with the rare 110v items that will be installed in the camper (small 110V LCD TV/dvd combo is way cheaper than 12v system...ridiculous).

Then, with EVERYTHING wired for 24v and inverted or converted after the breakers and at the appliance, plugging into shore power will just be a 110v to 24v charger/power supply. This also allows me to install a 220v to 24v charger/power supply along side. Eliminates the 50hz/60hz issues between power, since everything drops to DC first.

Thoughts, issues, suggestions?
 
Last edited:

RoosterBooster

Observer
i have a little bit of experience with alternative power systems;
you could say i`m on a expedition every day of the year (lol) ; i live "off grid" :wings:


your in luck; off-grid setups are usually 24V !
i would strongly recommend you to look in that direction. (Xantrex, Hart, Outback ,... to name some off-grid inverter companies)
IMHO everything RV related is usually cheap and s...ty quality.

everything in our house and shop runs on a large Xantrex inverter/charger/power management center (all our computers,TV, tools,... are standard 110V ).
off-grid inverters are "smart" clean sinus wave inverters... the "smart" part is that they also manage solar/wind input as well as charging, managing and protecting the battery bank.
they can also automatically turn on the backup generator (in case of high power consumption or low battery power) as well as manage (and clean!) a second (shore power) input.
here is a pic of my solar array (self tracking... however, next time i would do a motorized tracker; the solar tracker takes too long to swing over to the morning sun)
phoca_thumb_l_DSC_5633.JPG

i`m on fairly high altitude (5200 feet...at the old route 66 between Flagstaff and Kingman) with lots of sunshine and clean air so i have plenty of solar power.
my bbank is usually 4-8 high capacity 12V 135AH C&D Technology UPS batteries (cellular tower backup batteries)
for a RV i would say 2-4 batteries that size would be perfect (they are 100 lbs each)
get a quiet (remote start capable) generator and you would be all set for uninterrupted 110V power.
 
Last edited:

LowTech

Dirt Track Traveler
Joaquin,
loos like your lower alt pulley gets almost no wrap from the belt. Do you ever have trouble w/ it slipping?

We went w/ the dual alt set-up as well. add a simple 12v alt and run it straight to a 12 volt ( 2 - 6v) pack that is for the box only.
We can play the tunes, and burn lights till it's dead and still start the rig ;) For longer turn parking, as apposed to a moving camp, some solars will charge it.
 

Sleeping Dog

Adventurer
@LowTech
I always wondered, because it didn't make sense that half the population of Florida would have a CDL:)
So if I am understanding you right, as a truck it required a different license, install a toilet and you are good to go. Sounds about right, I ran into a similar issues with insurance. Is that just a Cali thing, or nation wide?
P.S. Love the truck, friend of mine in Washington has an M35A2 and an M818 tractor, but hasn't converted anything, Looks like You and "Tuff" are having lots of fun.

Yup, go find yourself a Peterbilt with a flatbed or a dump body and you need a CDL. Replace the dump/flatbed with a Totterhome and any yahoo can take it most anywhere in the US. Go figure.

Jim
 

RoosterBooster

Observer
hey apex, any update ??? :sombrero:

sounds like we have similar goals so i`m very curious to see /hear your ideas :coffee:
i think i will post a thread about my project today (or tomorrow) so we can exchange some ideas.
 

apexcamper

Carefully scripted chaos
Sorry for the delay, had some friends I hadn't seen in 2 years invite me to Oktoberfest in Munich.
Learned two things; Germans go CRAZY for beer, and if you drink like you are 21, every year between your actual age and 21 must be added to your age the next day.

For the time being I am going to avoid the dual alternator route and stick with a straight 24v system throughout. I have found a fairly inexpensive charge controller that will isolate the truck batteries when the engine is not running so they never get drained, and charge both truck and house batteries when the engine is running.

As for shore power, this truck will spend time on every continent (that's the plan anyway) so being able to use 220v 50hz or 110v 60hz or anything in between is important. I'm going with a 1600watt 24v power supply from TRC ELECTRONICS, that should provide more than enough juice in the box, and the unit I will be using accepts 85VAC to 264VAC. This means with a 50 cent plug adapter, I will be able to plug the truck in to the grid anywhere.
I get that most of my destinations for this truck wont be places we will be plugging in to, but at least from my limited experience, the trip TO those locations is typically much longer than the exploring AT those locations.

In the shop today, almost finished with the cabinets for the cab, will snap some pictures during the test fitting (then pulling them back out to stain).

In the mean time, made a crude drawing (sorry, not the auto-cad guy) of my purposed camper box suspension system. I am concerned that in my mind it is too simple and wont work in real life, so please...criticism and critique welcome, preferably constructive with suggestions, "wow...you are a moron" will work if you have ways to correct it.

Pulled out some crazy college algebra (my wife remembered it off the top of her head, awesome) and figured I should be allowing for over 20 degrees of frame flex at the rear without anything hitting or tearing, with excess of that tearing a rear bag, and not damaging anything important.
camper-susp.jpg


So my VERY BASIC understanding of air springs is that a small compressor pressurizes them and keeps a certain pressure, and that is about it...anything I am missing?

Also drew up my floor plan, very basic, nothing moves or has hydraulics or anything, dinette converts simply by moving the table to rest between the benches.
layout.jpg
 
Last edited:

RoosterBooster

Observer
lol ... i also have some bad memorys of going to Muenchen for the oktoberfest :coffeedrink:
(or should i say "bad memorys of the days after")

i`m not going to say your a moron ;) lol

but a couple things are missing in your drawing
a air ride cab is a wonderful thing if the motion is properly controlled.

the most important part is adjustable shock absorbers that allow you to dial in the compression and rebound for changing load and changing terrain.
on my (mostly on road) extended sleeper Peterbilt i used fairly inexpensive "Rancho 9000" series shocks (that i had laying around)
they work ok on the road and on my 4 miles gravel driveway (its a washboard if i`m lazy with grading :rolleyes:)
however, for serious "rough road" use i would probably install a better/ larger adjustable shock that is more precise and fade proof
a true offroad shock like King or Fox is overkill ... but at least something like the AFCO dirt track series (or a equivalent large body adjustable shock)

the second thing you need is to limit your up and down travel (so that you dont harm the airbags by crushing/overextending).
you want to do that in a "smooth" progressive way so that it does not get noticed.
i use progressive PU bumpstops on the up and down side (the bags i used do not have internal compression stops)
you also need provisions for the box to rest on if there is no air (for emergency driving if you loose air pressure or a bag)
i use fairly stiff PU pads in the middle of the box that are placed so that the body also rests on them if the rear bumpstops are fully compressed.

next on the list is some kinda landing gear (trying to sleep in a air suspended box is difficult; you feel every movement of whoever is with you in the box)
i use a 10klbs side crank gooseneck trailer jack on each side (permanently welded and hidden into the side storage boxes).
i converted them to hex drive to raise / lower them with the cordless or air driver.... the jacks also work great to level the box.

i would also highly recommend you to use a good quality "height sensing" level valve permanently plumbed into your air system (i reused the factory Peterbilt sleeper valve).
it keeps the box in its perfect riding height (air pressure) regardless of the box load status.

i see you drawn "double convoluted" bags (i also used 4 of them on my truck) but learned later that "sleeve"(rolling lobe) bags are actually better suited for this task (more linear)
 
Last edited:

apexcamper

Carefully scripted chaos
@RoosterBooster
Brother, I wanna crawl in your brain and go info-shopping. I was going to pm you about this stuff, but since this is an alternative to the rigid flex mounts most seem to go with, I feel it is good info to share.

AIR BAGS
I originally thought about the double convoluted bags because they seem to be, as a group, rated for more weight, they are also a lot less expensive. The real purpose of the airbag system is not so much for the occupants inside (will probably spend most of the time in the huge cab where the seat belts are) but to reduce the stresses on the standard RV equipment being installed inside (the equipment not designed for prolonged dirt road driving).
-What would be the real difference in ride?
-Given that they main goal here is vibration and "jarring bump" isolation, and that the fixed "hinge" at the front of the box should eliminate lateral issues, do you feel the rolling lobe bags are worth twice the money?

SHOCK ABSORBERS
Great idea! Going to add shocks to the mix, and I think the adjust-ability and cost of the RS9000 is what I will be going for. This truck will mainly be highway truck with dirt and rough road at our destination, not the whole trip. I do want an extended trip in Mongolia (2013?), which is all wash boards and river crossings, but the truck will have some trips under her belt before then, and we will have figured what works best for us.

LIMITING TRAVEL
Another one I didn't consider. I would assume something as simple as shocks and suspension limiting straps at the bags and bump stops running the length of the frame would be sufficient (obviously set up at varying heights to have the box sit supported down the length of the frame).
-Am I over simplifying this? The only real time there would be max extension or compression would be during max flex.
-Would a series of bump-stops down the frame be sufficient for the box to "sit down"?

AIR SYSTEM
So I love the auto-leveling system idea, I'm looking at this valve, but admittedly I know nothing about these and it was just cheap.
Should the airbags hook to the trucks normal air system, or is it better to have their own compressor?

LANDING GEAR
Another gem. Looking at maybe something like these jacks for now, hinged to fold under the rear. HOPEFULLY 6klbs will be more than enough.
 
Last edited:

RoosterBooster

Observer
stupid me ... i forgot the big difference between my Pete (pivot mount under the cab at the firewall) and your box ;
you are not riding in it :p .

so yes, convoluted bags will do (the lower profile do make them a lot simpler to mount) IIRC my bags have been ~ $ 50 each

the inexpensive RS9000 should also be adequate for just the box weight
...after all my extended sleeper (13.5') is a fairly heavy tubular steel construction and i have a lot of real granite surfaces in it.
normal_IMG_4998.JPG


same goes for the overextending bumpstops; a set of high quality off-road limiting straps will do.
it will be a little "harsher" then the progressive stops but a lot more economical to fabricate the mounts.

yes, my box "sits down" on a series of bumpstops

yes, that level valve in your link is perfect
a good semi truck valve usually last for 500k miles of constant movement ...
but IMHO at that price i would order two and carry one sealed up in a plastic bag just for the peace of mind (better then trying to find one in the middle of the Mongolia :p)

sorry, i have no idea of how the Euro air systems are structured...
but IIRC on US trucks there is a secondary air system (isolated from the brake system) where things like the air seats and suspension tab into.
i never had to mess with any of that
(all the trucks i modified have been factory air suspended and already had existing air systems that i simply reused/taped into)

i used 2x 10klbs square tubing side crank Bulldog jacks. IIRC i got them for something like $50 each
6k lbs should do ... but my jacks are solid welded to the box structure (roughly 2/3 down the length of the sleeper)
so i wanted them on the overkill side so that i may never need to replace them.

may carry a extra airbag, a small coil of airline and a bunch of pushloc fittings with you and you should be ready for any eventuality.

edit;
forgot to add that i run a beefy panhard bar at the back end of the sleeper to locate it
for simplicity (when i may need to order replacement) i used the exact same part that is also locating the rear axle
... maybe this is also not a bad idea on your box to take away some of the stress to the front pivot mounts.
here is a pic of my Pete when we test drove the sleeper suspension (with a couple concrete bags in the rear to simulate the finished weight) ...
dscf2772.jpg

unfortunately i lost all my "under construction" pic`s due to a computer meltdown
(i know; it was stupid to not burn them on a backup disc :p )
i will try to make a couple new closeup pics of how i did the airride for the sleeper.
 
Last edited:

RoosterBooster

Observer
that crewcab looked kinda odd with just the flatbed...


... but with a box it will look very sleek and sharp! ;)

apex1.jpg


sorry, very crude photochop (i spend only 5 minutes on it :rolleyes:)
 
Last edited:

apexcamper

Carefully scripted chaos
omgtff

I needed that.

Last night I broke a router bit on the main piece of wood, now have to rip it down and re-corner. I use a community wood shop and my work schedule this week means not getting much down till the weekend...AGAIN!!

Since that will be a bust till Saturday and I really want to get at least a little done every day, tonight I will just start stripping the bed for removal. I plan on saving and reusing all the boxes mounted under the bed, there are also 4 locking Jerry can holders. The boxes are lockable, very solid and have a rubber gasket seal making them very weather proof. Going to also remove the spare tire from it's mount under the rear. Until I get super-singles, I am probably sticking with that spare and it's placement, but want it out of the way for the new bed.

POOP...Poop I say
wood.jpg
 
Last edited:

apexcamper

Carefully scripted chaos
Spent some time today going back and forth with a couple honeycomb core FRP manufacturers, and one awesome wood-foam-FRP manufacturer...guess what...S@$T IS EXPENSIVE!!!

Knew that going into this, but DAMN, I'm in the wrong business.

So, looking about $2000 a side for the floor, roof, and long sides on a 5.13 meter box, and another $3000 for the two ends and a mid-box bulkhead wall.

I guess coming out around $12000 in materials is good, right. Just hurts my concept of "budget build".

No matter, we are committed to this project, and the honeycomb FRP stuff fits within the weight portion of our "budget" (budget was about budgeting price AND weight).

So here is the plan. our budget allows for about $1000 a month extra towards this project (doesn't leave much else, but the only way these things happen is if you take the time, effort, and RISK) and the "dedicated for this project" savings we have put aside knocks down about half that. This means in about 4 months I will be ready to glue the peices together. Figure 5 months to allow for Christmas (can't give my wife FRP...course if I did, it might make the project cheaper, since I would only need sleeping for one after that) and the extra expense of buying some aluminum to weld into the frame.

We are looking at a February time frame to start putting the box together. NOT the schedule I wanted, but remaining flexible is the key to budget builds. So between now and then we will be painting the cab a nice gloss black, stripping her for a weight diet, and getting the little crap, like enlarged fuel tanks, ready.

May end up just stripping the axles off a second hand RV trailer and throwing it on the flatbed in the mean time...would allow us to knock out some pretty killer road trips. I swore I would never do that...but they run about $2k here, and that seems like not a bad deal.

A HUGE part of this build is the actual building, as a family project (me and my 11 year old daughter spent a whole evening sanding together, and she asks every night what else WE can do) so the trailer option seems a cheat...but taking family trips is just as awesome, so we shall see.
 

Victorian

Approved Vendor : Total Composites
Call my dad... He may have ways of getting you cheaper material... Told him about you last Sunday... His english is pretty good :)

Cheers,
Andreas
 

shortbus4x4

Expedition Leader
Putting a trailer in the flatbed would let you use it for camping for a few months until you had all your box supplies together. This would also give you a chance to see what you would like or not like in your custom made camper. Looks to be a nice project.
 

Forum statistics

Threads
188,602
Messages
2,907,701
Members
230,759
Latest member
Tdavis8695
Top