BIG TRUCK - little budget

apexcamper

Carefully scripted chaos
Has it been so long?

Wow...where has the time gone.

Sorry I haven't been on here more, lots of work and family stuff has been happening, and not work on the truck...
But now we are back at it. Going to try and take advantage of the Christmas break to make some progress.

So to update you since last:

We have settled on a 4 point system for mounting the box. I originally wanted to try something new or unique, but after weighing everything out, we went with something simple that we know works.

We also decided that, while I have done some small wood and interior projects, most of it has been replacing wiring or redoing some parts of a boat interior. Since my skills to date have been mostly repair and replace, working from scratch will be a challenge.
Not to worry, challenge accepted!

HOWEVER, we (read "wife") feel that there are a lot of costly materials that I have the "ever so slight potential to [screw] up". I PG-13d it with the word "screw"...you get the point.

So here is the new plan...we are building a "practice" RV

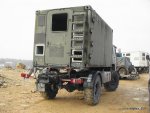
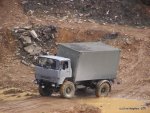
The truck isn't practice, of course, but the box will be. I found a company close to my house selling a 4.25 meter long mil-spec shelter. It is a former communication shelter from the Germany army. It has 2.25 inch thick plywood and foam walls with aluminum skin. On the inside it currently has a desk and packed wall to wall with radio racks (no radios).

BIG BONUS: Massive (don't know specs) 24v to 220v inverter, external 220v plugs for shore power as well as patch cables to connect to truck electrical system, large "master on" switch and separate 220v and 24v circuit breaker boxes, lighting, wiring, AND...
a diesel fired heater that worked WAY to efficiently to run for more that a couple of minutes.

We are going to gut this and build it up as a smaller version of what we want. Lets us hone our skills and start taking trips, learning what we do and don't need.

So, lets get started.


Here is the box, you can see the exhaust for the heater up front with it's own roll cage. The only windows are at the back, so we will cut and install some...great practice :)
IMG_8201.jpg


Maggie is prepped and ready.
IMG_8204.jpg


Using an old forklift, they managed to get it on straight, not on the first try, but straight none the less
IMG_8208.jpg


AWESOMELY the box is designed for the truck itself, so we were able to use the shelter mounting points and chain tie downs that were already there. (ya...it was 35 degrees and raining slush)
IMG_8211.jpg


It is really great to see things progressing again...I need a grinectomy
IMG_8213.jpg


So there she is...we are going to leave the drop sides on for now since it gives us a little storage front and rear (front storage is 1 stinking inch short of holding a Jerry can long ways...1 stinking inch).
IMG_8215.jpg


I will post up pics of the inside of the shelter tomorrow.
 

apexcamper

Carefully scripted chaos
The Interior

So here it is. I made some mistakes about what I got on the inside in my previous post, but having gone through it pretty good this evening, I have a better grasp on most of the stuff, and NO CLUE on some things, particularly a "transformer" inside that I have no idea what does...but more on that later. Sorry for the dark photos, I get off work at 5, sun sets here at just after 4...


As it sits on the truck, this is taken from the rear facing forward, from the entry door.
IMG_8297.jpg


Here it is from the front facing backwards towards the door
IMG_8298.jpg


starting at the back, just inside the door on the drivers side is a massive 220v circuit breaker box and master AC on/off switch.
IMG_8293.jpg


The whole thing is encased in an acrylic cover that unlocks, and a smaller acrylic flap that swings open to access the small breakers.
IMG_8294.jpg


I will have to figure out what all this means
IMG_8295.jpg


Below that connected to both the ac breaker box AND the outside shore power socket is a large transformer of some kind, NO CLUE what purpose it serves ( ideas??? ) [on the right]
IMG_8312.jpg


here is the only identification plate on it
IMG_8311-1.jpg


continuing forward on the driver side is a large desk with rubber top surface.
IMG_8313.jpg


The desk has overhead racks the full length with lamps and track locks for the ceiling, walls, and floor
IMG_8299.jpg


all the drawers push button release, the top two (left and right) have some kind of stone or ceramic surface
IMG_8302.jpg


that lifts on a hinge to access the rest of the drawer with a rubber mat in the bottom
IMG_8303.jpg


all the drawers are the same size, about 4 inches deep, except the bottom two on the right (forward) side, they are about double height or maybe 6 inches.
IMG_8304.jpg


Now reaching the forward wall on the driver side is another panel that eludes me. The plate on it only says "zusatzlüfter 24v" which I translate to mean "auxiliary fan" so I am guessing it is some kind of small air filter system separate from the heater.
IMG_8307.jpg


Forward wall center bottom is the big money. A large Webasto diesel heater that feeds it's air into perforated wall sections running down the length of both sides of the shelter. Literally the walls breath hot air. It gets it's diesel from a Jerry can that is placed inside a sealed box with it's own exterior vent and drain. a special adapter is sealed onto the opening of the Jerry can and lets the heater drink.
IMG_8305.jpg


The Webasto identification plate
IMG_8291.jpg


Forward wall passenger side is the 24v breaker system. It feeds 24v power strips down both sides of the shelter.
IMG_8290.jpg


Forward on the passenger side wall is a large rack, at the top is a huge 220v AC to 28.3v DC converter. It gets it's AC from the AC breaker box inside the door on the drivers side, and feeds DC to the DC breaker box right next to it.
IMG_8284.jpg


This thing is a monster, and we are very excited about having it. We'll get as many 24v appliances as we can for our camper, use this thing for shore power, and when we get back to the states, all we need to do is replace it with a 110v to 24v converter, and we are golden. Looks like it provides roughly a kilowatt of DC power.
IMG_8284-1.jpg


at the bottom of that rack is a seal battery box with cables to the 24v breaker box.
IMG_8308.jpg


and oh look, batteries, large 100amp/hour batteries. I am sure they are dead, but at least no core charges (can you recondition batteries? ...I think so)
IMG_8309.jpg


moving rearward down the passenger wall is another smaller desk with the same overhead racks, no drawers, and a rubber topped surface
IMG_8314.jpg


at the back of the passenger wall, just inside the door on the right (passenger) side is a panel in the wall that I believe was to originally allow phone or some kind of telecommunication setup through the wall, since similar posts can be accessed there from an outside hatch.
IMG_8310.jpg


We also got a ladder, more like stairs, with folding hand rail that matches up perfectly with the hand rail on the inside of the door.
IMG_8316.jpg


So...there is our shelter "walk-through". Anyone with any information on the appliances inside this thing, I would love to know more specifics. We are very happy with it and look forward to stripping the inside and seeing what we can make of it
IMG_8315.jpg
 
Last edited:

westyss

Explorer
That is a nice find, lots of good usable stuff, seems like the truck would easily handle the weight of that unit, so with that said, I predict if you make a mock up with the unit and start using it and improving it as you go it will become you're permanent set up. So when you do the mock up, do a good job with it!:D
 

apexcamper

Carefully scripted chaos
@westyss
We agree with you about doing a good job. We have discussed that this may be what we are using for a couple of years, since we are trying to build the other box from scratch by ourselves with a small budget and limited extra time and facilities.

That being said. I don't see this one going permanent since it has several shortcomings that prevent it from being what we want., most significantly that I am 6'5" and this box has 6'4" head room...close, but not enough.

We will probably spend the first year adjusting and refining this one, learn what we use most, and dont need as much, and then get our scratch-built one mostly right on the first try
 

dare2go

Observer
Sorry, I haven't read all your pages yet...
Do you speak some German? Because there's an absolutely great and helpful German forum for vehicles like yours, and a second forum which has excellent advice for building your own camper. If your German fails you try translate.google.com, or simply post in English (several do so).

(my apologies if somebody posted these links before me - I haven't read all pages) :D
 

egn

Adventurer
Congrats for you purchase. Here a few comments:

1. Isn't your truck with the box now at the weigth limit of 7,5 t?

2. I hope you fixed the box correctly onto the truck. The chains should be fixed crossed on both sides an the front to avoid any movement.

3. I personally would remove the 20 year old electric from the box completely. It ist oversized and overkill. It takes up to much space and is to complicated to handle should any problems arise. You should rip everything out and start from scratch to make maximum use from the limited space.
 

apexcamper

Carefully scripted chaos
@dare2go
Thanx for the links, I am slowly learning German, and maybe reading it more will help. I think those links will really pay off. I am going to try and post some questions on there (in English and bad German) about my 24v circuit breaker box and see what I get (see below)

@egn
1. We are pushing close to that weight. We were sitting at 6t for the truck and the box weighed in at just under 1000kg, but I think the junk we stripped out of it accounts for A LOT of that. The transformer on the floor felt like it weighed a ton, but obviously the box is the bulk of the weight. We put it on a serious diet and hopefully got it down under 750kg, but that may be overly optimistic...guess it is time to find some scales.

2. We used what I assume is the standard military attachment setup. At all 4 corners there are these "L" shaped brackets that slide down into holes in the bed and lock into place with shear pins (see fourth picture from the post on 12-07-2011). I did not get a picture of the final mounting, but in the last picture from that day you can see the rear "L" brackets on the ground. I will put up some pictures of the final mounting tonight and would love input...this is not something you want to get wrong.

3. I had not intended to rip all the electrics out, but now that you mention it, I think it is a good idea. I can locate them where I want them and rewire the breakers to flip what I want. I will be reusing all the actual wiring, since it is good copper and not to be wasted, and I love the over-sized master switches, but that monster of a 220v breaker box has to go.

I am also very curious as to the 24v breaker box. It appears to have some kind of charge controller (or it might just be a battery voltage meter) for house batteries and is directly connected to a slave cable outlet on the outside of the front of the box, facing the truck.
Is it a smart controller that charges the batteries with the engine, and then isolates them when it is not running (wouldn't that be great)?
Does it have a "jump truck off house batteries" option?
Basically I have no idea of it's functions and features...and help on this matter would be most appreciated (if anyone needs more info or pictures, I'll post them in exchange for knowledge :) )
 

egn

Adventurer
The transformer was there to separate galvanic external 230V from internal. There is absolutely no need to keep that. The same is true with all the rest of the 230 V wiring. In a camper 230 V installation you just need the blue external CEE connector and one combined breaker and ground fault isolator (LS/FI in german). That all is not very expensive.

For 24 V it is effectively the same. You have a connection to the truck with 24 V and normally just a relay that is controlled by the D+ signal of the generator. When the generator is running then the relay will close the connection to the house battery and it is charged. You may take this part from the 24 V panel, but I would remove the rest because of the size. You just need a small distribution panel with fuses. You may find 24 V devices for most of the functionality (fridge, light, water pumps, ...). But you may also need 12 V for some devices. For this you have to install a 24 V/12 V DC/DC converter. You have this large charger from Benning build in. I would replace it with a much smaller charger available now.

Did you already think about a floor plan?
Where do you put the fresh water and grey water?

Here are some images from trucks with such a box:

IMAGE_193.jpgIMAGE_376.jpg
PIC_0220.jpgIMAGE_195.jpg
IMAGE_373.jpgPIC_0226.jpg
PIC_0197.jpgIMAGE_372.jpg
PIC_0310.jpgPIC_0216.jpg

If you have time next weekend the 17./18. you may join a Christmas Stammtisch in Wolfratshausen where you may see some trucks with a box. There will be about 130 people there.

Cheers,
Emil
 
Last edited:

apexcamper

Carefully scripted chaos
We have settled on a sort of floor plan. Basically, a cassette toilet just inside on the right creating a full width changing/mud room just inside the door. Moving forward a small kitchen, becoming a full width convertible dinette attached to an elevated twin bed. The backs of the dinette benches will fold up and extend the kitchen counter (like in the earthroamer trucks), since to make all this fit will be a short kitchen. There will be storage underneath both the bed and dinette benches allowing for water and grey water storage as well as batteries. Propane will be stored externally, but the heater runs off a diesel Jerry can that mounts inside. it locks into a sealed box so it should not be a problem, we will see.

and I WOULD LOVE TO BE THERE!!!!
 
Last edited:

apexcamper

Carefully scripted chaos
Pulled the Gel Cell batteries out of the shelter, and at the suggestion of a forum member, started trickle charging them just to see what happened. They are holding a charge!

Now I know little about gel cell batteries, and have not load tested them yet, but I have been trickle charging them till they get close to 12 volts, then letting them rest while I do the same to the other one. After being removed from the charger they start immediately showing a loss, but after resting a while, that usually stops at a certain level. Each cycle of charge and rest has had them stop losing at a higher level, so hopefully I will get them back in usable shape.

If anyone has suggestions on how to better charge these batteries, I would be very interested.

gelcell.jpg
 

egn

Adventurer
12 V is much to low for charging. The gel batteries should be charged to 14,2-14,4 V (at room temperature) with a charger that can deliver at least 10 % of capacity as current. If you have charger with more charging capability you can connect them in parallel.

I use a CTEK charger for conditioning 12 V batteries.
 
Last edited:

apexcamper

Carefully scripted chaos
@EGN

Thanx for the info...parallel would be a lot easier.

I am definitely in need of a good charger, now that I will have many more batteries to charge. Is the CTEK charger something I can pick up locally or is it mail order?

Would the Gels charge better sitting in the truck charging off the engine?
 

apexcamper

Carefully scripted chaos
Update

Over the weekend we tried camping in the box without batteries, IE no heat. We assumed three people and two dogs worth of body heat would keep the place at least slightly warm...WOW! we were WAY wrong!
I am now wondering about the R value of the shelter walls. it was COLD!

It was a good family bonding experience but it made my daughter sick (she wasn't feeling tip top to start with) and we had icicles on the inside. We made it most of the way through the night, and called it a "great learning experince" (P S you can warm yourself with cups of hot water, it works well...but a box of tea bags is now stashed under the seat in the truck...just in case).

I spent the last two days in a freezing box getting all the crappy wiring out of it. Actually the wiring was incredible and will be reused, but the over-sized bricks they were patched into, and the number of huge gauge wires just to make a light come on...glad it's all out.

The box is now TRULY empty...gonna start putting up walls if it would stop snowing. I'll post some empty pictures when my hands thaw.
 

apexcamper

Carefully scripted chaos
Happy New Year

Happy new year everyone.

After the last frigid camping trip, I made it a point to make sure the heater was running tip top.

Turns out it has a fuel leak!!!

The system runs on diesel from a Jerry can in a box. Apparently once I ran it a little while and had all the air out of the lines, it created a siphon at a hose joint and about half of the Jerry can emptied itself into the fuel storage box.

Unfortunately I did not snap pictures of this till after I had already started siphoning the fuel back and realized it might be worth documenting. I will just start from AFTER I got most of diesel back in the Jerry can. This probably wont be interesting to anyone unless they have a similar set up, but it is a good lesson learned about the siphon effect for any fluids.

So to bring everyone up to speed, this is how it works.
This box fits a Jerry can. The adapter (center right) slides in the Can and locks on. The two quick disconnects attach and the whole thing has a top that seals it up tight. (The aluminum bar that is leaning to the left in the box was there just to weigh down the small tubing I used to siphon the diesel back. This space had about 4 inches of diesel in it after I removed the Jerry can)
img_8474.jpg


The lines go to the bottom of this box, there is a threaded connection, and then they proceed on to the combustion chamber. This is were the leak occurred. These is a small gasket around the bottom of the little well...it also leaks
img_8476b.jpg


I opened all the lower parts of the heater, no diesel...so the leak happened it those above fittings. When I took them apart and removed the fuel storage box, that little rubber gasket in the bottom had slowly leaked, leaving fuel in all the little crevasses on top.
img_8483.jpg


So while gaining access to all the little nooks, I started finding a LOT of dirt and stuck on gunk from years of military service.
img_8484.jpg


At this point, the wife and I figured if we are going to be sleeping in here, we don't want to breath crap, so we basically took everything apart and started a massive clean up project.
img_8485.jpg


I am going to wrap those fittings pretty heavy with teflon tape, put it back together and try the heater again. I am also going to add some silicon to that gasket at the bottom...just in case :)

So that was New Years day for us, mindless cleaning while hung over is easy to do.
 
Last edited:

apexcamper

Carefully scripted chaos
ACTUALLY BUILDING!!!

Finally, got everything cleaned up, put back together, functions checks, now to build.

Got the framework for the back wall installed, as well as the elevated bed and the raised floor for the dinette. Going to cover them in plywood tomorrow and start work on the bench seats and counter space. I am not a craftsman by any means and have just made up how to do this from pictures I have seen of others layouts that I liked, so constructive criticism and pointing out glaring concerns are awesome.

Here is what I did.

So with the heater back together, I started creating a false wall that will cover most of the utility space. I am losing about a linear foot, maybe a little more, but the overall appearance and easy of use will be better, and it will still retain it's functionality.
DSCF0007.jpg


The vertical posts are secured to the floor and ceiling using heavy "L" brackets, and the wood screws are driven in at angles to prevent splitting the wood.
DSCF0008.jpg


You can see they are almost as close to the heater as I can mount them.
DSCF0010.jpg


We are installing a raised permanent bed for my daughter that will allow a lot of storage underneath as well as a good sized engineering space for water tanks, batteries, and access to components.
DSCF0016.jpg


The floor of the bed will be hinged and lift up allowing access to the underside, and the back wall will have a hinged door for the circuit breaker box, and access to the heater to change out the Jerry can.
DSCF0022.jpg


Here is the final wall and bed frame, cross braced, but without the plywood skin.
DSCF0023.jpg


I am 6'5" and in my shoes have at least a couple inches to spare.
DSCF0024.jpg


I then created a raised sub-floor for the dinette area. The heater ducts will be rerouted to under the center section using standard house dryer ducts, and the electrical and water lines will run under each side, allowing the bench seats of the dinette to have storage underneath that doesn't contact any of the functional components.
DSCF0039.jpg


So there is the frame of the walls, bed, and raised dinette floor.
DSCF0040.jpg


Tomorrow I am in the wood shop to rip down my plywood and start skinning this thing. Unfortunately I don't have a separate garage to work in, so with the nasty winter weather, most of the work is being done in the shelter. For big stuff I use a community wood shop.

Cade
 

Forum statistics

Threads
188,601
Messages
2,907,669
Members
230,759
Latest member
Tdavis8695
Top