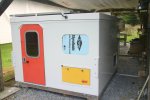
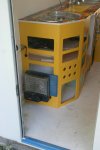
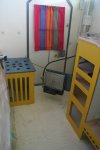
billboards hauler: homebuilt fiberlgass composite popup for flatbed tundra

bphang10

Observer
Excellent work. My family has had a fiberglass business since before I was born, and this thread has got me thinking...

jason77: thanks, and with access to all that knowledge and material have at it. you'd be a step ahead of the game. my experience is limited to surfboards and i'm doing fine. it's all been fairly easy for me but slow, and hard to get any info to make decisions when i come to an issue, so just learning as i go.

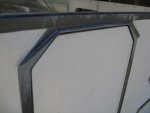
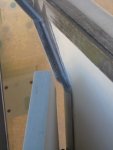
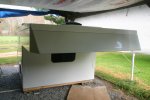
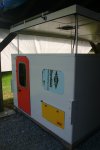
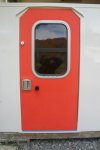
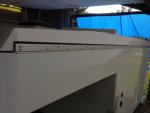
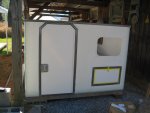
i put some time in on the door and board hatch so i can close it up a bit in bad weather. it's currently spitting sleet/snow and blowing hard. after not being able to find a reasonably priced custom door i made my own using the cutout from the door cavity. 1st i built the jam and threshold by milling some leftover frp angle and using epoxy to attach. at the suggestion of the nida-core tech guy, i've been using fasco 110 epoxy glue for most of my "glue" applications. easy to work with and super strong. i also found fasco epoxo 88 6 minute cure when i need quicker adhesion.
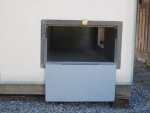
i'm using stainless piano hinges and have found them very strong and true even though their just held in place by 3 screws currently. i also decided to open the board hatch down so it would be out of the when getting boards in and out. the latch on the door is a standard rv style, and was pretty easy to install.
i also built a "gutter" above the door to help keep runoff out using scrap frp and held in place with epoxo 88. just apply glue, press in place, and tape it there or hold it for a few minutes. super strong, even though it's only an 1/8" edge and cut on an angle. later, i applied a resin putty fillet just to be sure. i also had to relieve the far corner to allow the door to open completely. i'll probably add this to the board hatch also.
IMG_0002.jpg
IMG_0003.jpg
IMG_0013.jpg
IMG_0016.jpg
 

MNtraveler

Observer
Great build! You certainly have the craftsman gene! Beautiful work. I have seen a couple references to actuators for the lifting mechanism. Can you explain more about these. Where sourced and if you don't mind, the cost? Also, how are you timing them so that the top goes up and down evenly.

Thanks!
 

bphang10

Observer
Thanks mn traveller!
I'm in Costa Rica now so all this is from the top of my head.
I'm using 20", 400lb actuators from progressive automation . I believe they cost about 135 each and I will wire up a control box. Based on other builds I've seen, "pods8 ","hooked up films", and maybe westyss come to mind, there is not much variation in lifting rate. I have not tried mine yet but am close. My roof weighs about 100lbs and will likely have no more than another 100 on top, so I'm hoping the 400lbs/ corner will be easy work. If necessary I can wire 4 switches or try adjusting wire length.
I recently read about actuator lift system by Reico-Titan using square tubing being introduced and it looks very interesting. If you're just starting, I'd for sure look into it. I'm gonna check it out before I go any further and see if it looks better than my system. Biggest obstacle with actuators in fiberglass composite is mounting system . I'm just trying to reinforce and overbuild for safety.
 

MNtraveler

Observer
Thanks for the info and the heads up on the Reico-Titan. I will look into it. And yes, just starting to get "my head around" all this pop up stuff. Thanks again!
 

DaGoof

New member
This build is looking great!

I'm not following how the corners are held together and radiused. Is there a piece of frp in there as a spline or are they just butted, filled, shaped, and taped over.
Thanks

Again great job!


Sent from my BNTV400 using Tapatalk
 

bphang10

Observer
DaGoof:
Yep, butted and glued with a thickened resin, filled, shaped and laminated.
In a few cases where the radius corner was very small, more square, I did an overlapping joint, I think it's called a rabett or dado(?), which results in fiberglass skin on both edges, therefore eliminating the need for filling.
In retrospect, I would consider using frp angles on the interior inside corners. Inside laminated inside corners require a lot of work to finish cleanly. Outside corners are pretty easy.

MNtraveler:
Please keep me posted on any info you might find on the Reico-Titan lift.

Quickfarms:
I got my nida-core through composites one. There are quite few sources, or just call nida core in Florida and ask for retailer near you.
 

bphang10

Observer
homestretch?

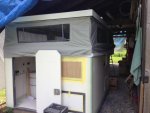
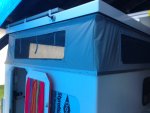
i've been hard at work to get this thing up and running. had some time to work in the spring, then had to work the summer months and been hard at it since sept 1. was able to paint the outside while nights were still warm but decided wait til next summer to paint the inside. that will give me plenty of time to figure out any interior changes since most attachment requires bonding of some sort which seems to work best on bare fiberglass. the roof is gloss white, the bottom is actually "mist grey" but it's hard to see the contrast in bright light. i used pettit easypoxy marine paint and used the "roll and tip" method. turned out fairly easy to get a decent job, though time consuming in that it has 2 coats primer, 2 coats paint, drying and sanding between each step.
here's a few photos:
IMG_2655.jpgIMG_2658.jpg
IMG_2642.JPGIMG_2649.JPG
IMG_2659.JPGIMG_2657.JPG
 

bphang10

Observer
softside attachment question?

i've test fit the sidewalls and have the roof attachment worked out. however i'm not sure of the detail on the bottom attachment to the camper body. i will be attaching it to the outside and was thinking of using some kind of double sided tape applied to the horizontal rim of the body(on the frp angle trim), then the sidewall pulled firm and use a 1 1/4" flat aluminum strip screwed to sandwich the fabric. will this be strong enough? is it relying too much on the screws to provide the hold or would the tape and pressure make it one?
i tested a piece of the sidewall sandwiched with the aluminum strip and screwed every 3" to a workbench without tape and was able pull it through if really tugging on it. i've looked at a bunch of other builds trying to find details. i'm pretty sure that a lot of campers use a rim strip that has a short "L" bend on the top and acts a bit like a clamp. have also seen that some use butyl tape where i was thinking of using tape?
any insight would be appreciated or maybe someone could point me to a detailed explanation of this process.
here's a few photos of the test fit:
photo.JPGphoto.JPG
 

djmase

Adventurer
Pictures speak to me.

BP.

If I am understanding you correctly, you want to have the canvas attached to the inside of the lid and the outside of the lower body, which makes sense for waterproofing.
If that is the case, it does seem like you will have an issue because you will effectively squish you canvas between the top and camper body every time it closes. (Edit: Just went back and looked at older photos...definitely think option two in my image is a better approach. It will be dry when it is up and it will allow you to properly (and easily) seal your lid when it is in the down position, too.)

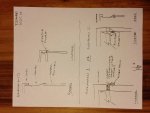
This maybe completely unhelpful, but here are the two obvious (to me) solutions drawn in section. The first is probably what you are proposing, and seems pretty doable given your glass work. I think you'd have to reinforce much of the top rim so that you could secure an aluminum angle (?) over the canvas. I would think you would want to tape above and below the canvas then squish the whole assembly between the alum and the camper wall. The downside to this is when it rain and water runs down the wall, it will want to sit in the small nook where the canvas meets the aluminum.
The second option is a bit more sewing and will probably be better on your canvas and water proofing long term, although I am not sure that it will perform as well in high wind conditions if you encounter those. Well planned skirts will probably deal with wind well. Naturally, you'd want to make the auxiliary skirt pretty tall so that it was easy to pull in when you lower the camper.

IMG_1865.jpg

In other news: I am a westcoast surfer but I have family in the SC Upstate and somehow ran across your shaping blog ages ago. You are cooking some great stuff. Really fun to run into you here! Also, I am in prelim design on build of my own, so my brain is often found swirling upon 'how do I do thats?' regarding TCs.
 

bphang10

Observer
thanks djmase and sarconcepts!

well, for some reason i did not see this response until i was beginning my install. it's turned cold here and i'm running out of time and hope to be traveling west and south by mid january so i'm sticking with a variation of solution 1. i also posted the on sarconcepts' "building the bullet" thread and used a lot of his advice.

http://www.expeditionportal.com/forum/threads/34294-building-the-Bullet-XV?p=1694712#post1694712

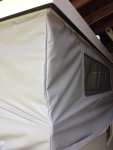
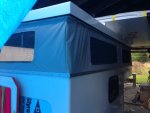
i ended out using an aluminum edge extrusion 1 1/4 tall with a 3/16 right angle lip. i did some tests and found that small lip acted as gripper and holds the fabric firm. the top lip of the main camper is reinforced with frp angle, which holds screws nicely, as well as 1" drilled and fiberglass putty filled reinforcement points every 6 inches. my liner is 3 layer, a nylon canvas on the inside, thinsulite middle, and the grey weatherproof material on the outside. first, i lined the camper with double sided tape and stretched the liner tight, pulling the tape and pressing the liner as i went. i had the luxury of help from a friend for a few hours....would have been hard solo. next, we used duct tape to stretch the exterior liner firm and in place. i also lined inside of the trim with double sided tape, and screwed the trim in place. the double sided tape really held well, specially on the inside layer. while not perfect and many little wrinkles, it's plenty tight, does not seem to move in the wind, and i finished before the snow fell. i do have a rubber/neoprene gasket on the top where it closes on the canvas to reduce rub. no too worried about that, my old shadow crusier closed on the canvas with no real issues over 10 yrs.

we were racing the weather so had no time for photos in process, but here's a few after complete:
photo_2_2_2_2_2_2.JPGphoto_2_2_2_2_2.JPG
photo_2_2_2_2.JPGphoto_2_2_2.JPG
photo_5.JPGphoto_2_4.JPG

and then:
photo.JPG

djmase, checked your tumbler. looks like your getting good use out of your sun lite and keeping busy having plenty fun! diggin the photos. if you get back east look me up.
 

djmase

Adventurer
Thanks, man. I can say in all honesty, your build is one of the cleanest, most inspiring ones that I follow.
Well done & enjoy Mexico!
 

eblau

Adventurer
This thing is drop dead gorgeous! Take note truck camper builders, THIS is how it should be done!
 

bphang10

Observer
thanks again djmase and eblau.
well, this is one way to do it and i sure hope it works as well as i envisioned from the start. i'm pretty confident the structure will outlast me. it's been a long process and i've learned lot on the way. some changes would be made if starting today. it's still not on the truck, so i'm not counting chickens before they hatch, but i'm close.

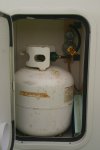
propane system is up and running:
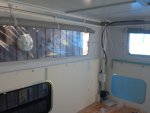
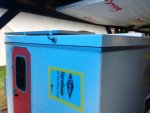
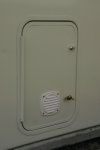
i used reg compartment doors bought off ebay for propane and battery access. easy and they work. also bought louvered vents and installed them.
IMG_2646.JPGIMG_2647.JPG
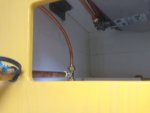
propane tank is directly below stove and next to heater so runs were short and simple
photo_2_3.JPG
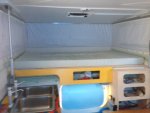
wave 3 is mounted on a swing panel; out of the way closed and opens to face the room and meet the clearance requirements. it can also be lifted off and removed easily if camping in warm temps only. i typically only use heater in morning and evening, not while sleeping unless caught in extreme conditions.
IMG_2631.JPGIMG_2635.JPG
 

Forum statistics

Threads
186,638
Messages
2,888,325
Members
226,767
Latest member
Alexk
Top