Blender, My LX450/FZJ80 + FJ45esk + GM + Land Rover crazy concoction

Metcalf

Expedition Leader
Cool, did you make any mods to improve storage/organization in the cab?

I have a few things on the list, but overall I have been pretty happy lately....

-I have a 5 bag system with my Titan Tool Bags that will fit behind the seats when the window panels are not there.
Those are Tools, Spare parts, Fluids, Repair stuff, and recovery gear.

-Under the drivers seat is a pair of jumper cables and my air hose

-Under the passenger seat is my tire kit ( in a plastic box ) and my first air kit.

-There is a fire extinguisher mounted to the outside of the drivers side seat frame.

-The (large) glove box is the clutter catcher.

-There is a spare driveshaft ( that fits the front or the back ) behind the seats too.

-And a there is a Toyota bottle jack that floats around back there too.

-There is a folding camp chair ( or two ) that live outside the passenger side seat mount.

Things I am thinking about adding....

-Center console. More for an elbow rest than anything. I have a shoulder that kinda likes to fall out on long trips. The extra space for clutter will be nice though. Lockable storage is nice when the windows are off too. I'd like to key it the same as the glove box.

-Door pockets. It would be nice to have some triangle shape zipper bags that fit on the 3 studs that secure the upper doors. Maybe a mesh pocket too. I'm thinking this would be nice for hats, gloves, maybe some recovery gear, maps, etc.

In the end, this is a smaller truck. With the pinched doors the cabin is only 56" wide so it is easy to fill up with stuff. The body width is great for the type of trail work I like to do with the truck though with the not full width axles. Overall pretty happy honestly.
 

Metcalf

Expedition Leader
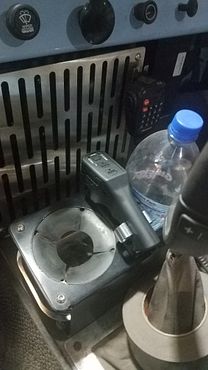
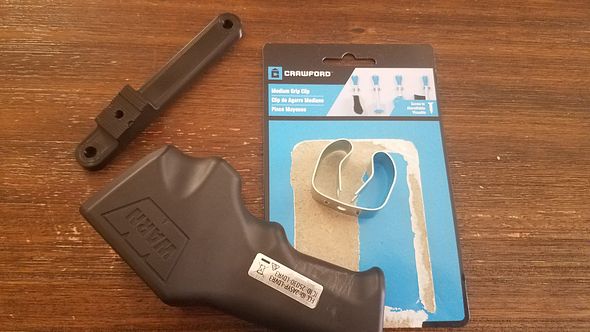
I made a 'home' for the wireless WARN winch controller. It also lets me us it as in-cab winch controls without having to hold it.


Metcalf

Expedition Leader


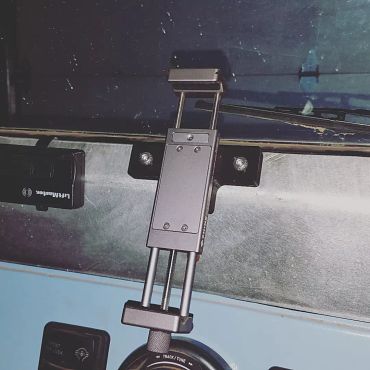
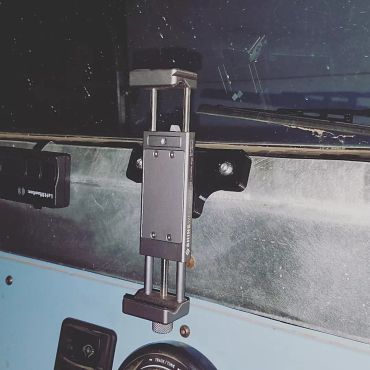
I change the old phone mount out for a larger version so I could add a tablet. I found that if I used my phone for stuff like primary GPS, I didn't pull it out of the holder near as much for pictures and videos on trips. I've taken to using GAIA gps more and more on trips. I like being able to sync all my devices AND work on a desktop to make new tracks from scratch. Having a larger screen is much nicer also. Daylight visibility isn't the best on this sub-$100 tablet from amazon, but honestly isn't that bad. This tablet also has an internal GPS so I don't have to add anything.

The next step is another version of the 3d printed adapter to slightly change the angle of the tablet and it's position slightly. I want to be able to use the camera in the tablet as a dash cam so I catch more footage of trails. The tablet can also connect to the marine head unit via bluetooth to port audio for nav, music, or even a movie.

One tip. I find it REALLY handy to use those little magnetic charging cable adapters for devices like this. It seems to REALLY save wear and tear on the charging port. It also makes it much easier to throw the tablet in the glove box when parking with the window panels out.

My only real complaint so far is the amount of dust that accumulates on the screen of the tablet. Anyone know of a product that keeps dust away from screens?
 

Metcalf

Expedition Leader
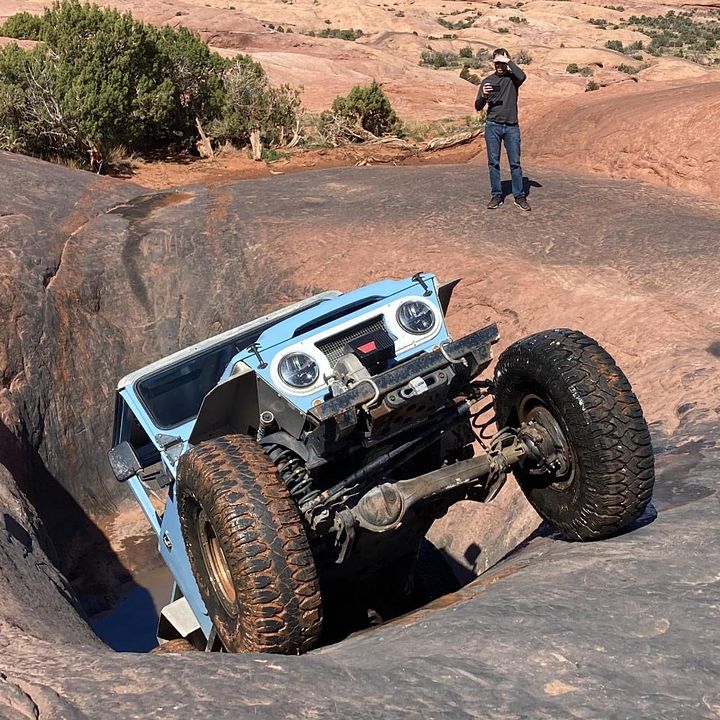
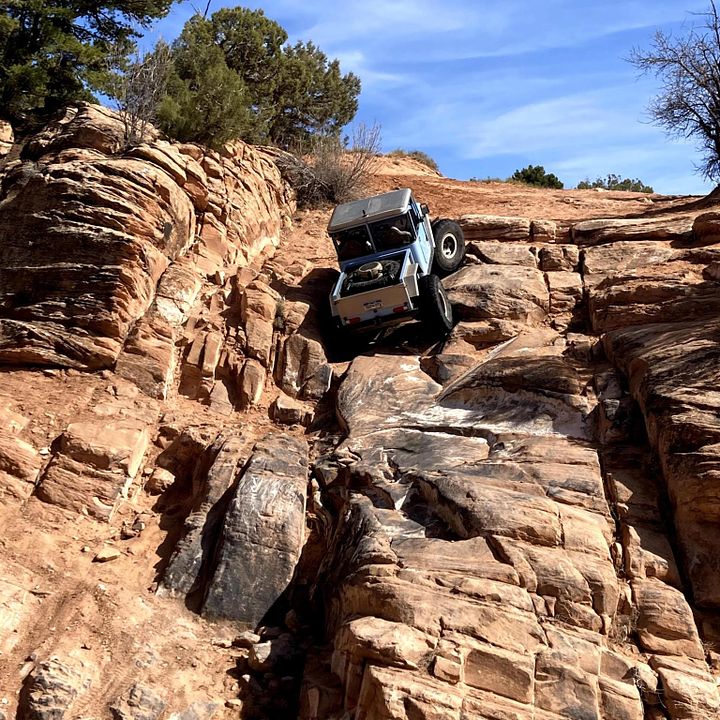
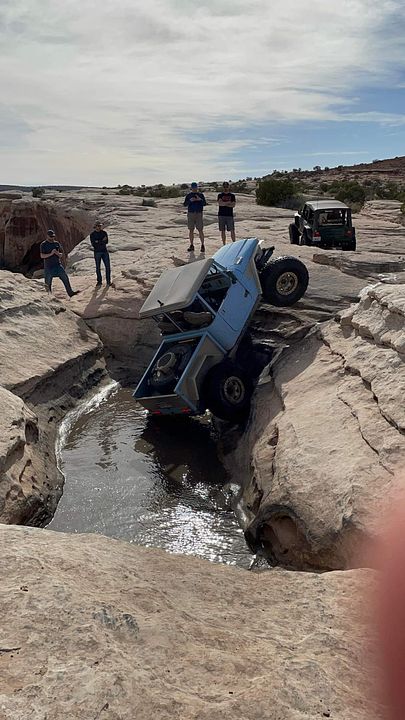
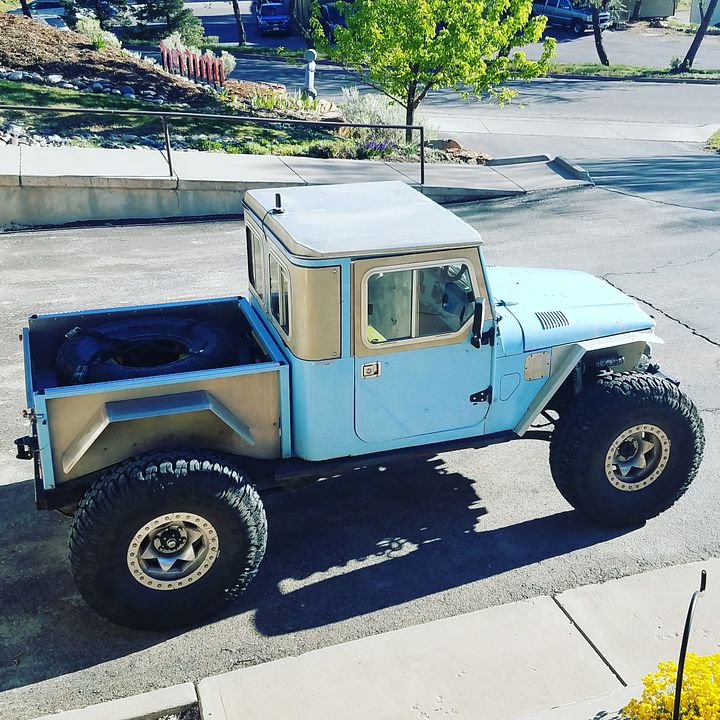
Just a few pics from the last trip to Moab before EJS in the #LX45.


This thing continues to impress me with its ability to do very hard obstacles, but still run down the highway at 80mph.

The only thing I don't really like about the 80-series chassis is the frame side rear lower control arm mounts. Those things get in the way, even with a 40" tire. I don't really want to ruin all the good things going with the no-lift OEM factory suspension geometry, so I think adding some skidplates to those mounts is the next step.
 

Metcalf

Expedition Leader


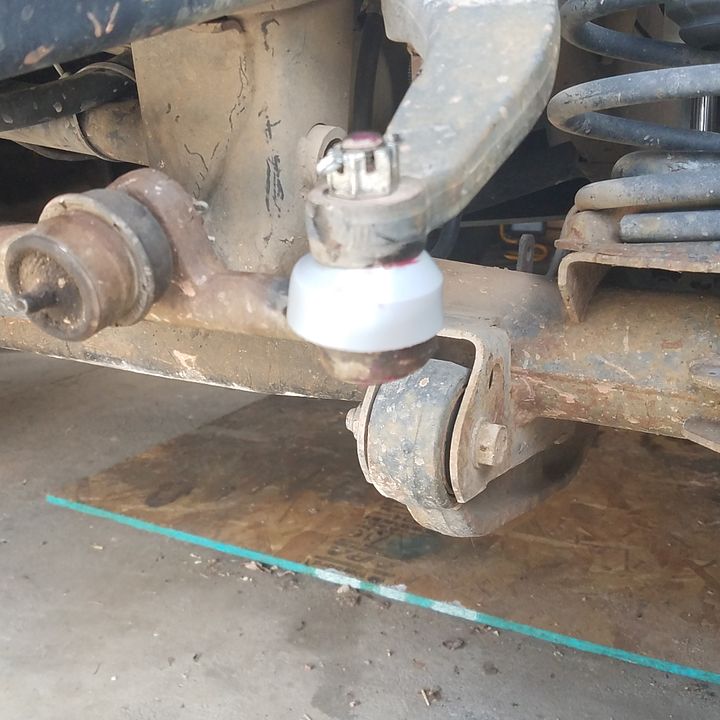
One continuing issue with the steering on the #LX45. Having the steering assist ram mounted in place of the steering stabilizer sure keeps it protected, but it does cause some accelerated wear on the boot of the pitman arm TRE with some rocking motions. I am going to try this 'kevlar' dust boot from Off Road Design to see if it holds up longer. If anything, they are a bunch easier to replace not being wired onto the TRE like stock.
 

Metcalf

Expedition Leader


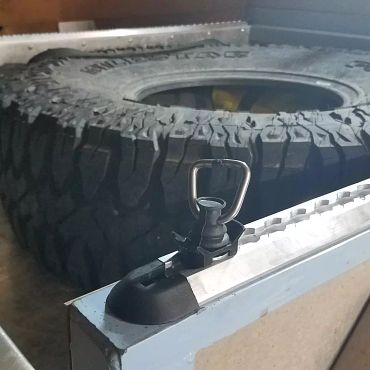
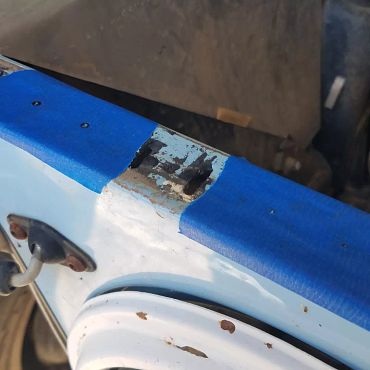
Mini-mod. I never love drilling (and tapping) holes, but after the Dusy-Ershim trip last year, I decided to add some L-track to the top of the bed rails.

Adding the track does a few different things. It not only provides a replaceable cap for the bed rails, it also gives me a better place to attach straps when having to haul more gear than I typically do. We had a rig on the Dusy trip break down on day one and we ended up absorbing their gear for the rest of the trip so they could ride along. I'm pretty picky with how I pack my vehicles for big trips, and having a bunch of random gear clanging around in the back was hard on the nerves.

I like that there are a ton of different options for tie down and attachment points already designed and available from many vendors. This gives me a ton of opportunities to try some different configurations on the #LX45 without having to commit to drilling even MORE holes!
 

Metcalf

Expedition Leader


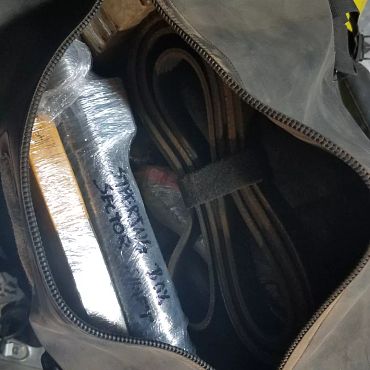
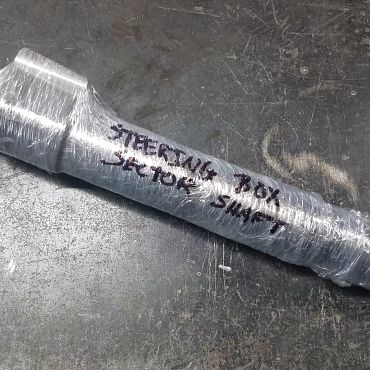
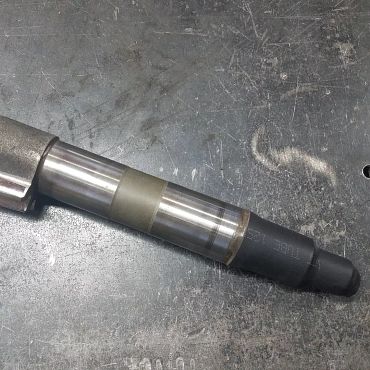
Another detail after the Dusy-Ershim trip was adding a spare sector shaft to the parts bag. We passed a gentleman that was right in the middle of the entire trail ( length not width ), and had sheared his sector shaft off the steering box in his Jeep Wrangler. His friend spent 2 days driving back into Fresno over a hundred miles away to find a replacement steering box. I had already had the box rebuilt for the hydro-assist steering, and I think the hydro ram does a good job at protecting the sector shaft honestly. If I was starting from scratch, I would probably do the 105 sector shaft upgrade, but I just couldn't justify the high cost at this point. With hundreds of hard trail miles on the #LX45 now, I decided that another stock (used) replacement sector shaft was a good middle ground.
Before being wrapped and labeled for it's new home in the #TitanToolBag spare parts kit, I made sure to wrap the threads with heat shrink and give it a good oiling.
 

Metcalf

Expedition Leader


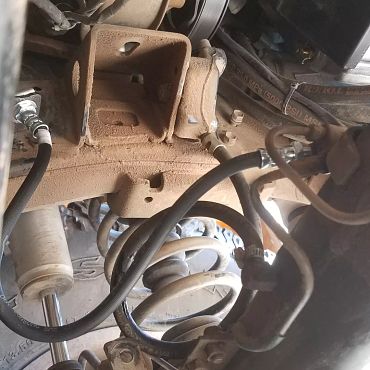
While the suspension on the #LX45 is stock height ( springs ), the Fox shocks I used allow slightly more down travel than stock. Since brake lines don't make the best limit straps, I decided to replace them with slightly longer than stock units. I found another factory toyota brake line that seemed to work perfect.

Rear Raybestos BH380233 fits 93-95 Toyota T100

This line worked both front and rear on my application, but I did convert my front axle to be plumbed like a non-abs 80-series. I only have the one drop line to the front axle.
The bonus to this is that I only need one spare part to cover this front and rear.
 

Metcalf

Expedition Leader


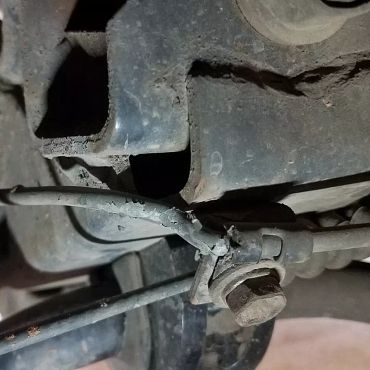
While I was doing brake stuff, I noticed that the rear hard line to the drivers side caliper had been damaged by a rock.

Replacing this hard line turned into a total headache as the T-fitting on the axle had one leg where the threads got messed up. I ended up having to find a metric bottom tap to repair the threads enough to work. That T-fitting seems to be hard to get from Toyota at this time. Most M10 metric T-fittings in the aftermarket seem to have too short of a thread depth to work with the factory Toyota flare nuts ( which don't have threads for about the first 3mm ).
 

Metcalf

Expedition Leader


I'm on version 2.something now with my Tablet mount. I changed the angle to hopefully allow using the tablet camera as a dash cam of sorts. I never get enough video footage from trips. This also helped clean up some of the glare on the screen. I REALLY like being able to iterate on stuff like this with the 3D printer vs having to drill more holes or whatever.

One big bonus to this style mount ( and mag charge cord ) is that it also works with my phone when using the #LX45 for a daily driver.

Looking back to the beginning ( or starting over ), I would recommend just using a generic double din Android head unit that could do many functions like nav, cam, music, phone interface, etc....all in one unit. I will do that on the next vehicle I build. Even if the head unit has to be replaced every 5+ years to keep up with technology, the double din space hopefully stays standard.
 

Metcalf

Expedition Leader


Continuing with the 'detail' stuff. I finally found a rubber bumper off the shelf that works really good for a hood bumper. I had been using some closed cell sticky back foam, and that just didn't hold up. The glue also made a mess when it got hot. I didn't want to drill more holes, but these rubber bumpers really helped eliminate some squeaks, reset the hood gap, and bring up the tension on the hood latches.
 

Metcalf

Expedition Leader


The #LX45 is now back in daily driver rotation after the brake line fitting debacle. There is nothing I 'have' to do at this point before my upcoming Rubicon trip, but there is always a long list of detail mods that I can chip away at!
 

Metcalf

Expedition Leader


A power steering upgrade on the #LX45.

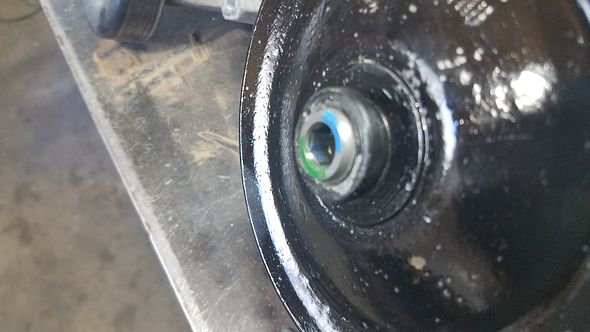
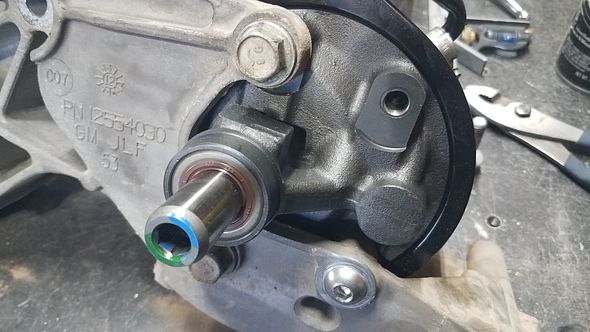
I had been running a bone stock GM 5.3 LS truck pump since I built the vehicle. I have a 1.5" hydro assist ram, and when I first got things going, the steering was pretty decent. Here we are 3 years later and that stock pump is feeling a bit tired. It started to bypass ( groan ) more and more on the trail, especially when the front locker was engaged.

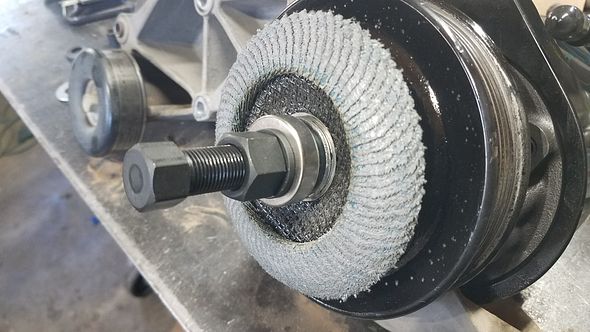
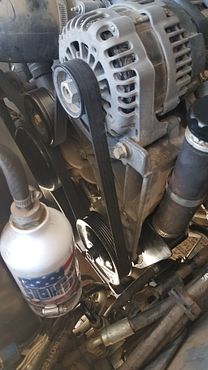
I didn't want to go too crazy with upgrades, but I did want something 'more' if I was going to the trouble of replacing the power steering pump. I decided to do a new stock BBB made pump, but with a few small tweaks. I ended up finding a stock GM 14100579 steel power steering pulley that was smaller diameter than stock to increase pressure and flow at an idle. The stock truck pulley was 6.5" diameter and the new pulley is 5.5" diameter. This makes the new pulley turn the pump about 18% faster. That seemed like a good middle ground without going crazy. The required mods for smaller pulley was to replace the lower mounting bolt with a button head for rim clearance, and then over-press the pulley about 0.11" to get the pulley lined up to the factory position.

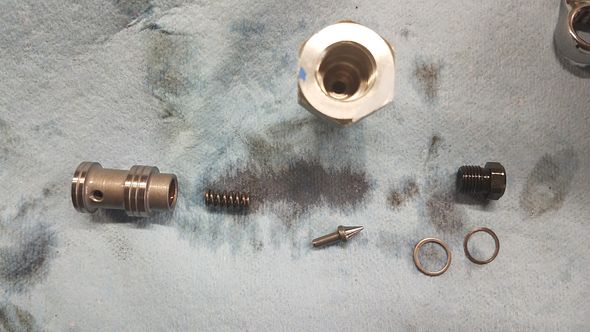
I also decided to do a few internal mods in the pump. I pulled the factory pressure relief valve and de-shimmed it. This should raise the pressure up to about 1400psi. I didn't shim under the spring yet, but that is an option for even more pressure if needed. I didn't want to go crazy with it all. I think there is a balance to all this in making the pumps lasting also. The last mod was to drill out the flow restrictor to 5/32nd diameter ( and it was pretty close to that stock in this application ).

I used a 92.5" belt, 6-rib belt, but I think a 92.3" would be a slightly better fit.

One tip. Even though this was just a simple pump swap, take your time in bleeding the system again. An air bubble in the system can sound a lot like failure and disappointment. Getting the front tires up in the air and then slowly turning lock to lock about 10 times with the engine OFF, seemed to help work any air bubbles in the system out. So good that it threw up a cup of fluid out the extended neck all over everything when I forgot to thread the cap on enough. Once I was done with the non-powered bleeding, then I did about 5 lock to lock runs with the engine running but the tires still in the air. Now all is quiet like stock was thankfully. I did also use GM AC-Delco fluid #10-5073 which is known for helping keep steering pumps alive.

First impressions. This was a good improvement. The steering feels better than it ever has. It has a much lighter feeling at idle now, you can tell the pump is putting out more pressure and flow. On the flip side, driving at speed or with increased RPM doesn't feel twitchy. I'll update this again after my Rubicon trip and a good workout in the rocks with lockers for a week.
 

Metcalf

Expedition Leader
Post Rubicon Trip Update...and repairs....


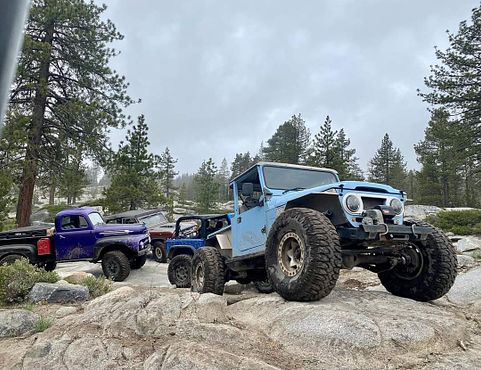
Overall the trip went well. The original plan was to run the Rubicon twice in a big loop. Tahoe out Wentworth and then loop around to Loon Lake and run back to Tahoe again. Day 2-3 on the trail went from a 20% chance of rain to 20 hours of rain really quick. That pretty much soaked most peoples gear and made the trail quite flooded and interesting. We ended up even finding a Ford ranger going out Wentworth that had hydrolocked his engine in one of the VERY deep puddles on the road. After everyone made it out safe, the group of 9 rigs turned into a group of 5 rigs that would make the return trip.

The vehicles that decided to stay for the 2nd half ended up running down to Placerville to find a laundry-mat to dry out our gear....which ended up being at a hotel for the night! All dried out and well fed we headed back up the hill to run the Rubicon the opposite direction from Loon Lake which many of us had not done before. The weather ended up being absolutely perfect the last 2 days.

Overall, the #LX45 did well, but I did have a few annoying issues.....

-My new steering pump decided it wanted to be a supercharger, or at least make that noise without any of the performance gains. I can tell you this, I'm not sure I would want to listen to a supercharger on the trail after that!

-Because It was only suppose to be a 20% chance of showers, I decided to leave my window panels back at the truck/trailer. That ended up being a big mistake. The top panel helps, but everything inside got pretty dang soaked after 20 hours of rain. I'm definitely going to make an effort, and a few mods, to allow me to take the window panels with me on all trips as I originally intended with this vehicle. I'm also going to make sure to throw in my rain cover for the cab for the odd shower.


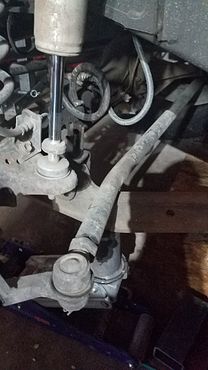
-Somewhere on the trail, and I honestly don't remember when, I bent my 1.25 x 1/4" wall DOM steel tie rod. Looking at the bend, I think it was from a rock getting stuck under the belly and backing off into the tie rod or something.....with the wheel cranked full driver.


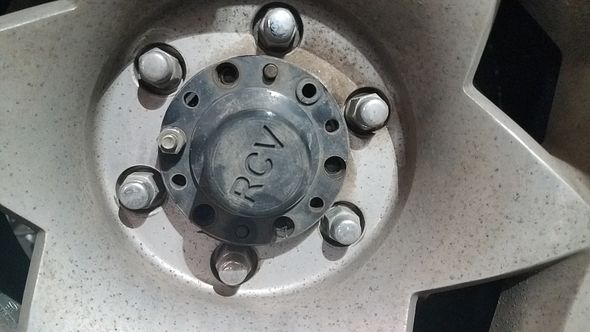
-The most concerning damage was that I sheared off 5 of the 6 drive flange studs on the drivers front tire. Could it have been related to bending the tie rod maybe? I do carry spare studs, cone washers, and nuts but with them sheared off it highlighted the need for a small trail repair kit that includes a drill bit and easy out. This is also making me think about an upgrade ( beyond TG super metal 8mm studs ) for all 4 corners.

Time for some repairs....
 

Forum statistics

Threads
188,069
Messages
2,901,840
Members
229,418
Latest member
Sveda
Top