Bolt-together fiberglass Jeep-tub trailer kit

RareSS

New member
Great job!
I can't wait to order one and start on it. I have a few other neat options in my mind ..... (I can't say anything, until I am finished with it. :/ I want it to be unique and show quality. ;) )
Do the inner fender wells and the outer fenders use the same holes and bolts when mounting them or are they separate mounting holes and bolts? Just curious ......
 

jscherb

Expedition Leader
Great job!
I can't wait to order one and start on it. I have a few other neat options in my mind ..... (I can't say anything, until I am finished with it. :/ I want it to be unique and show quality. ;) )
When you get your kit I hope you'll post photos of your build here!

Do the inner fender wells and the outer fenders use the same holes and bolts when mounting them or are they separate mounting holes and bolts? Just curious ......
If you want to bolt the inner fenders to the side panels, you'd need to use separate bolts for the fenders and the flares. I recommend bonding the fenders to the side panels with fiberglass for maximum strength though. I can post photos of the steps here if you like, it's very simple, and the fiberglass materials are available reasonably priced at places like Autozone or Advance Auto.
 

jscherb

Expedition Leader
Here's a conceptual view of the trailer-top tent mount design. It's pretty straightforward - the main platform is made from 3/4" plywood. The plywood forms a ring about 15" wide around the top of the tub; the four pieces of plywood are edge-joined, using either tongue-and-groove plywood, a "glue joint" edge made with a router bit, or whatever your favorite plywood joining method is. A wooden edging runs around the entire platform - it's even with the top of the platform and protrudes below the plywood so it "caps" the angled top edge of the tub. Pickup truck "topper tape" is used to seal/cushion the mount-to-tub joint.

RTTMountDesign.jpg


The tent I've got came with mounting rails which are designed to attach to a rooftop rack, but in this design I'll use them under the plywood to strengthen everything. The tent mounting bolts go through the tent platform, the plywood and the mounting rails, tying everything together. Topper tape is used once again to seal the joint between the mount and the bottom of the tent base.

A tailgate jamb is added to the underside of the plywood for the top of the tailgate to seal against; this piece gets weatherstripped to form a good seal for the tailgate. One important detail - the tailgate used will need to have an external latch, because once the tent mount is on, you won't be able to reach inside to latch the gate. I'll post more on external latching soon.

The plywood mount is secured to the tub using j-bolts; these hook under the top rail of the tub and the threaded portion sticks up out of the plywood and a nylock nuts snugs them down.
 

Land

New member
Truly admirable work on this build, from conception to the finished trailer.:drool::clapsmile And what great documentation of the process. I've really enjoyed following this and will continue to do so.

Love those trucks, by the way!

Thanks for sharing,
Chris
 

tbone1004

Observer
I had emailed last night regarding the extended version of this after coming across it via the web, and then to read this as I'm looking at the best way for a lifetime trailer tag. Small world.
 

jscherb

Expedition Leader
I'm beginning the building of the tent platform for the proof-of-concept trailer. I've posted this drawing before, which shows the basic design:

RTTMountDesign.jpg


And here's a photo/drawing showing how it will look:

RTTPlaftormMockupDraw2.jpg


There will be a 48" square "riser" of maybe 2x2 lumber around the opening, this is because the tent I have needs to be slightly raised from the platform in order to zip the travel cover onto it when it's folded. This riser isn't shown in the drawing/mockup above.

Also not shown are the bolt head/nuts of the j-hooks that will secure the platform to the tub. They'll hook under the top rail of the tub, and the threads will stick up through the platform and be secured with washers/nuts.

BTW, this same construction method could be used to make a nice budget hard tonneau cover:

RTTPlaftormMockupDraw1.jpg


Building a hard tonneau this way, you could probably come in at about $50 plus hinges and whatever paint or finish.

I'll post construction photos of the tent platform along the way.
 

jscherb

Expedition Leader
Tent platform build in progress. I've got the main platform together, and the corners on to verify the platform fits exactly the way I want it. Now that the fit has been verified I'll add the side trim and the details for mounting the tent.

PlatformTestFit1.jpg


PlatformTestFit2.jpg


Here's a few shots showing how the corners and side trim go together, these shots are test parts on the workbench:

PlatformCorner1.jpg


PlatformCorner3.jpg


The angle on the inside of the trim and corners matches the angle on the top of the tub, so once weatherstripped, the platform will seal perfectly around the top of the tub.
 

jscherb

Expedition Leader
The tent plaform is 95% done, here's a few shots of the final fitting. Imagine it in black bedliner...

PlatformFinalFit1.jpg


PlatformFinalFit2.jpg


PlatformFinalFit3.jpg


PlatformFinalFit4.jpg


I don't have a few necessary hardware bits on hand to complete the installation today, so I'll have to make a trip to the hardware store before I can put the tent on it. Probably will get the tent on it tomorrow.

Here are a few shots of the underside, you can see how the angle in the edge and corners will "cap" the angle on

the top of the tub really nicely. Those surfaces will be weatherstripped so everything is completely sealed.

PlatformTrimmed1.jpg


PlatformTrimmed2.jpg
 

jscherb

Expedition Leader
Great work Jeff. How did you cut the angle on the inside of the corner piece?

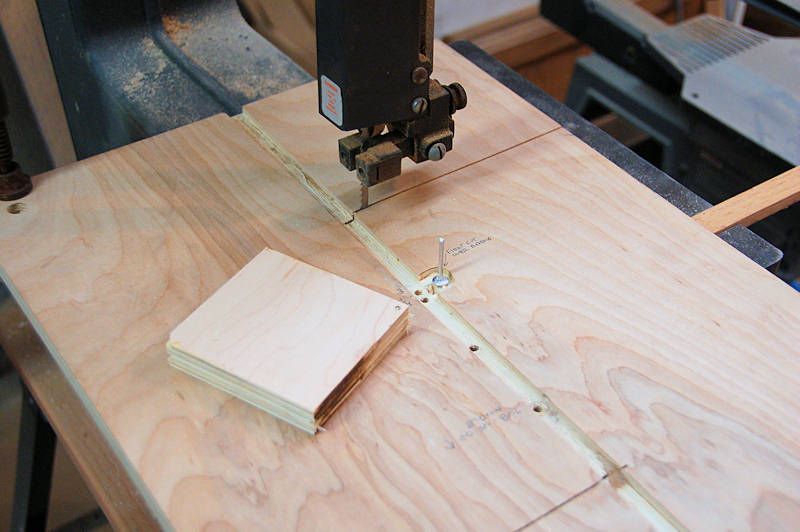
I cut the corners on a bandsaw. Shown in the first photo below is a circle-cutting jig I made for my bandsaw (I didn't make it just for this project, I also used it to cut the larger half circles for the small inner fenders I did about a month ago). It's got a pivot pin on which the wooden blank spins to cut circles. The blank is a piece of wood with a hole drilled in one corner that goes over the pivot, and there are two blanks for each corner.

CircleJig1.jpg


Next photo shows a blank being cut, I stopped mid-cut to take the photo. The blank is being rotated clockwise into the blade.

CircleJig2.jpg


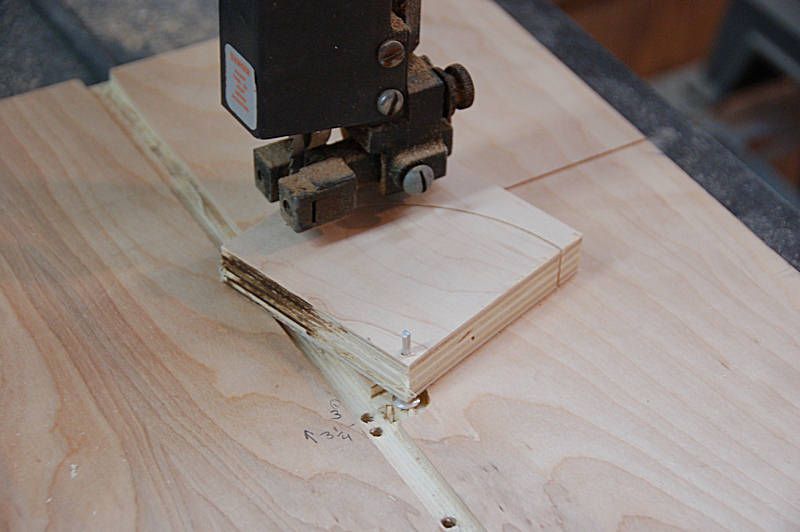
One of the blanks for a corner only gets that one cut, but the second blank also needs an angled cut on the inside. That's done with the same jig, but with the bandsaw table set at the same angle as the angle on the edge of the tub, and the pivot pin in a different position to make a smaller radius. Here's how it looks with the blank in place setting up to make the cut:

CircleJig3.jpg


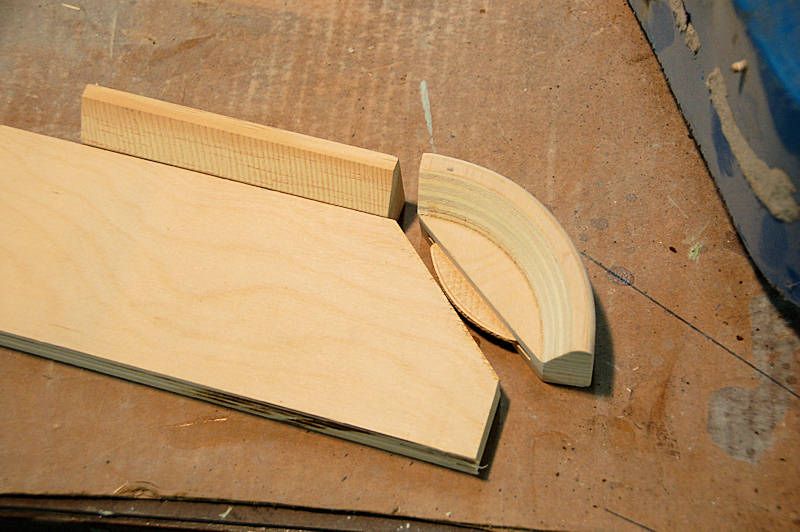
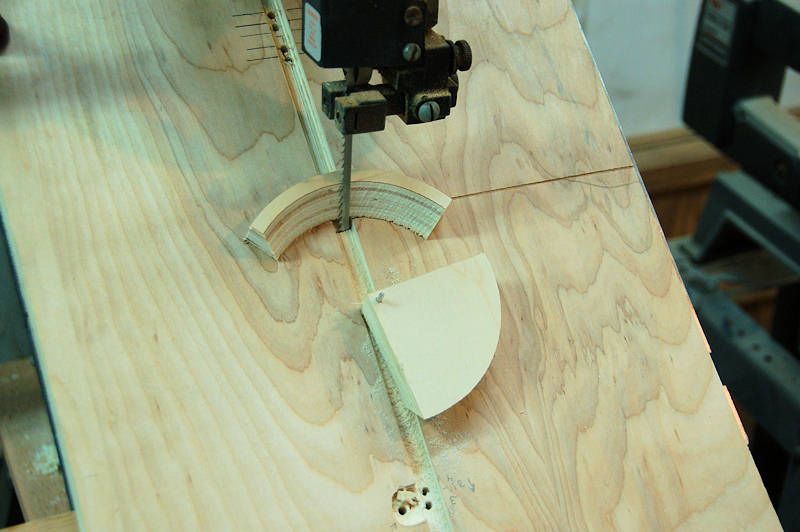
And here's a shot after the cut. I've set the cut piece against the blade so you can see how the angle gets cut:

CircleJig4.jpg


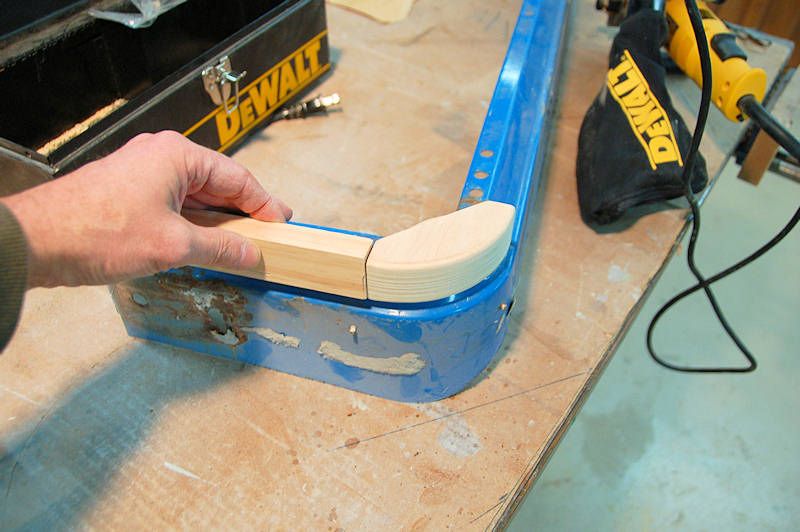
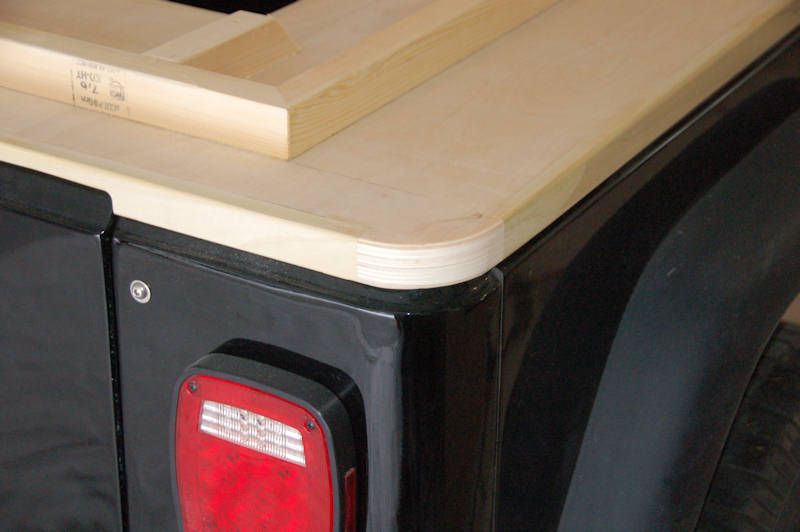
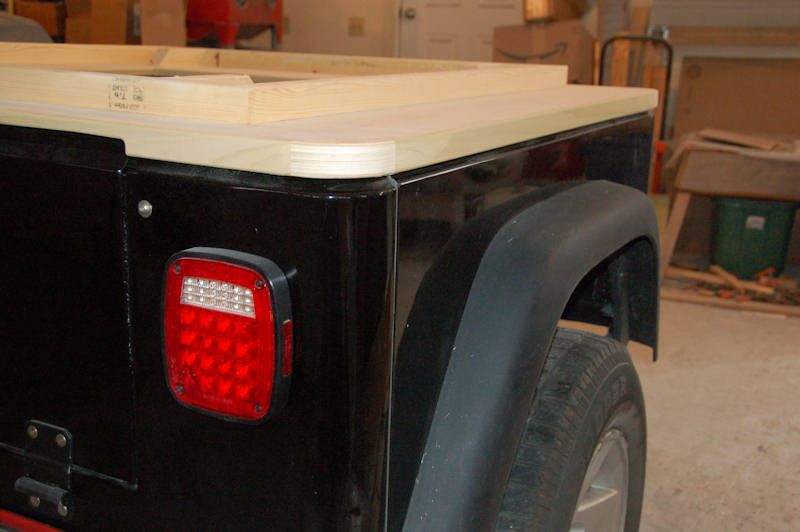
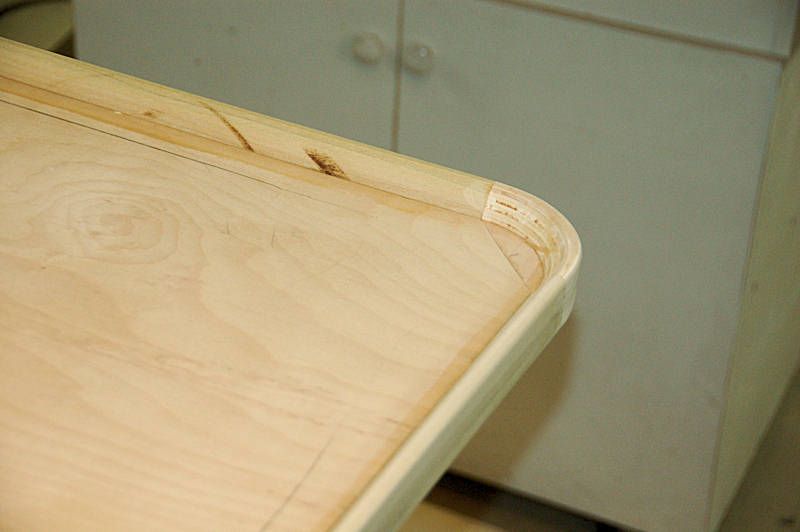
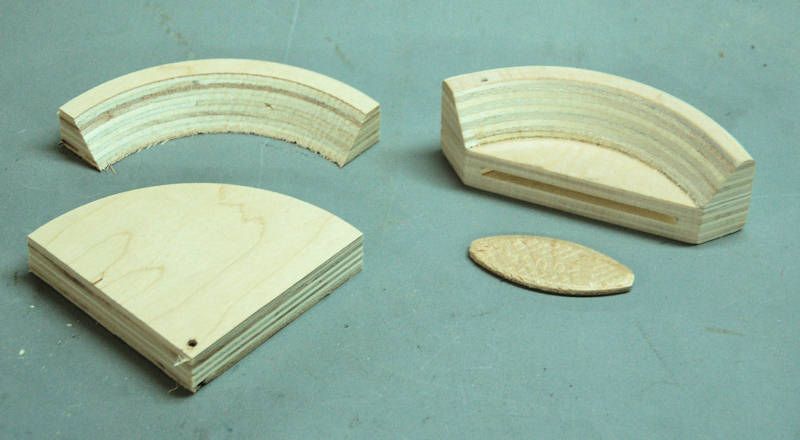
Once the two parts are cut, they're glued together. The 90 degree corner is cut off at a 45 degree angle. A small roundover bit in the router is used to knock the sharp edges off (the router is mounted in a router table to make routing on such a small piece safe). A slot is cut in the angled edge to accept a wooden biscuit, which is used to join the corner to the main platform.

CircleJig5.jpg


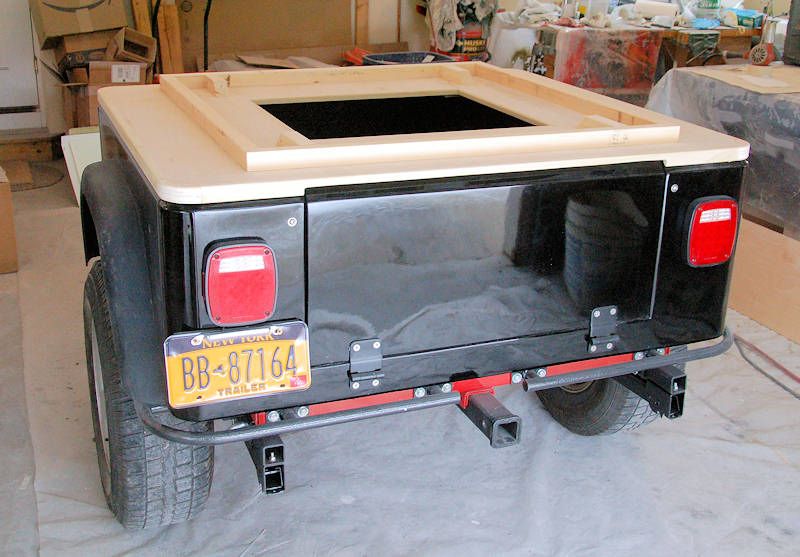
Finish up with a little light sanding and that's all there is to it.
 

jscherb

Expedition Leader
I got the tent mounted on the tent platform this morning. The tent fits great on the platform, and the platform supports the weight just fine. The tent platform is still unfinished wood; I plan to seal it and then shoot it with black bedliner.

Here are some photos of the setup ready to roll with the travel cover on.

RTTFolded1.jpg


RTTFolded2.jpg


RTTFolded3.jpg


RTTFolded4.jpg


More photos to come...
 

Forum statistics

Threads
186,819
Messages
2,888,304
Members
227,280
Latest member
Smithmds77
Top