Build - Fiberglass & Foam Truck Camper

underkill

Active member
Hello Everyone! I've spent a lot of time researching but wanted to have the camper complete before I started this build thread.

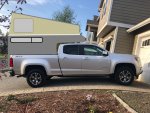
Our truck is a Chevy Colorado Z71 with Fox shocks and some other bits. We love our truck and wanted a camper to put in the bed but they're all either too heavy, flimsy, expensive, or don't fit the tall bedsides of the Colorado. So we made our own.

520243
 

underkill

Active member
After having (and loving!) a CVT rooftop tent on multiple vehicles, we were tired of still having to cook outside and be cold. We wanted a camper where everything was enclosed and waterproof, but we wanted to keep our Colorado instead of converting to vanlife or buying a camper that just doesn't fit right. 4 wheel campers etc are awesome, but we didn't want to afford one.

520244
yeah, the struggle is real. Loved the trailer, but all that stuff needs a home!

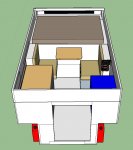
We have a lot of experience with boats and decided to do a foam and fiberglass camper of some kind to save weight. (hadn't decided the actual build method yet) The planning was a ton of fun. I got dimensions from the Colorado bed and we decided that the camper should be as low profile as possible so minimize trail damage etc. That made the outer dimensions fairly easy to figure out. The interior layouts don't seem to change a lot between different manufacturers. I went with the bed in the cabover, galley to left, fridge to right, with a little tiny settee forward.

520246

Many many hours were spent debating what type of roof to do. A solid camper would have been too tall, so we know we needed some sort of pop up. We decided on a VW bus type where one end is higher than the other. (for now anyway)
520247
Models courtesy of Google Sketchup and the ever-reliable microsoft paint...
 

underkill

Active member
While researching I found one build thread that used nidacore panels with an aluminum frame and another couple threads with blue insulation foam. Nothing really provided quite enough information. Wood was way too heavy for what we wanted to do and I really didn't want to build the whole thing out of aluminum.

The blue insulation foam was tempting due to the price point. We ordered a sheet of the blue Foamular 250 1.5" to test out after reading all of the threads recommending that type because of the increased density. We laid up some test panels and it failed too easily. We didn't want to go through all of this effort only to have it fall apart on the trail.

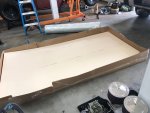
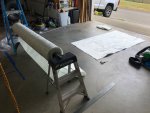
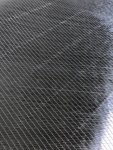
We found a local composites supplier and went to see what they had. We were still debating between Nidacore honeycomb panels or Divinycell structural foam. They recommended the foam because apparently the nidacore uses considerably more resin. I'll trust their professional experience, so we went with sheets of Divinycell H-80 foam. It's waterproof and won't rot (big deal to the boat builder guys!) and is rated for boat hulls, so it should be more than enough for our truck camper. They also recommended 1708 biaxial E-glass two layer fiberglass. It has a thin matting on one side for adhesion, and a stitched weave on the other so it doesn’t fall apart. It’s super thick but since we don’t really have any experience with fiberglass we just took her suggestion and went with it. It’s cheaper by the roll… so we have an entire roll now. There wasn't really a lot of information about how many layers of fiberglass are required for a particular application either. The boat people are using like 15 layers, and others are using a single layer. We weren't sure about the exact loading our camper was going to see, so that didn't help the design any. Again, we decided to trust the recommendation of the lady working at the composite shop and decided on a single layer of glass.

520251
520252
520253
520254
 

underkill

Active member
Hindsight being 20/20 and all that now that the camper is done I can add a little more information about the materials and what I would do differently next time.

Foam: I love this stuff. It was so easy to work with. It's easy to cut and lightweight. Would definitely use it again. We went with 1/2" thickness. It's more than strong enough for our small camper. I would maybe go a little thicker if I was building a flatbed or something larger. We were trying to keep weight down because the payload on our truck is kind of sad.

Glass: the 1708 was also fantastic. Only having to cut and lay up a single layer at a time made dealing with large sheets of glass fairly manageable. One downside was that it's thick, so when layers overlap it creates a fairly large seam. not attractive, but a great way to build up thickness. It also held its shape well and didn't twist up. We chose fiberglass because of the price point. Honestly if I were to do this again, I'd use carbon fiber. Now that I know the process, the additional material cost would save even more weight.

Resin: We started the build using polyester resin, which was easy to pour and work with. We switched to epoxy (more expensive) for the roof. Epoxy is stronger, but stickier and harder to work with. Mixed feelings about both of these. Probably comes down to budget what I would use if I were to build another one.
 

underkill

Active member
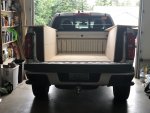
Time to stop planning and start cutting! We wanted to make the camper extend to the end of the taillights on the truck so it didn't stick out, but we didn't lose interior volume by making it to where we could keep the tailgate on. We also planned on leaving roughly 2" above the bed rails for clearance.
520354
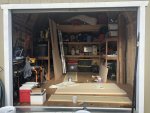
So yeah, it's going to look kind of like that. The lady at the composite store also gave us one more tip and that was to lay up one side of the foam with the fiberglass first before you start to assemble it. This will keep the fiberglass from flexing. We have some lessons learned on this. Mostly, we're doing this build in our 12x16 storage shed in the backyard and the floor isn't completely flat so you have to keep that in mind.
520355
It was really impressive how much that single layer of glass stiffened up the foam. It barely bends at all now. We did one side of each of the main tub panels and waited for them to cure. It was pretty hot outside so that generally only took an hour or two until we could handle the panels. To glue the panels together for assembly we used wood toothpicks and gorilla glue. I didn't know that gorilla glue expanded when it got wet, but it works awesome to really seep into the texture of the foam and if you insert the toothpicks at different angles and then break the tips off of them, the panels stay together even as the glue starts to expand out the seams.
520356
520357
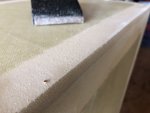
we used 2x4s to keep the panels lined up. After this first joint we started wrapped them in saran wrap first because we sorely underestimated how much glue was required and how much it expands...and glued the boards to the foam also. Once we got that pried off we started working on rounding off the edges. Fiberglass won't make a 90* angle, so we got some sandpaper and put a nice radius on the outside edges. For the inside edges we cut a triangle strip off of a scrap piece and glued it inside.
520362
520363
The angled toothpics work great. The limiting factor for this part was that the foam takes way longer to cure than the fiberglass does. So we would end up doing the foam when we were nearly done for the day and could just leave it overnight and fiberglass in the morning so we could just take a snack break and then get back to work. Sanding the foam and glue wasn't too awful either. I wrapped a sheet of sandpaper around a scrap of metal tubing.
 

ITTOG

Well-known member
Are you going to lay one more later of glass down after you put the panels together? Or are you just going to glass the joint area?

Sent from my Pixel XL using Tapatalk
 

underkill

Active member
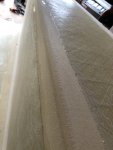
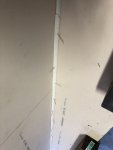
Next we cut strips of fiberglass for the edges of the tub to that they overlapped the existing glass by a few inches on each side
520391
520392
520393
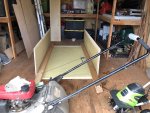
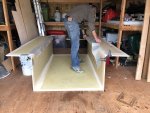
It almost looks like something! The tub will still flex inward, but it's still pretty stiff. Once the end pieces are on it should be super solid. The bedrail pieces ended up being a lot closer. I didn't want a lot of wasted space though, and it clears, so I'm happy with it. The Colorado bed has a very slight angle to it. so the back edge has more clearance than the front. Not a big deal and I'd rather be able to cut straight panels and have it angled on the truck than deal with funky angles on the camper.
 

underkill

Active member
Are you going to lay one more later of glass down after you put the panels together? Or are you just going to glass the joint area?

Sent from my Pixel XL using Tapatalk
We just did the joints and a single layer of glass. It doubles the thickness around the joints and the second layer all over wouldn't have been necessary. With a layer on each side it's super solid at least for what we built. I did add additional layers in areas that we knew would see some stress, like the cabover joint and places we knew we would be bolting through to secure things.
 
looks awesome

very much like the one I built with my son..... but foam not wood..... I love the design having done a trip with my son it is soooooo perfect. Not too big, not too small, out of the weather when you need to.... now I have to build one for myself.
 

Xtreme XJ

Adventurer
Hindsight being 20/20 and all that now that the camper is done I can add a little more information about the materials and what I would do differently next time.

Foam: I love this stuff. It was so easy to work with. It's easy to cut and lightweight. Would definitely use it again. We went with 1/2" thickness. It's more than strong enough for our small camper. I would maybe go a little thicker if I was building a flatbed or something larger. We were trying to keep weight down because the payload on our truck is kind of sad.

Glass: the 1708 was also fantastic. Only having to cut and lay up a single layer at a time made dealing with large sheets of glass fairly manageable. One downside was that it's thick, so when layers overlap it creates a fairly large seam. not attractive, but a great way to build up thickness. It also held its shape well and didn't twist up. We chose fiberglass because of the price point. Honestly if I were to do this again, I'd use carbon fiber. Now that I know the process, the additional material cost would save even more weight.

Resin: We started the build using polyester resin, which was easy to pour and work with. We switched to epoxy (more expensive) for the roof. Epoxy is stronger, but stickier and harder to work with. Mixed feelings about both of these. Probably comes down to budget what I would use if I were to build another one.

So you feel that 1/2" was strong enough... no real need for 1"+ ? What were the failure points with the XPF ? I imagine the joints...
I would have thought thicker would be needed...
Congrats... looks good, well done...
 

underkill

Active member
There are lots more posts coming, but unfortunately I'm traveling at the moment which makes it difficult to keep up with regular updates. I promise we'll get everything posted through to the finish. Sorry about the delay! :)

Yes, 1/2" is plenty strong, especially once everything starts taking a 3d shape instead of flat panels. At one point, we had a piece of foam with glass laid up on both sides that was about 4" wide and 18" long; my husband (~190 lbs) supported the ends of the piece and then stood on the middle of it without it breaking. It deflected maybe 2", but didn't buckle. We did the same with XPS (only thicker and 6" wide) and the test piece buckled.

XPS has 2 issues. The primary failure method is that the foam compresses under the load and essentially allows the test panel to be folded in half, unfortunately I don't have a good picture of this. The 2nd issue it has is that the foam is so weak that the fiberglass skin will pull away from the foam taking a thin layer of foam with it. In the picture below, you can see that the fiberglass that has pulled away has a thin layer of the pink foam still bonded to it.

This is one of our original test pieces. The load was applied to the side where the glass has broken in 2. The foam compressed in a very concentrated area that allowed the entire piece to be folded at about a 90 degree angle. When we straightened it back out, the glass broke in half on one side and sheared away from foam on the opposite.

IMG_9406-X2.jpg
 

Alloy

Well-known member
So you feel that 1/2" was strong enough... no real need for 1"+ ? What were the failure points with the XPF ? I imagine the joints...
I would have thought thicker would be needed...
Congrats... looks good, well done...


Both types of foam are made in different densities. The most dense XPS is similar to the least dense Divinycell.

Divinycell H80 has approx 8 times more compression strength vs. Formular 250.


  • Like
Reactions: Ark

rruff

Explorer
Yes, 1/2" is plenty strong, especially once everything starts taking a 3d shape instead of flat panels. At one point, we had a piece of foam with glass laid up on both sides that was about 4" wide and 18" long; my husband (~190 lbs) supported the ends of the piece and then stood on the middle of it without it breaking. It deflected maybe 2", but didn't buckle. We did the same with XPS (only thicker and 6" wide) and the test piece buckled.

XPS has 2 issues. The primary failure method is that the foam compresses under the load and essentially allows the test panel to be folded in half, unfortunately I don't have a good picture of this. The 2nd issue it has is that the foam is so weak that the fiberglass skin will pull away from the foam taking a thin layer of foam with it. In the picture below, you can see that the fiberglass that has pulled away has a thin layer of the pink foam still bonded to it.

Thanks for posting all this info; really appreciate it!

Oddly I built nearly the identical sample with XPS using the same Foamular. I had to jump up and "kung **** stomp" it to get it to break. The foam is indeed weak and very light (1.55 lb/ft^3 vs 5 lb for Divinycell) and will be the first thing to fail. I'd usually get a diagonal crack through the foam and then part of one side of the FG would break away from the foam.

But still I deemed it suitable for my use, which is a full size camper that is frame mounted. I believe it will survive the stresses it will encounter, and it's much less expensive. A look online shows 1in sheets of Divinycell are $324, plus I would have had to pay considerable shipping. Price with shipping would be ~$13/ft^2 vs $1/ft^2 for the 2" Foamular 250 I'm using. My full cost of materials for the epoxy, cloth and foam for the panels is <$6/ft^2. I couldn't justify using high priced foam.

I'm definitely not dissing your choices at all! I know... I tend to go the cheap route first and see if that works for me ;) Many people go for "the best" right off the bat and run with it.

The XPS foam does need to be properly prepped. Light sanding first and then clean the surface. I tried using a wallpaper perforator and carpet roller to texture the foam, but the thing that seems to work best is a dog brush (recommend by someone on ExPo). It creates a lot of vertical slices.

I also have every sheet of foam edged with a piece of wood, for my piece of mind and to give the panel additional strength, particualrly at the corners and edges.
 

Forum statistics

Threads
188,362
Messages
2,906,022
Members
230,117
Latest member
greatwhite24
Top