Wow just now checking out your build for the first time, awesome thread so far! Really interested in your relay bank setup. I'm in the same boat as you, big plans for electrical accessories, and currently have a bunch of different wires all over the place with excess zip-tied here and there, etc. Impressive work so far, I'll be following this one. :sombrero:
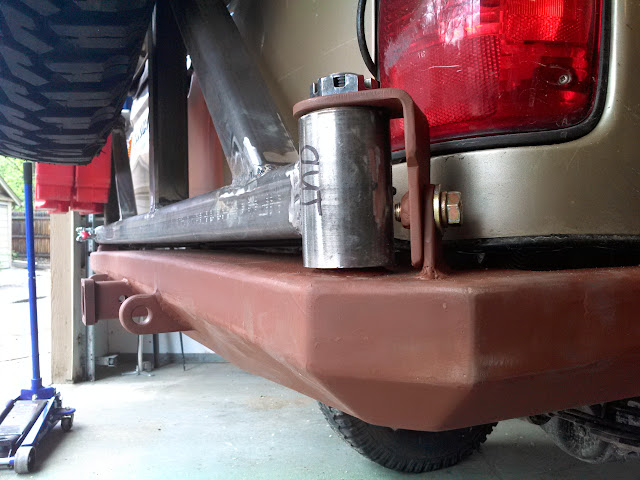
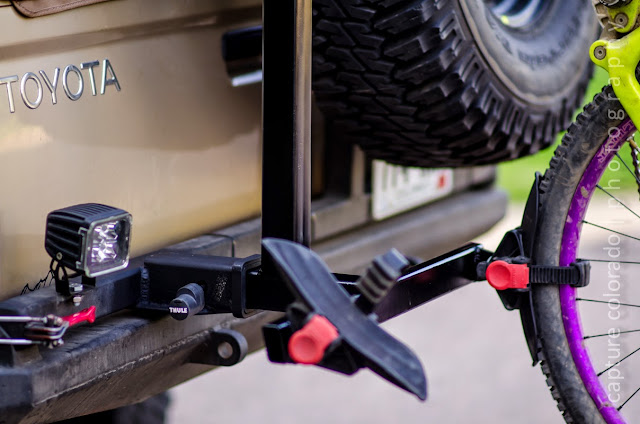
Also - nice work on the rear bumper. It sounds like you have most of the details worked out, but in case you're still on the fence about the latch, have you checked out the Synergy Suspension latch? Not cheap, but it's what I have on my rear swingout and it's awesome. Really smooth, very stout, super easy to open and close, even one-handed.
http://www.synergymfg.com/Synergy-Universal-Swing-Out-Latch-Assembly-p-19993.html#.U44UYxZNtuY
Thank you!
For some reason the latch that I used on my personal bumper has been giving me problems, but the latch (same exact one as mine) that I put on the bumper I built for a guy has had no issues whatsoever. I'm now trying to figure out if it's the latch, or something in the geometry of how everything comes together when it's closed. It could simply be that I don't have the swingarm resting on the pad, so it has some vertical movement causing a discrepancy with the adjustment. I think I'm going to experiment with some chunks of HDPE to fill the space and see if that solved my woes, if not I may very well be buying a $125 latch...
=======
After a couple of months of not really doing anything to the truck, mostly due to a combination of not enough time or money... I caught a cold, so I'm taking the time that I can't get out and ride my bike every day to do things I've been meaning to get done for a while.
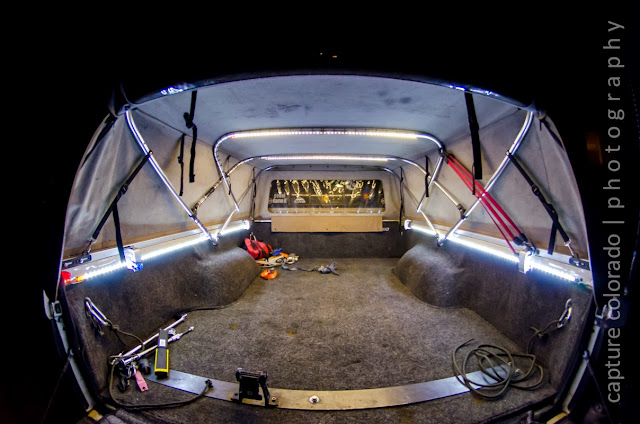
I burnt in, sanded, and painted the front bumper last week (still trying to find a good chance to take pictures...I like using the parking lot at red rocks, but there's been shows every night). Today I took some LED strips that I had sitting around from when I had my jeep and gave the bed some illumination. There's about 18 feet total of strip, approximately 6' on each bed rail, and 3' on the center two softopper supports. The bed rail lights are waterproof, and because a) I didn't have enough waterproof lights to run on the topper, and b) the underside of the topper is almost always totally dry, I used some non-waterproof lights on the topper.
The whole circuit runs on a 5 amp fuse, I'm going to see if I can get away with less, but I'm not sure just yet. It's powered directly off the battery and I used an illuminated toggle switch with a safety cover in the rearmost driver-side corner of the bed to make sure that the lights don't accidentally get turned on by cargo, it's also in an extremely easy to reach spot, so I can blindly flick them on without issue. The switch cover plate worked out to be perfectly the same height as the bed rail, and tucks into the corner quite effectively.
I wired up the topper lights with a disconnect at the base of the topper, and enough extra wire at each pivot point to allow it to be folded down without issue.
In all (not counting new tools
")
) the total cost of this project was about $20. I already had the LEDs from almost a year ago, I used 18 gauge speaker wire for all the connections, which I already had... So really I just needed to buy a light switch and 130 4" zip ties today.
I went a little overkill on the zip ties.
PICTURE TIME!!
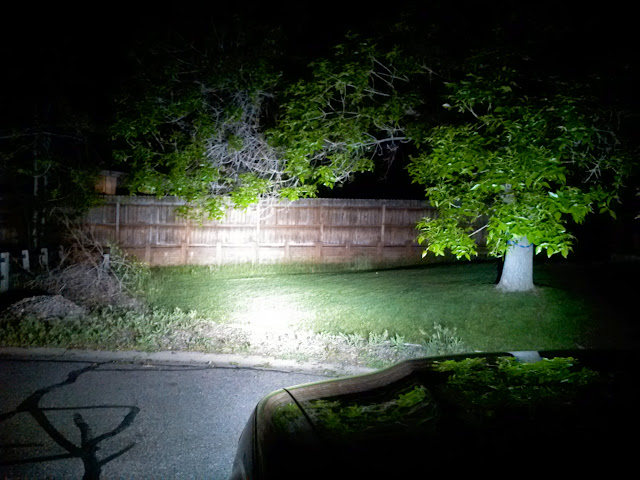
This is how I previously navigated the back of the truck at night... So brutish and caveman-tech; an (admittedly bright) LED flashlight w/ flood. Same settings on the before/after picture both in-camera and editing.
Ta-da!! (seriously, same settings)
Millie approves of her throne.
#ziptieoverkill
Hard to see, but here's the switch. I'll get better detail shots when the sun is up.
I'll be putting these in the cab and wiring them to the dome lights soon, as well. The method of drilling holed in the bed rail and securing the lights with a zip tie seemed to work out well, so I think I'll do similarly to the plastic trim in the cab.