Converting a factory JK/JKU hardtop to modular

jscherb

Expedition Leader
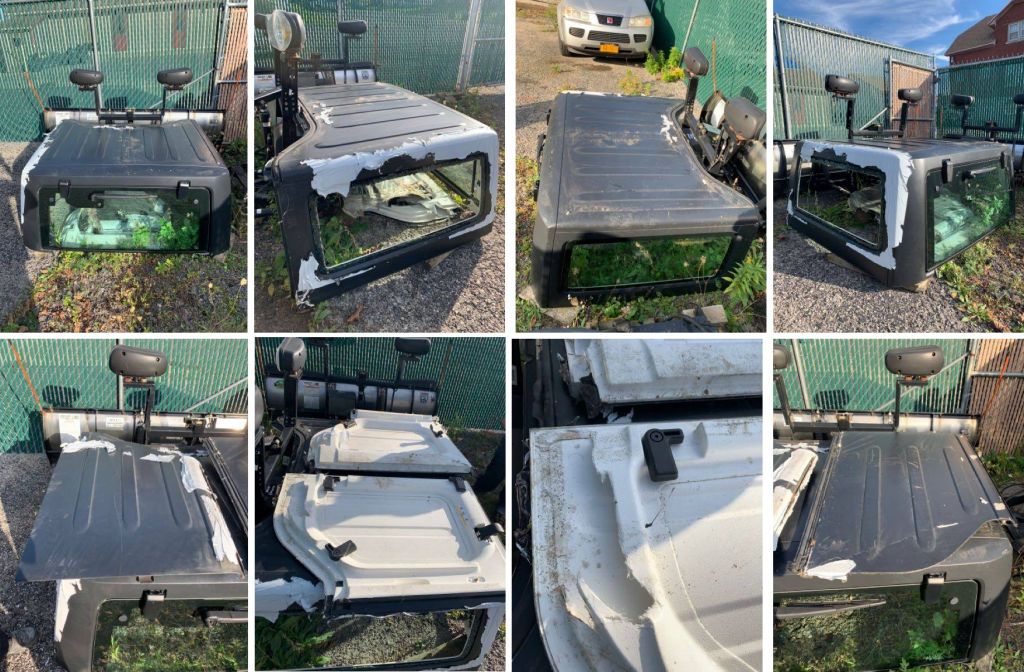
I picked up another 2dr hardtop I found on Craigslist. It looked pretty bad in the listing:
Hardtop3_zpsv0xnpxpy.jpg


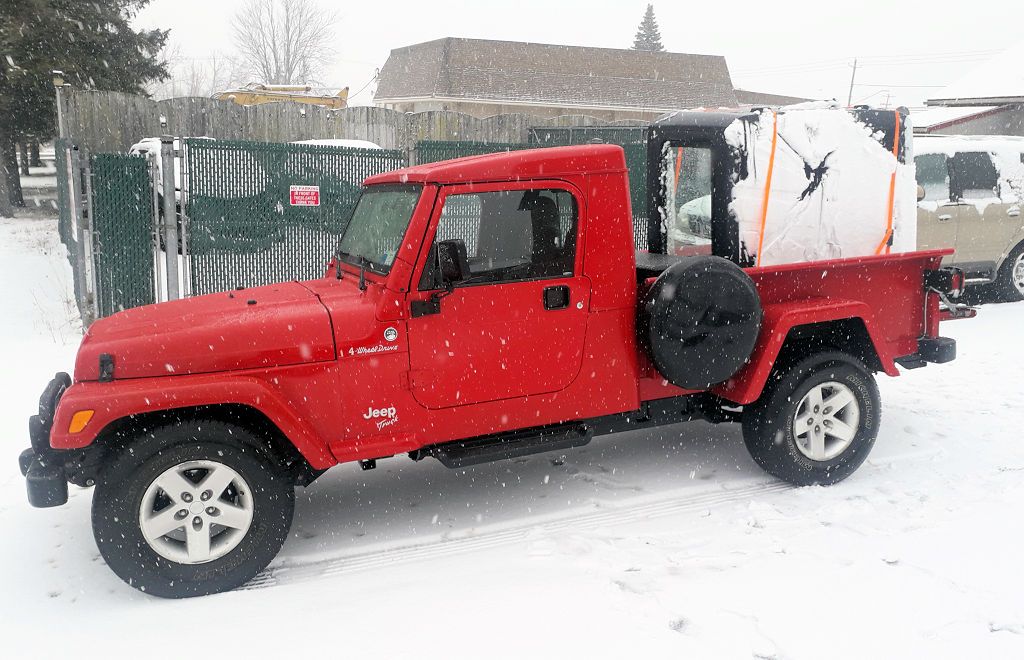
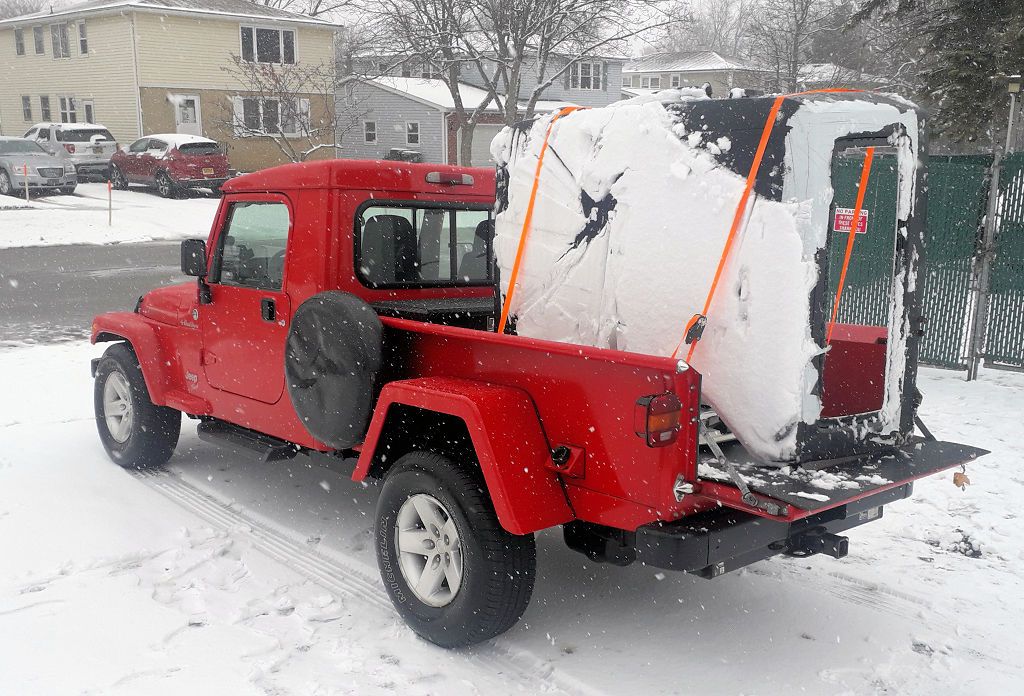
I called the guy and asked him why there was body filler slathered all over it and he said that wasn't body filler, it is tape and that the hardtop itself was in good condition other than some damage at one corner and a missing rear side window. He said the Freedom panels also have some damage. For the price he was asking if all I did was resell the complete liftgate glass with wiper I'd double my money so I decided to grab it.
HardtopPickup1_zpsqkvaaksn.jpg


The white stuff on the hardtop roof is snow, the white stuff on the side panel facing the back of the truck is tape.
HardtopPickup2_zpsnhj5pp5q.jpg


Next I'll review the damage and post a damage/repair assessment.
 

jscherb

Expedition Leader
Damage and repair assessment.
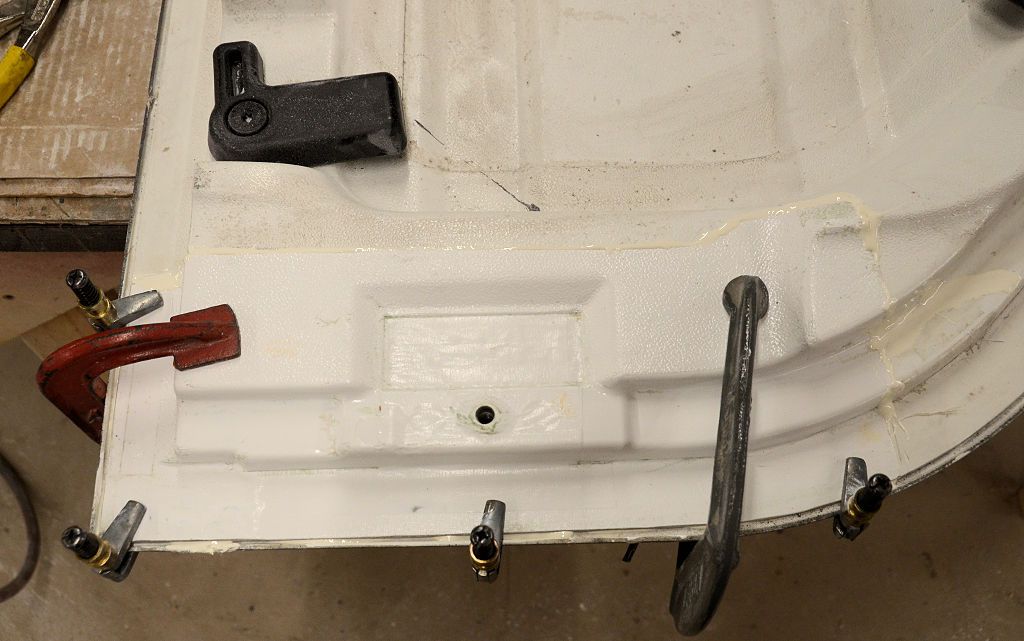
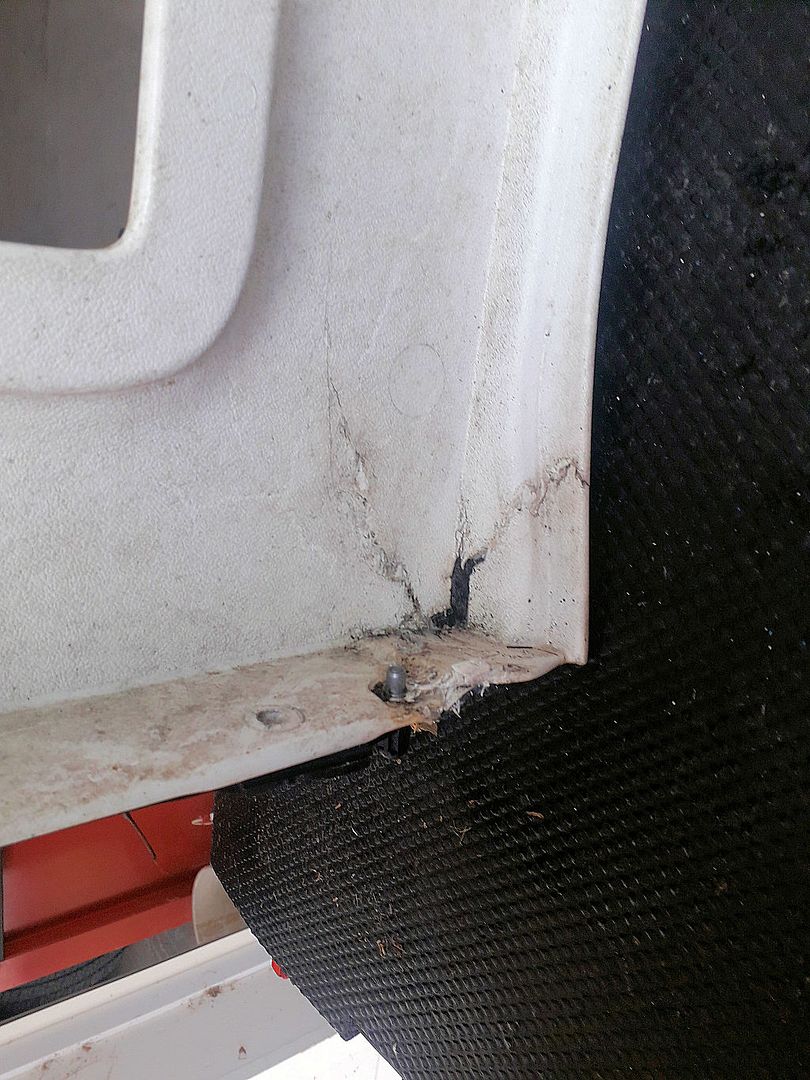
The hardtop has two areas of damage - the lower front driver's side corner:

DrvLowerCorner_zps506pf82a.jpg


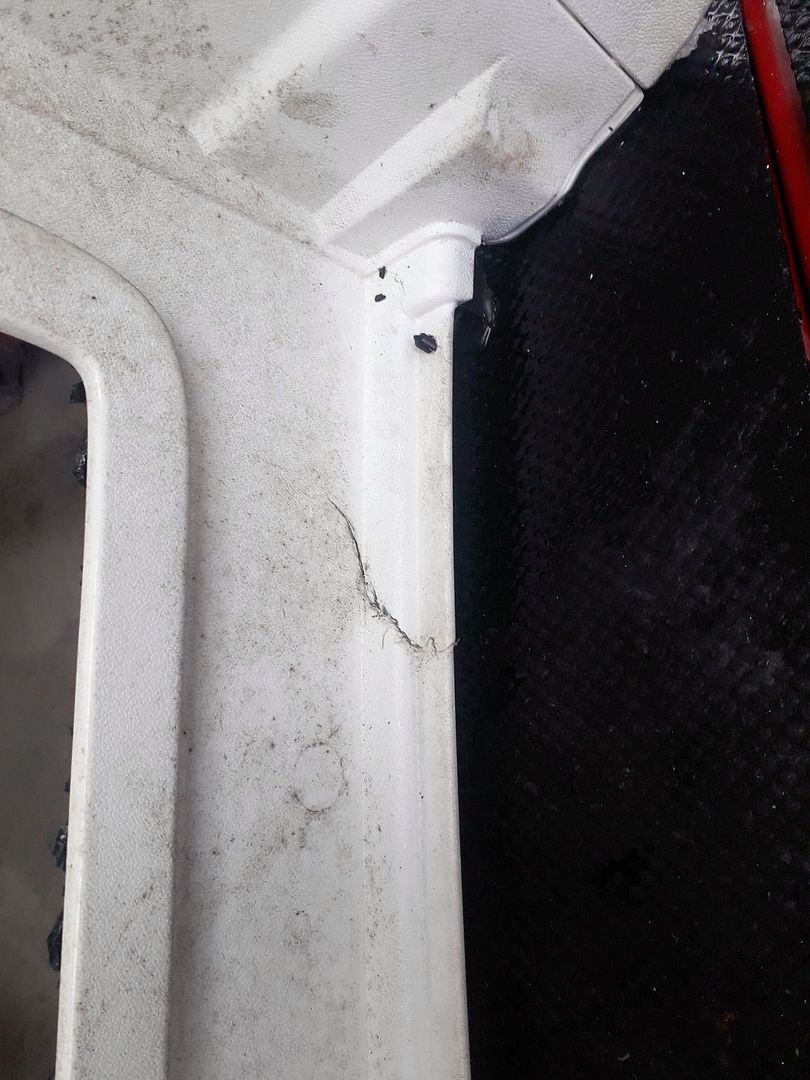
And a crack about 3/4 of the way up the drivers side b-pillar.

DrvBPillar_zpsrk46vabv.jpg


Both of these are pretty easy fixes.

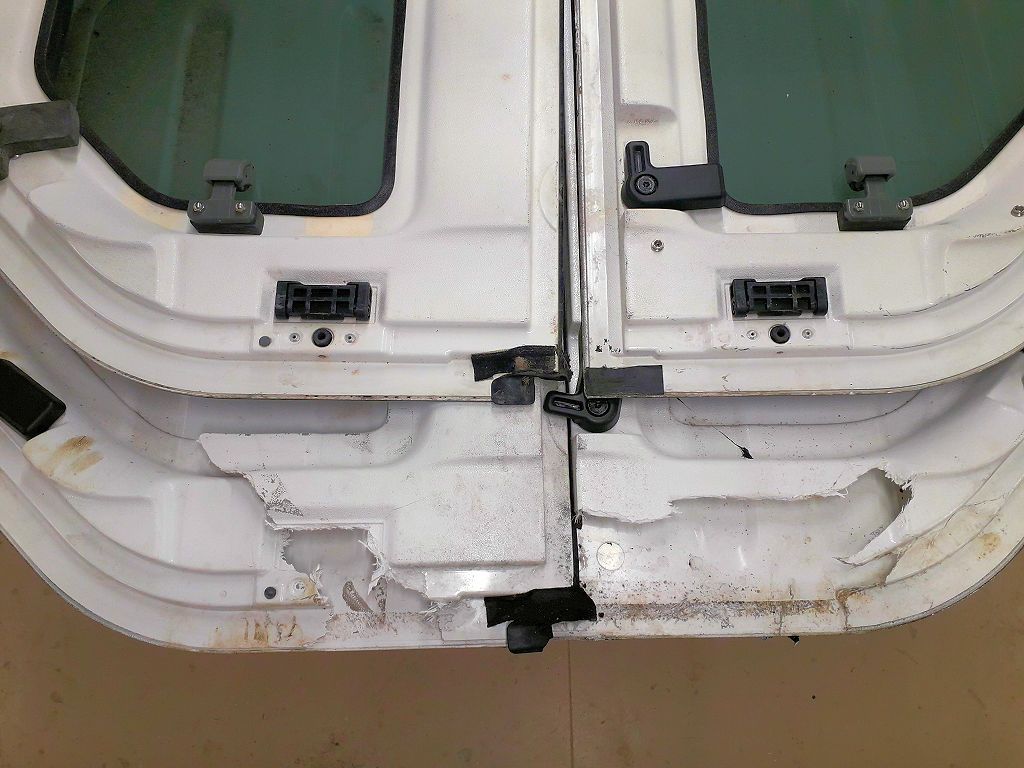
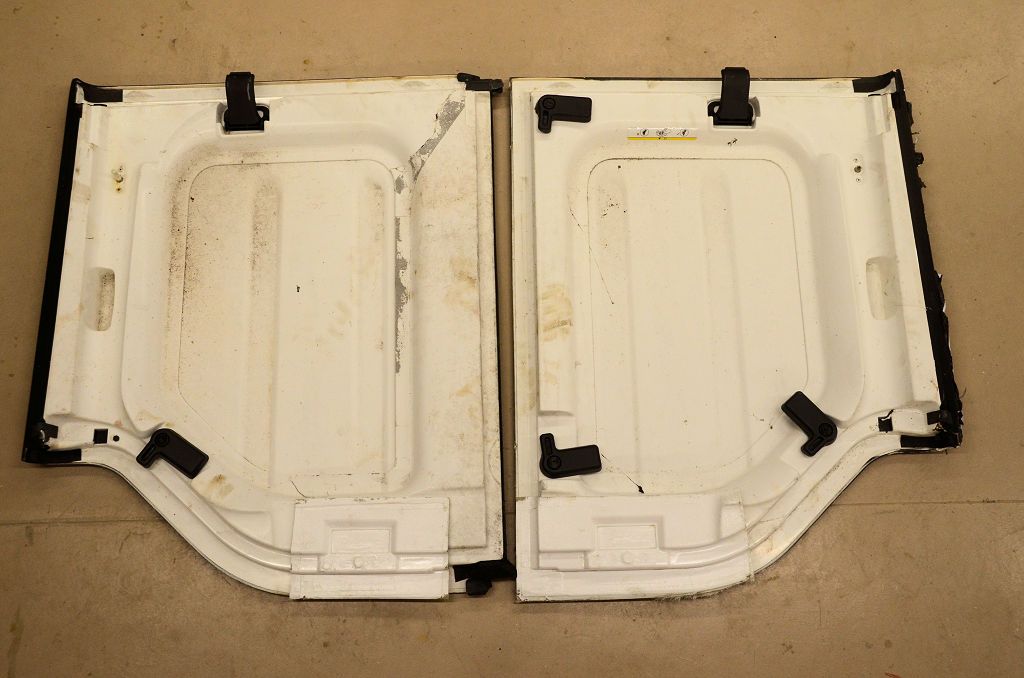
The Freedom panels are in worse shape. Apparently whatever incident happened to the Jeep caused the panels to be forced off and since the large knob screws were in place, the screws stayed in place on the roll bar and kept part of the inside skins of both panels with them while the panels came off, which left large pieces of the inner skins broken off. I did not receive the broken off pieces.

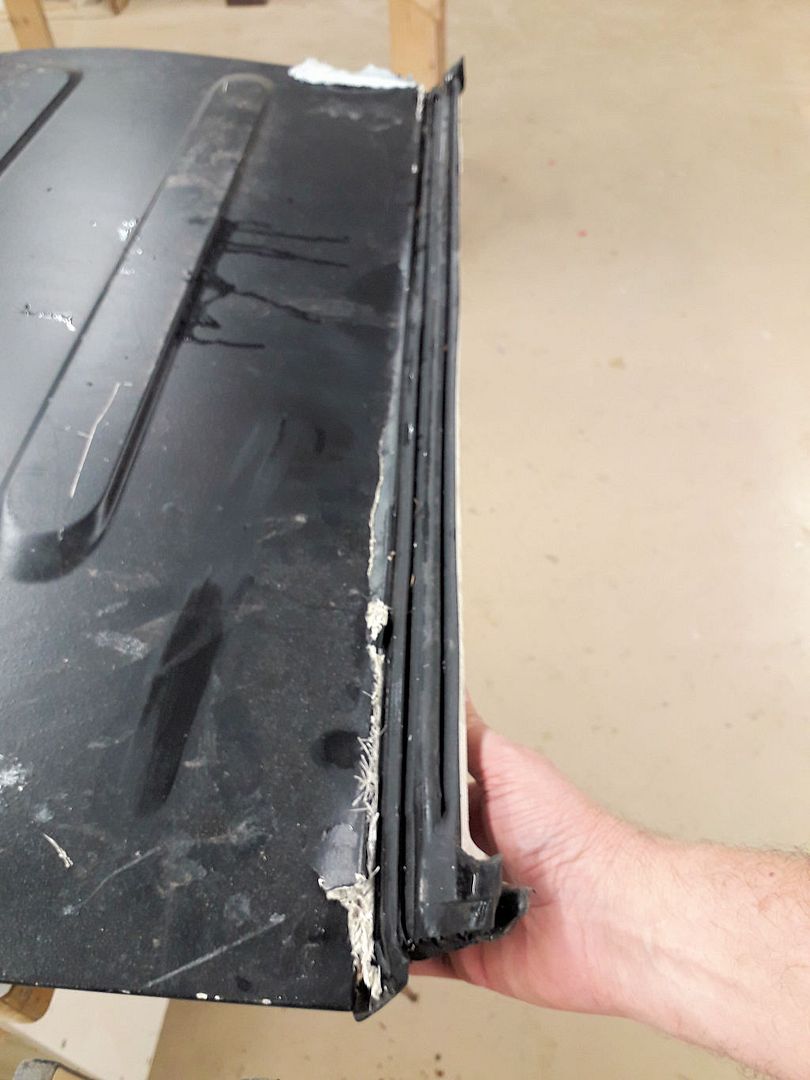
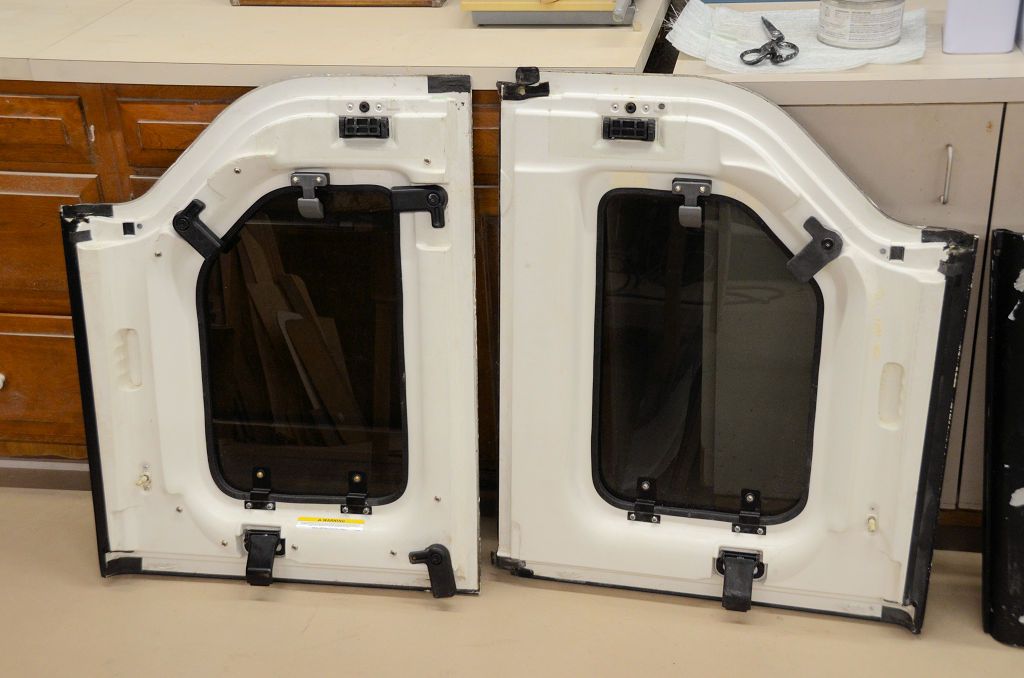
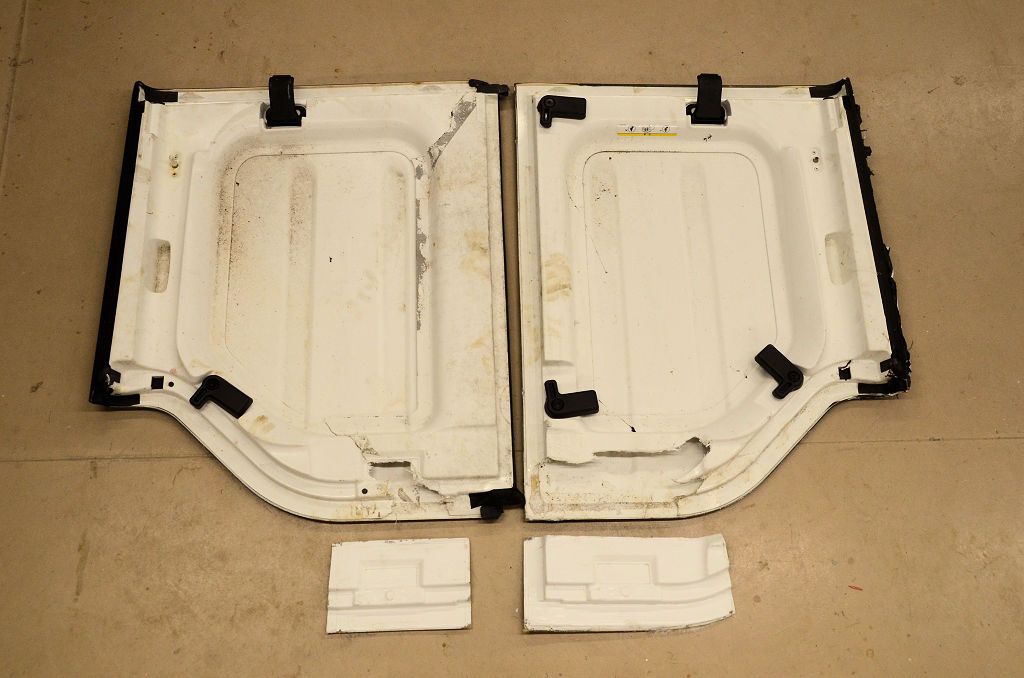
This view compares the broken panels to a pair of complete panels to show what's missing.

FreedomPanelDamage1_zps7ysc6a6o.jpg


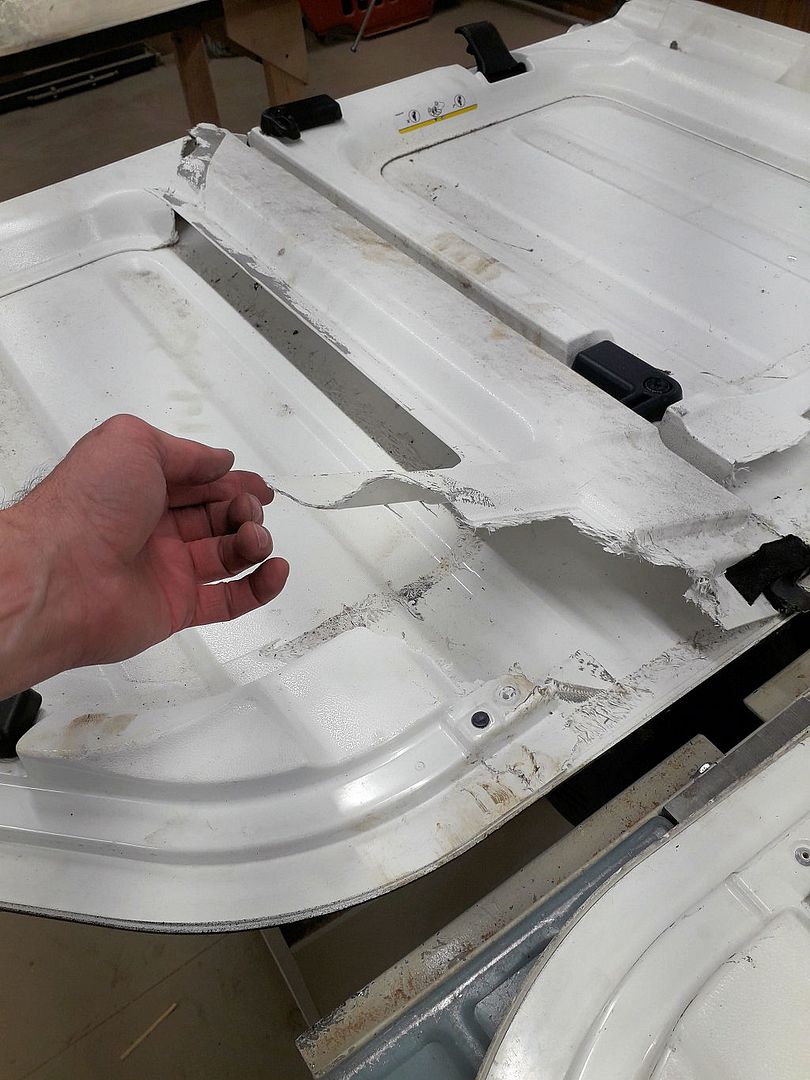
One panel is in worse shape than the other, a large section of the inside skin along the center line is broken:

FreedomPanelDamage2_zpst413odpx.jpg


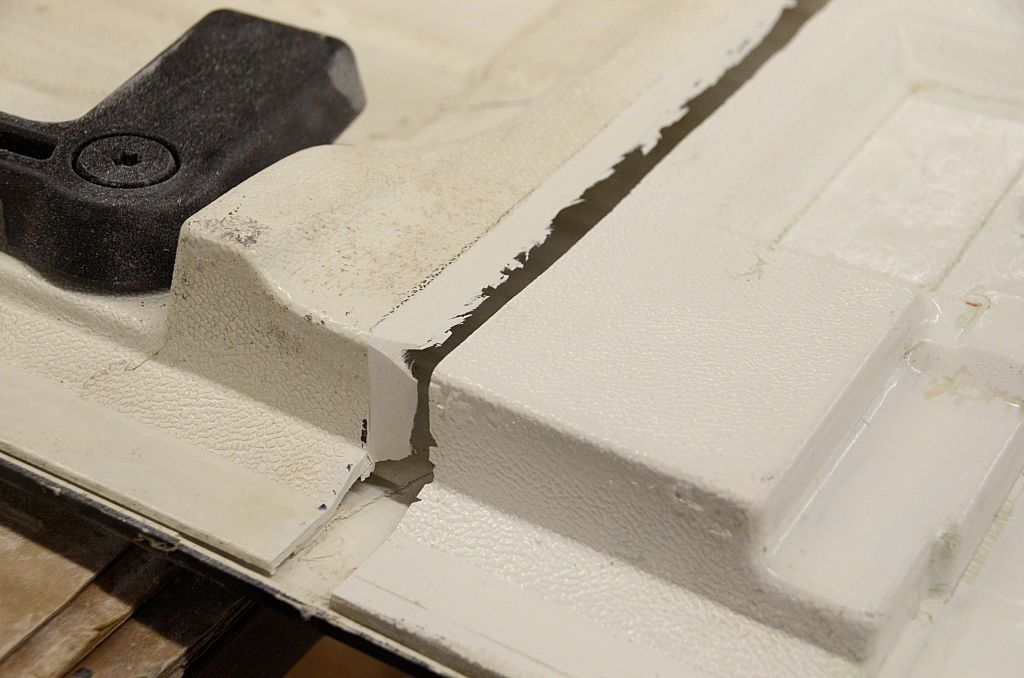
And there the outside skin is broken along the center line, in this photo I'm angling the center sealing surface up along the broken line.

FreedomPanelDamage3_zps50javlap.jpg


You might think the Freedom panels aren't repairable, but pretty much anything made of fiberglass is repairable, even these panels.

I'll probably leave the hardtop repair until warm weather; I don't need the hardtop and I don't want to evict a Jeep from the garage in the winter while I do that repair. The Freedom panel repairs I will start right away, I'll explain in the next post.
 

jscherb

Expedition Leader
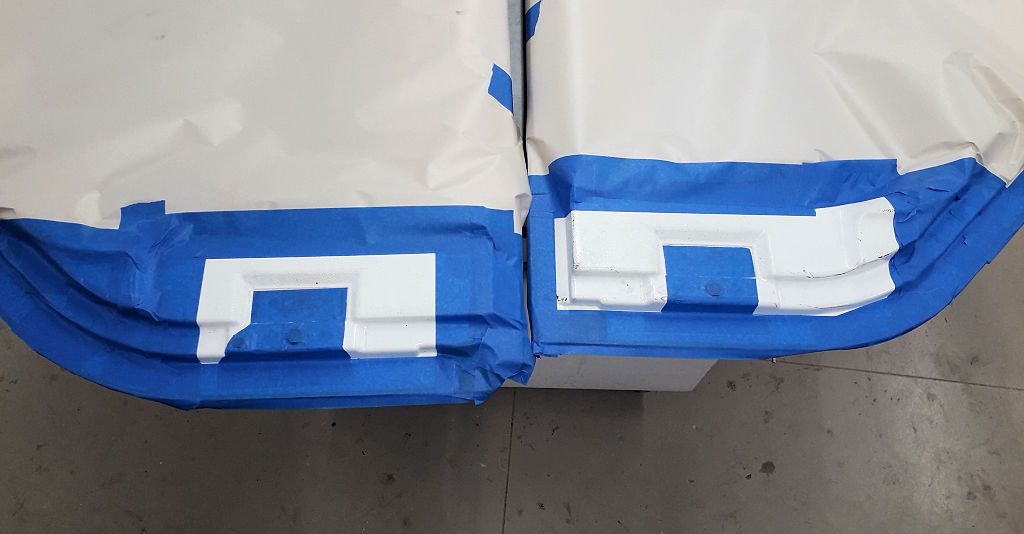
Since I'm doing fiberglass for another project tomorrow, as long as I'm making the mess in the garage I'll start the first step in the Freedom panel repair, which is to recreate the broken pieces. Using a good pair of Freedom panels, I've masked around the sections I need to duplicate:

FreedomPanelRepairMolds1_zpsrmpucmij.jpg


I'll apply mold release wax followed by spraying PVA mold release, which will protect the surface of the good Freedom panels. Then I'll shoot some gelcoat on the surface and lay up enough fiberglass to make "throwaway molds", by which I mean molds that I'll use just once to make replacement sections. Once those sections are made, I'll add threaded inserts for the hardware that causes the sections to be ripped out, and then I'll splice them into place in the broken Freedom panels and secure them with epoxy.
 

jscherb

Expedition Leader
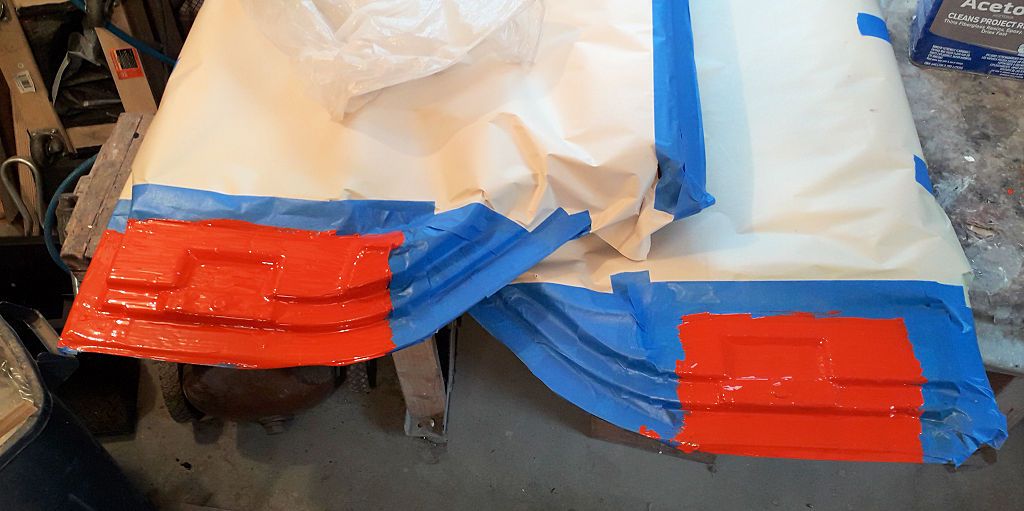
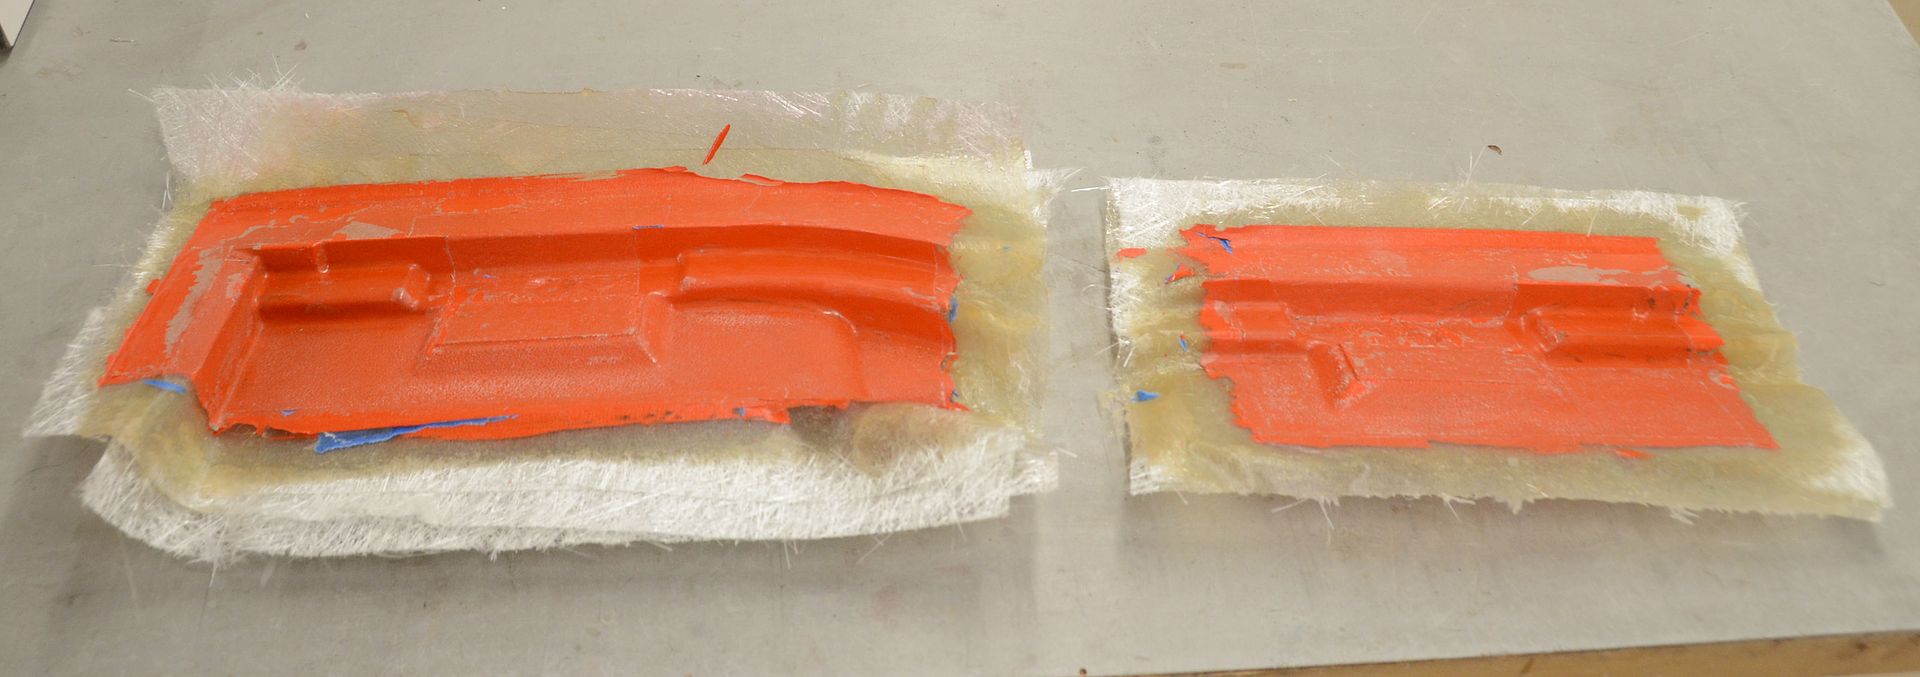
After applying mold release wax and spraying PVA mold release on the areas, I brushed gelcoat on. The gelcoat is orange tooling gelcoat indended for making molds, but for these throwaway molds any gelcoat would do. The other larger fiberglass project I'm doing today involves making a mold for a new TJ/LJ grille design I'm working on so I just mixed enough extra gelcoat to do these tiny temporary molds as well.

FreedomPanelRepairMolds2_zpsaqebcycu.jpg


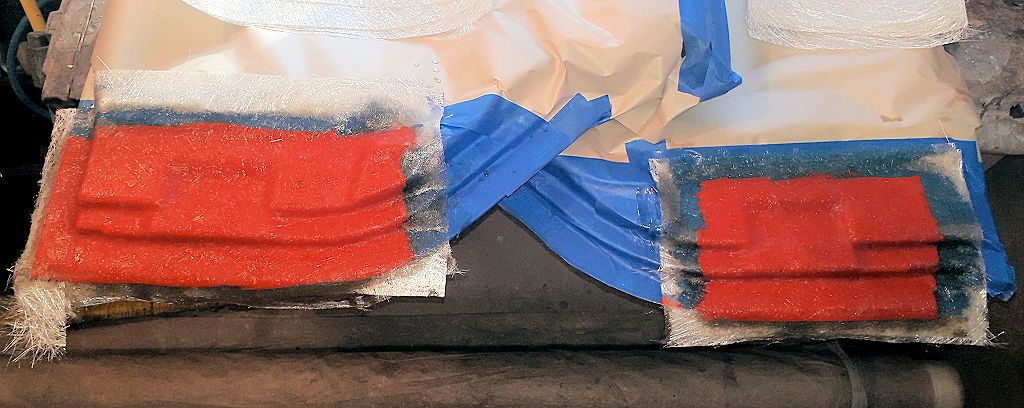
Once the gelcoat cures to the appropriate point (about 2 hours), I'll lay up several layers of fiberglass mat on these areas and the molds will be done.
 
43552e1647d7c8b2b5a7ec7d95240862.jpg


f34930a47f6e704c8e954c64c06d2888.jpg


Looking like another solid project. Scrolled through a bunch and I’m impressed with all the variety of designs.

I’m currently making a Cherokee specific camper top with similar mold making methods
 
Last edited:

jscherb

Expedition Leader
First thing this morning I popped the molds off the good Freedom panels. In this photo they're just as they came off the panels, I haven't trimmed them or washed off the mold release yet.

FreedomPanelRepairMolds4_zpsr4vtptem.jpg


The panels I made the molds on weren't harmed. There's a little mold release wax left on the surface, but that will wash off.

MasterFreedomPanels_zps9eioktmz.jpg


I'll trim and wash the molds, prep them for molding, and mold the replacement sections today.
 

jscherb

Expedition Leader
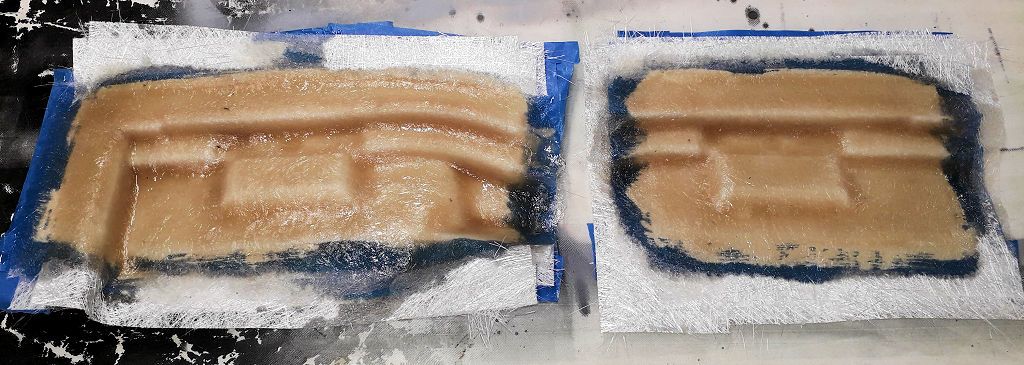
I cleaned the mold release off the molds, trimmed the rough edges, prepped them with wax and PVA mold release and molded the replacement sections. They're curing now, I'll pull them off the molds tomorrow morning. You're looking at the inside of the parts, the outside is white gelcoat to match the Freedom panels.

FreedomPanelRepairMolds5_zpszhkj75dg.jpg
 

jscherb

Expedition Leader
First thing this morning I pulled the replacement sections off the molds, washed off the mold release and trimmed the rough edges.

ReplacementParts1_zpsbgl3qw09.jpg


With a final fitting and trimming, these parts will make for a nice repair.

ReplacementParts2_zps36wqnfuo.jpg


Before I trim, fit and epoxy them into place, I need to add hardware - these parts are where the large knobs screw into so I have to add threaded inserts for them.
 

jgaz

Adventurer
Excellent write up!
I wish I’d had this internet tutorial 25 years ago when I was fixing a fiberglass truck cap that was damaged in an accident.
 

jscherb

Expedition Leader
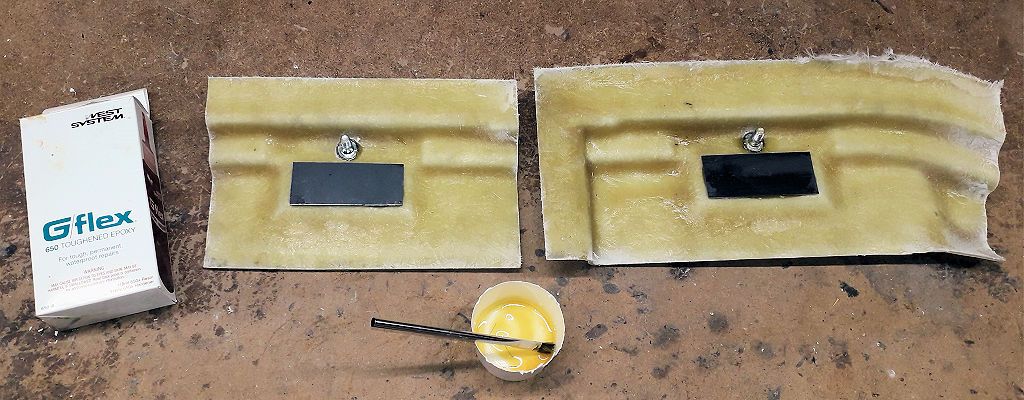
Before I trim, fit and epoxy the replacement sections in place, I need to install the necessary hardware. Two components attach to sections - threaded inserts for the knob screws that secure the panels to the roll bar, and the tilt-up props.

The first step is to epoxy in place threaded inserts for the knob screws and metal plates for the tilt-up props. I don't plan to install props but if I ever do I'll be able to drill and tap mounting holes through these plates.

FreedomPanelHardware1_zps8zzxeozq.jpg


Since this hardware will be permanently sealed inside the panel, in case the epoxy ever lets go best practice is to put a layer of fiberglass over the parts.

FreedomPanelHardware2_zpsdii4mrl1.jpg


Once everything cures these sections are ready to trim, fit and epoxy into place.
 

jscherb

Expedition Leader
Excellent write up!
I wish I’d had this internet tutorial 25 years ago when I was fixing a fiberglass truck cap that was damaged in an accident.
Thanks! I'm posting all these details so if someone else has a broken hardtop or Freedom panel this will give them some guidance on how to do repairs.

I did post some repair info earlier in the thread, I had another Freedom panel that had some damage on one corner that I repaired. Much simpler than making replacement panels like these but also hopefully helpful to someone with damaged fiberglass.

Always happy to answer questions on repairing or making fiberglass parts.
 

jscherb

Expedition Leader
For anyone following along on the repair of these Freedom panels, it'll be a few days before I get back to them. The hardware installation in the patch sections has cured just fine and the next step is for me to splice them into place, I'll get to that in a few days.
 

jscherb

Expedition Leader
I'm back on the Freedom panel repair project. I had to delay a few days because I was in the middle of the refinishing step of restoring/updating/refinishing an antique table and I couldn't make fiberglass dust in the workshop, but the table is done now so I can make all the dust I want.

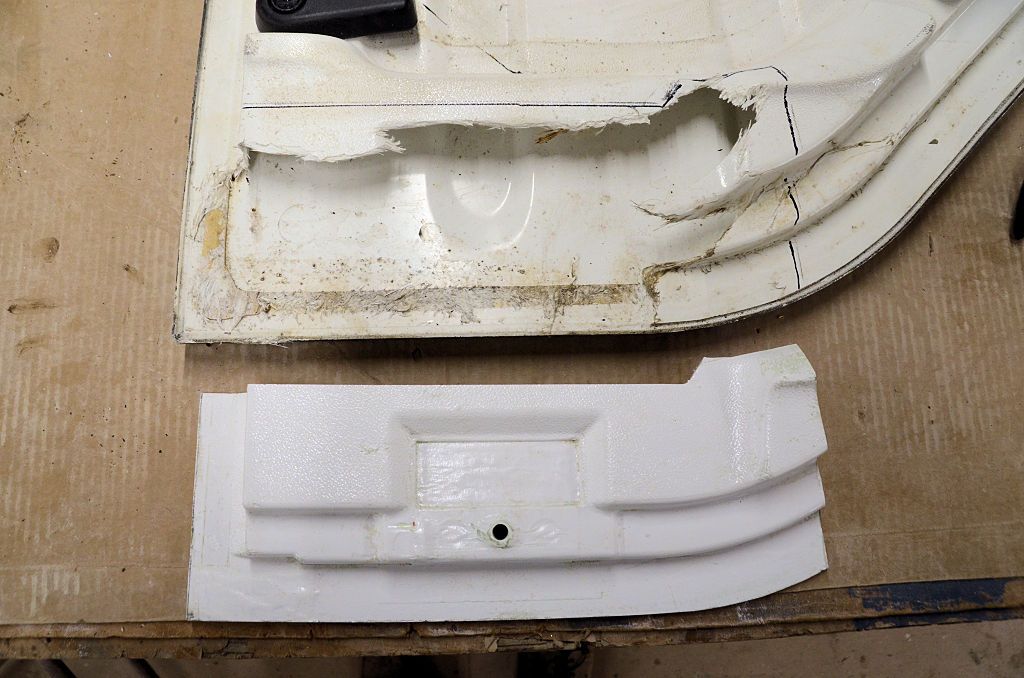
I've trimmed the patch for this panel to final size and I've traced it on the panel.

Patch1Fitting1_zpscddrgdoi.jpg


Next I cut about 1/4" inside the lines on the panel, and sanded a taper on both the panel edge and the patch edge:

Patch1Fitting3_zpsxp2oy8x5.jpg


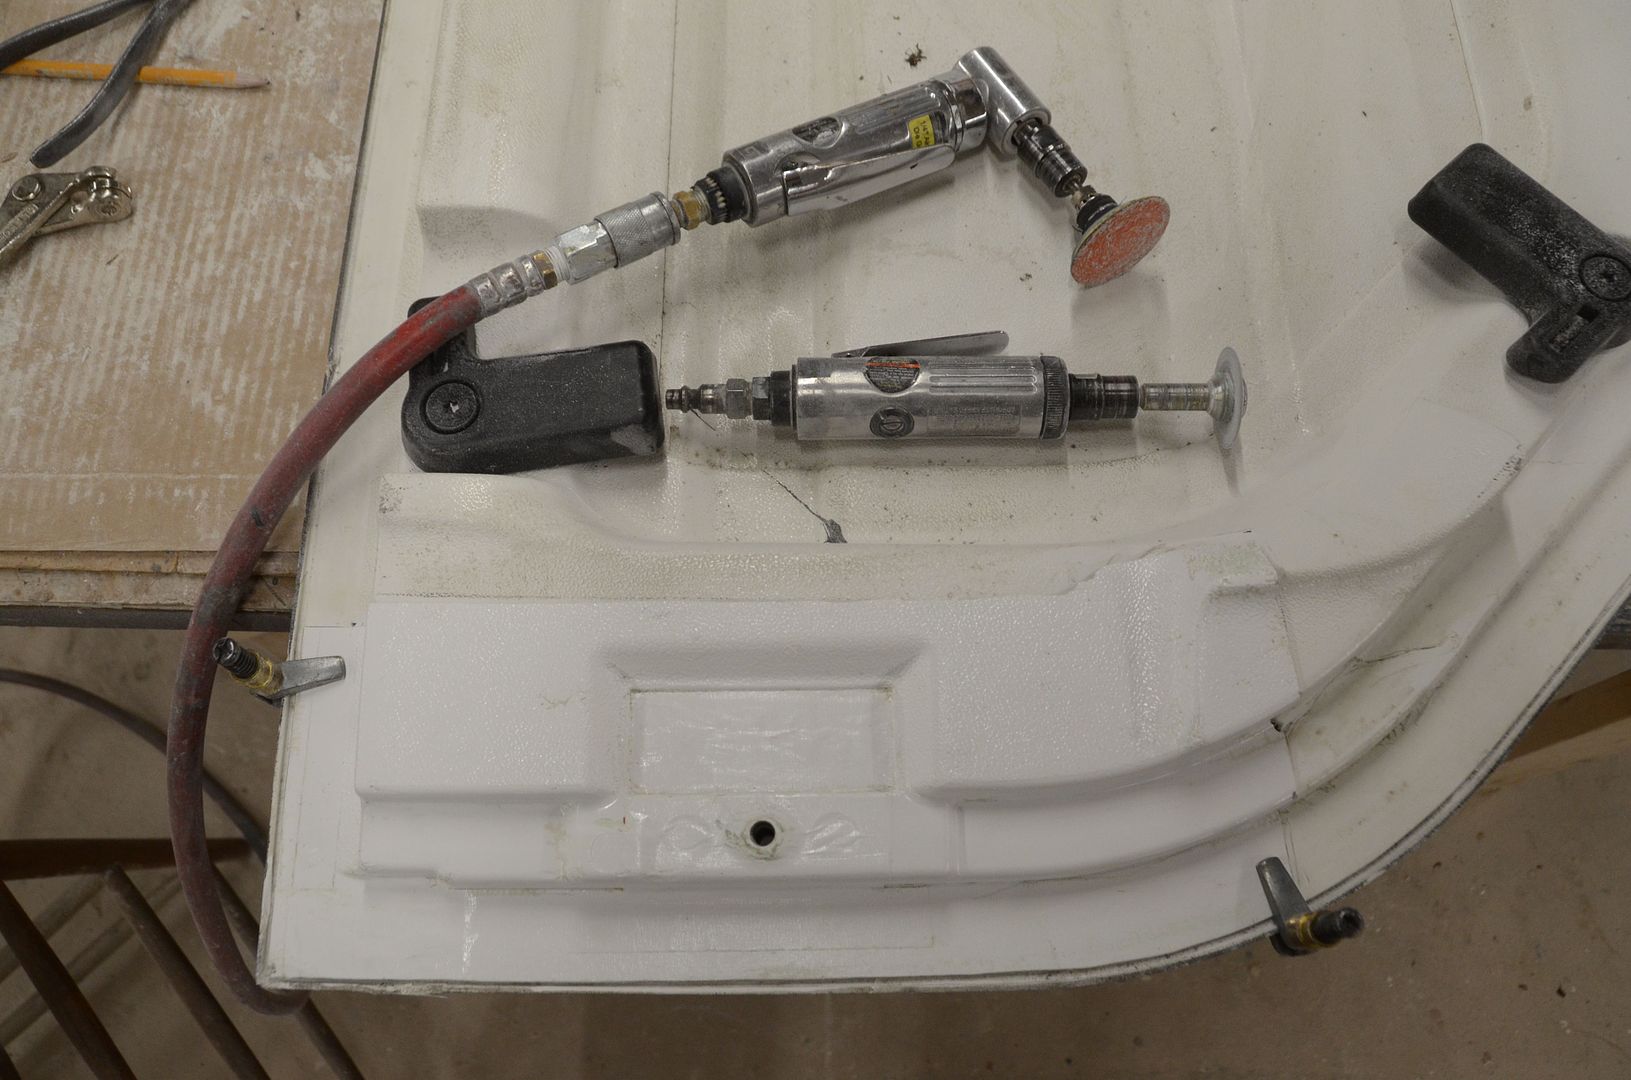
Once the edges have an initial taper, it's a process of refining the fit until all the surfaces are flush. This next photo is a work-in-progress photo during the fitting. Also in this photo are the two tools that speed this process - an angle grinder with a 36-grit sanding disk, and a die grinder with a diamond cutting wheel. Harbor Freight items. Don't strictly need both the angle grinder and the die grinder, but having both is quicker than swapping bits on one tool.

Patch1Fitting2_zpscxxx4kzp.jpg


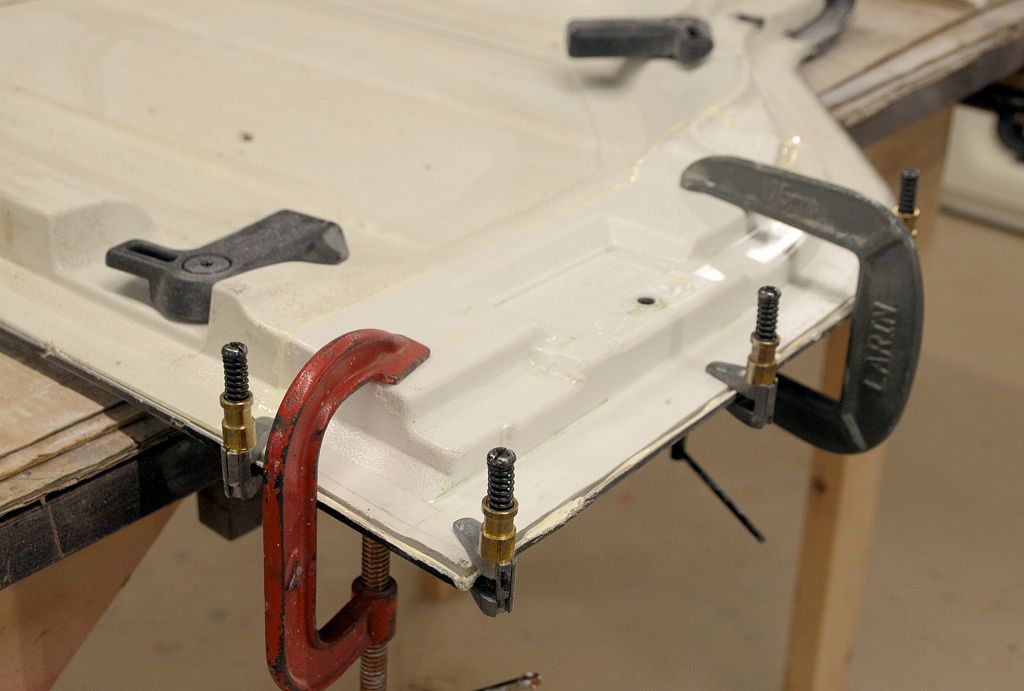
Once I was happy with the fit, I mixed up some epoxy, tinted it white, and put the patch in place, holding it gently in place with some clamps. On the far right in the photo there was a crack in the panel beyond the patch so I ground out a groove along the crack and filled it with epoxy (see the photo above for a photo of the crack before grinding and epoxy.

Patch1Fitting4_zpsk4gm9r5o.jpg


Patch1Fitting5_zpsemqjpayp.jpg


I'll let the epoxy cure overnight then I'll sand off the excess epoxy at the joints.
 

jscherb

Expedition Leader
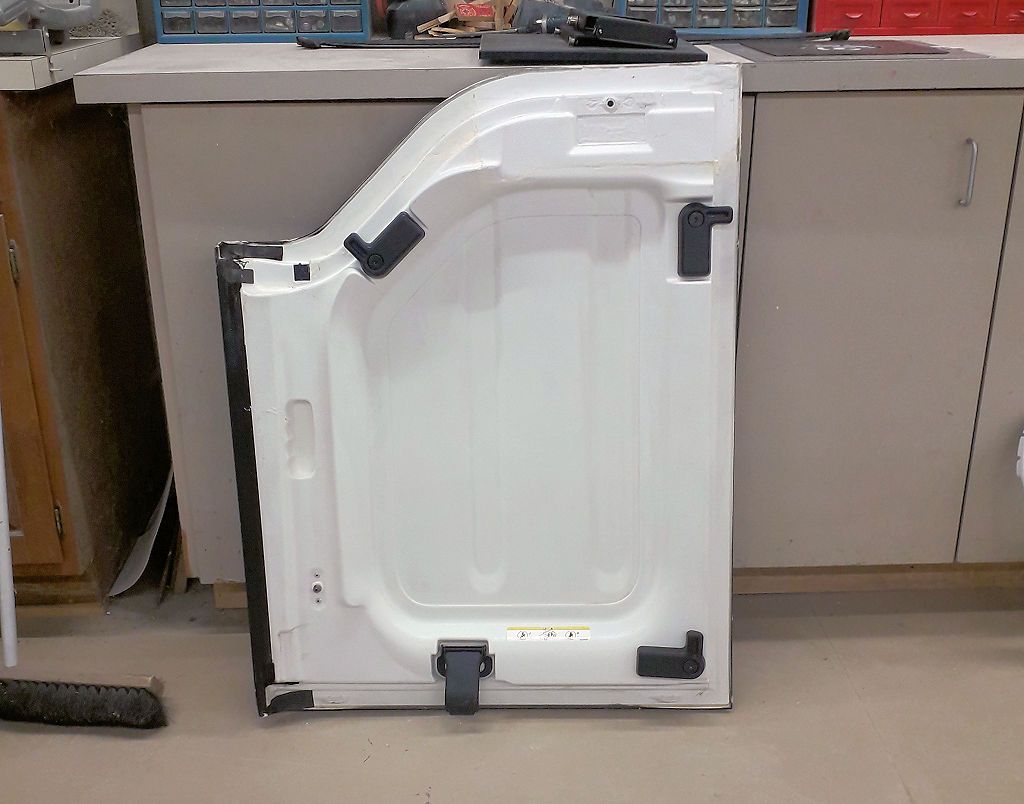
First thing this morning I removed the clamps and washed the dirt off the rest of the panel but haven't sanded the excess epoxy off the joint yet. There are a few scratches in the paint on the outside of the panel that I'll have to touch up but other than that and smoothing the patch joint this panel is repaired and ready to be used.

Patch1Fitting6_zpser0pvdna.jpg
 

Forum statistics

Threads
188,039
Messages
2,901,492
Members
229,352
Latest member
Baartmanusa
Top