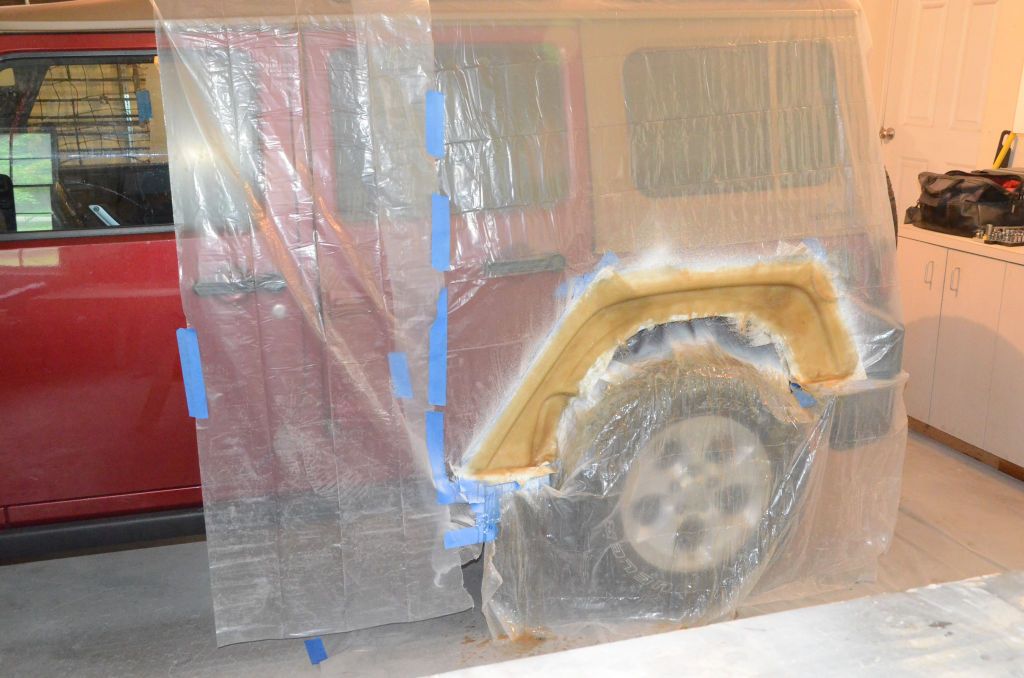
Converting a factory JK/JKU hardtop to modular

jscherb

Expedition Leader
I was able to get the panels cut - pretty easy process. Thanks again for your instructions! I will probably have to put this project on hold for a few weeks, but something I have been pondering, and I would appreciate your thoughts... did you consider going with a tool-less quick release mounting/attachment option for the panels? Being in Florida we get a lot of rain, often times unexpectedly, so having the ability to quickly replace the panels would be appealing. The idea on unbolting like 20+ bolts sounds cumbersome. My concern with this, however, is ensuring the panels are secure so they don't fly off while driving down the highway. Any thoughts on this, Jeff?

Also, before I sell my 'good condition' hard top (I already have my soft top back on), do you suggest that I make fiberglass copies of the side and rear windows, so when I go to build the barn door and side window panels, I already have the shape (convex curvature). This seems like a no brainer, but wasn't sure if you had any other methods to recreate the complex curving of the windows.


DSqg3b4_usH8LjnZY_aULoqdeJfj-6gKGW0uWIhfvXr2iVaU6HaJpIM5CCz-Qww-dNO8MyHWuBLEDg-5Q2s_EzXxnIoK3h6Nw0KXPtMzRySlEymRFy8Z9vZGuA-FBFOQE68I2Kr5hlTnP-hN26C2Is0PGwEPvg_6nNnYxk7Wv2P2FmlsSPvEac1RCCxQztI7W1O-ZtoMZyz4QKvTbQOcPECA4Ur9R5KOsL1HLHTppybjoPbE6GmqqLb6uwu5eey_cvKJ-PNpcgVppuMTfQPqh5QC3aap_GV3TZWUBhs3qOLvw0ZTFf1dH9ELdpkUU8_nOR82XUh7Uho24Hmp3sCmybghEbdl7qJqc2998U5lagDADtxVmlNm1If1m1jVzTOP0Ge9mQ9P9oEgAFZNRCte9FDnGetHtxkPieb9H3B8SG4XcI1R3IblwrcjRC6qbEaqQKKXxeoGU9lkUkBUotgrntxgUOzA57-XAZhejLHcqFPnkR3irfcTsifADXPfAlH9Scv9as4C6AiO3AFsIYJ_SWW86yJZ3dsfTPI1z2Cblm_XCVeCTaF6w89P2uL12_OaIShHvSI5hGLmKo1R2tp8YOj9UaolExi4_ahcZ5Gy3RO4HvF0RBVUnSxYcCeemwU4LQu3BwD_5uvUaJDBesUO0o9FMWul84zhWasnY2yje5VgxOflOEQssA=w1184-h888-no
If the panels aren't bolted tightly together, they will move a bit relative to each other when the Jeep tub flexes, so whatever fasteners you choose, make sure they can hold the panels together as tightly as bolts could. If the panels move you're likely to get leaks at the joint.

I don't see any reason to make molds of the side windows, what did you think you would do with those molds?

Yes, making a mold from the liftgate is a fine way to get a mold that's curved exactly the same as the liftgate. Make sure to fiberglass bracing into the back of the mold so it stays the correct shape.

It looks from the photo like the hardtop you cut up is a later model wide-hatch hardtop. I covered this in the barn door thread, but a barn door to fit that width opening will not work with the factory tailgate hinges, you'll need wide-swing tailgate hinges. The hinge pin has to be in line with the passenger edge of the liftgate glass. The hinge pin in the factory tailgate hinges is too far to the driver's side for the barn door to swing properly. You'll find info on this in the barn door thread.

Thanks Jeff. Regarding the new model hard top, I actually covered that with you in your barn door thread some time back, ha! I will likely have more questions when I get to that stage of this process, but for now I do understand that the hinge will need to be in line with the window edge (what will effectively become the outer edge once the panel is secured to the swing gate). I was really hoping to find an older style top, but didn't luck out.

Regarding the fasteners, I was thinking some variance of a sturdy latch - there are so many different types out there. I agree that it would need to be something strong to properly seal out any water. I would also be a little worried about any stress the latch may have on where the bases for the latch and catch are mounted. I feel like this could lead to premature micro-cracks or wear. I will give this some more thought.

As for making molds of the windows on my 'good' top before I sell it... the idea here was that I really didn't know how I would recreate the same top/bottom, left/right convex curvature to replace the missing windows on the 'converted' top. It seems you agree with this approach for the rear glass... maybe I incorrectly assumed the side windows were convex as the rear glass is? Good tip on bracing the mold for the rear glass so it retains it's shape.
 

jscherb

Expedition Leader
Thanks Jeff. Regarding the new model hard top, I actually covered that with you in your barn door thread some time back, ha! I will likely have more questions when I get to that stage of this process, but for now I do understand that the hinge will need to be in line with the window edge (what will effectively become the outer edge once the panel is secured to the swing gate). I was really hoping to find an older style top, but didn't luck out.

Regarding the fasteners, I was thinking some variance of a sturdy latch - there are so many different types out there. I agree that it would need to be something strong to properly seal out any water. I would also be a little worried about any stress the latch may have on where the bases for the latch and catch are mounted. I feel like this could lead to premature micro-cracks or wear. I will give this some more thought.

As for making molds of the windows on my 'good' top before I sell it... the idea here was that I really didn't know how I would recreate the same top/bottom, left/right convex curvature to replace the missing windows on the 'converted' top. It seems you agree with this approach for the rear glass... maybe I incorrectly assumed the side windows were convex as the rear glass is? Good tip on bracing the mold for the rear glass so it retains it's shape.
I agree with making a mold of the rear hatch to be used to begin to make a fiberglass barn door, but fiberglass won't stand up to the heat required to bend and temper glass so fiberglass molds made from the factory windows wouldn't be usable for making replacement glass.

I recommend these, easy to install and very nice for ventilation: https://www.retrofitoffroad.com/sho...-factory-hardtop-slider-window-kit-2011-2017/

Thanks. I was actually thinking of making replacement opaque panels, not glass for the side window locations. Something similar to your storage solutions, etc.
 

Tkhawk

Adventurer
When creating the first set of flanges how many layers of fiberglass tape did you use? You said multiple and in another spot you said layers 2-4 after the mat, so I'm guessing 3 layers of fiberglass tape?

I'm finally moving forward, I've got the forms on and im cutting the mat!

Thanks for your help.
 

jscherb

Expedition Leader
When creating the first set of flanges how many layers of fiberglass tape did you use? You said multiple and in another spot you said layers 2-4 after the mat, so I'm guessing 3 layers of fiberglass tape?

I'm finally moving forward, I've got the forms on and im cutting the mat!

Thanks for your help.
I used two layers of fiberglass cloth tape over two layers of mat in most places.

Post photos of your project, I'm sure people want to see the progress.
 

Tkhawk

Adventurer
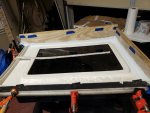
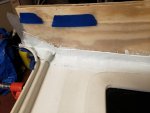
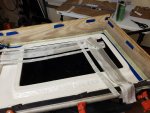
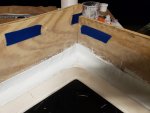
Well i got the first flanges done. I think i should have watched a couple of videos on how to do it first because it was definitely a learning experience, still not sure if i did everything right, hopefully it'll hold.

JSCHERB have you done a how to video on fiberglass? I saturated it, but i feel like i may have over saturated it, is that possible?

I also used to much hardener in the All Resin, it turned to gel before i finished the first panel and I had to mix another batch.
 

Attachments

  • 20200410_180018_copy_2016x1512.jpg
    20200410_180018_copy_2016x1512.jpg
    660.3 KB · Views: 27
  • 20200411_013703_copy_1612x1209.jpg
    20200411_013703_copy_1612x1209.jpg
    365.4 KB · Views: 26
  • 20200411_013708_copy_1612x1209.jpg
    20200411_013708_copy_1612x1209.jpg
    330.7 KB · Views: 26
  • 20200410_232243_copy_1612x1209.jpg
    20200410_232243_copy_1612x1209.jpg
    548 KB · Views: 26
  • 20200411_013712_copy_1612x1209.jpg
    20200411_013712_copy_1612x1209.jpg
    309.8 KB · Views: 26
  • 20200411_013720_copy_1612x1209.jpg
    20200411_013720_copy_1612x1209.jpg
    355.1 KB · Views: 27

jscherb

Expedition Leader
Well i got the first flanges done. I think i should have watched a couple of videos on how to do it first because it was definitely a learning experience, still not sure if i did everything right, hopefully it'll hold.

Your work looks very nice for a first try. There are a few spots at the corners where it looks like there may be a gap between the new fiberglass and the old surface but other than those small spots it looks very good.

JSCHERB have you done a how to video on fiberglass? I saturated it, but i feel like i may have over saturated it, is that possible?

I've never done a video on fiberglassing myself but there are many on YouTube that might be helpful for a beginner.

Over saturation can be a problem for some parts but for these flanges it shouldn't be a problem. If the ratio of resin to fiberglass is too high, the resin can crack under stress leading to failure of the part, but since these flanges are built on the original hardtop surface they shouldn't flex enough for that to be a problem.

I also used to much hardener in the All Resin, it turned to gel before i finished the first panel and I had to mix another batch.

Proper ratio of hardener to resin is important for strength - if the cure is too fast the integrity of the finished part may be compromised. For strength it's much better for it to take too long to cure than for it to cure too fast.

After you remove the forms, I recommend you test the bond of the flanges to the hardtop surface. Try to flex the flange using your hand to make sure the new flange is well bonded to the old surface, especially in those few spots I mentioned earlier. You'd much rather have the bond fail now than have it fail once the project is finished and in use. If the flange does come loose from the hardtop surface, it's not hard to fix.

But overall it's very nice work!
 

JDaPP

Adventurer
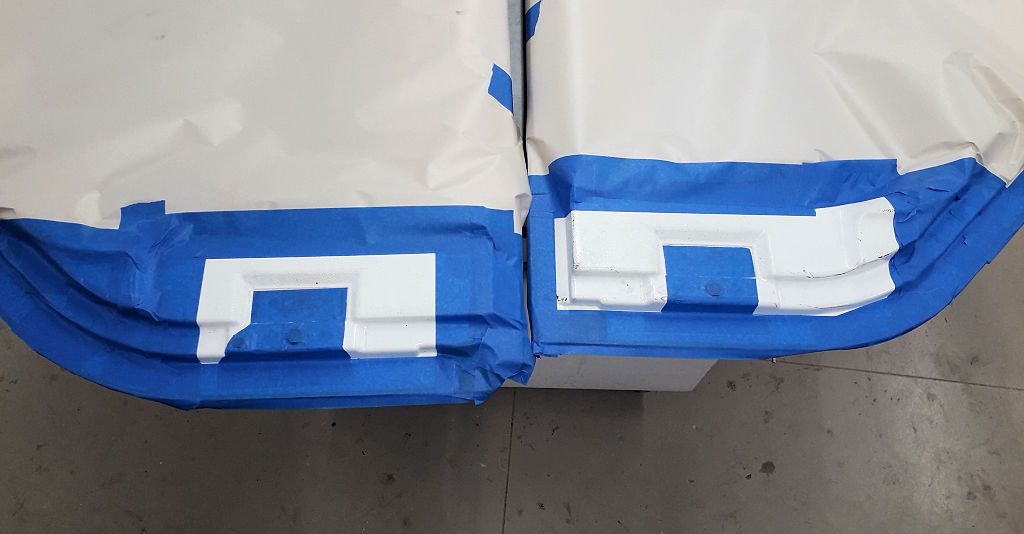
Since I'm doing fiberglass for another project tomorrow, as long as I'm making the mess in the garage I'll start the first step in the Freedom panel repair, which is to recreate the broken pieces. Using a good pair of Freedom panels, I've masked around the sections I need to duplicate:

FreedomPanelRepairMolds1_zpsrmpucmij.jpg


I'll apply mold release wax followed by spraying PVA mold release, which will protect the surface of the good Freedom panels. Then I'll shoot some gelcoat on the surface and lay up enough fiberglass to make "throwaway molds", by which I mean molds that I'll use just once to make replacement sections. Once those sections are made, I'll add threaded inserts for the hardware that causes the sections to be ripped out, and then I'll splice them into place in the broken Freedom panels and secure them with epoxy.
Do you have a general materials list for doing a repair similar to how you had the list in the beginning? I realize quantity will be different based on each repair I am mostly just trying to determine what I need to make the molds.
 

jscherb

Expedition Leader
Do you have a general materials list for doing a repair similar to how you had the list in the beginning? I realize quantity will be different based on each repair I am mostly just trying to determine what I need to make the molds.
It would help if you told me what you were planning to make molds of, but in general, you want to prep the surface (clean the surface and then tape the edges where the mold will end), apply mold release (wax AND ideally PVA), apply gelcoat, and lay up fiberglass mat with resin.

I buy all of my fiberglass supplies from US Composites, so for best results making small molds like the ones I made to make the replacement sections for the Freedom panels, I'd use this:
The 3/4 oz. mat I listed is very thin and excellent for conforming to edges and details but will require more layers than thicker mat to build up enough thickness. Small molds are easily made completely with 3/4 oz. mat but for larger molds you'd want to start with 3/4 and then build up thickness with 1/5 oz. mat.

I'm happy to provide more detail and guidance if you've got a specific project in mind.
 

JDaPP

Adventurer
Thank you. I will take a picture tomorrow as it is hard to describe. Top was free so figure it will be at least worth giving it a shot.
 

JDaPP

Adventurer
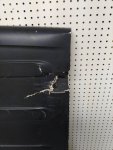
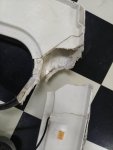
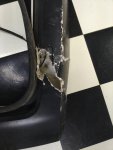
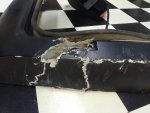
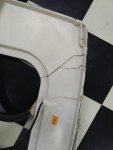
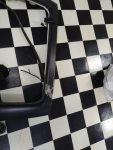
Area is right above passenger hinge for rear window. Not sure if it will need reinforcement because of that (I have the hinge). There is also some separation along the top edge. It is completely broken through which you can see in the pictures.
You can also see there is a little damage on the top panel.
 

Attachments

  • 123_1_1.jpg
    123_1_1.jpg
    86.6 KB · Views: 32
  • 123_1_2.jpg
    123_1_2.jpg
    74.4 KB · Views: 30
  • 123_1_5.jpg
    123_1_5.jpg
    104 KB · Views: 28
  • 123_1_3.jpg
    123_1_3.jpg
    102.4 KB · Views: 22
  • 123_1_4.jpg
    123_1_4.jpg
    64 KB · Views: 21
  • 123_1_6.jpg
    123_1_6.jpg
    101 KB · Views: 18
  • 123_1.jpg
    123_1.jpg
    90.7 KB · Views: 18

JDaPP

Adventurer
I am assuming make a mold of the hinge area on the driver side and then use that to make a new area for the damaged part. For the top panel what would be the recommendation for it? I can get more pictures if you need it.
 

jscherb

Expedition Leader
I am assuming make a mold of the hinge area on the driver side and then use that to make a new area for the damaged part. For the top panel what would be the recommendation for it? I can get more pictures if you need it.
Unfortunately making a mold of the driver side hinge area to make a replacement for the passenger side won't work out as well as you think because the sides is a mirror images of each other, the right isn't the same as the left - they're different by a few degrees. I took a photo of a rear panel and cut/pasted the left side above the right. I drew the top yellow line along the body line that runs through the center of the hinge area. Then I attempted to put the same yellow line along the same body line on the right side.

JDaPPRepair3_zpsues2qf31.jpg


To do it correctly, you'll need to make a mold of the passenger side hinge area of a good hardtop. That's not a high risk operation, with proper mold release (wax + PVA), the good hardtop will not be harmed. I did a similar thing when I was making the JK flat fenders - the mounting flange for the fenders is an irregular shape and for my fenders to fit properly I needed to exactly match that shape so I molded flanges to make the mold masters right on the Jeep. No harm was done to the Jeep.

FlangeLayup_zpsv5yzapb3.jpg


As for the damage to the roof panel, you may find that making a mold to make a new section isn't required - it's a pretty simple surface. Before committing to making a mold for that area, I'd try to make a form on the outside surface of the roof using something like 1/8" plastic sheet. The sheet would be cut larger than the area to be repaired and conformed to the surface using screws (the screw holes can easily be filled later). One the form fits well, it can be removed, prepped with wax and PVA and screwed back in place after sanding the broken fiberglass edges sanded to a taper. Then the layup for the repair can happen against the form. Some sanding/bodywork of the outside surface will be necessary after the layup is done and the form removed, bit you'd end up with a strong repair for less work than making a mold, molding a replacement section, fitting the section in place and sanding/bodyworking it so the repair didn't show.
 

JDaPP

Adventurer
Well that is disappointing as I just moved here so it will probably be a while before I meet someone that I can impose on for the mold.
In case I do come across someone that is willing to let me make the mold what supplies do you recommend i have on hand/quantities? Appreciate the help as I really don't know much about this other than what I learned here. Thank you.
 

Forum statistics

Threads
188,293
Messages
2,905,023
Members
229,961
Latest member
bdpkauai
Top