You are using an out of date browser. It may not display this or other websites correctly.
You should upgrade or use an alternative browser.
You should upgrade or use an alternative browser.
Coyote; aka my 96 D1 5 speed build thread
- Thread starter Ray_G
- Start date
Ray_G
Explorer
I didn't see it listed in your build, which Pelican cases are you running in your storage platform? Thanks!
1510's- small enough to be difficult to overload!
R-
Ray
Thanks Ray,
I've been following your build and it has inspired me, hopefully I will get to one of the DC area get togethers so I can see it in person. I am looking at picking up an Excursion in the near future and your build has given me quite a few ideas (platform, rear doors etc.)
Thanks again for the info.
Larry
Ray_G
Explorer
Thanks Ray,
I've been following your build and it has inspired me, hopefully I will get to one of the DC area get togethers so I can see it in person. I am looking at picking up an Excursion in the near future and your build has given me quite a few ideas (platform, rear doors etc.)
Thanks again for the info.
Larry
Larry-
If you go excursion seek out Roudy (should be on here on the VOT threads under the NE section). His diesel truck was a beast during VOT and he is local to us. Def swing by the HH scene which seems to be converging at Kilroys in Springfield for both Rover and Expo folk.
R-
Ray
Ray_G
Explorer
Winter update: Kexby D1 'tactical' seat covers
The winter hasn't been kind to upgrades, and perhaps even more tragically the D1 now has a younger brother in the form of a 2006 LR3 (aka D3) which has reduced how much I drive her a fair amount. That being said it does give some more freedom to upgrade and wheel her a bit and I'm looking forward to the Spring to do some rust prevention/reduction, tighten everything up, and generally recondition the truck. Intent moving forward is the eventual 4.6 build/drop in with a newer R380 and LT230. After that...maybe ARB's to top it off.
What I did finally get the chance to do with a break in the horrendous weather was to install my Kexby D1 tactical seat covers to match the RRC versions in the back.
Pics do better than words here:
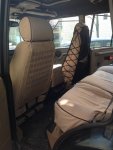
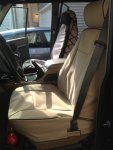
While I really liked the rather inexpensive Cabelas covers, the matching Kexby covers are extremely nice.
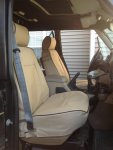
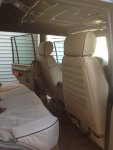
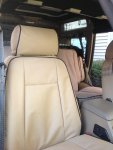
So far only a couple of pouches but I'll likely mirror the backs and have tear away first aid kits and saw pouches holding various things (the one pictured has a small peli with the winch controller in it).
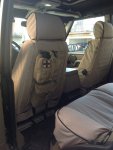
Overall it adds a nice balance to the interior and freshens it up quite a bit. Fit and finish are excellent as one would expect from Kexby. Nice to by from a US small business who is also an enthusiast.
r-
Ray
The winter hasn't been kind to upgrades, and perhaps even more tragically the D1 now has a younger brother in the form of a 2006 LR3 (aka D3) which has reduced how much I drive her a fair amount. That being said it does give some more freedom to upgrade and wheel her a bit and I'm looking forward to the Spring to do some rust prevention/reduction, tighten everything up, and generally recondition the truck. Intent moving forward is the eventual 4.6 build/drop in with a newer R380 and LT230. After that...maybe ARB's to top it off.
What I did finally get the chance to do with a break in the horrendous weather was to install my Kexby D1 tactical seat covers to match the RRC versions in the back.
Pics do better than words here:


While I really liked the rather inexpensive Cabelas covers, the matching Kexby covers are extremely nice.


So far only a couple of pouches but I'll likely mirror the backs and have tear away first aid kits and saw pouches holding various things (the one pictured has a small peli with the winch controller in it).

Overall it adds a nice balance to the interior and freshens it up quite a bit. Fit and finish are excellent as one would expect from Kexby. Nice to by from a US small business who is also an enthusiast.
r-
Ray
Ray_G
Explorer
ROAV @ Wintergreen 2014
After a LONG winter lull with the truck, and the reality that once purchasing the D3 I don't drive her nearly enough anymore, the old girl got broken out for the recent event ROAV held down in Wintergreen, VA.
All told it validated the build in the sense that it took about 30 min to get the truck ready to go, it also validated the notion that they prefer to be daily driven since the truck decided to pay me back by having the winch not function for the first time on me since...2006. I blame myself for the neglect. That will get sorted.
Some pics:

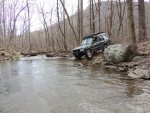
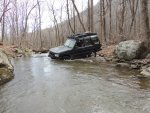
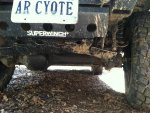
Skid plate (along with the rear bumper) took some licks but functioned as intended:
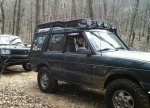
All that really matters...time with those closest to you.
The spring will be a consolidation and prep for storage...sadly she's going to sit a lot more over the next two years while I got OCONUS.
r-
Ray
After a LONG winter lull with the truck, and the reality that once purchasing the D3 I don't drive her nearly enough anymore, the old girl got broken out for the recent event ROAV held down in Wintergreen, VA.
All told it validated the build in the sense that it took about 30 min to get the truck ready to go, it also validated the notion that they prefer to be daily driven since the truck decided to pay me back by having the winch not function for the first time on me since...2006. I blame myself for the neglect. That will get sorted.
Some pics:


Skid plate (along with the rear bumper) took some licks but functioned as intended:

All that really matters...time with those closest to you.

The spring will be a consolidation and prep for storage...sadly she's going to sit a lot more over the next two years while I got OCONUS.
r-
Ray
Ray_G
Explorer
Spring Break 14
On the heels of Wintergreen the truck got a little attention, like getting the winch back in the fight (properly ground cables helps) and the install of the 'other' hood I had on hand which didn't have vents in it. Since she'll sit for awhile in the coming months I wanted to mitigate any potential water ingress points. Grabbed the kiddos and we went to the mountains of WVa.
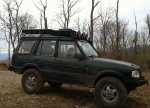
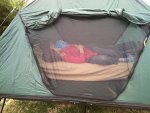
Packout this time included stuffing a double tent cot in...not small, but worth the space
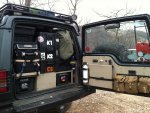
The kiddos promptly decided they needed to try out my new acquisition.
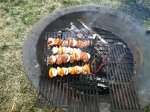
Some good food over the fire and the eldest got to try out making a torch, something everyone should do as a kid (supervised...of course)

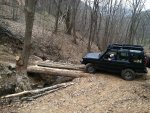
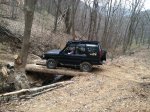
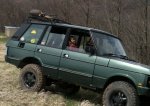
Hit the trails with a buddy since we were on his property, nothing to it...when its dry.
r-
Ray
On the heels of Wintergreen the truck got a little attention, like getting the winch back in the fight (properly ground cables helps) and the install of the 'other' hood I had on hand which didn't have vents in it. Since she'll sit for awhile in the coming months I wanted to mitigate any potential water ingress points. Grabbed the kiddos and we went to the mountains of WVa.

Packout this time included stuffing a double tent cot in...not small, but worth the space

The kiddos promptly decided they needed to try out my new acquisition.

Some good food over the fire and the eldest got to try out making a torch, something everyone should do as a kid (supervised...of course)


Hit the trails with a buddy since we were on his property, nothing to it...when its dry.


r-
Ray
NW40
Explorer
Hi Ray, just read through your whole thread. Love your D1.
Any detailed pics or info on your Mantec snorkel install, particularly how and what you used to route the intake from the snorkel pipe inside the fender panel to the air filter box? Trying to determine how to install the Mantec along with a dual battery setup, which it looks like you've done from the photo below I found in this thread.

With the 2nd battery, it appears I can't route the intake hose from the stock intake horn location and through the stock hole in the fender panel. I'm guessing you went straight out the side of the air box and through the fender panel. Would like to know more!
Also, any pics available of your air tank setup on the frame rail?
Thanks!
Any detailed pics or info on your Mantec snorkel install, particularly how and what you used to route the intake from the snorkel pipe inside the fender panel to the air filter box? Trying to determine how to install the Mantec along with a dual battery setup, which it looks like you've done from the photo below I found in this thread.
With the 2nd battery, it appears I can't route the intake hose from the stock intake horn location and through the stock hole in the fender panel. I'm guessing you went straight out the side of the air box and through the fender panel. Would like to know more!
Also, any pics available of your air tank setup on the frame rail?
Thanks!
Ray_G
Explorer
Hi Ray, just read through your whole thread. Love your D1.
Any detailed pics or info on your Mantec snorkel install, particularly how and what you used to route the intake from the snorkel pipe inside the fender panel to the air filter box? Trying to determine how to install the Mantec along with a dual battery setup, which it looks like you've done from the photo below I found in this thread.
With the 2nd battery, it appears I can't route the intake hose from the stock intake horn location and through the stock hole in the fender panel. I'm guessing you went straight out the side of the air box and through the fender panel. Would like to know more!
Also, any pics available of your air tank setup on the frame rail?
Thanks!
Appreciate the kind words, she's definitely my baby. So you've pretty much hit the nail on the head about the snorkel + dual battery setup. You can just see in the picture you posted where I'd cut the horn off the box and then blanked that out with a piece of plastic that I epoxied in place. With the outer fender removed I lined up entry from the side and cut a new hole in the inner fender for the hose-likewise cutting a hole in the air filter box to match as well. Not difficult just a little time consuming to ensure you get the hose in below the air filter and such-a lot of measure, eyeball, re-measure, cut and pray, etc.
I'll see if I can dig up any pics of the tank under the frame rail. The previous owner had done than and did an amazing job both in mounting the tank and especially with the little skid plate he made to cover it. The biggest issue I'll have is the truck is in VA and I'm out in the UAE so I'm a little displaced from her till I get back for Spring Break!
r-
Ray
Ray_G
Explorer
Being out of the country has slowed the usage of the truck quite a bit as one would expect (it has given time to build my LR3 which will have a thread soon). That said the trips back give occassion to use her and I have been remiss with updates/happy snaps.
Spring Break with my kids saw the chance to take her back up to WVa and shake the truck out, despite a lot of sitting over the past year she still is running great (a testament to a good friend who is watching her and keeping the battery charged, etc).

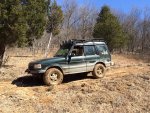
Wheeling in WVa mud can be deceptively difficult off camber with zero traction and full tires. Maxtraax..work
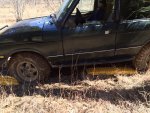
The kiddos spending time outside, shooting potato cannons, generally not being in the city = priceless.

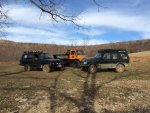
A final shot with company.
More to follow since this summer the truck is going on a roadtrip!
Spring Break with my kids saw the chance to take her back up to WVa and shake the truck out, despite a lot of sitting over the past year she still is running great (a testament to a good friend who is watching her and keeping the battery charged, etc).


Wheeling in WVa mud can be deceptively difficult off camber with zero traction and full tires. Maxtraax..work

The kiddos spending time outside, shooting potato cannons, generally not being in the city = priceless.

A final shot with company.

More to follow since this summer the truck is going on a roadtrip!
Ray_G
Explorer
Summer Road trip prep
Returned to the U.S. for some time around the 4th of July, the truck was destined for a long road trip going from VA to WI (and back) so some attention was in order since she sits quite a bit while I'm in AD.
Fluid changes, spark plug changes, and the like all done in short order. What was lingering was the longstanding chipped tooth in the LT230 since prior to VOT. The how on that is a long story, suffice it to say it involves learning taking place. The truck had functioned just fine after flushes and such but was loud on the highway with a serious TC whine. The initial plan was to just swap in a new 28 tooth gear from an offroad-only donor and vice versa but the splines on the R380 are longer than the shaft that comes in from a ZF so that was out (i.e. my R380 would happily accept the donor, but the donor would then be down so....a few phone calls and a road trip to a buddy resulted in having an LT230Q. Then we got to swap it all in...good times
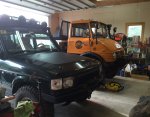
Staged next to big brother
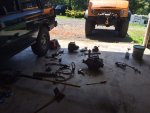
Like many jobs, it expands to the room and all tools available. 13mm sockets in particular, as well as the obligatory absurdly large flathead, pry bars, and BFHs.
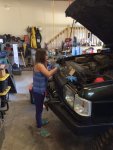
Little one doing her part.
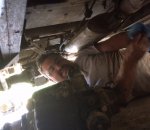
Help under the truck, always helpful-for this job absolutely critical.
Buttoned up, with 235/85 ATs on in prep for the long road trip.

Test drive.
More to follow, the initial reflections are that I should have swapped in an LT230Q a long, long time ago given the comparative quiet.
Returned to the U.S. for some time around the 4th of July, the truck was destined for a long road trip going from VA to WI (and back) so some attention was in order since she sits quite a bit while I'm in AD.
Fluid changes, spark plug changes, and the like all done in short order. What was lingering was the longstanding chipped tooth in the LT230 since prior to VOT. The how on that is a long story, suffice it to say it involves learning taking place. The truck had functioned just fine after flushes and such but was loud on the highway with a serious TC whine. The initial plan was to just swap in a new 28 tooth gear from an offroad-only donor and vice versa but the splines on the R380 are longer than the shaft that comes in from a ZF so that was out (i.e. my R380 would happily accept the donor, but the donor would then be down so....a few phone calls and a road trip to a buddy resulted in having an LT230Q. Then we got to swap it all in...good times
Staged next to big brother

Like many jobs, it expands to the room and all tools available. 13mm sockets in particular, as well as the obligatory absurdly large flathead, pry bars, and BFHs.

Little one doing her part.

Help under the truck, always helpful-for this job absolutely critical.

Buttoned up, with 235/85 ATs on in prep for the long road trip.

Test drive.

More to follow, the initial reflections are that I should have swapped in an LT230Q a long, long time ago given the comparative quiet.
Ray_G
Explorer
Welcome back to the States, Ray. What's the difference between the LT230 and LT230Q? I'm not familiar with the Q.
Its nice to be back, esp up north where it is in the 70's vice the 120's.
LT230Q's input gear has 38 teeth vice the normal 26 or 28 tooth LT230 from earlier years. From what I read late in the D1 years and for the DII's it was implemented to quiet down the TC a bit. All I can say is compared to the original it is significantly quieter...now there is tire noise and wind noise from the rack!
r-
Ray
DividingCreek
Explorer
Glad to hear the tcase worked Ray, have to admit as you were leaving Ricks I had my doubts.
That picture of John under the truck smiling is classic, I can hear his accent.
Good to see you last week. Cheers
That picture of John under the truck smiling is classic, I can hear his accent.
Good to see you last week. Cheers
Similar threads
- Replies
- 0
- Views
- 131
- Replies
- 26
- Views
- 1K
- Replies
- 67
- Views
- 6K
- Replies
- 7
- Views
- 2K
