AllPro Expedition Heavy Duty Leaf Spring Install
With 60,000 miles on my 2005 Tacoma's rear springs it was high time for a change. AllPro Off Road is synonymous with rock crawling Toyotas and has developed some of the best Tacoma suspension kits on the market. With their reputation as leaders in the Toyota aftermarket since forever their "APEX" line caught my attention, specifically their new Expedition leaf springs.
Available for 1st and 2nd Generation Tacomas, the AllPro Expedition heavy duty leaf springs feature a 20% higher spring rate than their standard springs and are rated to maintain a 3 inch lift height while carrying 400-500 lbs of cargo. Since I'm a bit heavier than most I also opted to add the Timbren bump stop kit. And since it would all be apart it was a good time to install AllPro's U-bolt flip kit and their longer 24" stainless steel braided brake lines. Combined with my Icon rear reservoir shocks this should be a pretty cool setup. Here's my initial thoughts on the springs, a comparison to the Old Man Emu's they replaced and some install pics.

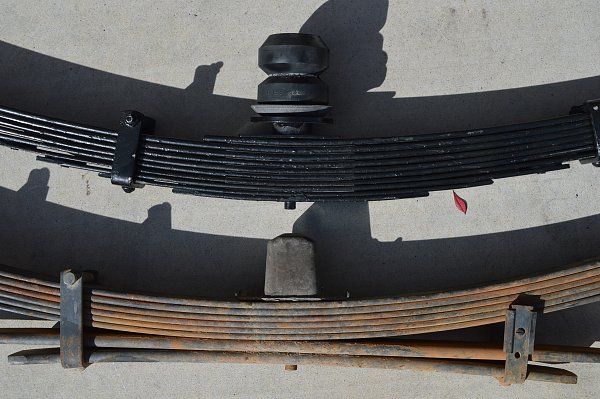
Each leaf pack weighs about 60 lbs and upon inspection I was impressed by the build quality of the APEX springs. Nicely finished and accompanied by a full set of Energy Suspension polyurethane bushings these springs compare nicely to the Old Man Emu Dakars they were replacing in both heft and construction. Here they are side by side for comparison.

A comparison of the all important center section and bump stops. The AllPro "APEX" springs measure up very well with comparably sized leaves. The obvious difference is the overload leaves with the trade off being the APEX pack having 10 total leaves (including the special "torque leaf" on top designed to prevent axle wrap) and the OME having 6+2 overloads. The Timbrens are considerably taller than the OEM bumps. They feature a progressive hollow "bellows" design and softer "aeon rubber" construction so they should be quite an improvement over the harder solid rubber bumps. If the truck squats under load these are designed to act like an airbag.
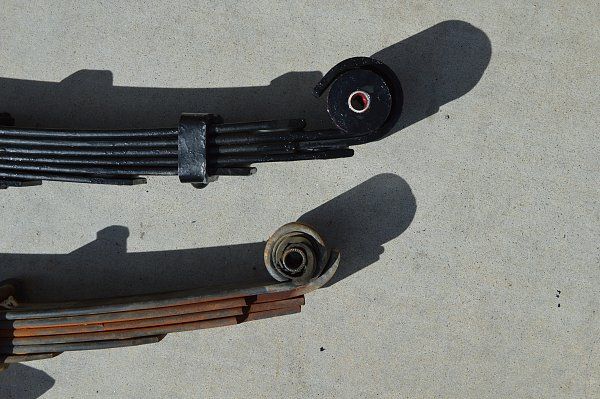
Leaf size and thickness appears identical. Note the full military wrap eye and Energy Suspension polyurethane bushing on the APEX spring, and the chewed up Dakar rubber bushing after 60k miles - this was not fully apparent or even possible to see until the spring was off the truck. I think the Energy Suspension polyurethane bushing will stand up better to the the twisting of the spring eye in technical terrain.
A key difference is that fact that the AllPro springs are custom made in USA by Betts Spring Company of Fresno, CA while the OME's are made in Indonesia for Old Man Emu of Australia. This was also a key factor in my interest and subsequent selection of these springs over the other options available for the 2005+ Tacoma.
Now that we've looked at the springs, let's briefly cover the install with a few key recommendations for your safety and sanity and some pictures of the process:
1. Get a buddy to help you, these are heavy. Safety First.
2. Get good jack stands (6 ton) that go high enough and a couple good BIG floor jacks. Car size stuff will not work on a lifted truck. Do not trust any jack - always use quality jack stands on the frame!
3. Tools. Air is best, and a set of breaker bars/alignment tools for bolt holes etc.
4. PB Blaster is your friend. Use liberally on all suspension fasteners days or hours before you start work.
5. While it's up in the air, check EVERYTHING. Grease all fittings. Look for damage, cracks, and missing or loose parts.
6. Take some pics of how it is assembled BEFORE you tear it apart for reference during re-assembly.
7. Use Red Loctite on ALL suspension fasteners. Losing an eye bolt on a shock can ruin a trip and be quite expensive.
8. Use a quality grease on all fittings and lube up the bushings for an easy install and longer life. I use #2 Lucas red grease.
ORDER OF WORK:
1. Make sure you have all parts on hand before the you begin. Assemble new spring eye bushings and install in springs.
2. Spray everything with PB Blaster several days before.
3. Block front wheels. Loosen lug nuts.
4. Jack up the rear of the truck, set jack stands on FRAME. Keep floor jack under rear axle. Remove wheel.
5. Loosen all bolts/nuts from the passenger side spring. Loosen u-bolts and bottom of rear shock absorber as well. Do not remove anything yet.
6. Install longer lines before you drop axle. Bleed brakes, etc.
7. Drop rear axle (lower jack) to remove pressure from old springs.
8. Remove old u-bolts, bumpstop and bottom bolt of rear shock absorber. Keep the shock eye out of harms way.
9. Remove rear eye bolt from FRAME HANGER side of shackle. Leave shackle on leaf pack for transfer to new pack.
10. Remove front main eye bolts (I was able to do it without having to cut them)
11. Remove old spring pack. Inspect bushings/leaves on old pack and note any wear/damage.
12. Install new spring pack, install front eye bolt first, then to the rear shackle hanger and bolt both up loosely.
13. Align spring pack with axle (might need to push axle forward a bit or move up/down). Ensure center pin on leaf pack drops into hole in axle plate.
14. Install new U-bolts, re attach bottom eye of rear shock absorber using Red Loctite. Torque U-bolts to 80 ft/lbs using Red Loctite. Torque leaf spring eye bolts x3 to 89 ft/lbs using Red Loctite.
NOTE: For safety, do not re-use old U-bolts.
*Repeat steps on passenger side.
Pics to illustrate the process:
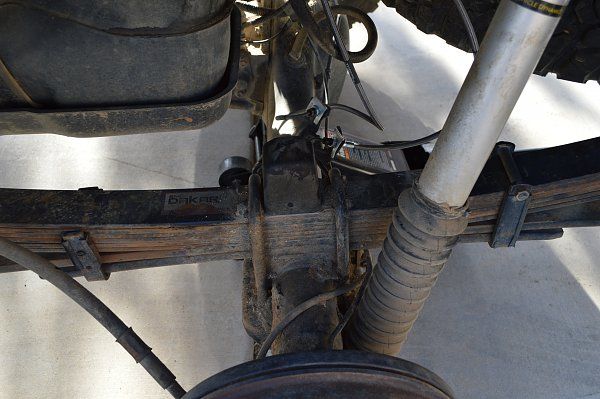
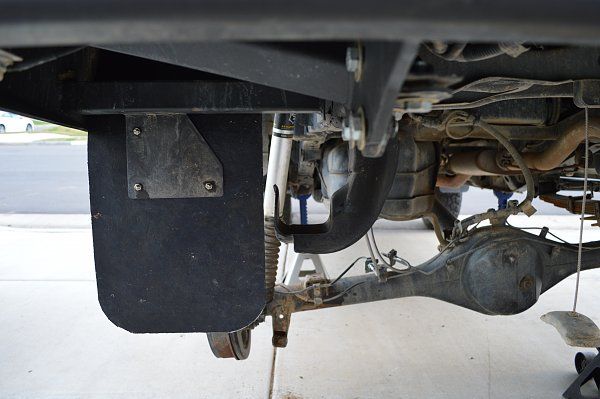
Dakars with 60k on them and OEM bumpstop
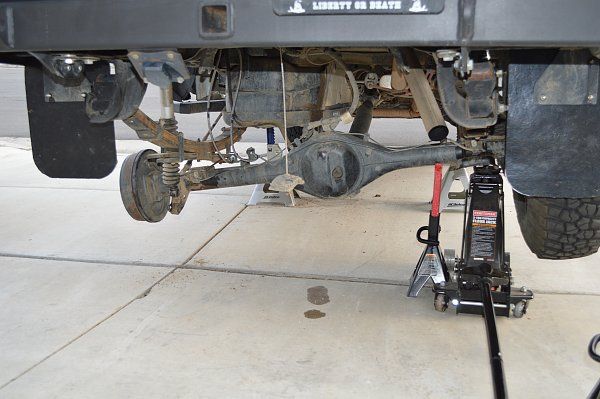
Getting it ready for the transplant
U-bolts and bump stop removed. Be careful with the E-brake cables. The guide that is hanging on the E-brake cable in the picture was removed.

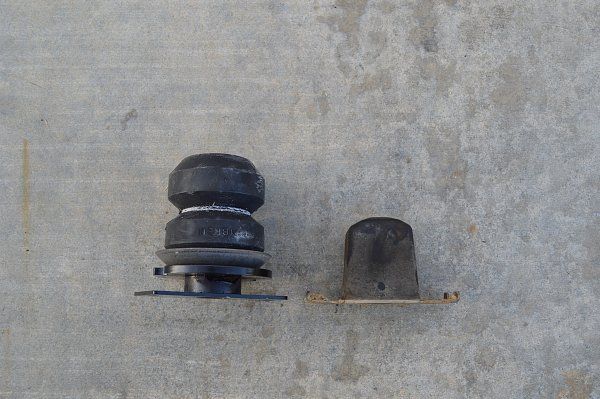
OEM bump and Timbren side by side.
Ready for the new spring.
Looking through the rear spring hanger to the forward spring eye mounting point on the frame.
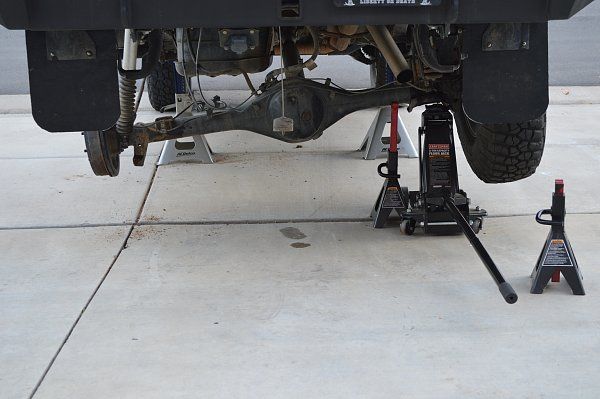
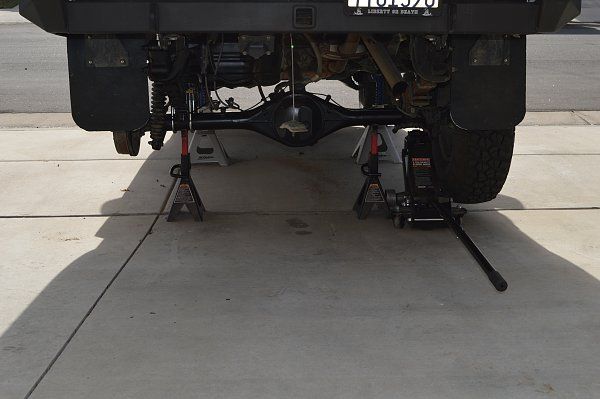
Use of floor jack and jack stands to move the axle up and down for alignment of leaf pack and hardware. Patience is key here. I did this alone, but two guys would be easier.
Military wrap eye into forward mount first.
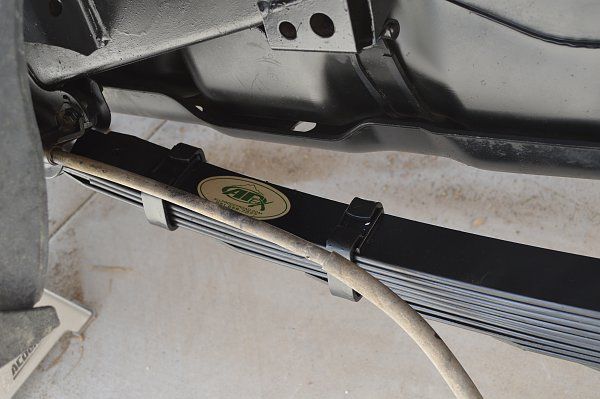
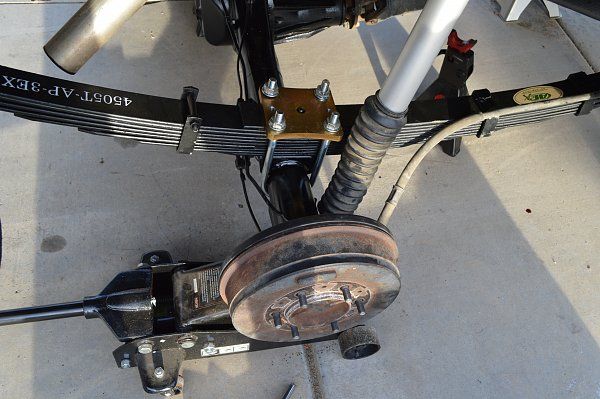
Pack in place, ready for tightening up. This is also a good time to inspect the frame etc and spiff things up
")
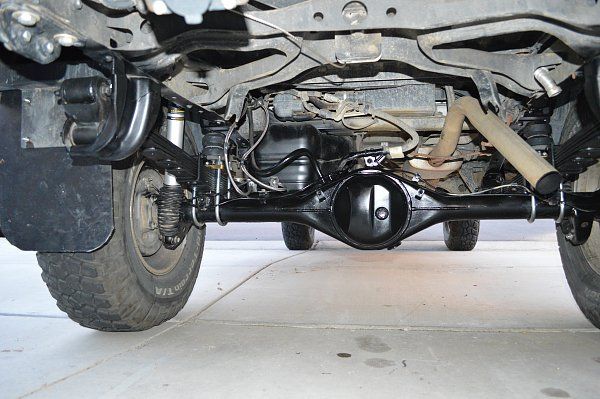
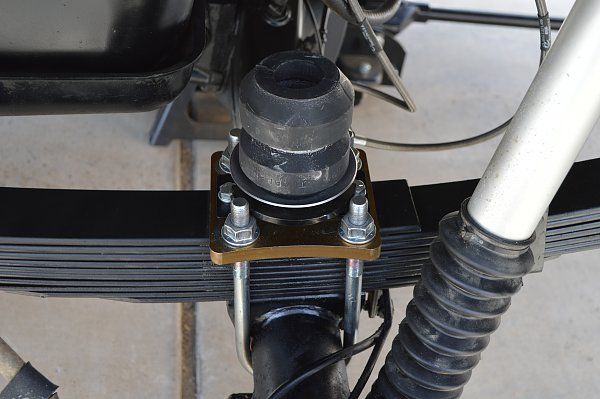
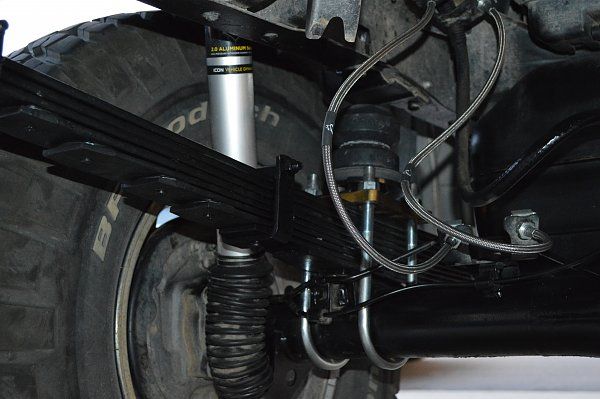
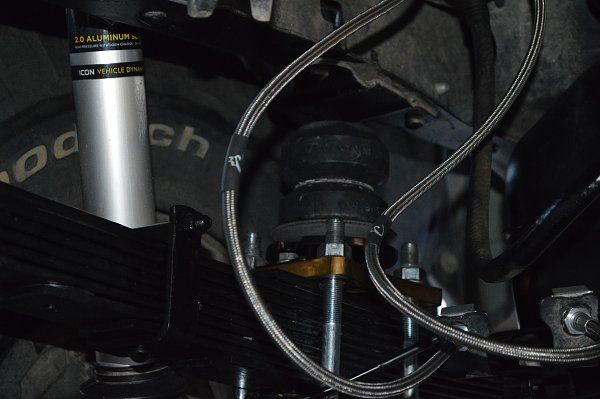
Detail of AllPro U-bolt flip kit and Timbren bump stop. This is an outstanding kit!
Passenger side installed.
Moving on to the other side now.
Driver side going together.
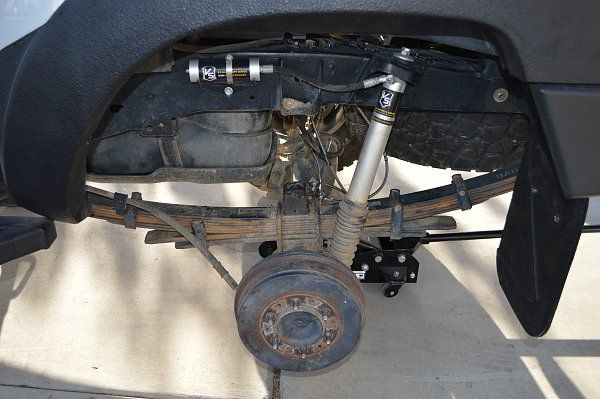
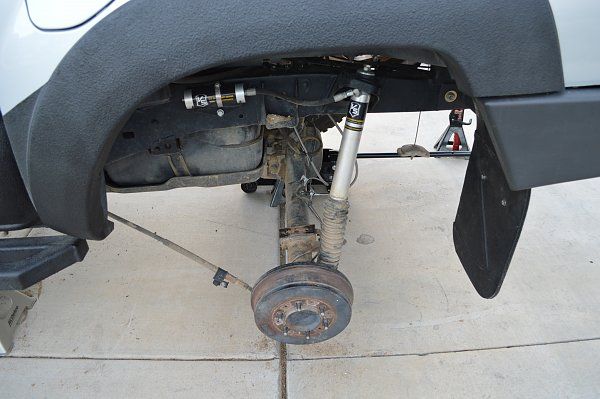
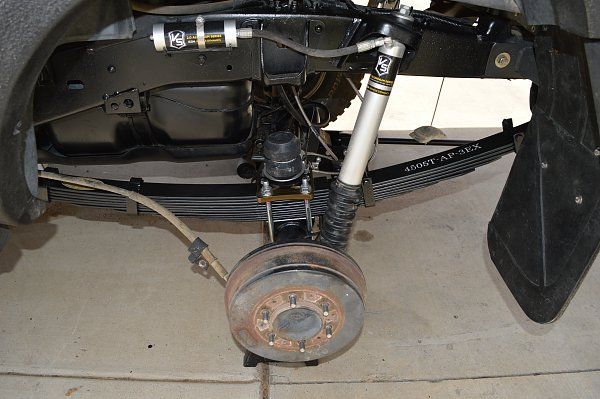
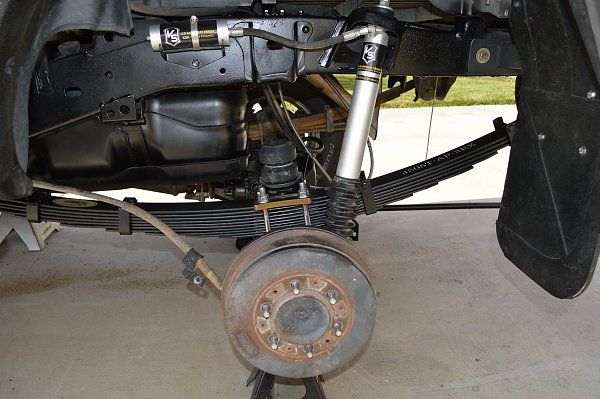
A view from inside. Note the longer stainless steel braided brake lines from AllPro. Down travel is pretty good with my setup so these were needed
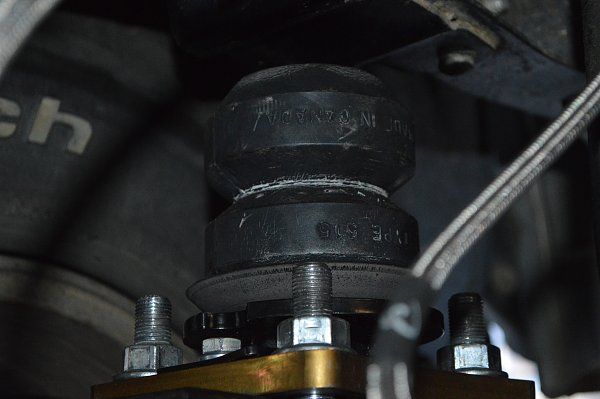
Close up of Timbren bump stop. As you can see up travel on the Tacoma rear suspension is pretty limited from the factory - the Timbrens will contact sooner than the factory bumps but they are softer and progressive due to their hollow "bellows" construction. This is better than the hard solid rubber OEM bumps "striking" the frame plate and allowing the flattening or inverting of the springs. The Timbrens should help improve spring life and ride quality.
 Mission complete! I'll let you know how they work on the trail!