Fiberglass M416/M100 Military-style Trailer Tub Kit

jscherb

Expedition Leader
First off, just an amazing thread! To be quite honest, I wasn't expecting too much at the beginning of the thread. Lots of people have good ideas but few actually follow through. Especially with a project as ambitious as yours! As I watched your progress my whole perspective changed. Like others have expressed, I looked forward to each future post to see what was coming next. My expectations for the final product were pretty high and you exceeded them.
:) I agree, I'm constantly surprised at the wealth of good ideas in these forums but often the lack of follow-through. My projects are very ambitious, but before I start the work or start a thread on them I've got pretty much all of the design details worked out so I know exactly what the result will be. I typically spend more time in design than I do in construction, I'm really a designer at heart and the construction phase is more or less a necessary evil to realize the design. You may not have expected much from me because this is really the first detailed design thread I've done here, but people on other forums are familiar with my work - here are a few of my other ambitions fiberglass projects, left to right, the Safari Cab modular hardtop (licensed and now marketed by Gr8Tops), the the Jeep-tub trailer kit (licensed by Compact Camping Concepts and marketed under the name of Dinoot), and the CJ Grille Kit for the TJ/LJ that backdates the styling of a Wrangler to the CJ era by integrating a factory CJ grille with new fiberglass front "sheet metal" (I decided not to license that one):

GlassProjects_zps746bebcb.jpg


I had to smile when you wrote about not doing it for money, but rather the satisfaction of seeing others build and enjoy your trailers. That attitude is one that we don't hear expressed very often. I'm surprised how often I receive e-mails asking if it is ok for a builder to model their trailer after my Desert Dawg. When I was young my parents would tell me, "Imitation is the sincerest form of flattery". I didn't understand it back then, but I do now. I love the idea of someone liking my trailer enough to build one similar. I finally drew up a diagram with the basic dimensions that I could email people just to give them a starting point. I know that you aren't in it for the money, but I hope that your positive energy comes back to reward you bountifully.
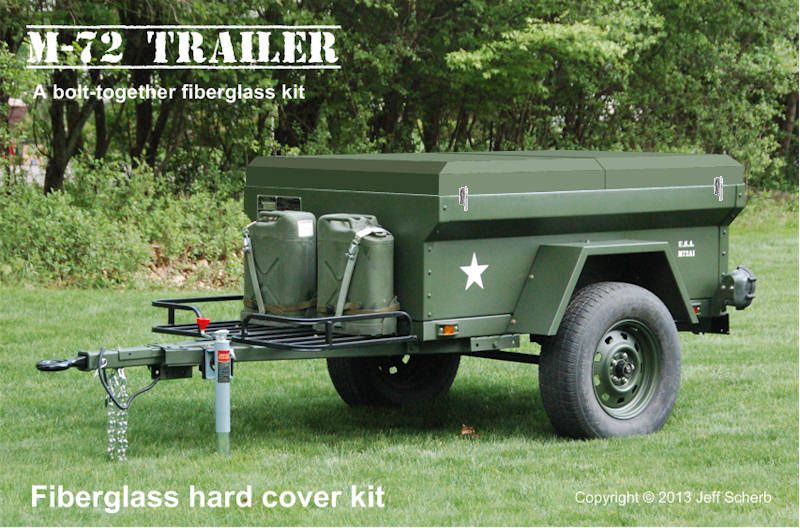
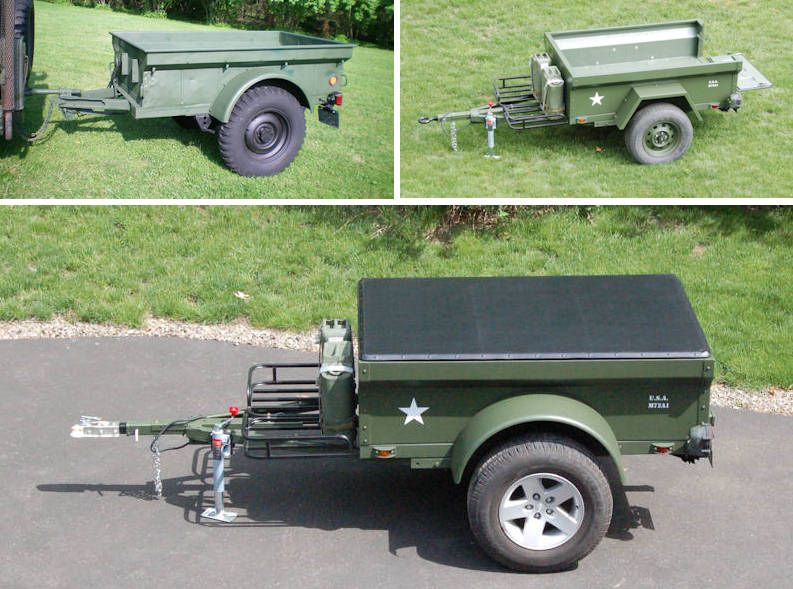
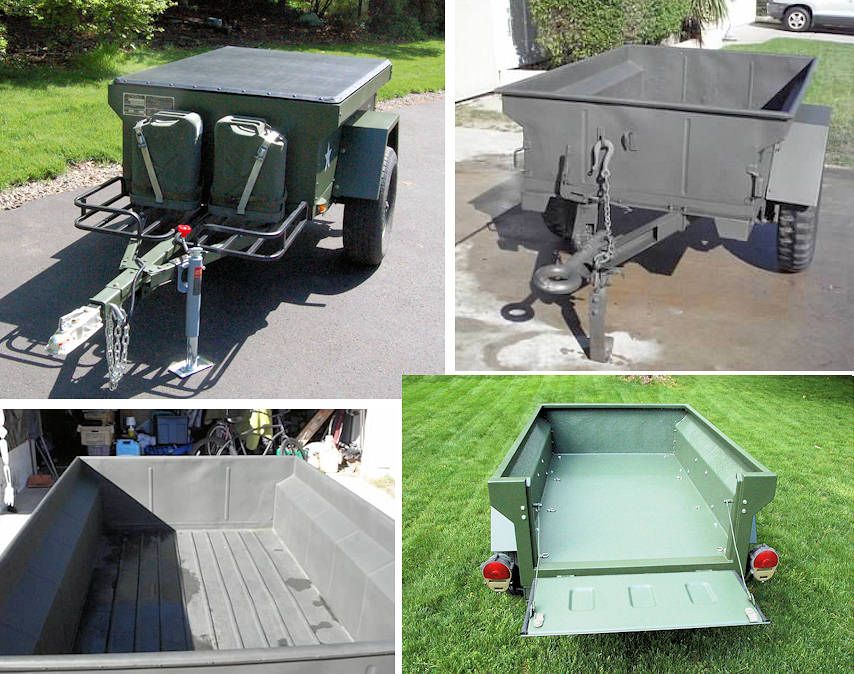
The Desert Dawg is very nice. I've done a bunch of concept designs for teardrop-style camper tops that fit on top of a long version of the Dinoot trailer, I've even built a prototype camper top based on Safari Cab hardtop parts. I haven't posted them in this thread because they're way off-topic. I'd love to get your input on them, here's a thread: http://tventuring.com/trailerforum/thread-160.html

With regard to the round VS square fender choice, I had to make the same decision when building my trailer. Ultimately I ended up choosing the flat top fenders primarily because I like the way they look. But after a number of years of regularly camping in the trailer I found that the decision was a great one, not for aesthetics but for a purely practical reason; storage at the campsite! The fenders become small but very handy tables on each side of the trailer. I set my small "packer" boxes on them rather than on the ground. At night my shoes get set on top of the fenders to keep bugs out of them and so they are handy for those night time trips to the restrooms.
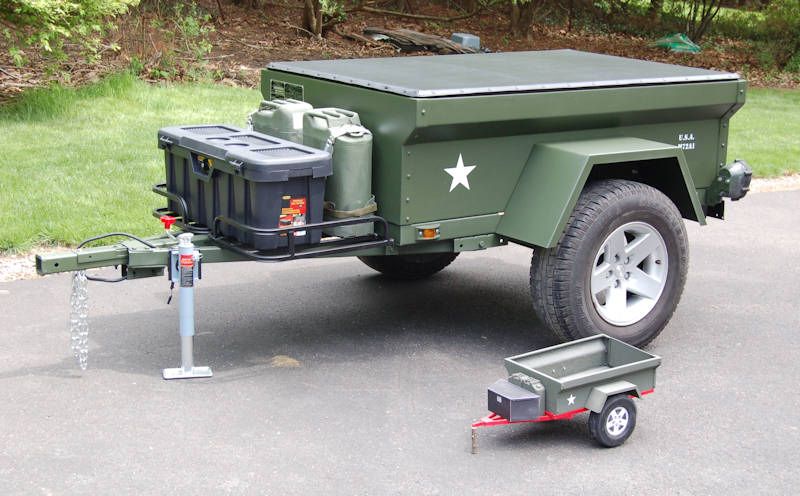
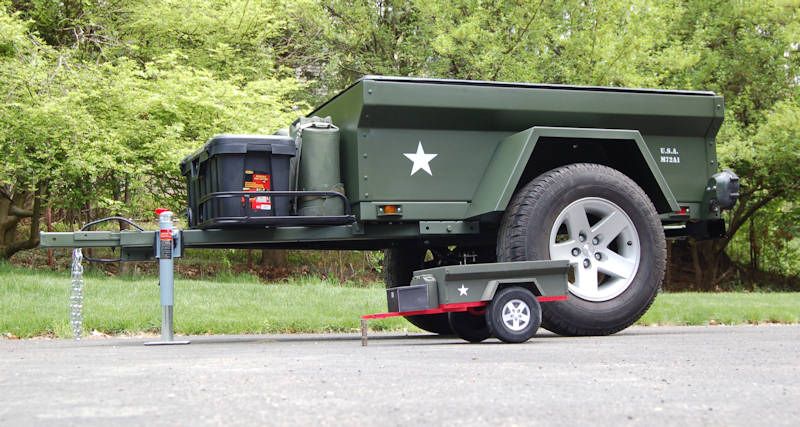
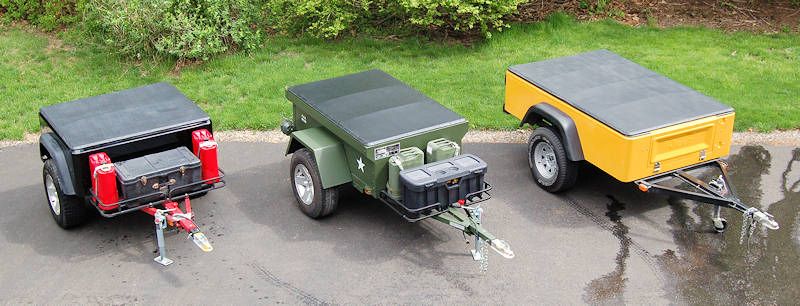
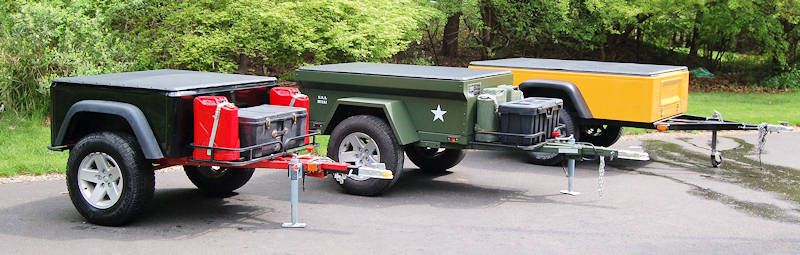
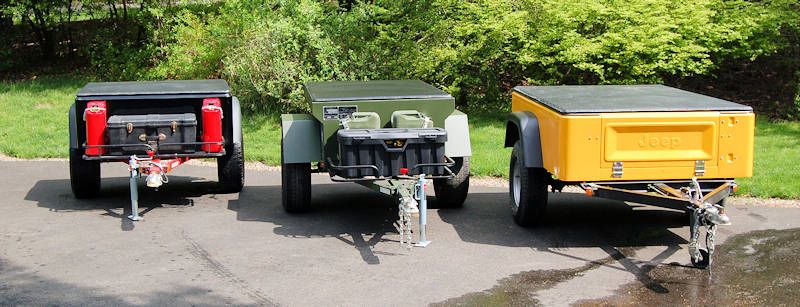
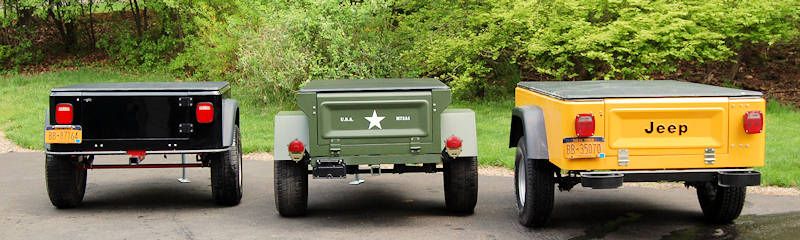
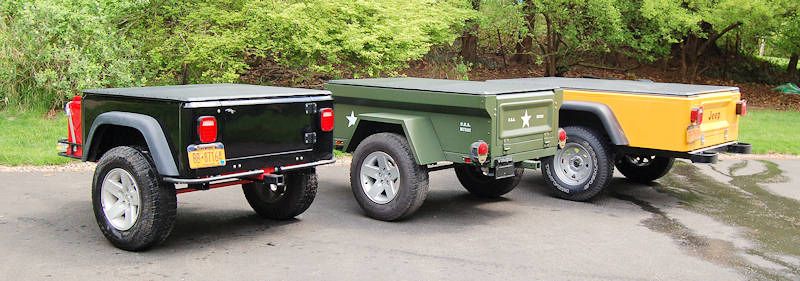
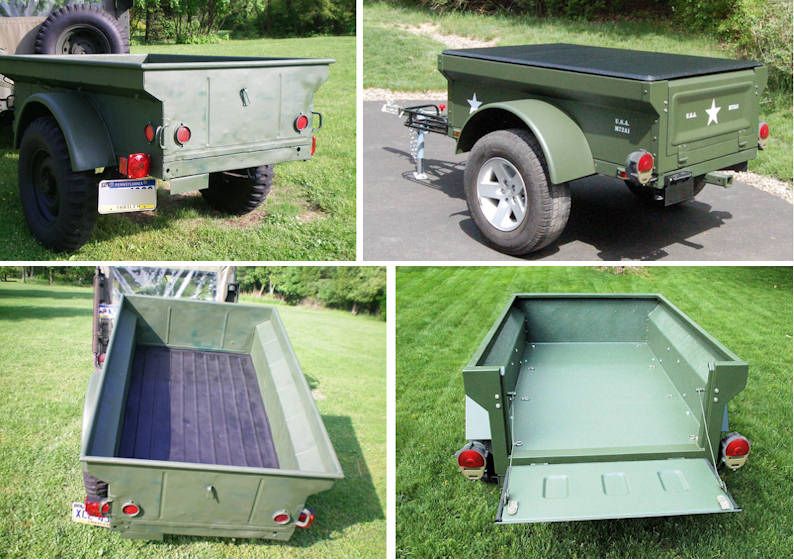
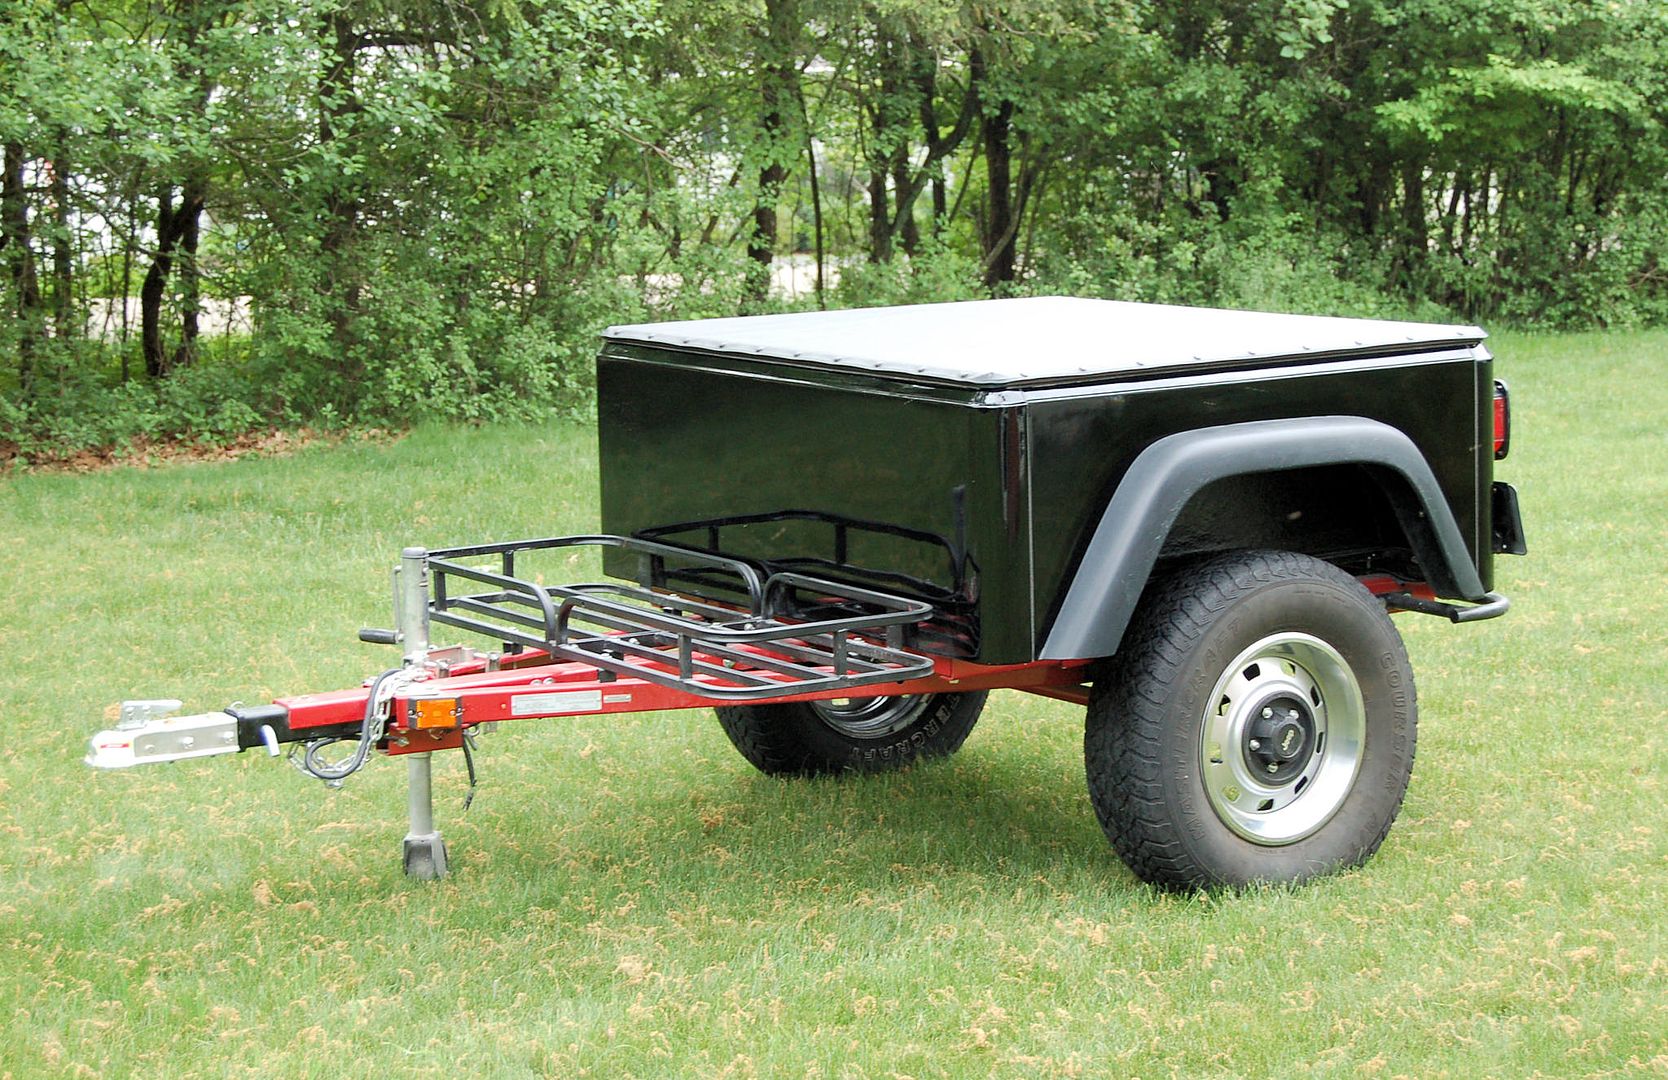
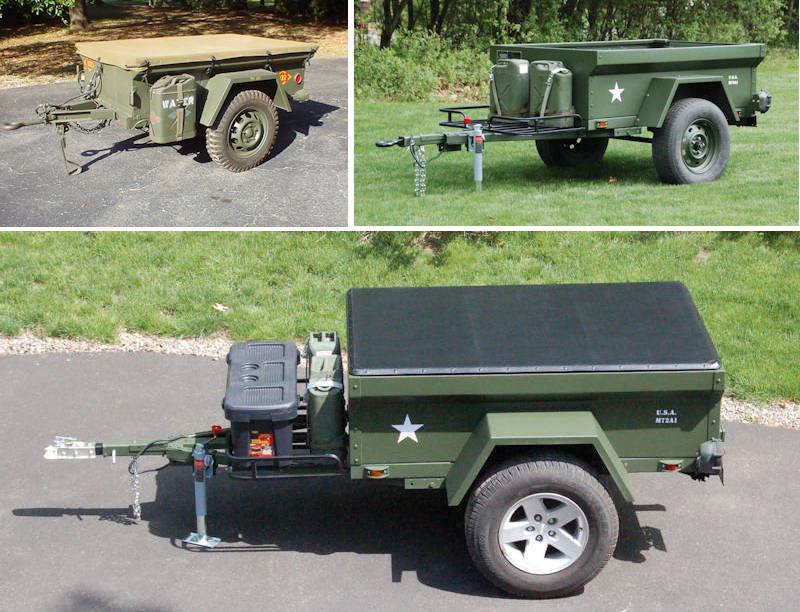
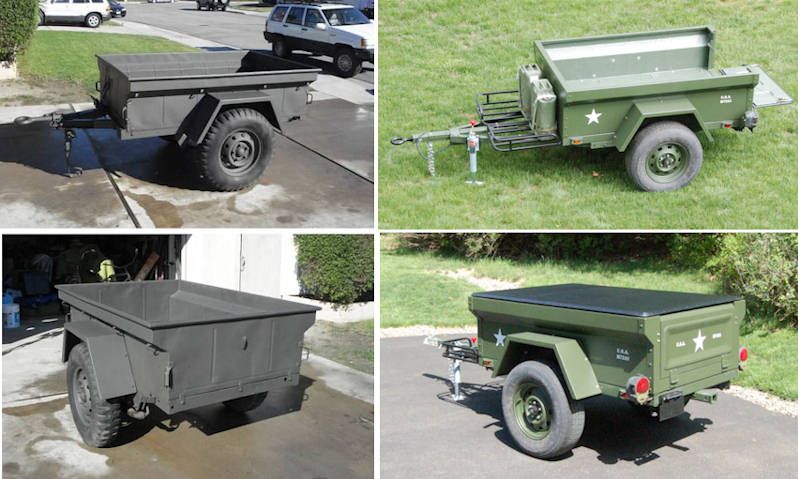
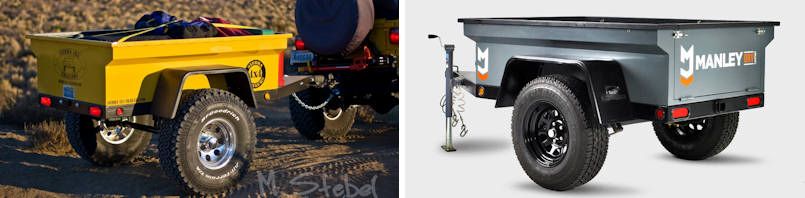
Since original M416 fenders are very hard to come by, and the wider M416-style fenders I've shown on my trailer are custom ones I made and are not on the market, I expect most people who build this kit will use what the fender industry calls "Jeep-style" fenders on their kit builds. They've got a flat top for setting things on, and they're available at many places in a bunch of sizes. Some of the commercial trailer builders use "Jeep-style" fenders:

JeepStyleFenders_zps4b237ea6.jpg


Anyway, I've droned on enough. One last set of kudos on the trailer!

Joanne
Thank you!
 
Last edited:

jscherb

Expedition Leader
The basic trailer is done, but I still plan to make the molds for the fiberglass hard cover. Here's what it would look like in olive drab:

CoverMilitary1_zps29d4e37c.jpg
 

jscherb

Expedition Leader
Outfitting the trailer: water tank(s)?

This is a photo of the underside of the trailer and tub:

FrameUnderside1_zps979c2b52.jpg


There is about 6" between the bottom of the frame rails and the bottom of the floor (when the raised floor option is used like I've done on the prototype), but the measurement below was taken in front of the axle where the tongue triangle is bolted to the bottom of the main frame. There's almost 9" from the bottom of the floor to the bottom of the tongue rails.

FrameUnderside2_zpsa2936445.jpg


Here's the approximate size and shape of the space:

FrameStorageSpace_zpse19fc67e.jpg


Water tanks are available that would fit very nicely in that space: http://www.plastic-mart.com/category/33/rv-water-tanks?gclid=CL6Pgoul3rYCFZOHMgodQFgASQ. Looks like maybe 8-10 gallons could go on either side of the frame backbone in front of the axle, so almost 20 gallons of water under the floor. If plastic tanks like the ones linked to are used under the floor of the tub, it might be a good idea to also install a piece of sheet metal under the tanks to protect them from trail obstacles even though they wouldn't be below the bottom of the frame rails.

Another option would be to do what Adventure Trailers does, they put a 19-gallon water tank on the tongue, along with two jerry cans and a cargo box that also contains a battery. The way I've designed the mods to the HF frame for this tub, the tongue is long enough for all that, but it does seem like a lot of weight on the tongue.

ATChaser_zps495adfec.jpg
 

ReconZJ

Observer
Outfitting the trailer: water tank(s)?

This is a photo of the underside of the trailer and tub:

FrameUnderside1_zps979c2b52.jpg


There is about 6" between the bottom of the frame rails and the bottom of the floor (when the raised floor option is used like I've done on the prototype)...

Water tanks are available that would fit very nicely in that space: http://www.plastic-mart.com/category/33/rv-water-tanks?gclid=CL6Pgoul3rYCFZOHMgodQFgASQ. Looks like maybe 8-10 gallons could go on either side of the frame backbone in front of the axle, so almost 20 gallons of water under the floor. If plastic tanks like the ones linked to are used under the floor of the tub, it might be a good idea to also install a piece of sheet metal under the tanks to protect them from trail obstacles even though they wouldn't be below the bottom of the frame rails.

Another option would be to do what Adventure Trailers does, they put a 19-gallon water tank on the tongue, along with two jerry cans and a cargo box that also contains a battery. The way I've designed the mods to the HF frame for this tub, the tongue is long enough for all that, but it does seem like a lot of weight on the tongue....

I think that keeping the weight as low as possible this way (lower COG) and having it just in front of the trailer axle vs higher COG and closer to the tongue is better, with only the added weight of the jerry cans and battery on the platform.

Not sure I've commented on your build here, but have on another form. I think it's great here, too!
 

jscherb

Expedition Leader
If you start with a Harbor Freight frame and build it like I did with a receiver on the front, and you put a Harbor Freight rack basket on the tongue, then you've got almost all the parts you need to adapt the HF ball coupler to a receiver mount. The center 2" square tubing from the cargo basket isn't used when you mount the basket on the tongue, so you can cut a piece from that to be the tube to mount the coupler on. The only issue is that the coupler is designed to mount on 2 1/2" tubing, so you'll need two 2" x 5" x 1/4" thick spacers. Here are the parts:

HFCouplerAdapt1_zps21158be1.jpg


Assembled, the spacers go on the side of the 2" tubing, between the coupler and the tubing:

HFCouplerAdapt2_zps7d64e3c0.jpg


And while I'm on the subject of couplers, I'm also in the process of making a "TSC" 3-Axis Coupler for this trailer. The photo below shows a completed coupler (top), and the pieces of the one I'm in the process of making, all the parts have been made, they're ready to be welded together and assembled:

3Axis2-2_zps7b4c1654.jpg


The details of building a TSC 3-Axis are here: http://tventuring.com/trailerforum/thread-65.html
 

jscherb

Expedition Leader
Here's the completed 3-axis coupler and the original one, all that's needed now is a little final sanding, primer and paint.

3Axis2-3_zpsf123083f.jpg


Having the receiver on the front allows for lots of coupler choices...

CouplerTypes_zps5bde3fff.jpg
 

jscherb

Expedition Leader
Lots of the concept drawings and ideas I presented in this thread were done with the 1/4 scale model trailers:

MiniM416s1.jpg


For example, I drew the hard cover on this photo of the model:

Cover1-SplitOpen_zps72148514.jpg


Part of the reason I built the scale model was to test the bolt-together assembly design of the tub; the other reason I built it was to do concept drawings like the one above. But now that the full size trailer is done, I just had to pose it with the model :)...

ModelAndFinal1_zps6d48e0e3.jpg


ModelAndFinal2_zpsea5a3a4a.jpg


A few differences: I didn't make the model fenders go down to the bottom of the frame, so they look a little different, and I didn't make a tonneau cover for the model, and the model frame is still red to indicate that it's a model of a Harbor Freight frame. Also the model's side panels are also not quite as tall as the final product, I made the model before I finalized the panel height.
 

jscherb

Expedition Leader
Since it's spring and the hopefully the last of the snow is gone up here (it actually snowed a few flurries within the last week!), I decided to roll all the trailers out of the garage for a spring wash. The two Jeep-tub trailers had been used in the winter and had gotten dirty, so it was overdue. Here are some photos of the fleet.

The black trailer is a fiberglass Jeep-tub trailer, it was the prototype for the Dinoot trailers, which are now commercially available as kits (www.dinoot.com).

The military trailer I just finished building, it's also a fiberglass kit. The kit is likely to be licensed by a company for production.

The yellow trailer I made from the back half of a YJ and the back half of my LJ after I cut the LJ in half to make a pickup out of it. It's my "parts getter workhorse" trailer. For example, this winter I brought a Jeep Wrangler tub home on top of it.

Fleet1_zpsdf6c445b.jpg


Fleet2_zpse47bed74.jpg


Fleet3_zps87932ca9.jpg


Fleet4_zps709d4963.jpg


Fleet5_zps31e8ea27.jpg


Obviously I've now got too many trailers now, so I'm going to sell the black one. I've got a different pair of tires and wheels for it, as soon as I can get them installed (the ones on there now are part of a set of 4 I need to keep) and swap a few things out (the jerry cans won't go with it, for example), I'm going to list that trailer on Craigslist and eBay.
 

jscherb

Expedition Leader
I found some photos of a nicely restored original M100. They were in similar poses to the ones I had taken of my fiberglass M72 prototype, so I thought it would be fun to do a comparison.

Some of the differences...

The original doesn't have a tailgate, and I've built the M72 prototype with one, although you could build an M72 with solid end panels at each end instead of a tailgate panel at the back if you didn't want a tailgate.

In the photos below, the original has its original military NDT tires and the original narrow fenders; the M72 prototype photos show larger Jeep wheels and tires and wider fenders.

M100FinalCompare2_zpsefe749d8.jpg


Below: I didn't quite have a similar pose with the M72 wearing round fenders and steel wheels, so the upper right photo below has M416 fenders instead of M100 round fenders. The bottom photo has M100-style round fenders, although these are wider to fully cover Jeep-sized wheels/tires.

I built the prototype frame with a longer tongue than the original to allow for the rack basket and extra cargo space.

M100FinalCompare1_zps9fa7c681.jpg
 

jscherb

Expedition Leader
Continuing the comparison photos from the other day, here's the M72 prototype compared to a very nicely restored M416.

The tongue of my prototype is longer, which is a good place to put both jerry cans and a storage box. On this original, the owner has put a jerry can on the side. Also the original has a canvas tarp which ties on; the M72 prototype has a snap-on tonneau cover. You could put an original-style tarp on the fiberglass trailer, but you really can't beat the convenience of a modern snap-type tonneau cover.

M416FinalCompare1_zps04f87454.jpg


The tailgate and tongue length are the main differences in the photos below.

M416FinalCompare2_zps6cfe8c4a.jpg


M416FinalCompare3_zps634ef9a1.jpg
 

Mark Harley

Expedition Leader
Ready for a tub! I want to build one like this. RED OF COURSE with matching 8 bolt wheels.
 

Attachments

  • Photo0208.jpg
    Photo0208.jpg
    320.4 KB · Views: 60

Forum statistics

Threads
186,502
Messages
2,886,736
Members
226,515
Latest member
clearwater
Top