Fiberglass M416/M100 Military-style Trailer Tub Kit

jscherb

Expedition Leader
Someone asked me if I was designing the cover installation and brackets specifically for junkyard struts. No I'm not, I'm only using the junkyard struts for testing and final design of the brackets. I'm designing the brackets for the prototype installation so they accept a range of different strut lengths to allow testing different lengths and strengths of struts. New struts are only about $30 per pair, so it doesn't make sense to design for something you'd need to search for in a junkyard. But junkyard struts are about $10 per pair so it's economical to grab a bunch of different lengths and strengths for testing the prototype installation.
 

jscherb

Expedition Leader
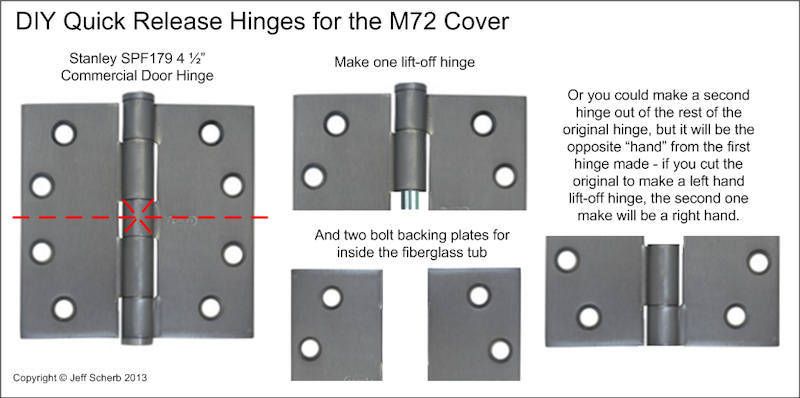
I went back to Lowes and picked out stronger door hinges as a starting point for the DIY lift-off hinges. I got Stanley 4 1/2" "Commercial" hinges, they were a little less than $7.00 each. They're made from much thicker-gauge steel than the $3.00 hinges I used the other day, and they've got 5/16" hinge pins instead of the 1/4" pins the other hinges had.

Here's how they get cut:

DIYCoverHinges10_zps0b413e3e.jpg


Two nice things about these Stanley hinges - they come in primer, so they'll be easier to paint, and, because of the way the holes are laid out, no drilling is necessary, they'll end up with two holes after cutting, so there's one less step necessary to make them.

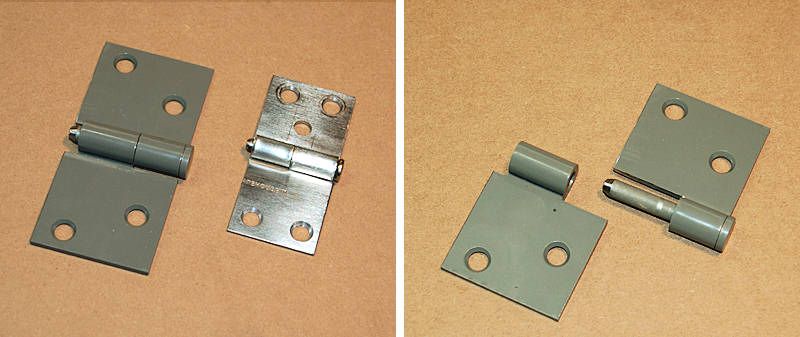
Here's a finished hinge, and a comparison to the smaller hinge from the other day.

DIYCoverHinges11_zps859fc3b7.jpg


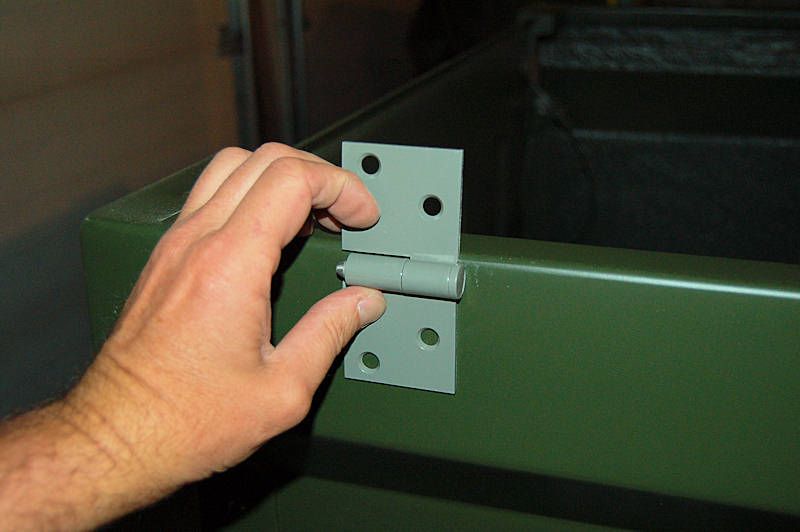
Because door hinges are designed to be used in doors and not to hinge two flat surfaces together, the barrel is slightly offset, which means the back of the hinge isn't flat (this was true with the hinges from the other day too). I need the back of the hinge to be flat because I plan to mount the hinges so that the barrel of the tub side hinge is below the top of the tub, like this:

DIYCoverHinges12_zpsadeb7007.jpg


Making the backs flat is easily fixed by a blow with a hammer, using the scrap side of the hinge as a punch. Here's a before and after shot, and a shot showing the process:

DIYCoverHinges13_zps1716e698.jpg


If you're wondering why I want the hinges mounted with the barrel below the top of the tub, it's so that when the cover is removed, the hinge half that's still on the tub doesn't stick up above the edge of the tub.
 

notdeankane

New member
Thanks for the excellent description of the kayak racks w/RTT!
It is an elegant solution~ Extra receivers simply add more utility and keep the overall look clean!

"Phineas J. Whoopee, you're a genius!!!!!!!"
 

jscherb

Expedition Leader
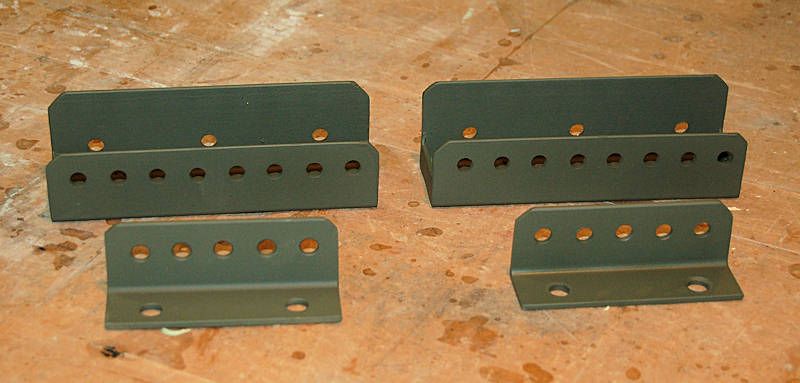
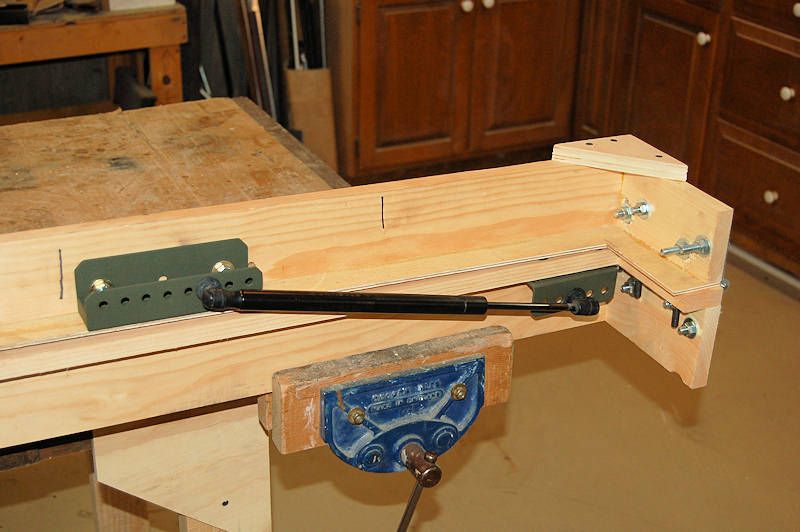
I've finished up the strut bracket hardware for the test installation in the prototype trailer.

StrutBrackets1_zps1abb6cdf.jpg


I decided to increase the range of adjustability for the cover-side brackets, so I added more holes when I made the final version brackets. I did this so that without having to drill new holes to change the position of the brackets, a wide range of junkyard test struts could be tested, and different degrees of lift when opened could also be tested. Here's the final hardware installed in the mockup:

StrutBrackets2_zpsd2395e30.jpg


The above photos are mocked up for the side-hinged configuation, the right side photo below shows the tub-side bracket bolted up for the end-hinged and center-hinged configuration (right).

StrutBrackets3_zps91002314.jpg


The hardware is now good to go for any of the configurations below.

CoverConfigurations3_zps67517458.jpg
 

jscherb

Expedition Leader
The company reports that the mold masters for the tub kit have completed their journey from NY to OR and arrived at their fiberglass shop. They say they'll begin work on the production molds in a few weeks.

mm1_zps4c127990.jpg


mm2_zpsfa1718b2.jpg
 

jscherb

Expedition Leader
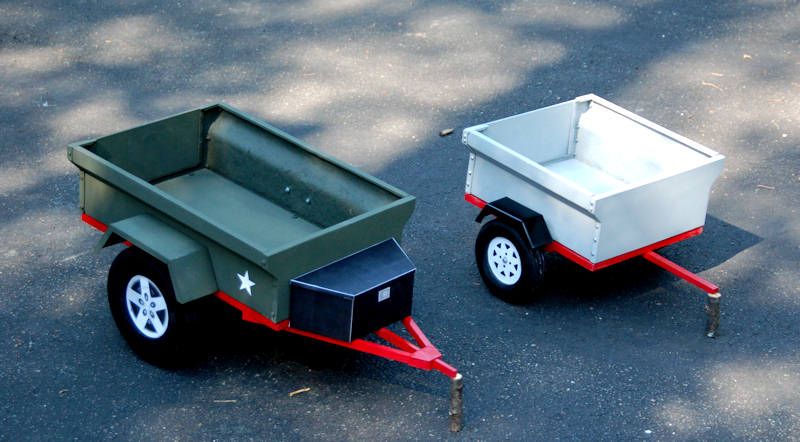
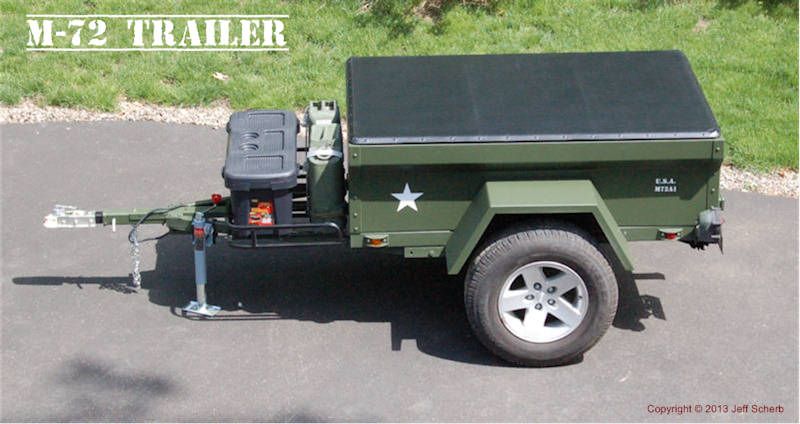
I've been calling the prototype military trailer an "M72", meaning 'military design, 72" long'. That's the same length as the original military M100 and M416 trailers, so that's the length I built the prototype. But I designed the assembly of the tub and the molds that make the parts so that any length side panel can be made in the same molds. During the design phase of the project, I made up a 1/4-scale M72 model, and a 1/4-scale "M48" model:

MiniM416s2.jpg


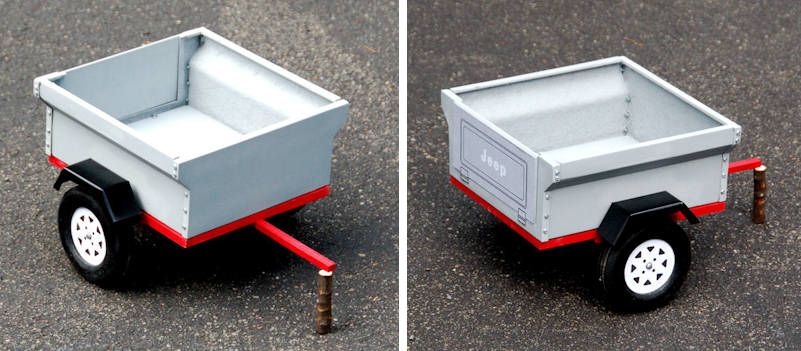
The Harbor Freight #90153 1090 Lb. capacity 40-1/2" x 48" utility trailer is a popular and inexpensive platform for building DIY trailers, and can often be had on sale for less than $200 with a coupon. The fiberglass tub is the correct width to drop right on to that Harbor Freight frame. For a budget-based start, the original HF wheels, tires and fenders can be used. The 1/4 scale model below uses models of those original HF parts. I also built the model with a Jeep-style tailgate, but it could be also built with two solid end panels and no tailgate. Here are a few photos of the "M48" 1/4 scale model:

M48Model_zps3a66e48a.jpg


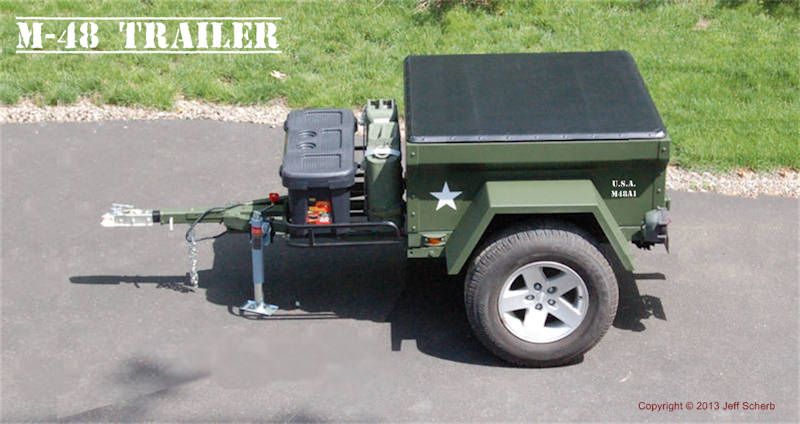
I did a quick photo edit of the M72 trailer to come up with a rendition of the M48 in a military theme, with Jeep wheels and tires and the larger fenders:

M48A1Chop_zps7d4bab12.jpg


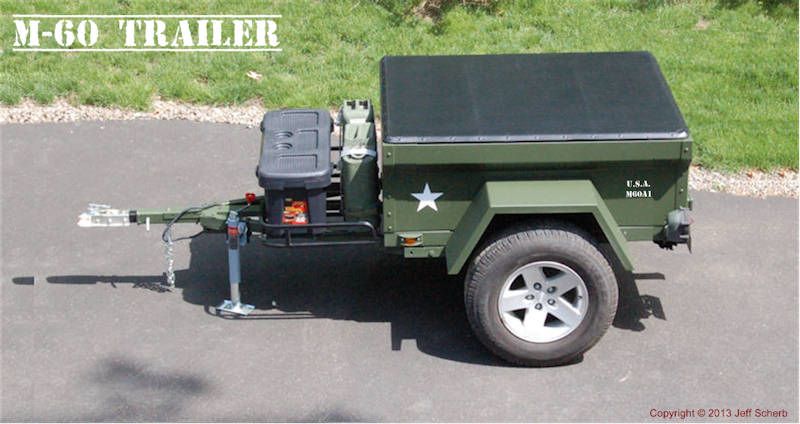
An "M60" version of this trailer would be a good length for a trailer-top tent. There is a ready-to-roll 60"-long military style trailer on the market already, so there must be some interest in that size. So here's an edit of the same photo depicting an M60:

M60A1Chop_zps8e476a74.jpg


And for comparison purposes, here's the original M72 photo that I edited for these shorter models:

M72A1Stock_zps35ff49cb.jpg
 

jscherb

Expedition Leader
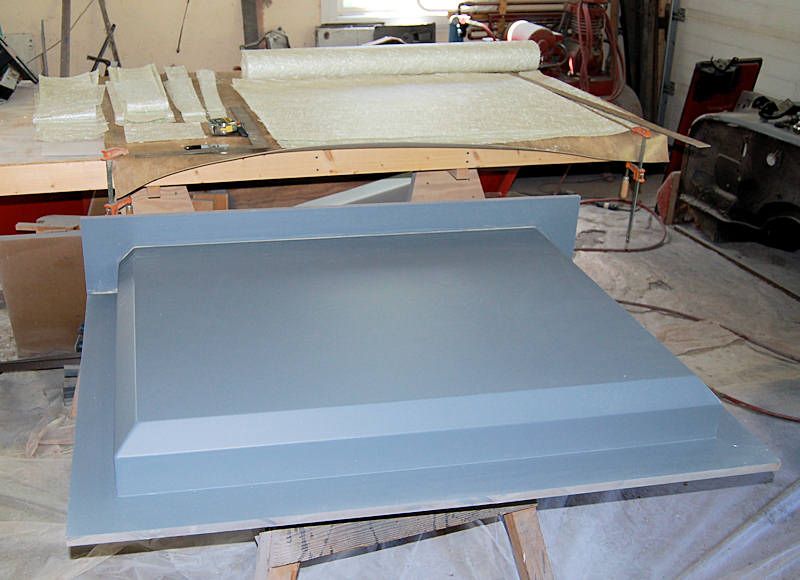
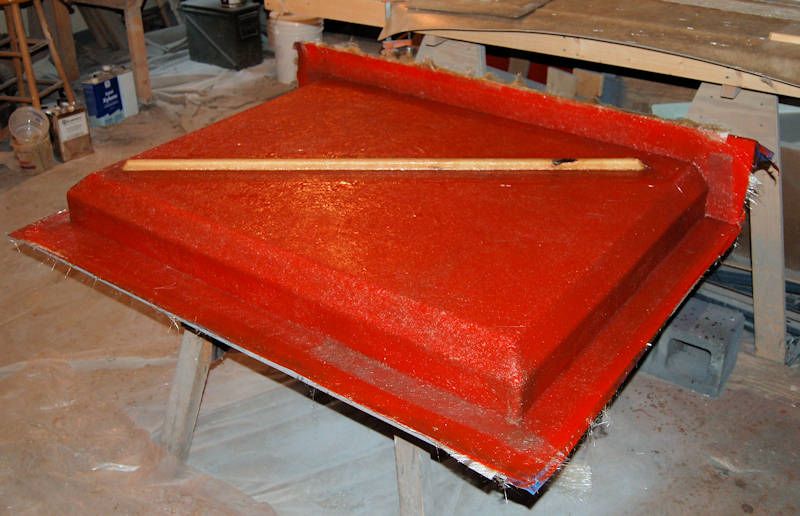
My fiberglass supplies arrived today, so I set up everything for making the cover mold tomorrow. In the photo below, I've made up the kit of fiberglass parts to be laid up in sequence (on the table). I'm doing this as a two-part mold with the joint side of the cover being made by a bolt-on form, so I've added a form on that edge to make the flanges of the mold. You can just make out a tan line at the joint between the main mold and the flange board, that's modeling clay to seal the joint.

CoverMold1_zps4fa1fe38.jpg


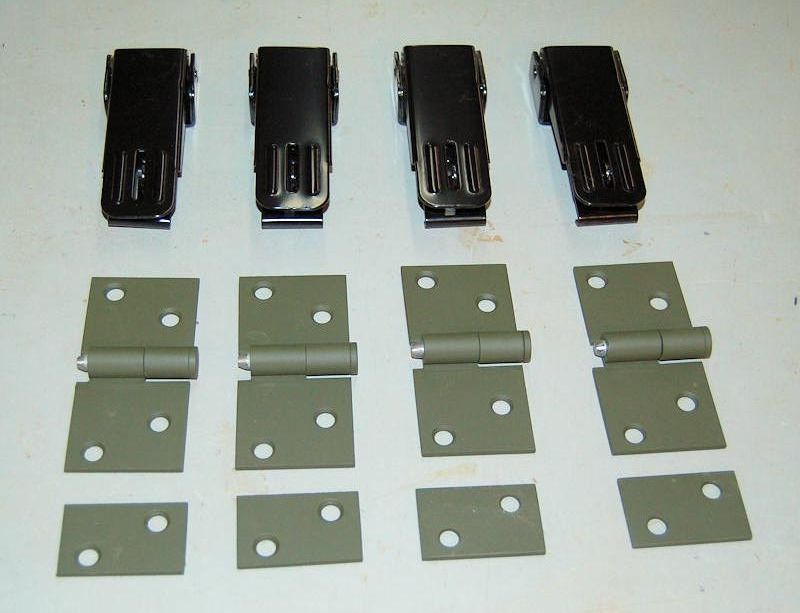
Also today I finished up the hinges and painted them olive drab. I also made four bolt backer plates out of the scrap left over from two of the hinges; they'll go inside the tub to reinforce the installation of the hinges. I didn't do backer plates for the cover side of the hinges, as long as I'm molding the cover, it's easy to add reinforcement during molding so I won't need backer plates.

CoverHardware1_zps496fb710.jpg


I'm not sure if I'll leave the hinges olive drab or not, the latches that will go on the other side are black. Maybe I won't care if they match side to side, I haven't decided yet. I might decide to paint the hinges black, or I might decide to paint the latches olive drab, I'll decide that before I do the final olive drab paint on the cover.
 

Mark Harley

Expedition Leader
You should market a hands on fiberglass class.
I would be a paying student.
I would love to learn the skills you posses.
 

jscherb

Expedition Leader
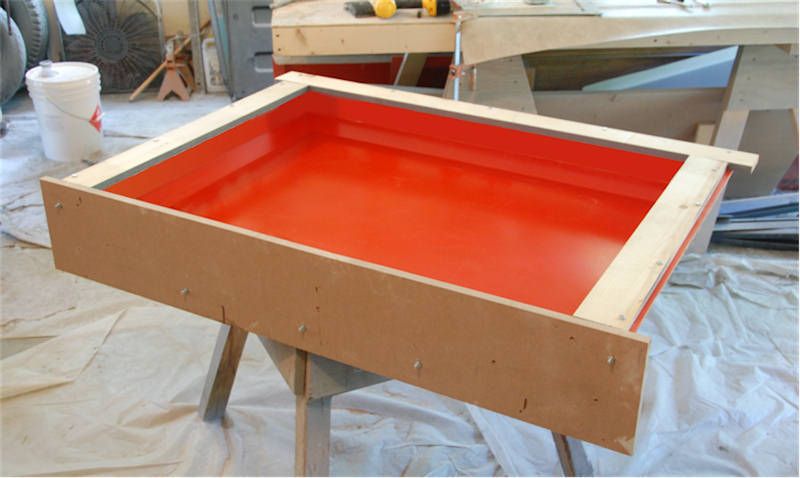
The cover mold is now ready to make parts.

CoverMold6_zps181cb518.jpg


The form boards bolted around the edge of the mold create an inward-facing flange on the bottom of the cover. This flange sits on the top edge of the tub, and will be weatherstripped to seal out the elements. These forms are bolted on so that they can be removed in order to pop the finished cover out of the mold - if these weren't removable, the cover would be locked in the mold forever. The "joint side" of the cover is also done with a bolt-on form, this facilitates demolding the part. Without this removable edge the part would be difficult to remove from the mold because of the vertical sides of the part and mold. Unfortunately because of the shape of the cover, there's no "draft angle" to facilitate demolding, so a removable side to the mold is a good idea to make it easier to pop the part out of the mold.

So the next step is to mold the two cover halves in this mold.
 
Last edited:

jscherb

Expedition Leader
You should market a hands on fiberglass class.
I would be a paying student.
I would love to learn the skills you posses.

Fiberglass isn't really too difficult, I learned pretty much all I know about it from reading books and learning-by-doing. If what you want to do is make copies of existing parts, like say the hood of a car, making a mold from an original hood and then molding a part is pretty straightforward, all you really need is a place to make a big mess, and a couple of special tools, like a gun to spray gel coat with. If you're going to make original designs, then you'd need the ability to make a decent mold master and put a nice finish on it before molding, so some skill in doing bodywork is usually required. You'll also need to think through things like demolding - making sure there's a way to get it out of the mold when it's done :).

Over the years I've been doing this I've invited people to stop by and I'd spend a day teaching them what I can, but I guess I'm far enough off the beaten path up here in the NY Finger Lakes region that it's too far for people to take me up on that offer.

Here's a book on fiberglass I would recommend for anyone who wants to do their own molds and parts. You can usually find it in the automotive section at a Barnes & Noble bookstore:

Fiberglass and Other Composite Materials, Forbes Aird, Book - Barnes & Noble

9781557884985_p0_v2_s550x406.jpg


You'll probably find a book or two at your local library on building fiberglass boats, here's an old one I've got:

FiberglassBooks2.jpg


Even if a fiberglass book was written in the 60's, it'll still have lots of information on molding and making molds that is very applicable today. One nice thing about the really old books is they won't go into a bunch of generally useless stuff based on today's high-tech molding methods, they stick to simple techniques and basic tools and materials that can still be used in a home garage today. Pretty much everything I do with fiberglass could be found in one of those old boatbuilding books.

I'm always happy to share what I know, so if you want to do a fiberglass project of your own, feel free to ask questions.

I have put quite a few more detailed fiberglass steps in the main build thread for this trailer in the Trailer Adventuring Forum at: http://tventuring.com/trailerforum/thread-119.html
 
Last edited:

jscherb

Expedition Leader
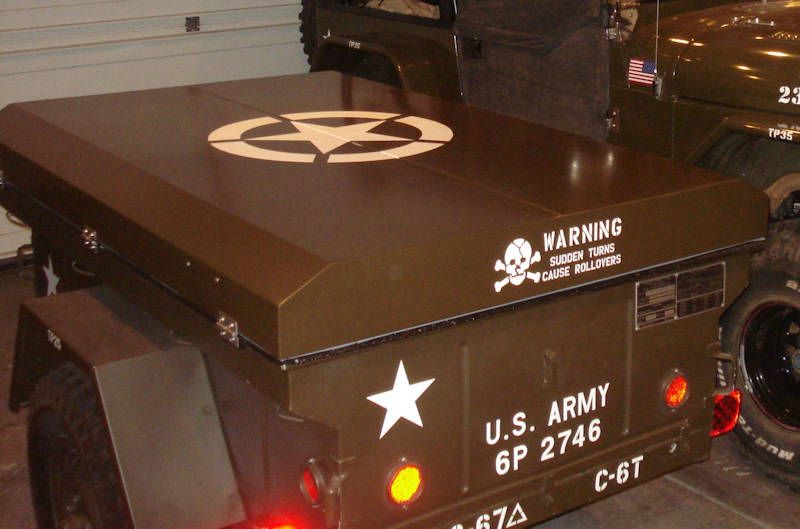
The other day I came this photo of an M416 wearing a WWII invasion star on its Sierra 4x4 hard cover (it belongs to "67tank", here's his build thread: http://www.expeditionportal.com/forum/threads/111431-M416A1-Trailer-Build):

InvasionStar2_zps4d969fdc.jpg


I like the way that star looks, so I drew one, printed it on paper, cut it out and tried it on the cover mold master for size:

InvasionStar3_zps48d74671.jpg


InvasionStar4_zps262f77e2.jpg


The mold master is only half of the cover, so to be centered on the finished cover the star would have to go over the joint between the two parts, but that wouldn't be a problem. If you look at the Sierra cover in the photo above it's got a seam running down the center.

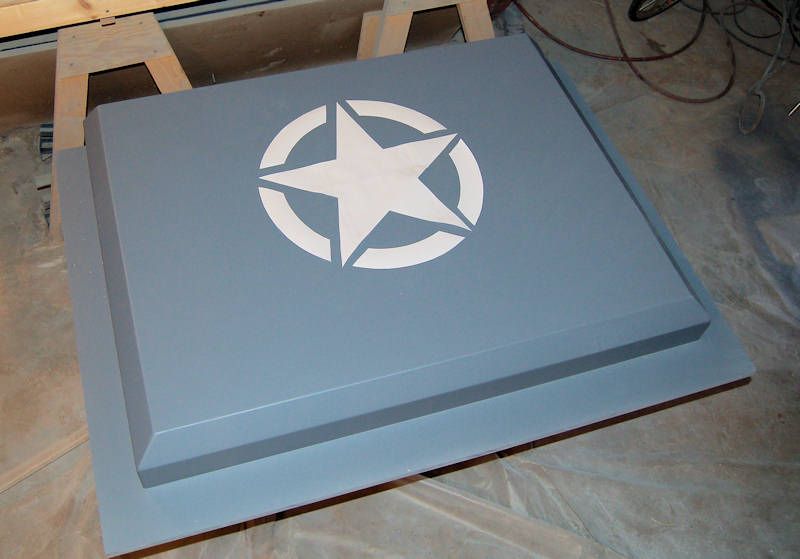
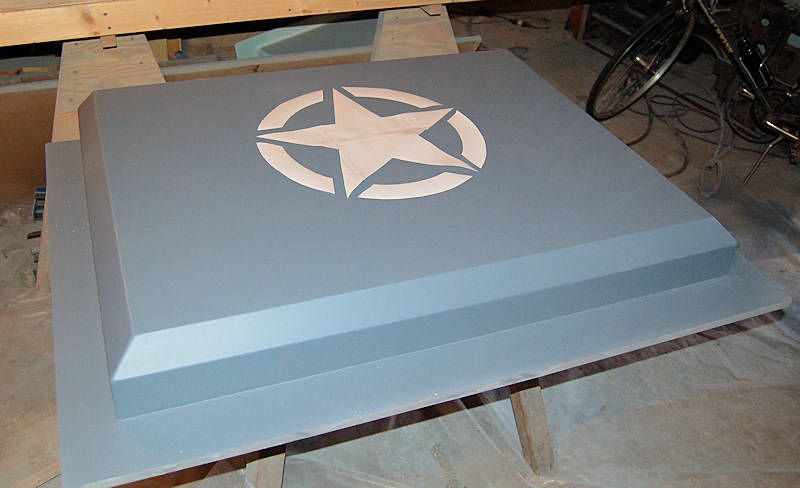
I think I'll put one of these stars on the fiberglass cover after it's painted.

Stencils for painting these stars are available in lots of sizes: http://www.militarystencils.com/Paint-Mask-Stars-C11.aspx, and I also found vinyl decal versions on eBay: http://www.ebay.com/itm/STAR-20-HOO...Parts_Accessories&hash=item5af1f370bc&vxp=mtr, but I'll probably just take a PDF of my drawing down to the local sign/decal shop that did the other decals I put on the trailer and have them make a decal for me.
 

jscherb

Expedition Leader
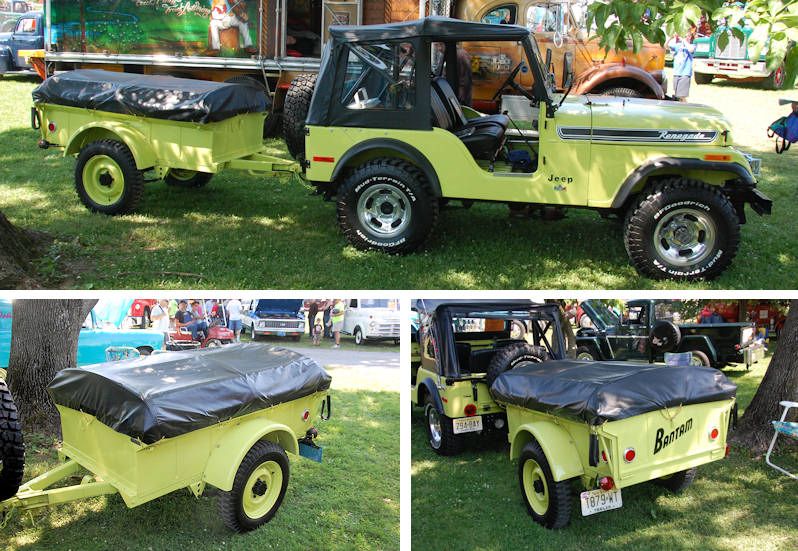
Yesterday I went to an antique truck show in Pennsylvania; there wasn't too much that's relevant to this thread, but I did see this really nicely restored Bantam TC-3 (Civilian) trailer.

MacungieBantam_zps5c43f3eb.jpg


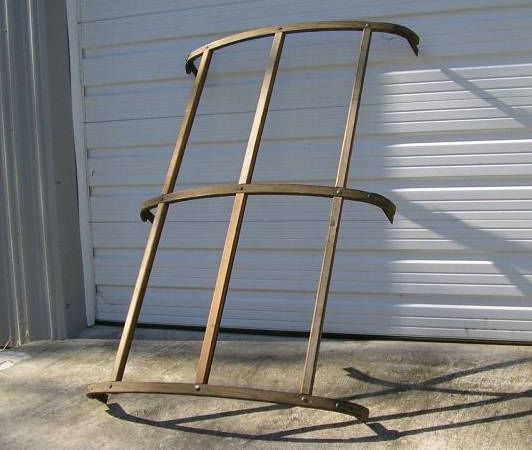
It appears that it's got bows in the stake pockets to support the cover. I stopped back several times hoping the owner would be there and he'd show me the interior but no such luck. Here's a photo of a set of Bantam bows, I suspect this is what's under the cover:

BantamBows_zps906eb7b2.jpg


Nice way to get some extra storage space out of the weather.
 

Forum statistics

Threads
188,364
Messages
2,903,769
Members
230,227
Latest member
banshee01
Top