Fiberglass M416/M100 Military-style Trailer Tub Kit

jscherb

Expedition Leader
Could you spec or direct me to the cable and connector you use here?
View attachment 179517
That's a standard Jeep CJ-7 tailgate cable, they're available aftermarket: http://www.quadratec.com/products/22504_90.htm. It's attached to a standard Jeep CJ-7 tailgate cable bracket, which I don't think is available aftermarket, but aftermarket equivalents should be available soon from Compact Camping Concepts, here's a photo of a pre-production one they sent me for testing:

TailgateFab2_zps94fcff55.jpg


I think the frame idea is great. Especially the easy on/off use of a set of receivers. One thought might be to include even smaller receiver ports up in the corners.
Good idea!

I added one last month to receive my "tactical towel/trash bag bar" in the wheel well. Slides in and out and causes the Camp Cook to smile.
I smiled too :).
 

jscherb

Expedition Leader
Finished up the fabrication of the tailgate. I bonded an aluminum skin on the outside, and on the inside an 18-gauge steel skin because I would expect the inside to take more abuse than the outside due to loads being moved over the tailgate; steel will be more ding/dent resistant than aluminum.

TailgateFab20_zps69682a42.jpg


TailgateFab21_zpsb8626902.jpg


TailgateFab22_zps4d15bef2.jpg
 

jscherb

Expedition Leader
A few more photos of the tailgate:

TailgateFab24_zpsc77a842d.jpg


TailgateFab23_zps6e18fbc8.jpg


Now that this project is finished I can put my CJ-style tailgate back on :).
 

cjm

Adventurer
tailgate

J........you never cease to amaze me with awesome DIY projects that turn out so great. You are truly a talented dude!
 

jscherb

Expedition Leader
J........you never cease to amaze me with awesome DIY projects that turn out so great. You are truly a talented dude!

Thanks! :). This wasn't a particularly hard project... my goal for this project was to design something using easily available materials, requiring no complicated fabrication and no special tools (except a welder), that someone who's fairly new at metal fab/welding could build successfully.

All of the materials I've used could have been bought at someplace like Tractor Supply, except perhaps for pieces of sheet metal large enough for the skins - I'm just not sure what they carry in the store for sheet metal.

To get to this point the only tools necessary were a welder, some way to cut metal (a cutoff wheel in an angle grinder would be fine, or a even a hacksaw), and a few drill bits, and a 3/4" hole saw for the holes for the latches.

I think the only special tool I ended up using for the whole project was the gun for the structural adhesive to bond the skins on, it's a special size for the dual-tube "mix in the nozzle" adhesive. Many places that sell that adhesive will loan a gun, so hopefully even that wouldn't be classified as a special tool. And since you'd have a welder if you were building this project, you could always use steel sheet metal skins and weld them on, so the structural adhesive isn't really necessary.

Hopefully people can look at this example and build their own custom tailgates, and if anyone wants more detail I'll be happy to provide it :)
 

jscherb

Expedition Leader
When I initially built and installed the new metal tailgate, I did it with Jeep factory hardware to ensure all of the bolt holes were accurately placed. This morning I switched out the hinges for aftermarket ones.

TailgateHardware1_zpscbc65202.jpg


TailgateHardware2_zpsd0db7458.jpg
 

jscherb

Expedition Leader
I also had initially installed Jeep factory tailgate cable brackets:

TailgateCableBrackets1_zps35efa068.jpg


Today I swapped them for these really nice stainless ones from Compact Camping:

TailgateCableBrackets3_zpsa5901fcd.jpg


I think the CC brackets may be the only ones that will be available aftermarket (these are preproduction ones for testing), so if your application needs CJ-style brackets, these are a really good option. I especially like that they're stainless steel.
 

jscherb

Expedition Leader
A few photos of the new metal tailgate off the trailer.

TailgateDetail1_zps9e16b22b.jpg


TailgateDetail2_zps57941577.jpg


TailgateDetail3_zps3df056f3.jpg


TailgateDetail4_zps6f569d4f.jpg


No too much to see really, it's pretty much a plain thin box :). But I think in these photos you can see how nicely the bonded skins work out. The skins are completely sealed to the frame, there's no distortion that might occur from the heat of welding (not to mention that you couldn't weld the aluminum outside skin to the steel frame anyway), and there wasn't any tedious weld grinding required.

All it would need now is a bit of finish sanding, a coat of primer and some paint to match whatever trailer it would be going on.
 

jscherb

Expedition Leader
I put the original tailgate back on the military trailer, and just for fun I tried the metal tailgate on my Jeep-tub trailer:

TailgateOnYellow1_zps34b387de.jpg


It fits just fine of course, because it was built to fit a Jeep tailgate opening, but obviously the square top just doesn't look right. Building a similar metal tailgate with an angled top could easily be done, but then you'd just be building something just like the Dinoot smooth tailgate. So you might as well just buy one of those if you wanted a smooth tailgate on your Dinoot/Jeep-tub :).

TailgateOnYellow2_zpsc4b65000.jpg


TailgateOnYellow2a_zpse35de7d2.jpg


TailgateOnYellow3_zps2ee1b184.jpg


TailgateOnYellow3a_zps6d381a76.jpg
 

jscherb

Expedition Leader
I design things like this trailer kit as a hobby, which means I generally only build one or sometimes a few copies for my own use and in order to prove and test the design. Sometimes, as in this case, a company will license the design from me to bring it to production, and I usually take that opportunity to make any design changes I come up with from building and testing the first prototype.

In the case of this tub design, I decided to make one change to the details of the design. Here's the first prototype:

Done-119_zps20277a81.jpg


And here's a "version 2" tub:

1239504_492802787484808_1673411795_n.jpg


The change I made, which is visible when comparing these two photos, is that I widened the top rail of the side panels. In the original prototype, the rail on the side panels was narrower than the rail on the end panels; now they're the same width. I did this for several reasons, not the least of which is that it's much easier and faster to do the fiberglass for the wider rail. And the functional reason is that it will provide more stiffness, and more area for mounting things on the tub if desired. Not only that, I like the look of the wider rail better.

The 2x4 sitting across the tub in the version 2 photo is for testing - standing on that is a one good way to test side panel flex. These new side panels pass the test just fine.

Also notice this particular v2 tub has been assembled with two solid end panels, just like the original military trailers. The first prototype above was assembled with one solid and one tailgate end panel.
 

jscherb

Expedition Leader
A "version 2" military tub assembled and on a modified Harbor Freight frame. Don't mind the tiny HF tires/wheels, something larger is in the plans.

msp4_zps087aa075.jpg
 

jscherb

Expedition Leader
Here's another shot of the version 2 military tub kit. It's sitting on a resized Harbor Freight frame, but this one's got a mod Compact Camping/Dinoot is testing - instead of the noisy and stiff HF "slipper" springs, this one's got a new bolt-on spring hanger with longer, more compliant shackle springs. Should be a really nice upgrade to the HF frames. Needs some bigger tires and some fenders though... :)

msp7_zps4b01b464.jpg
 

jscherb

Expedition Leader
A few more photos of the early spring upgrade prototypes...

This one shows the new longer shackled springs compared to the Harbor Freight "slipper" springs:

sr2_zpsc31e3027.jpg


And here's how the spring hanger mounts to the frame, it mounts in the same was as the Harbor Freight spring hanger it replaces, an easy bolt-on:

sr3_zpsa285d1e7.jpg
 

jscherb

Expedition Leader
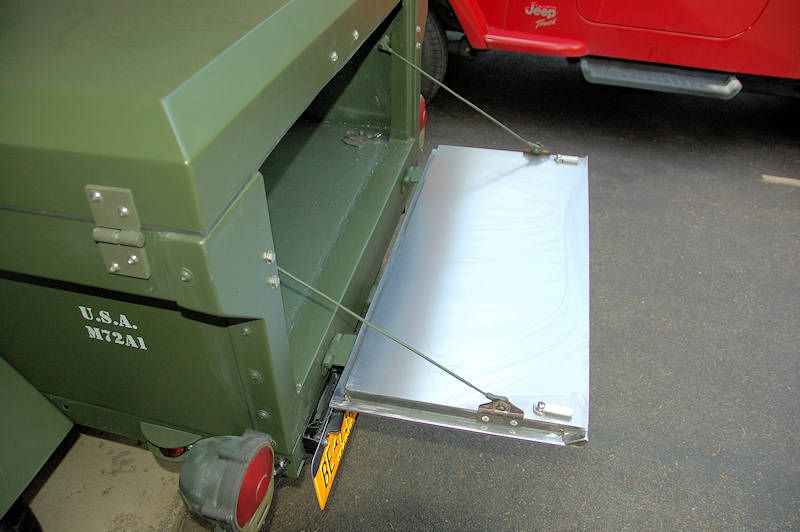
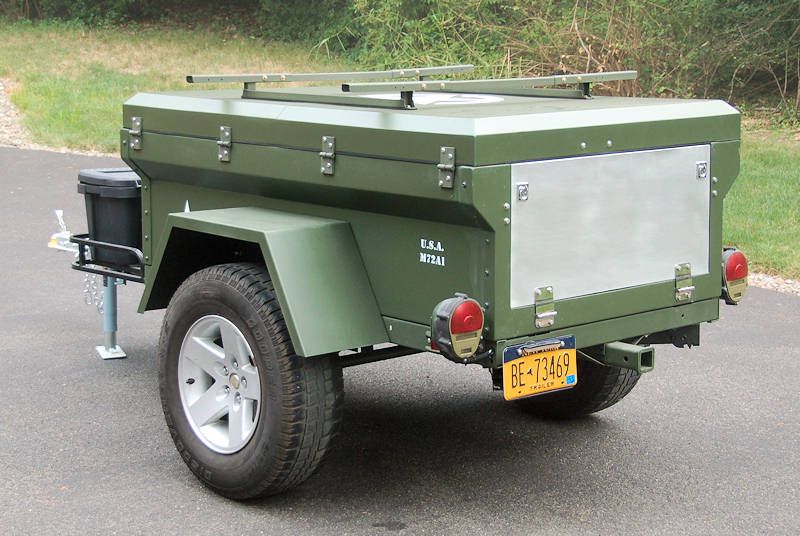
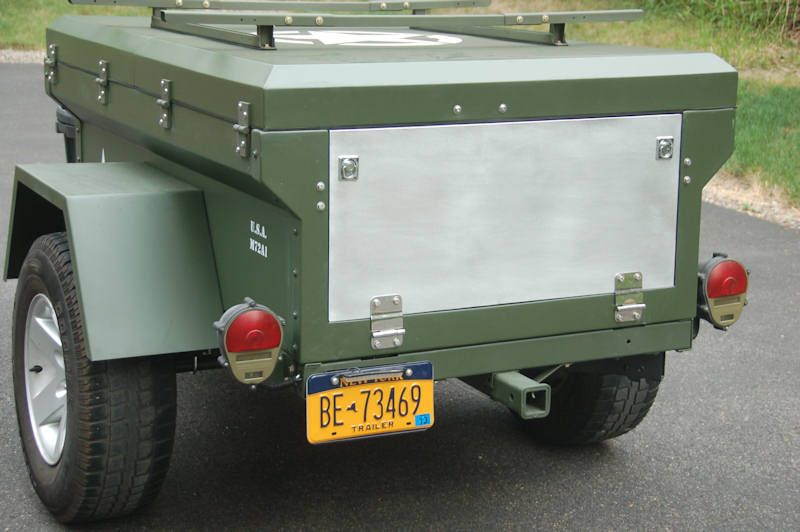
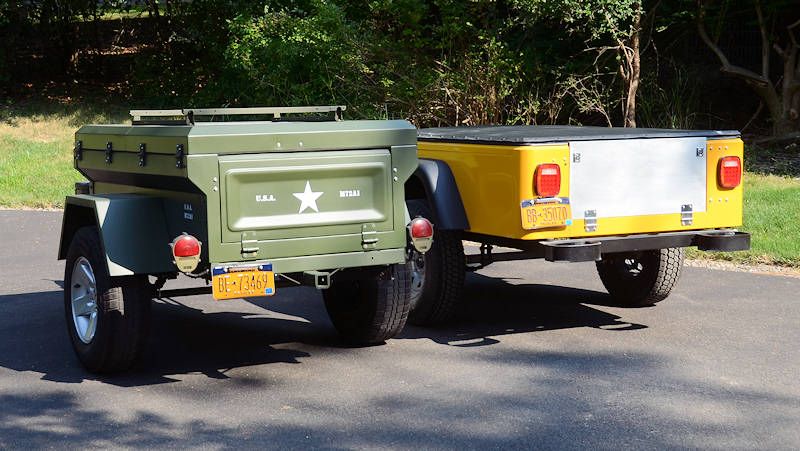
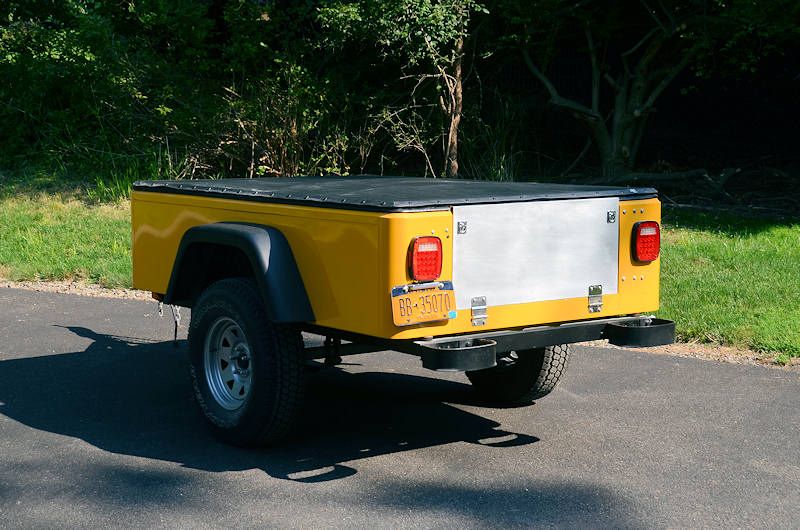
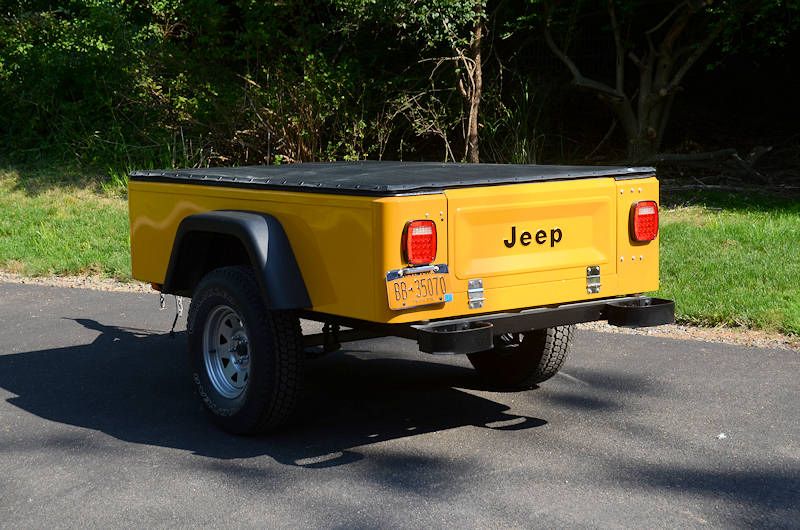
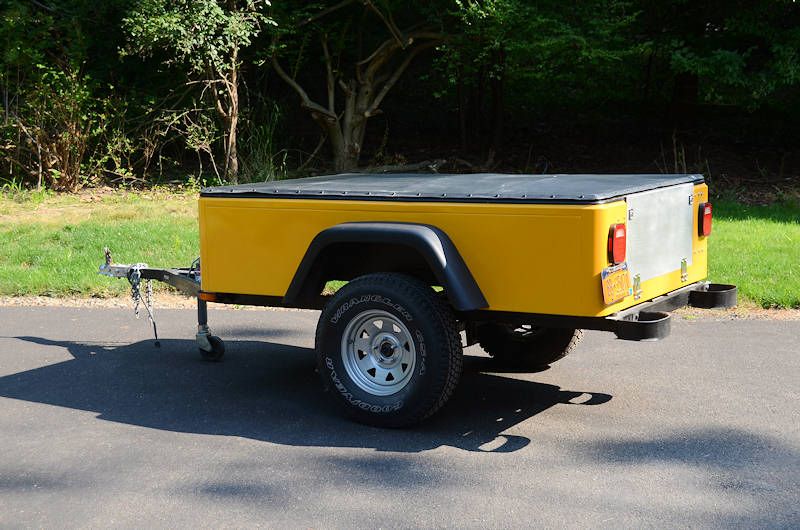
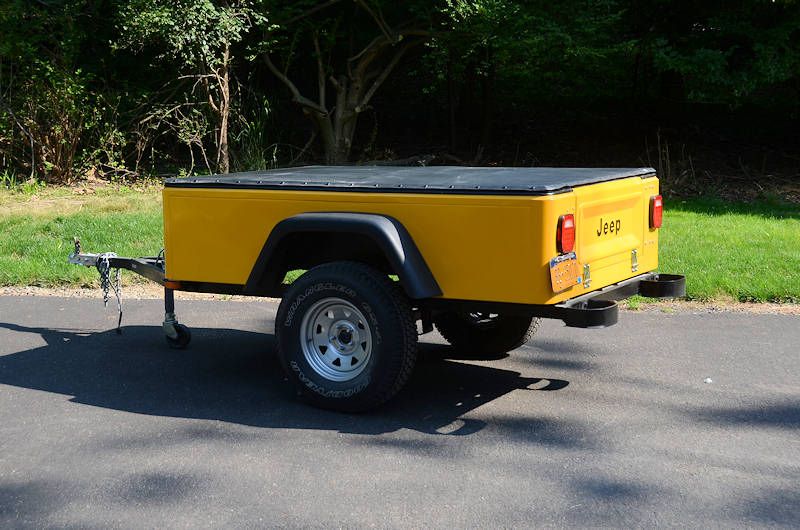
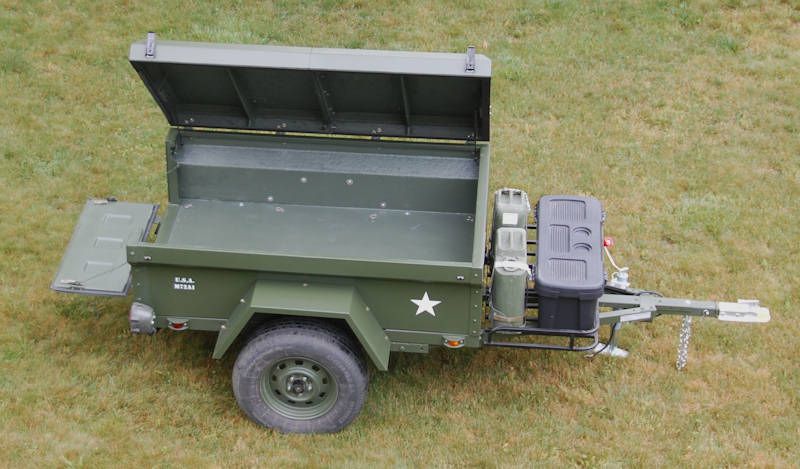
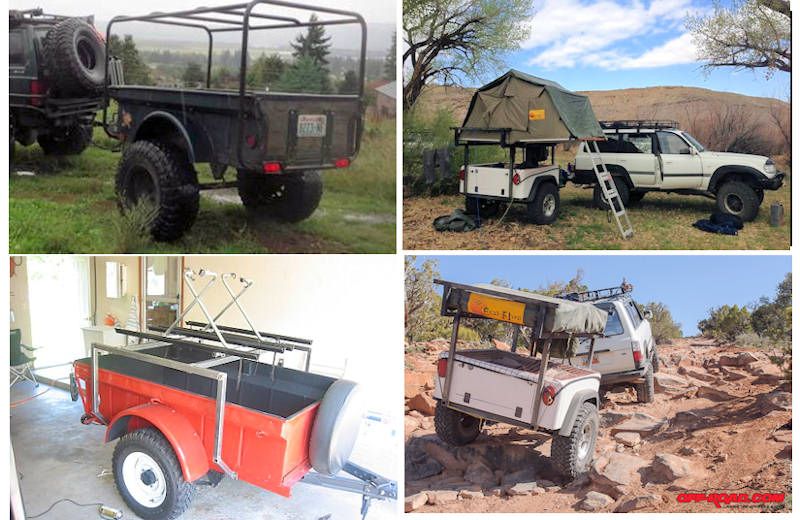
"Overhead" racks for trailers seem to be pretty popular - whether it's to carry kayaks or canoes, extra cargo or maybe a roof-top style tent, an overhead rack can provide access to the storage space inside the trailer while at the same time accommodating large cargo. Here's some few examples I've come across on both military style and Jeep-tub trailers:

OverheadRacks1_zpsffcf2602.jpg


Most of the racks I've seen, including the ones pictured above require some fabrication, and specifically welding, that an average DIY-er might not have access to.

I've been thinking about ways to DIY-build an overhead rack for a trailer that wouldn't require welding or any advanced fabrication skills or techniques. So here is one...

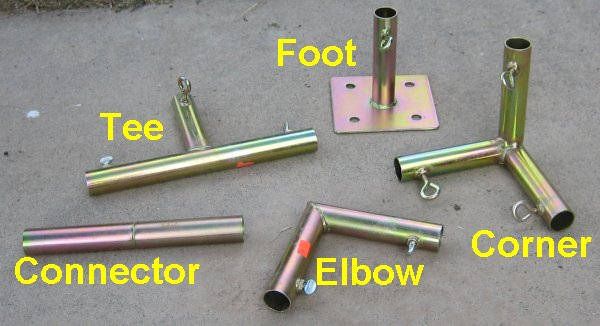
Tent canopies like the ones you can rent for backyard for parties or you might see set up as outdoor Jeep show vendor booths are mostly based on standard fittings that accept common sizes of inexpensive tubing, here's a sample set:

CanopyParts1_zps8ae7a501.jpg


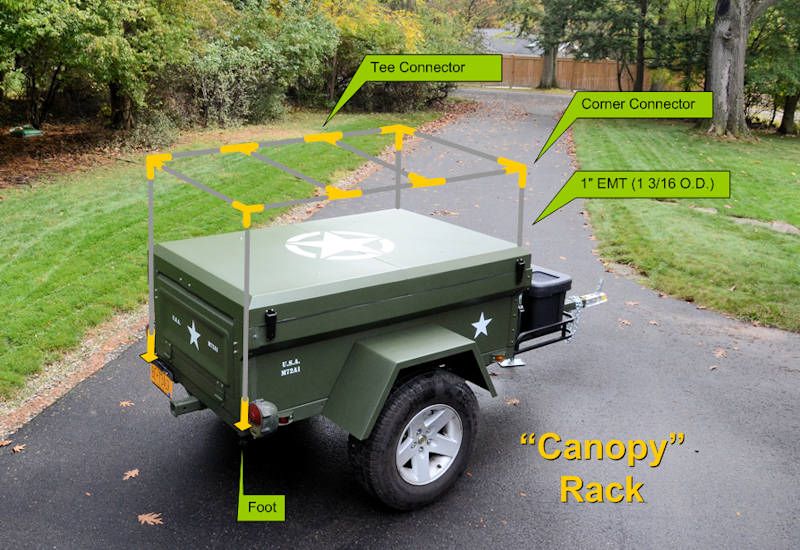
They're commonly available to work with 1" EMT (electrical conduit, 1 3/8" outside diameter), and several larger sizes of chain-link fence tubing, both of which are inexpensive and strong. It would be easy and economical to build an overhead rack using these fittings and 1" EMT (or larger tubing if your strength needs dictated). Here's an example:

CanopyRack1_zps8c959dd4.jpg


I've done the fittings in yellow; this one uses 4 "flat" corners, 4 tees, and four feet, and everything's connected with 1" EMT (in gray).

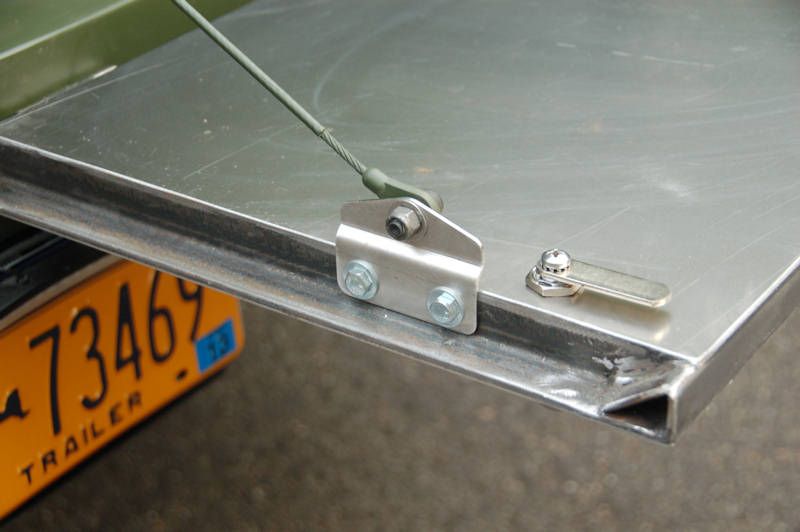
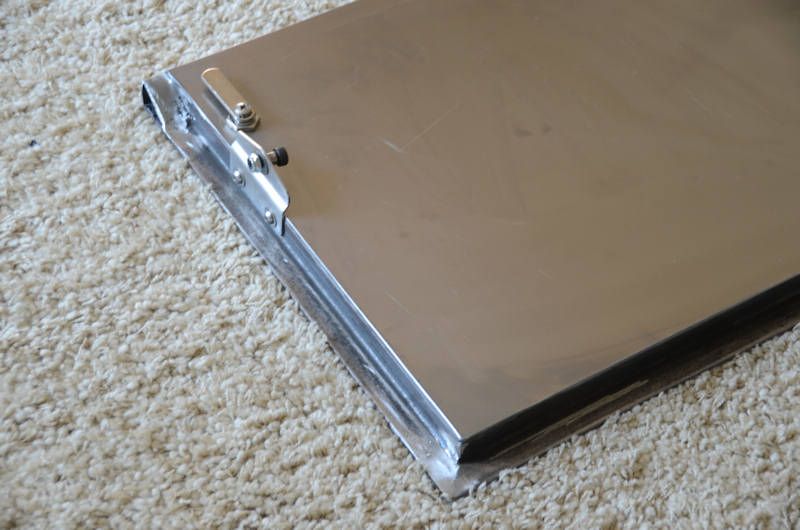
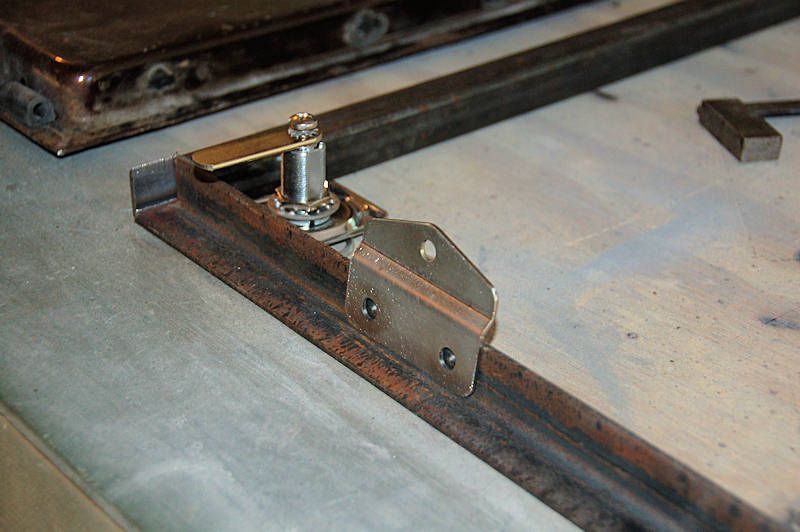
The rack would be secured to the trailer frame using angle brackets bolted to the frame that the feet could bolt to. Depending on the feet used and the size of the angle brackets, the base of the feet might need to be trimmed a bit because as designed, they're large enough to sit on the ground without sinking in; for this application the size of the base could be smaller.

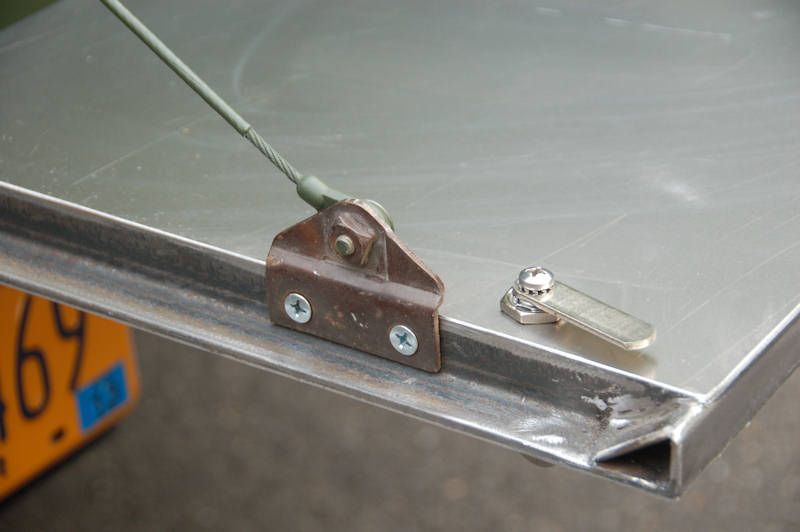
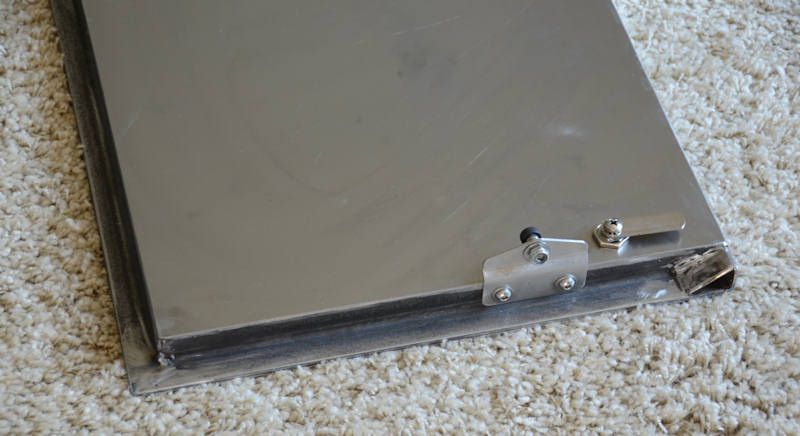
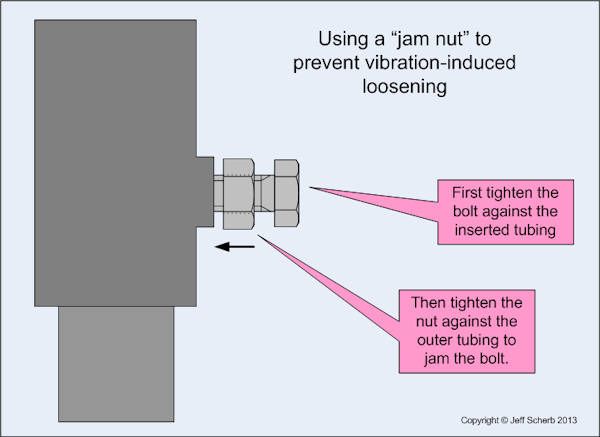
The fittings come with an eye bolt which gets screwed against the tube that's inserted into the fitting, which is fine for a static tent, but for a rack that will be subjected to the vibrations of the road or trail, a more positive lock would be a good idea, so a jam nut setup could be used:

CanopyJamNut_zpsd1e75896.jpg


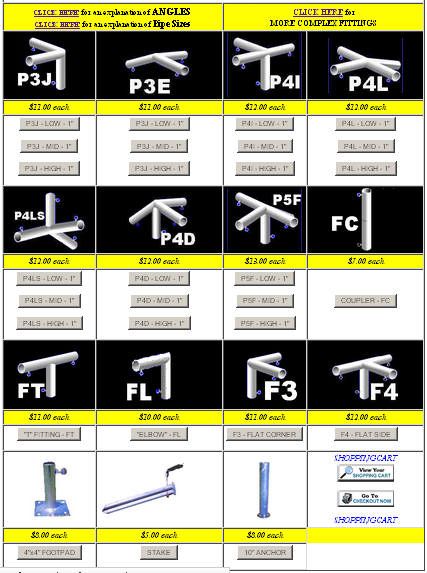
The fittings are pretty affordable, and there's a wide range to pick from so many different configurations of rack could be made. Here are a few sources: http://www.creativeshelters.com and http://www.canopymasters.com, and here are some example fitting types:

CanopyParts2_zps2d7f2d7b.jpg
 

Forum statistics

Threads
186,520
Messages
2,886,924
Members
226,515
Latest member
clearwater
Top