You are using an out of date browser. It may not display this or other websites correctly.
You should upgrade or use an alternative browser.
You should upgrade or use an alternative browser.
FJ62 destruction
- Thread starter esh
- Start date
esh
Explorer
Update on a few things to bring this thread up to speed...
I installed quality, high-power component speakers in the front and deleted the rear speakers. My platform sits above any height that would make rear door or fender speakers useful.
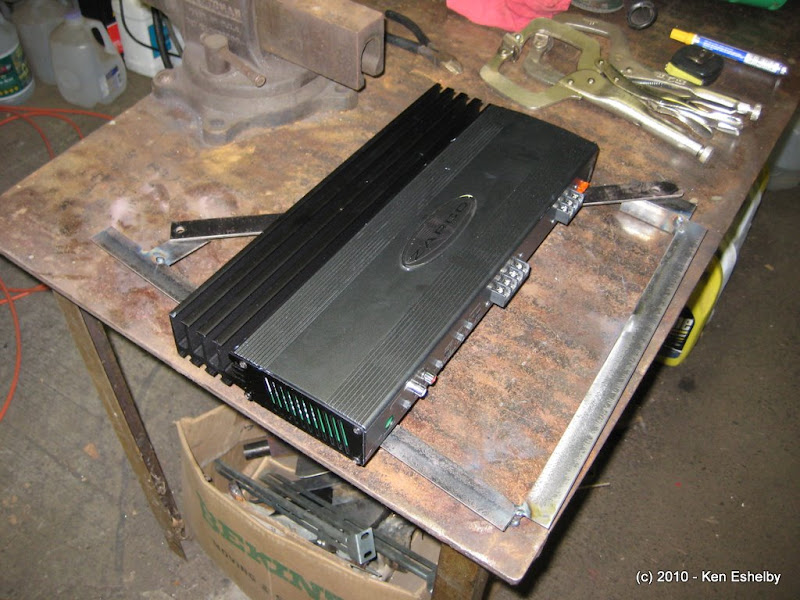
I have been meaning to mount my amps in final locations. After measuring and monkeying with ideas I decided to mount the sub amp under my Tuffy and build a bracket to mount the 2-channel speaker amp under the passenger seat.
For anyone looking for a quality amp, I have been very pleased with Zapco. I've run the 500W sub amp for a couple years in pretty harsh conditions without any kind of issue. I have also come to appreciate the little things, like how they designed their mounting feet system. Zapco tends to under-rate their gear and with some decent speakers you can get an appreciation for SPL vs loud noise.
test fit after cutting the Tuffy bracket

close fit, but more subtly this shows how flexible the amp feet mount system can be

passenger side

driver side, note this is a 6" Tuffy stereo console.. the amp would be hidden with the 8" but I'm glad for the smaller one because I can find crap that falls between the seats easier

console sitting in place

wires connected. I'll clean it up... some day.

I installed quality, high-power component speakers in the front and deleted the rear speakers. My platform sits above any height that would make rear door or fender speakers useful.
I have been meaning to mount my amps in final locations. After measuring and monkeying with ideas I decided to mount the sub amp under my Tuffy and build a bracket to mount the 2-channel speaker amp under the passenger seat.
For anyone looking for a quality amp, I have been very pleased with Zapco. I've run the 500W sub amp for a couple years in pretty harsh conditions without any kind of issue. I have also come to appreciate the little things, like how they designed their mounting feet system. Zapco tends to under-rate their gear and with some decent speakers you can get an appreciation for SPL vs loud noise.
test fit after cutting the Tuffy bracket
close fit, but more subtly this shows how flexible the amp feet mount system can be
passenger side
driver side, note this is a 6" Tuffy stereo console.. the amp would be hidden with the 8" but I'm glad for the smaller one because I can find crap that falls between the seats easier
console sitting in place
wires connected. I'll clean it up... some day.
esh
Explorer
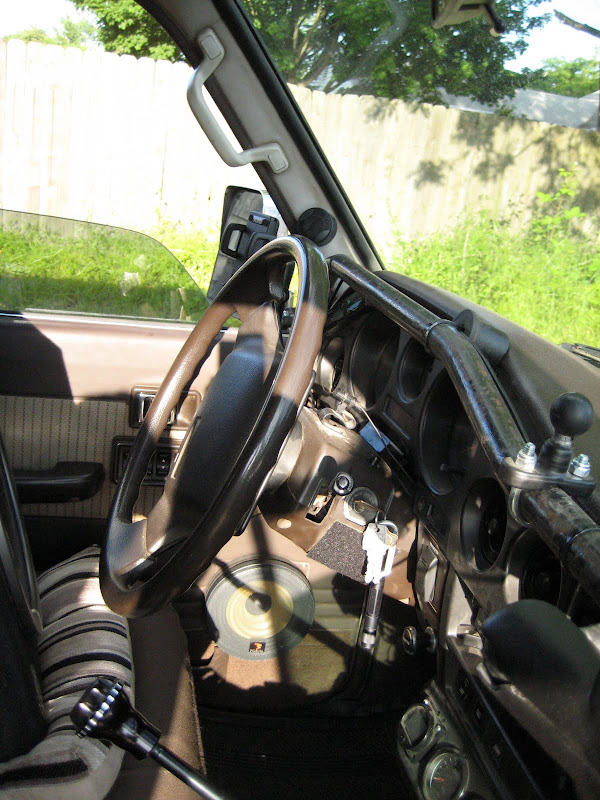
Onto the 2-channel amp...
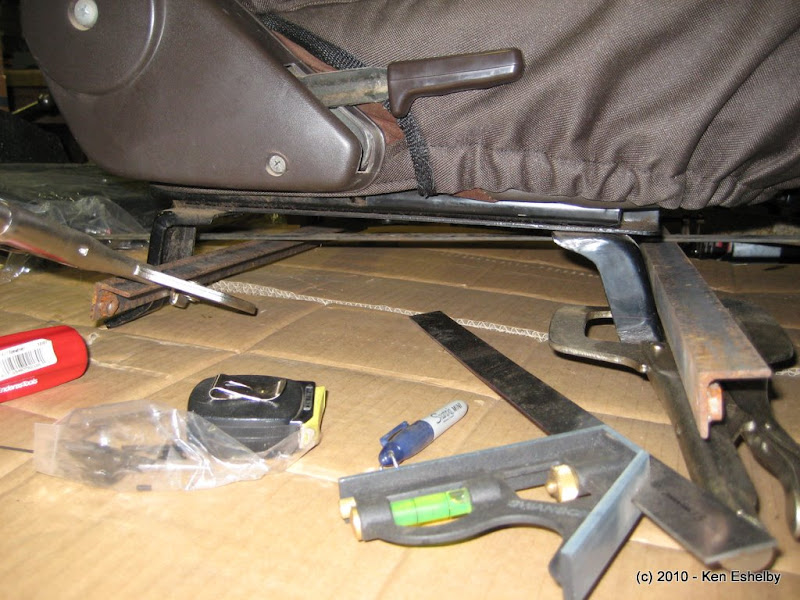
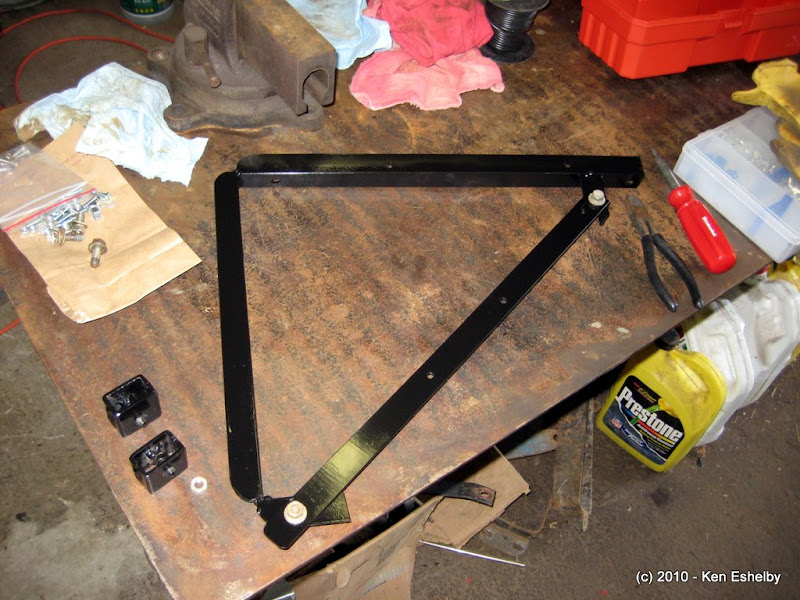
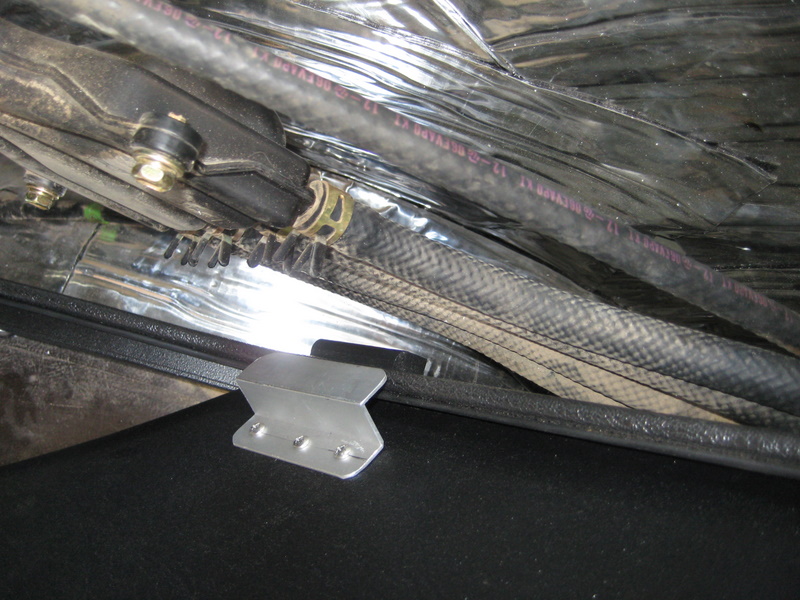
checking the lay of the land.. there is nothing square about FJ62 seat brackets..
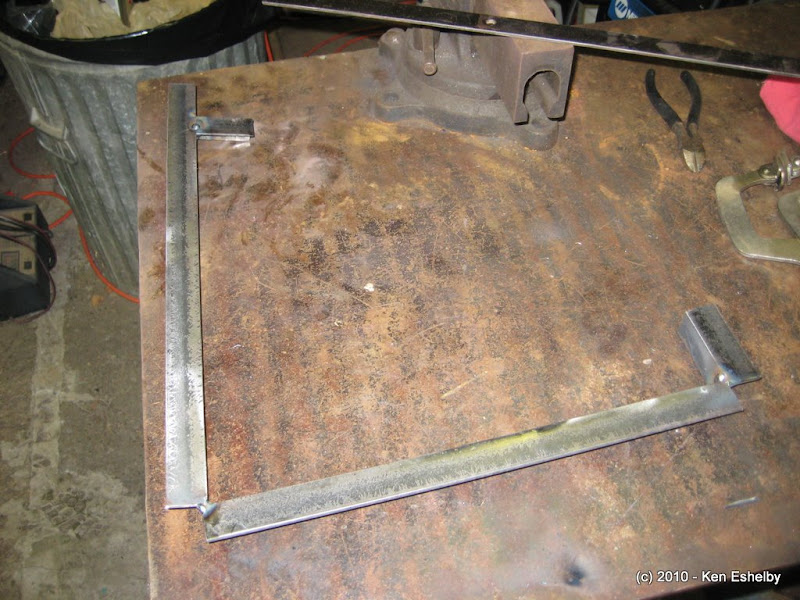
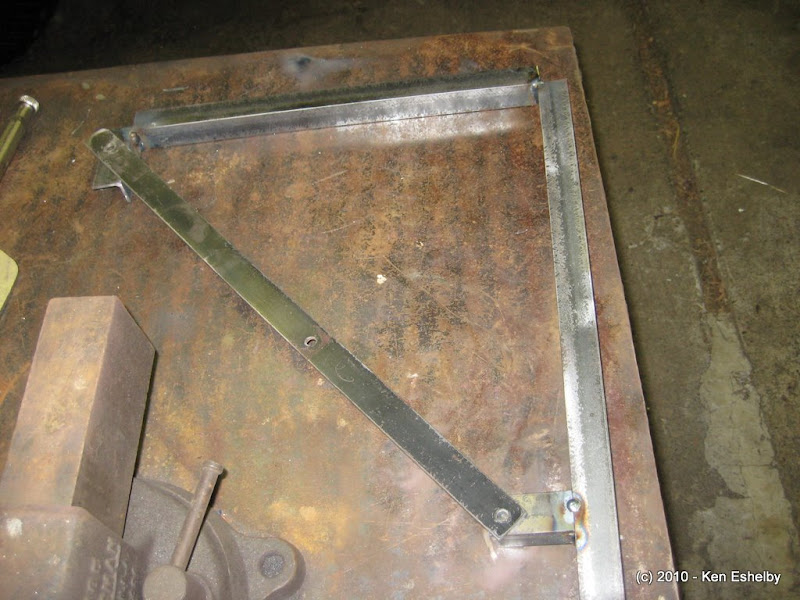
this is what I came up with from scrap on hand
finished and painted.. rounded off some of the more accessible corners and left the hidden ones for a surprise for my hands one day
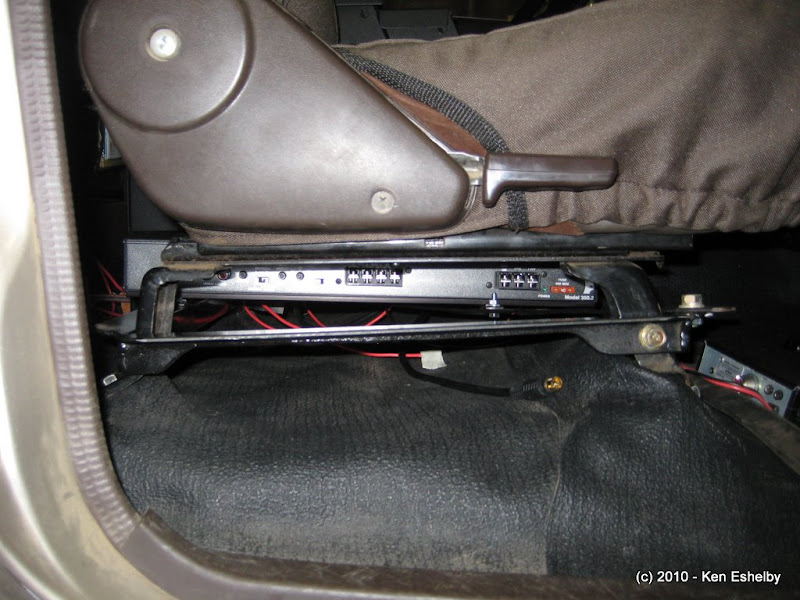
final amp location, again with the harping on about how cool the Zapco install feet system is
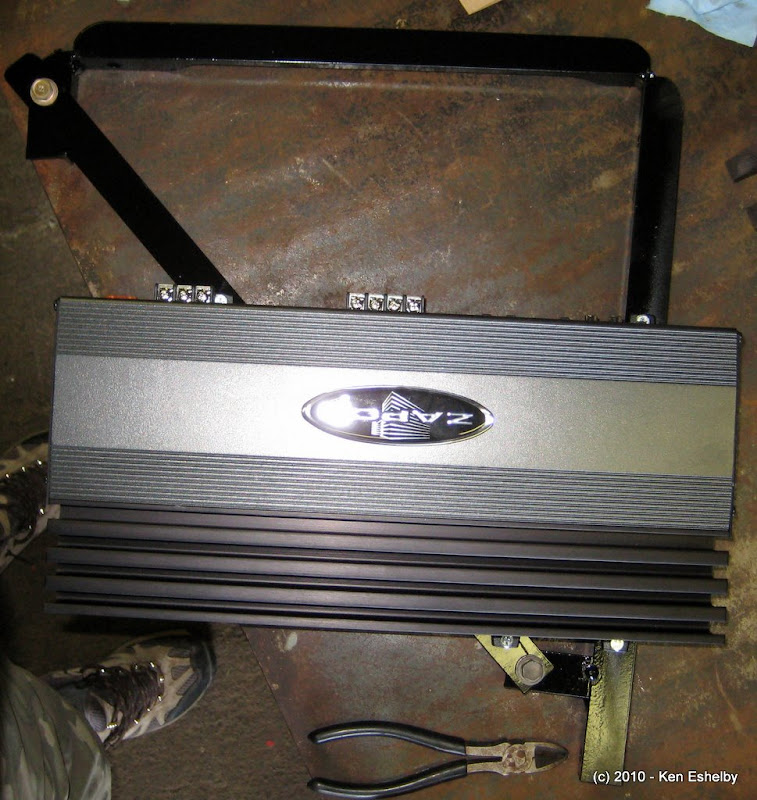
possibly a design flaw.. have to install the bracket and then the amp. I clearanced the outside bracket to be able to shove yet more crap under the seat
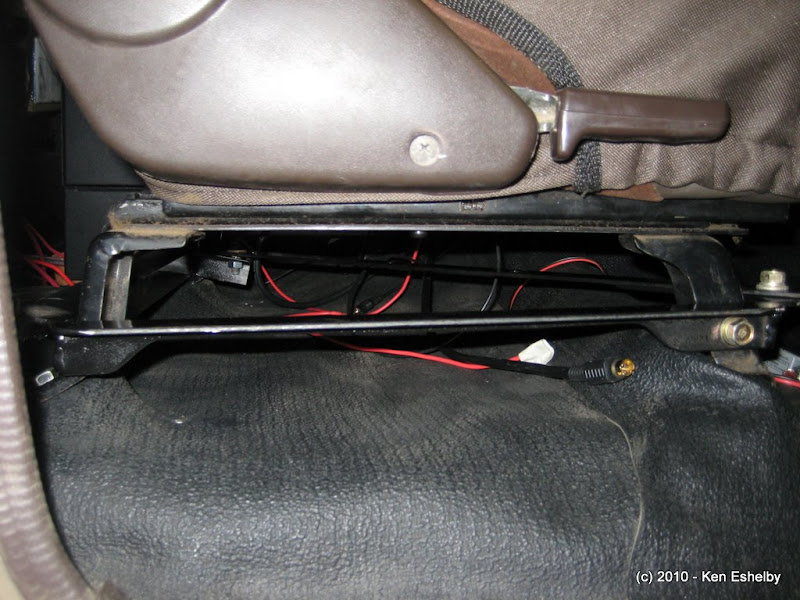
payoff.. amp sits nice and high, tucked under the seat. out of the way and can still get to the adjustment doodads easily. it would be hard to steal without a few minutes of frustration
checking the lay of the land.. there is nothing square about FJ62 seat brackets..
this is what I came up with from scrap on hand
finished and painted.. rounded off some of the more accessible corners and left the hidden ones for a surprise for my hands one day
final amp location, again with the harping on about how cool the Zapco install feet system is
possibly a design flaw.. have to install the bracket and then the amp. I clearanced the outside bracket to be able to shove yet more crap under the seat
payoff.. amp sits nice and high, tucked under the seat. out of the way and can still get to the adjustment doodads easily. it would be hard to steal without a few minutes of frustration
esh
Explorer
Shock install...
I've been looking for a replacement for my 10 year old OME shocks. I like the ride on the softer side, have always heard great things of Bilstein shocks, and wanted something that could last. Most of my travel in the 62 is to explore, so road conditions are anything but tend to end up over long stretches of rough gravel or dirt roads. I settled on 7100s because they measured closest to the OMEs that I could find and seemed to be well regarded. They can also be rebuilt and can be built for different ride qualities. So these should last forever if they aren't damanged and if parts exist.
I forget my actual measurements, but the closest shock I could find in all of Bilstein's range was the short body 10" travel, AK7110SB. I don't expect to ever go beyond running 33s in SUA, so planning for future increase travel wasn't in the cards.
My list of parts-
4 shocks, expect to pay around $700
4+ stem conversion adapters... I want to say w/14mm hole, 2x $17.50 @ man-a-fre
Dodge truck bushings for '69-93 truck, 1" spring eye
This is about a 2 banana job, mostly in figuring out how to mount things. Not a bolt up job.
After finding a post in the 80s forum on ih8mud, I decided to only use the front top heim joints that come on either end of each shock. The rest I converted to bushings, mostly for ease of use. I have 4+ U-bolt flip kits on each corner and that's how things worked out. The 4+ kit for the 60 uses 16mm mounting surfaces. The top rear OEM mounts for a 62 is 19mm. I had to drill out two bushings to fit the rear upper mounts and that was another adventure to find a 3/4 bit that would work (don't bother a gradual hole increase for poly bushings, just go for it).
Now that I know, I would have built the front stem adapters out of square tube. The adapters from 4+ have a massive vertical bolt.. 7/8", and is just a pain to deal with finding a bit to hone out the OEM mount. I'm not sure why such a huge bolt is needed.
I'd like to find a better way to do the bushings, but was limited to a size that fit and what form it came in. Ideally I wanted to find two hat-shaped ends and sandwich them together with a metal inner sleeve. Prothane sells something that might work if I cut the ends down, but I just went with what I found at the local 4x4 shop. Why are all my projects the weirdest thing a counter jockey has ever seen?
what comes in the box.. including 4 bushing rings, one goes on either side of each heim (i used 3 per top front shock to get spacing right with the stem adapters)

shot of the poly bushings used

easy end

with clip removed

this clip is more difficult.. see how the ends are formed?

my makeshift press bits.. 8mm and 25mm sockets

shade tree in action (a press would work better, be careful of the top shock housing)

what I came up to remove the clip.. prevent the clip from spinning with vice grips and pry the end I could get on with a small screwdriver... there has to be an easier way

vice grips don't mar up the end that bad.. nothing some emery cloth or die grinder can't correct

another angle

bushing fits

shot with a spare mount pin... this could be mounted better, but should serve to keep the end in place

very close in length to OME, my stock bumpstop should hit before the shocks bottom out according to measurements

front mounted, need to swing the clamps around but they don't interfere with anything

rear resevoirs clamped in.. my 3" exhaust is going to move so I might make a few adjustments then

and a few pics at different angles


I've been looking for a replacement for my 10 year old OME shocks. I like the ride on the softer side, have always heard great things of Bilstein shocks, and wanted something that could last. Most of my travel in the 62 is to explore, so road conditions are anything but tend to end up over long stretches of rough gravel or dirt roads. I settled on 7100s because they measured closest to the OMEs that I could find and seemed to be well regarded. They can also be rebuilt and can be built for different ride qualities. So these should last forever if they aren't damanged and if parts exist.
I forget my actual measurements, but the closest shock I could find in all of Bilstein's range was the short body 10" travel, AK7110SB. I don't expect to ever go beyond running 33s in SUA, so planning for future increase travel wasn't in the cards.
My list of parts-
4 shocks, expect to pay around $700
4+ stem conversion adapters... I want to say w/14mm hole, 2x $17.50 @ man-a-fre
Dodge truck bushings for '69-93 truck, 1" spring eye
This is about a 2 banana job, mostly in figuring out how to mount things. Not a bolt up job.
After finding a post in the 80s forum on ih8mud, I decided to only use the front top heim joints that come on either end of each shock. The rest I converted to bushings, mostly for ease of use. I have 4+ U-bolt flip kits on each corner and that's how things worked out. The 4+ kit for the 60 uses 16mm mounting surfaces. The top rear OEM mounts for a 62 is 19mm. I had to drill out two bushings to fit the rear upper mounts and that was another adventure to find a 3/4 bit that would work (don't bother a gradual hole increase for poly bushings, just go for it).
Now that I know, I would have built the front stem adapters out of square tube. The adapters from 4+ have a massive vertical bolt.. 7/8", and is just a pain to deal with finding a bit to hone out the OEM mount. I'm not sure why such a huge bolt is needed.
I'd like to find a better way to do the bushings, but was limited to a size that fit and what form it came in. Ideally I wanted to find two hat-shaped ends and sandwich them together with a metal inner sleeve. Prothane sells something that might work if I cut the ends down, but I just went with what I found at the local 4x4 shop. Why are all my projects the weirdest thing a counter jockey has ever seen?
what comes in the box.. including 4 bushing rings, one goes on either side of each heim (i used 3 per top front shock to get spacing right with the stem adapters)
shot of the poly bushings used
easy end
with clip removed
this clip is more difficult.. see how the ends are formed?
my makeshift press bits.. 8mm and 25mm sockets
shade tree in action (a press would work better, be careful of the top shock housing)
what I came up to remove the clip.. prevent the clip from spinning with vice grips and pry the end I could get on with a small screwdriver... there has to be an easier way
vice grips don't mar up the end that bad.. nothing some emery cloth or die grinder can't correct
another angle
bushing fits
shot with a spare mount pin... this could be mounted better, but should serve to keep the end in place
very close in length to OME, my stock bumpstop should hit before the shocks bottom out according to measurements
front mounted, need to swing the clamps around but they don't interfere with anything
rear resevoirs clamped in.. my 3" exhaust is going to move so I might make a few adjustments then
and a few pics at different angles
Last edited:
esh
Explorer
Got WagonGear fender panels installed today in preparation for storage/sleeping platform v2. I have been sleeping inside the truck instead of on the roof to create a smaller profile on the roof and keep the rack open for utility (currently hauling the canoe about).
I have Kevin's original prototype tailgate storage panel so it is fitting I have his only custom lift-out fender panels. He is using very nice cam-action latches and was able to make me what I think will work well with my storage platform. He even sent me spare latches to upgrade the old tailgate panel. The need for lift out panel doors is because the platform will sit not far below the window sill level, so having hinged side panels won't work. Luke Porter has these nice lift out panels on his German built Sahara-proven HJ61, and that was what I think will do the trick for me.


I have Kevin's original prototype tailgate storage panel so it is fitting I have his only custom lift-out fender panels. He is using very nice cam-action latches and was able to make me what I think will work well with my storage platform. He even sent me spare latches to upgrade the old tailgate panel. The need for lift out panel doors is because the platform will sit not far below the window sill level, so having hinged side panels won't work. Luke Porter has these nice lift out panels on his German built Sahara-proven HJ61, and that was what I think will do the trick for me.
esh
Explorer
Got a start on platform v2. It is pretty tall, but that is the requirement to clear the fridge. I will try it out and see how it goes. I need to build boxes into the front sides for clothing and do some drawers for the rear. I used Baltic Birch 1/2". Kind of a compromise of lightweight/strong/fairly easy to work with.
the open area is the cutout for the fridge access panel. it will be hinged toward the rear and is supported by 2x4s which tie into the front supports
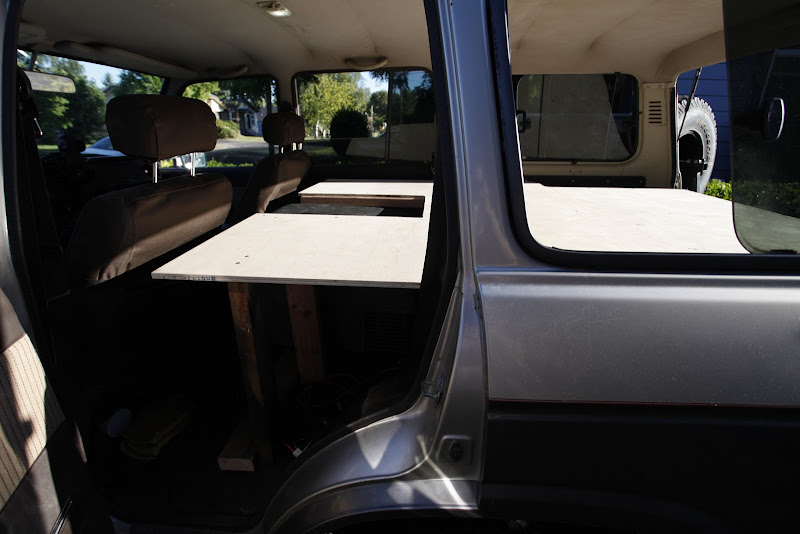
front area.. i kind of cheesed it. I like the open space but the supports tend to interfere with just about everything. I am rushed as i'm leaving for the FJ Summit in Ouray (crashing with the HZ-powered 62 ) so whatever gets done will have to do for my 3-week Colorado trip
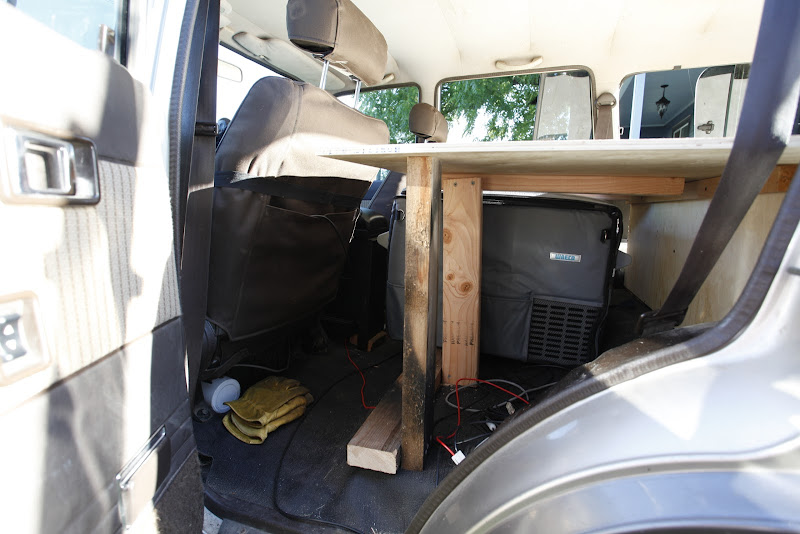
rear area. left side will be a large drawer for parts, right will be 2 drawers for camping/food I think I should have offset the center to have larger camping side drawers but that is easy to redo when i get time.. just have to build new drawers as well
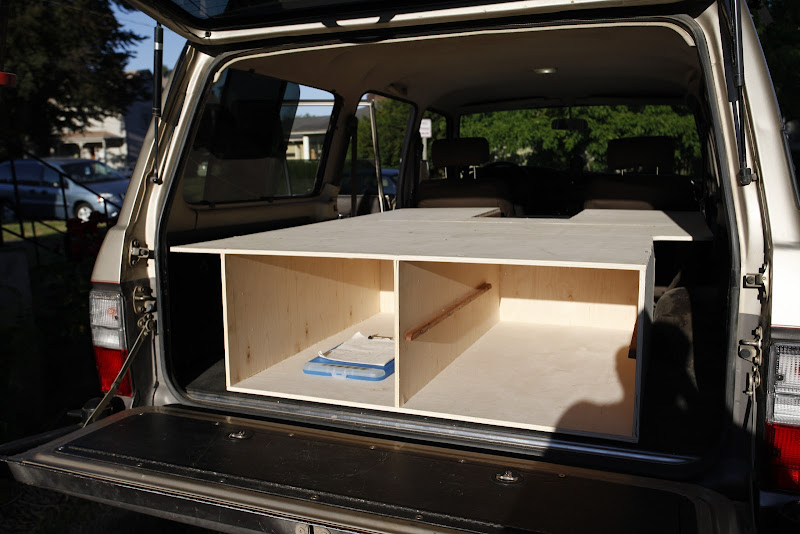
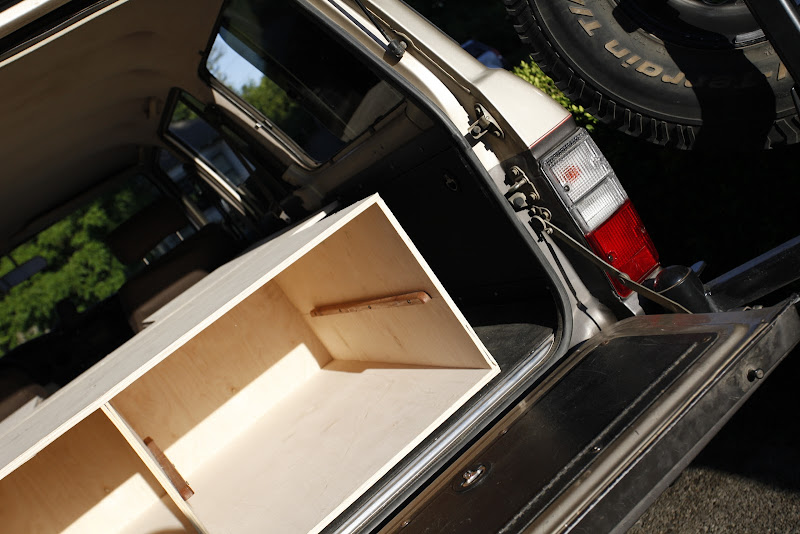
you can see a little of where the water can goes. just a cheapo plastic that doesn't have plastic flavor or leak. i use a super syphon to pull water. this was one of the reasons to have Kevin redesign his fender panels to lift out. hinged would have been a huge PITA. With a lift out panel, i only need about an inch of space to get into the fenders.
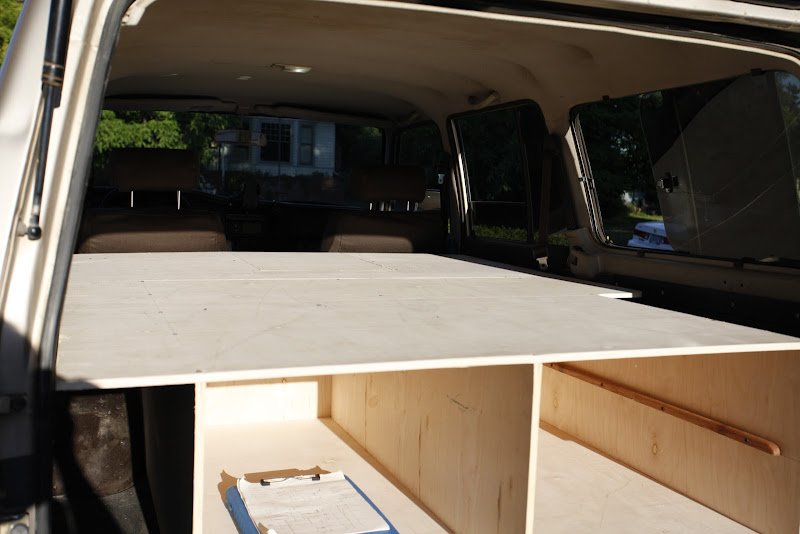
entire surface. i will have to add hinged flaps in the front for a little bit longer sleeping surface. platform v1 was 74" long, platform v2 is 66" for now I'll just stuff junk behind the front seats to make more surface.
I am sleeping on a 2" double/full size memory foam mattress.. sort of medium hardness. It will be sweet to sleep with real bed sheets and covers. Mattresses are about $120 on ebay. Next one will be harder as from my experience with this one on my home bed, I will pretty easily get to the rubber mat / plywood surface as is. No time to order a new one and make things better.
the open area is the cutout for the fridge access panel. it will be hinged toward the rear and is supported by 2x4s which tie into the front supports
front area.. i kind of cheesed it. I like the open space but the supports tend to interfere with just about everything. I am rushed as i'm leaving for the FJ Summit in Ouray (crashing with the HZ-powered 62
) so whatever gets done will have to do for my 3-week Colorado trip
rear area. left side will be a large drawer for parts, right will be 2 drawers for camping/food I think I should have offset the center to have larger camping side drawers but that is easy to redo when i get time.. just have to build new drawers as well
you can see a little of where the water can goes. just a cheapo plastic that doesn't have plastic flavor or leak. i use a super syphon to pull water. this was one of the reasons to have Kevin redesign his fender panels to lift out. hinged would have been a huge PITA. With a lift out panel, i only need about an inch of space to get into the fenders.
entire surface. i will have to add hinged flaps in the front for a little bit longer sleeping surface. platform v1 was 74" long, platform v2 is 66" for now I'll just stuff junk behind the front seats to make more surface.
I am sleeping on a 2" double/full size memory foam mattress.. sort of medium hardness. It will be sweet to sleep with real bed sheets and covers. Mattresses are about $120 on ebay. Next one will be harder as from my experience with this one on my home bed, I will pretty easily get to the rubber mat / plywood surface as is. No time to order a new one and make things better.
esh
Explorer
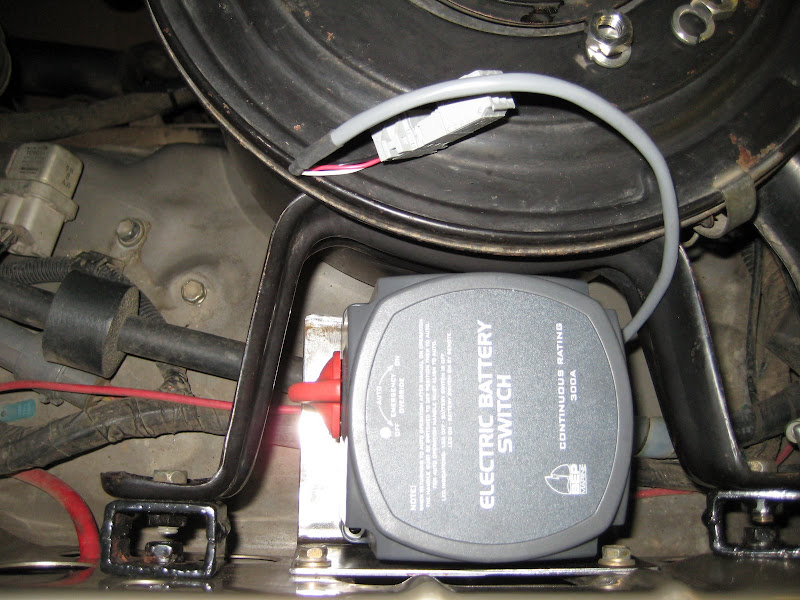
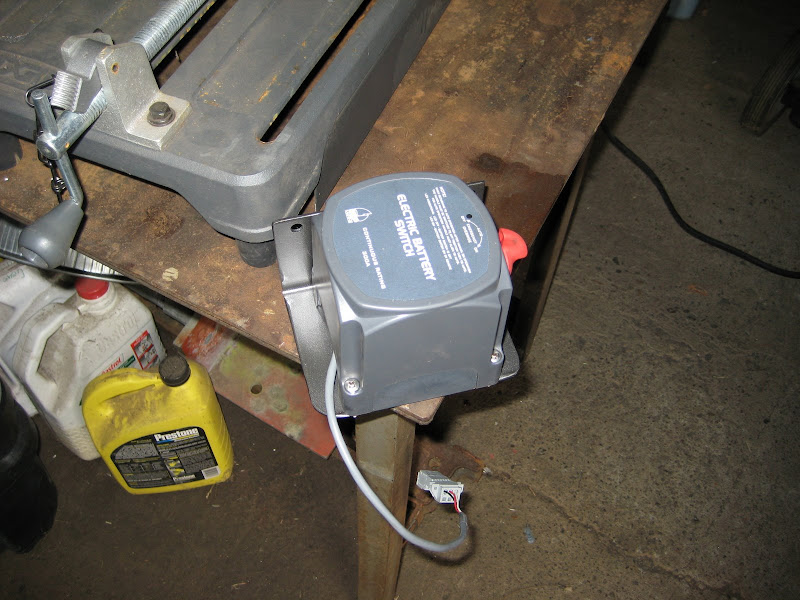
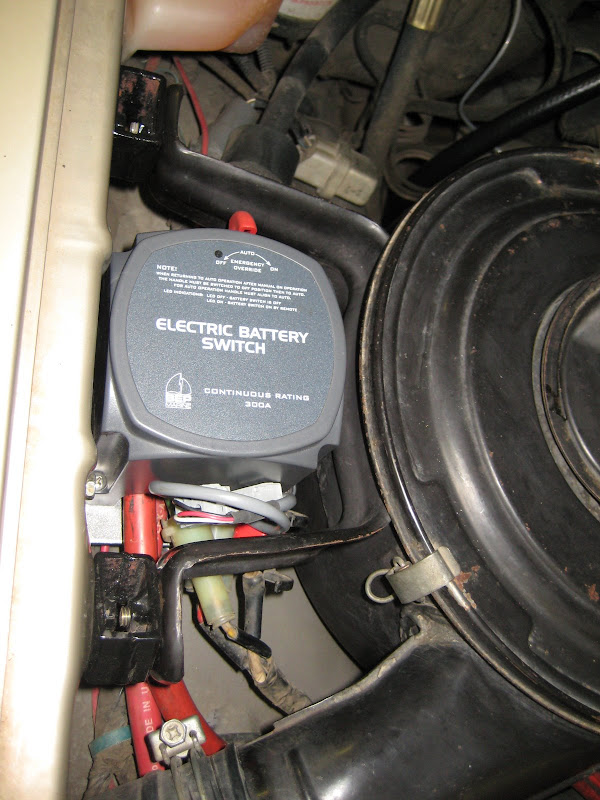
Took some time to get pics of the dual battery setup. I am using a BEP Marine VSR (voltage-sensing relay). Note on the pics, they show a battery switch with a similar hookup to the VSR, but the final install uses a VSR.
I used Marco's (Rover67) writeup on Rising Sun Toyota 4x4 Club * Denver, CO as a guide. It is nearly identical to my connections. I think the only minor differences are my starter is connected directly to the Main and the alternator is on the VSR +battery post.
My cable runs, battery locations, and VSR location were decided upon by how difficult it would be to modify existing wiring and make new runs. The 1HZ starter is on the driver's side so my Main went there (shortest distance). Likewise the factory wiring came out on the passenger, so instead of extending the "bundle" I just turn it all aft and connected to the +battery post of the VSR. The only added cables were a 1/0 cable from Main to +battery, and another 1/0 from Aux (+) to the VSR's "load" post.
VSR locating. Used a simple piece of steel channel with one side cut off for an L bracket(scrap on hand), also made two small spacers to push the air filter housing out about 3/4" All used existing captured nuts and Toyota fasteners.
mount bracket painted with Duplicolor Wheel Paint (Graphite). i am obsessed with that paint, it is great stuff. also rounded all the edges and corners near cabling
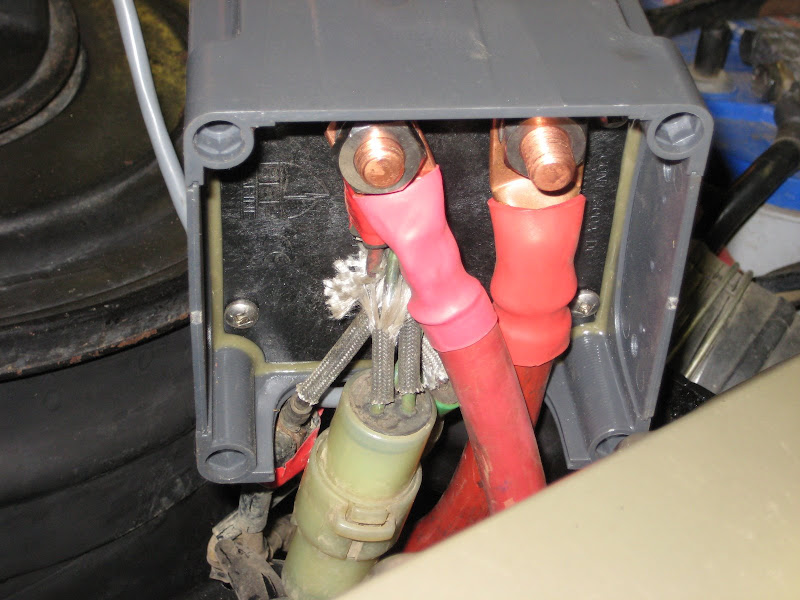
wiring.. 3 connections. had to hog out the oem connector a little. you can see the marine sealing of the VSR's housing
Main battery- G34 (32? forget now) Sears DieHard Platinum on stainlesstrays.com tray, my cables and military top posts from WranglerNW Power Products in Portland. oh and my fugly battery clamp made from scrap
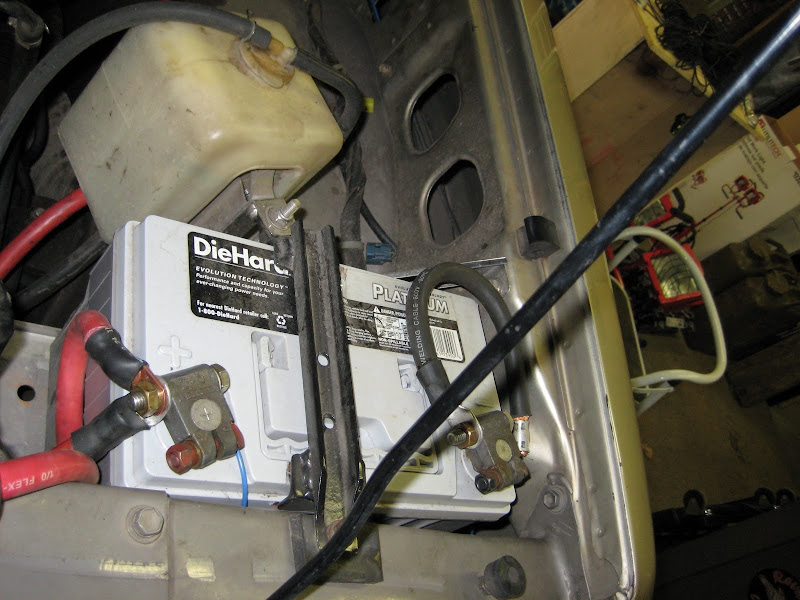
Aux- was my main, a Blue Top Optima (same as yellow with extra top posts.. handy). Connections are VSR, wayne tangen's headlight harness, stereo amps, winch, accessory fuse block in passenger kick panel. Need to reroute the Main VSR cable more stealthily. VSR in background.
VSR installed. looped cable is the remote switch cable/connectors
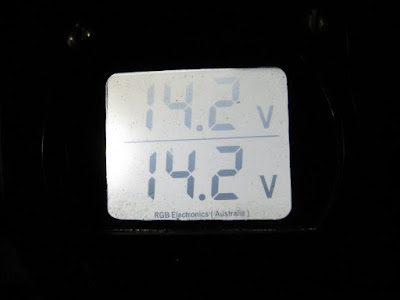
dual gauge showing Auto (voltage-sensing) mode readouts. top is Main, bottom is Aux
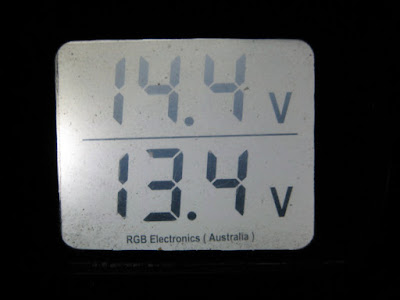
readout with VSR set to Off (isolate) mode
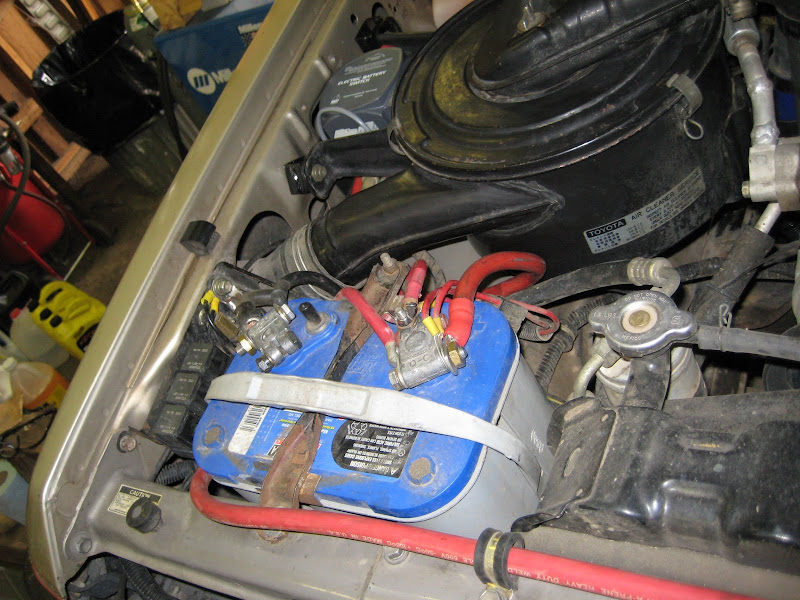
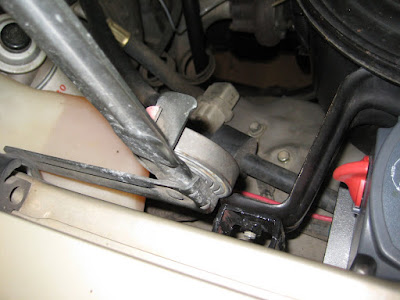
did run into a minor design flaw. the coil spring arm hits my spaced air housing mount now. have been meaning to swap to struts and design around it. note: fender panel has my last 3FE compression numbers behind the engine swap.. Cyl 6 was 165 before the engine was ejected. (cylinder #6 now has much, much greater compression )
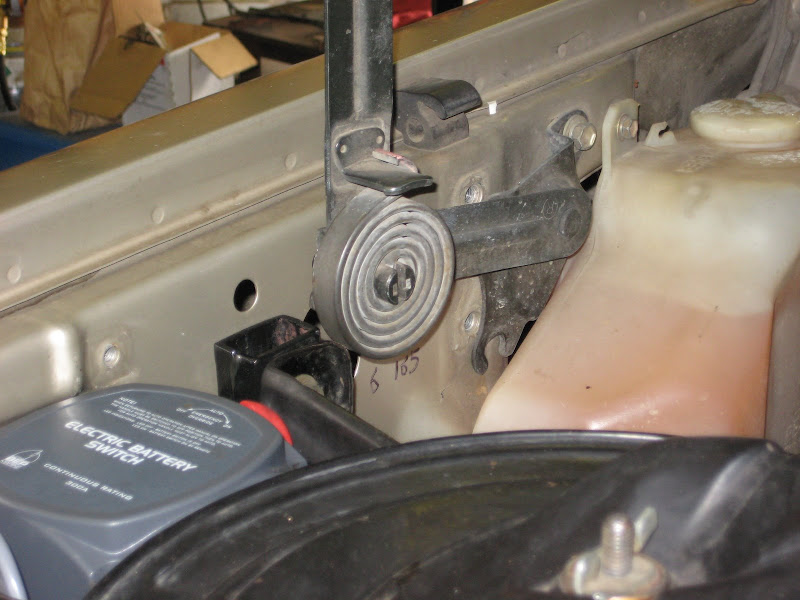
another interference shot
I used Marco's (Rover67) writeup on Rising Sun Toyota 4x4 Club * Denver, CO as a guide. It is nearly identical to my connections. I think the only minor differences are my starter is connected directly to the Main and the alternator is on the VSR +battery post.
My cable runs, battery locations, and VSR location were decided upon by how difficult it would be to modify existing wiring and make new runs. The 1HZ starter is on the driver's side so my Main went there (shortest distance). Likewise the factory wiring came out on the passenger, so instead of extending the "bundle" I just turn it all aft and connected to the +battery post of the VSR. The only added cables were a 1/0 cable from Main to +battery, and another 1/0 from Aux (+) to the VSR's "load" post.
VSR locating. Used a simple piece of steel channel with one side cut off for an L bracket(scrap on hand), also made two small spacers to push the air filter housing out about 3/4" All used existing captured nuts and Toyota fasteners.
mount bracket painted with Duplicolor Wheel Paint (Graphite). i am obsessed with that paint, it is great stuff. also rounded all the edges and corners near cabling
wiring.. 3 connections. had to hog out the oem connector a little. you can see the marine sealing of the VSR's housing
Main battery- G34 (32? forget now) Sears DieHard Platinum on stainlesstrays.com tray, my cables and military top posts from WranglerNW Power Products in Portland. oh and my fugly battery clamp made from scrap
Aux- was my main, a Blue Top Optima (same as yellow with extra top posts.. handy). Connections are VSR, wayne tangen's headlight harness, stereo amps, winch, accessory fuse block in passenger kick panel. Need to reroute the Main VSR cable more stealthily. VSR in background.
VSR installed. looped cable is the remote switch cable/connectors
dual gauge showing Auto (voltage-sensing) mode readouts. top is Main, bottom is Aux
readout with VSR set to Off (isolate) mode
did run into a minor design flaw. the coil spring arm hits my spaced air housing mount now. have been meaning to swap to struts and design around it. note: fender panel has my last 3FE compression numbers behind the engine swap.. Cyl 6 was 165 before the engine was ejected. (cylinder #6 now has much, much greater compression
)
another interference shot
esh
Explorer
Sept 2010- I did a two-week trip out to San Rafael Swell in Utah. The alternator didn't appear to be charging for a day on the way out, but after getting in touch with Kurt @ Cruiser Outfitters to check for spare 1FZ alts (possibly the same/similar to 1HZ) and picking up spare brushes and a regulator, it started working fine and didn't have a hitch the rest of the trip. Need to take it out and do a comparison to the spare 1FZ alternator I have in the shop (but not in the truck, doh).
Got my 2nd tire carrier built for the 4x4Labs rear bumper. My welds aren't as pretty as Luke's.
Also got APRS up and going sporadically throughout the trip. I have the GPS module in my Yaesu FTM-350R. Also mounted the display above the rear-view mirror with some RAM mount bits. APRS is a good tool for friends and family- Location of KF7EOX - Google Maps APRS It works by sending the GPS coordinates (and other bits of info) into a global network. The Finland site picks it up and makes it available for mapping.
So, after 3 long trips this summer in a variety of challenging environments (technical wheeling Rubicon, altitude in Colorado, and dry/hot/dusty environments in Utah), I think the only problems I had was a busted shock mount and a fuse that had fallen out my fuse block preventing Sirius radio from working. The shock mount was a bugger weld fix previously that a Rubicon boulder unfixed.
The sleeping setup is outstanding. I can stop anywhere, crawl into the back and sleep within seconds. It takes a little more effort with a passenger.
Some fuel info given from the aCar Android app-
(over trip, 2 weeks)
Total Running Costs: $417.68
Running Cost/day: $27.85
Running Cost/mile: $0.171
Cost/gallon: $3.125
Miles/$ : 5.86
Avg MPG: 20
Min MPG: 16
Max MPG: 23
Total Miles: 2700 (est)
Total FillUps: 10
Total Gallons: 133.64
Miles/FillUp: 244.6
Miles/day: 163.07
Leaving the roof rack off helped a lot with fuel efficiency on the highways. Maybe 2mpg better without it. I only run the awning since moving to sleep inside.
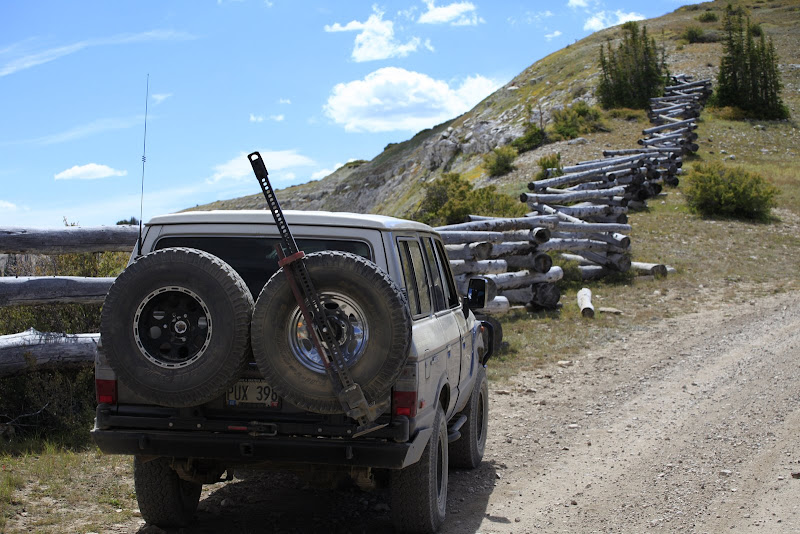
Got my 2nd tire carrier built for the 4x4Labs rear bumper. My welds aren't as pretty as Luke's.
Also got APRS up and going sporadically throughout the trip. I have the GPS module in my Yaesu FTM-350R. Also mounted the display above the rear-view mirror with some RAM mount bits. APRS is a good tool for friends and family- Location of KF7EOX - Google Maps APRS It works by sending the GPS coordinates (and other bits of info) into a global network. The Finland site picks it up and makes it available for mapping.
So, after 3 long trips this summer in a variety of challenging environments (technical wheeling Rubicon, altitude in Colorado, and dry/hot/dusty environments in Utah), I think the only problems I had was a busted shock mount and a fuse that had fallen out my fuse block preventing Sirius radio from working.
The shock mount was a bugger weld fix previously that a Rubicon boulder unfixed. The sleeping setup is outstanding. I can stop anywhere, crawl into the back and sleep within seconds. It takes a little more effort with a passenger.
Some fuel info given from the aCar Android app-
(over trip, 2 weeks)
Total Running Costs: $417.68
Running Cost/day: $27.85
Running Cost/mile: $0.171
Cost/gallon: $3.125
Miles/$ : 5.86
Avg MPG: 20
Min MPG: 16
Max MPG: 23
Total Miles: 2700 (est)
Total FillUps: 10
Total Gallons: 133.64
Miles/FillUp: 244.6
Miles/day: 163.07
Leaving the roof rack off helped a lot with fuel efficiency on the highways. Maybe 2mpg better without it. I only run the awning since moving to sleep inside.
esh
Explorer
built a metal frame for the front of the platform and finally pulled all the hilarious 2x4 setup off. Saved a ton of space and built in a little containment cage for the fridge in the design. simple project.
I also finally figured out the best way to support the hatch to the fridge so that I can put weight on it. I crawl through that area a lot. At some point I want to add struts to help lift and hold the fridge door up.


I also finally figured out the best way to support the hatch to the fridge so that I can put weight on it. I crawl through that area a lot. At some point I want to add struts to help lift and hold the fridge door up.
esh
Explorer
When I got the 1HZ, I also bought a replacement fuel tank from Australia. It holds somewhere between 46-50 gallons.

So out goes the stocker, and with it all the extra rubber lines, the looped hard line that runs in front of the stock tank, and that plastic thing in the fender. I cut down the plate that runs through the rear fender well and filled in holes with epoxy so just the breather is left.
Found that the exhaust was routed so that it just interfered with the front corner of the tank. Tried some strategic shaping of the tube with clamps and a hammer, but it got messy and I needed to remove the cherry bomb for the big flowmaster I'd bought long ago. It's nice to get parts off the shelf and onto the truck. The flowmaster has a low note at low RPMs. I was hoping for silence but this is much less annoying for low speed drives on back roads than the farty noise the cherry bomb made.
Time got short for a trip so I dumped the exhaust down just in front of the rear axle. It doesn't seem to smell or cause any other issues so far. It does bang a little against the transfer case so I will need to go back when it gets annoying enough and support it away from the case a little. It's a pretty tight fit in that area for a 3" inside the frame. (Update: I added another exhaust hanger that is welded to the frame and helps to pull the run away from the transfer case. Nice and quiet now!)
The less free flowing new exhaust with the muffler doesn't appear to affect EGTs one bit. I can cruise at flat 65mph with 650F temps. 62-63mph is the coolest I can get it to run in 5th gear at about 500F. As you slow and lug the engine more, EGTs will creep up. 55mpg gets back to 650F. Overall I am pretty happy with the temps. They have moved toward lower temps at just a little higher RPMs since the engine was installed, as I expect the miles have broken in the engine rebuild and loosened things up just a little.
esh
Explorer
With the tank swap, I found the sender that came with the tank wasn't working. It was a stock sender cut and extended so the float could sweep from empty to full. I'd anticipated some aftermarket gauges because I wanted gauges that actually moved and gave readings that meant something, so I bought a VDO quad gauge made for marine use that shows fuel/volts/pressure/temp in ranges similar to automotive, with senders to match all around (12-120ohm VDO). The VDO fuel level sender has good instructions but I still managed to mangle one of the connections and in turn had the float against a wall so it wasn't moving. All fixed and ready for a test run. Oil pressure sender doesn't appear to work so I need to try another and see if that works. Water temp doesn't move much and stays between 140-180F. (Update- I swapped wires for pressure and temp senders, so those work now!)
Now that I think I have working fuel level indications, I plan on filling up to 20 gallons for regular driving. You can really feel the weight of the extra fuel if the tank is full, so I'll only fill it for long trips in the boonies. 900 miles shouldn't be hard to get with mixed driving, which was one of the goals of the diesel conversion in the first place.
I also moved the pyrometer to the stock tach location. Both gauges are held by some flat plastic cut to fit and holes drilled to screw into the stock mount holes. The Vanguard quad marine gauge comes with a nice piece of plastic to be mangled up, and the pyro has a bulkhead connection that makes it easy to mount. Overall it wasn't a very hard mod to make work. I would still rather deal with the flat FJ60 dash.
I might make an effort to get bulbs to match up the night colors, but so far they don't really annoy me. Need to move the ebrake and high beam lamps on to the other panels on the dash. I have noticed not having the high beam indicator lets you forget easily.
Also got my Tiny Tach working. So I am roughly back to full stock dash functionality but with much better gauges plus a dual volt gauge, pyrometer and turbo boost gauge.
blurry night shot-
Last edited:
esh
Explorer
Probably due for a yearly update by now.
There isn't too much to report. I've added WagonGear's seat box and mounted some very nice VW GTI Recaro seats onto them. The storage space got a 12V outlet added for the fridge, my Zapco amps and a Blue Sea fuse block to manage it all. Awesome to have flat surfaces all under and around the seats, and the WagonGear seat box makes your seat attachment stronger and much more stable. Also added LED strips under the gutter to help with rolling into a dark camp, and swapped into Cooper ST 255/85r16s on 2004ish Tacoma 5-spoke steel rims.
The most impacting change has been swapping to a different turbine housing for the exhaust side of the Garrett turbo. The 2860RS "Disco Potato" can come with a .86 A/R turbine housing or the .64 A/R. The lower ratio, to quote Garrett, "provides increased turbine power at lower engine speeds, resulting in a quicker boost rise. However, a small A/R also causes the flow to enter the wheel more tangentially, which reduces the ultimate flow capacity of the turbine wheel. This will tend to increase exhaust backpressure and hence reduce the engine's ability to "breathe" effectively at high RPM, adversely affecting peak engine power." This is noticeably true even with a 3" exhaust.
I have been wanting quicker spool at altitude as I try to get out to Utah and Colorado as often as I can. There are many places to explore at >8,000 feet and up to above 13,000 feet, and the 1HZ has to maintain a relative oxygen to fuel ratio to run well. The two options available are modifying fuel and modifying air intake (effectively oxygen). So at altitude on a traditional non-turbo motor you can either manually reduce fuel to deal with less oxygen available, or have an altitude compensator which reduces fuel automatically. A turbo is effectively doing the opposite, increasing oxygen to help with the mixture and allow the motor to burn fuel effectively.
After driving for 3.5 years with the larger ratio (.86 A/R) turbine housing, I wanted to try the .64 to see what kind of difference made. Just as Garrett says, spool up is faster (much faster.. near instant) but effectiveness is reduced. The difference for me is in this 6400lb truck (when loaded), I can no longer be cruising at 65mph, stomp on the throttle and get up to 85mph in a shockingly short amount of time. It takes a couple seconds longer now. But at altitude, it is a whole new game. No more sputtering and struggling at slow speeds because the turbo is now always pretty active and generating at least 1-2psi off idle. Perfect for what I was looking for.
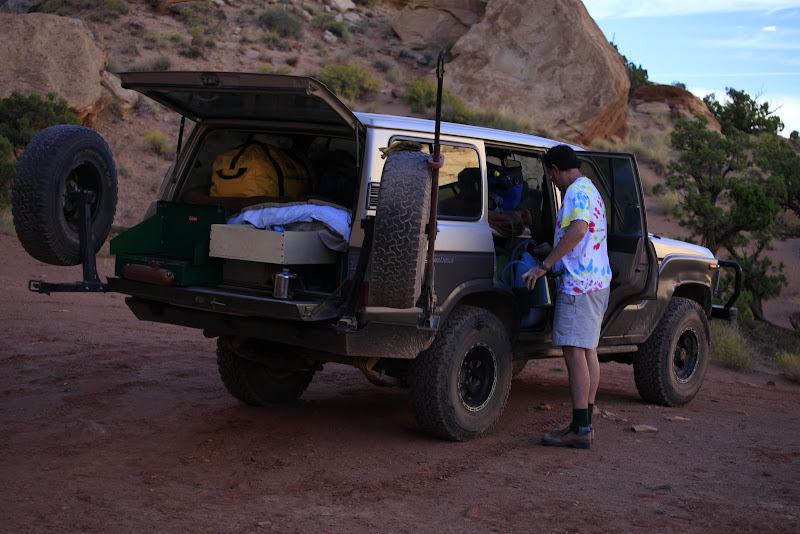
The truck has been fantastic otherwise. Economy has been 20-24mpg, 24mpg tanks have been at 55-60mph on summer fuel and relatively flat land. I mostly no longer use the roof rack (though I miss my Hannibal awning sometimes), and that helps with economy as well... maybe 2mpg difference. With the 50G tank, of which about 40G is usable due to a shorter pickup than I need, I can do about 800 miles. I did this recently at the tail end of a loop to Aspen, CO and back to Oregon. Decided to go through California on some errands and ended up doing about 750 miles with a fill near Fallon, NV, and another not until I came up 101 and filled near Grants Pass, OR. Shout out to California Diesel fuel prices.
Thanks to this shot I also remember I added synth rope to the Warn 9.5XP winch. The rope was from ASR Offroad, and Ryan is an excellent guy to work with offering very fair prices (just a happy customer).

There isn't too much to report. I've added WagonGear's seat box and mounted some very nice VW GTI Recaro seats onto them. The storage space got a 12V outlet added for the fridge, my Zapco amps and a Blue Sea fuse block to manage it all. Awesome to have flat surfaces all under and around the seats, and the WagonGear seat box makes your seat attachment stronger and much more stable. Also added LED strips under the gutter to help with rolling into a dark camp, and swapped into Cooper ST 255/85r16s on 2004ish Tacoma 5-spoke steel rims.
The most impacting change has been swapping to a different turbine housing for the exhaust side of the Garrett turbo. The 2860RS "Disco Potato" can come with a .86 A/R turbine housing or the .64 A/R. The lower ratio, to quote Garrett, "provides increased turbine power at lower engine speeds, resulting in a quicker boost rise. However, a small A/R also causes the flow to enter the wheel more tangentially, which reduces the ultimate flow capacity of the turbine wheel. This will tend to increase exhaust backpressure and hence reduce the engine's ability to "breathe" effectively at high RPM, adversely affecting peak engine power." This is noticeably true even with a 3" exhaust.
I have been wanting quicker spool at altitude as I try to get out to Utah and Colorado as often as I can. There are many places to explore at >8,000 feet and up to above 13,000 feet, and the 1HZ has to maintain a relative oxygen to fuel ratio to run well. The two options available are modifying fuel and modifying air intake (effectively oxygen). So at altitude on a traditional non-turbo motor you can either manually reduce fuel to deal with less oxygen available, or have an altitude compensator which reduces fuel automatically. A turbo is effectively doing the opposite, increasing oxygen to help with the mixture and allow the motor to burn fuel effectively.
After driving for 3.5 years with the larger ratio (.86 A/R) turbine housing, I wanted to try the .64 to see what kind of difference made. Just as Garrett says, spool up is faster (much faster.. near instant) but effectiveness is reduced. The difference for me is in this 6400lb truck (when loaded), I can no longer be cruising at 65mph, stomp on the throttle and get up to 85mph in a shockingly short amount of time. It takes a couple seconds longer now.
But at altitude, it is a whole new game. No more sputtering and struggling at slow speeds because the turbo is now always pretty active and generating at least 1-2psi off idle. Perfect for what I was looking for.The truck has been fantastic otherwise. Economy has been 20-24mpg, 24mpg tanks have been at 55-60mph on summer fuel and relatively flat land. I mostly no longer use the roof rack (though I miss my Hannibal awning sometimes), and that helps with economy as well... maybe 2mpg difference. With the 50G tank, of which about 40G is usable due to a shorter pickup than I need, I can do about 800 miles. I did this recently at the tail end of a loop to Aspen, CO and back to Oregon. Decided to go through California on some errands and ended up doing about 750 miles with a fill near Fallon, NV, and another not until I came up 101 and filled near Grants Pass, OR. Shout out to California Diesel fuel prices.
Thanks to this shot I also remember I added synth rope to the Warn 9.5XP winch. The rope was from ASR Offroad, and Ryan is an excellent guy to work with offering very fair prices (just a happy customer).
lostworldexpedition
Explorer
Looking good!
Not a big fan of photo, are you Ken? How about more pics of the platform and maybe some of the WagonGear under seat storage? Or do I have to go looking for them elsewhere
Not a big fan of photo, are you Ken? How about more pics of the platform and maybe some of the WagonGear under seat storage? Or do I have to go looking for them elsewhere
Forum statistics
Members online
- dcwn.45
- radar56
- robertmspeakout
- rgv
- vwrunner
- Savagenut
- fatmab
- 1979ford
- Curly42
- mr3dogs
- 2flexed
- Burlydirtyhippy
- Vinicius_Bressiani
- Chasingopenspaces
- kxthor911
- Hplum74
- BigD3
- Red90
- Phessor
- IdaSHO
- whilewereoutside
- wfv56
- ionyota
- mark5280
- NorthIdmark
- 4runnerteq
- Peter_n_Margaret
- AZyucca
- fadagnes
- Lhenecke
- driller
- 301
- uglymud
- Luke Duke
- GR8ADV
- STravis
- MS100
- Leegriff
- blownpotential
- CowTownJohnny
- 94LandCruiserDude
- bejinscbr
Total: 1,394 (members: 44, guests: 1,350)