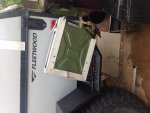
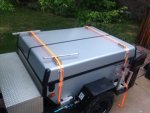
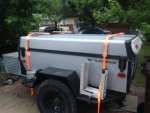
Fleetwood Neon Modified for off road

Jeepinaaron

Adventurer
Cool. I just put a box on mine also, just smaller, so my propane tank could sit beside it.

I'm interested to see what awning solution you came up with!
 

MountainD

Adventurer
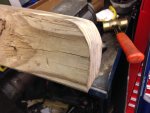
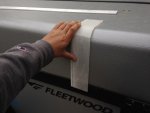
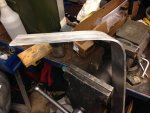
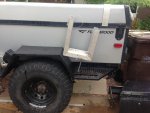
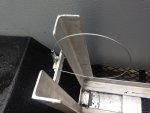
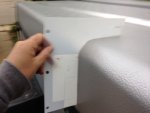
As a matter of fact I just started the mounting system. I realize that the trailer weight is starting to creep up (amazing how that happens) so I am trying to simplify everything and reduce weight where I can. I am bailing on the full width rack system (weight) and just mounting the awning (no rack right now) and I am trying to stick to all aluminum from this point out (for the most part). I wanted the aluminum to be thick enough to weld, so I picked up some 3/16" flat bar stock at my local AL place, Alreco (for any Denver folks, that place is a MOST). I want the mounting brackets to form onto the sides of the top so I started with a template to get the curvature correct and then made a wooden form to bend the aluminum over. A piece of plastic was used to see how far the bracket should project over the top and down the sides. I've opted to have it overlap the aluminum rail at the bottom (black horizontal rail in picture) in order to attach to it to this rail to provide a little more strength as this rail also holds on the hold-down clamps that attach the top to the body. I also wanted it to project onto the top about 6-8" as well to provide a secondary bolting position (one on the vert, one on the horz). I will SikaFlex the bracket onto the top and use two through bolts into the inside with a matching mounting plate on the ceiling bent out of 1/8" flat bar stock. There will be brackets on both sides of the trailer so that the awning can swap sides depending on the camp site. I am still working on the prototype quick connect system to swap from side to side as well as attachments on my Defender so I can also use it on the truck as well. Something quick, simple, yet confusing to steal. More to come on that.

Here is the template, form, and the bent corners. I still have a couple more to make (I am man-handling them into shape with a big brass hammer and then I will put a new finish on them). More to come...template.JPGwood block.JPGmock up.JPGbent aluminum.jpg

I just finished the first pair and I have a lot of work still to come.
 

MountainD

Adventurer
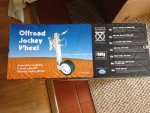
Shipping was FREE! I ordered directly from their site here: http://www.arkportablepower.com/products/xo-trailer-jack Little pricey, but I have a bad back and some medical issues so the last thing I need is to worry about my jack and this thing is awesome. All the things that I have been doing to save some weight just flew out the window---I can't believe how beefy this thing is. Even the wheels weight a ton....

Amazon has them for the same price plus $5 shipping, so no reason not to order it directly from them. Took 4 days to arrive---the link is the USA distributor arm...
 

MountainD

Adventurer
Both. Up high and down low. I figured out a system to do both since I don't always need to have it low unless I do the "room" attachment to the awning. I'd LOVE to show you, but I don't have the parts yet. It is a super simple solution that I think a lot of folks are really going to like. I am stopping off at my aluminum place today to see if they have what I want, otherwise I have to get a dovetail bit for my mill and make my own... Hopefully, if I am lucky, I can find something off the shelf as the bit that I need is not cheap...

Sorry to be elusive, but a picture is worth a thousand words and I don't have a picture yet :-(
 

Jeepinaaron

Adventurer
Both. Up high and down low. I figured out a system to do both since I don't always need to have it low unless I do the "room" attachment to the awning. I'd LOVE to show you, but I don't have the parts yet. It is a super simple solution that I think a lot of folks are really going to like. I am stopping off at my aluminum place today to see if they have what I want, otherwise I have to get a dovetail bit for my mill and make my own... Hopefully, if I am lucky, I can find something off the shelf as the bit that I need is not cheap...

Sorry to be elusive, but a picture is worth a thousand words and I don't have a picture yet :-(
:lurk:
 

MountainD

Adventurer
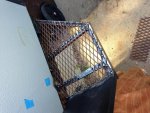
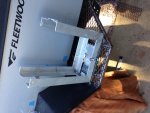
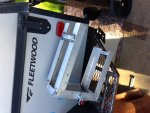
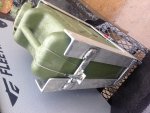
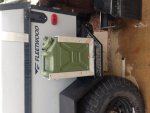
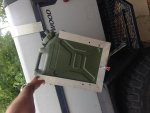
Spent all weekend working on the Water Can "Tilters" which are attached to the rear of the trailer. Since I have a bad back and non-existent breathing ability (curtesy of West Nile), I wanted something that could stay attached to the truck and still be usable--which means I wanted them to tilt in place at an angle so all the water flows out. One could add a pump, but this is just pain simple in execution so I dig it. Plus, it was fun coming up with something unique and original (there may be something out there, but I sure don't know about it!). Fun to invent. Made 100% from scrap metal I had from salvaging stuff from work and on leftovers from other projects which is why they are not pristine. But I dig them :) One on each side of the trailer. I used some heavy duty hinges from a commercial light fixture and then aircraft cable going through an adjustable cable grip to hold the cans in. Cam pull latches keeps everything locked down. For whatever reason, though the photos are rotated and I have tried everything I know of fix that, but I just have no more ideas...(chime in if you know)).

JT1.jpg JT2.jpg JT3.jpg JT4.jpg JT5.jpg JT6.jpg JT7.jpg JT8.jpg JT9.jpg

the awning rack is next--just working on it still :)
 

MountainD

Adventurer
On to the awning!
362e66c6f0ba3d673a249ec0f8bfaba6.jpg
65217114fdc429e60eaf1a496dc1e198.jpg
906c84a4e01d8b924483969a54c9eec5.jpg
9f2e54bd6514343e8bf1ae60521495c5.jpg
e3a00e9db5692fcecb17e2d1a77e4063.jpg


I milled a slot in the rectangular tubing and that part will be welded to the curved brackets on both sides of the trailer as well as a set on the truck. The other portion bolts onto awning and there will be a set screw. Simply loosen set screw and awning can flop to whatever side or vehicle I'd like it on. Quick and easy. There is one other security bit that will be incorporated as well. This was proof of concept for me-- now to finish everything up a bit tighter and finished...


Sent from my iPad using Tapatalk
 

MountainD

Adventurer
I finished the water can tilters--super solid when locked, very easy to tilt. Also welded up the awning rack. I still have to attach them to the roof (and attach the brackets to the awning), but the "figuring out" part is done. I thought I could mimic the outside on the inside, but there is a corner brace that makes that impossible. I am running some 3" x 1/8" flat bar stock on each side (6') from attachment to attachment.
https://youtu.be/Qsp0HLMsVUw

https://youtu.be/rXchLuFL5DI

I am going to Sikaflex the attachments onto the roof and then through bolt them to the inside support braces. Should be pretty straight forward.
 

MountainD

Adventurer
I'll have it done for our trip next Thursday. Life got in the way and only been out once camping (boo hooo!). Glueing tonight, I'll drill it tomorrow and bolt it all up Wed (in theory).
image.jpgimage.jpg
 

Forum statistics

Threads
188,486
Messages
2,905,529
Members
230,494
Latest member
Sophia Lopez
Top