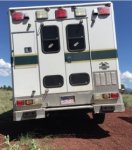
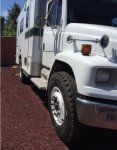
From Freightliner ambulance to RV - we hope!

patoz

Expedition Leader
Ross I don't know about you, but if that were me I would sure fire off a nastygram to UPS and include those pictures along with your tracking number. About all they will do is say, "We're sorry!" (maybe), but if the unit develops problems down the road it may provide you with a little bit of CYA.

I found some info on it, but when you get time please post your impression and experiences with it if you would.

Thanks...
 
Last edited:

rossvtaylor

Adventurer
Thanks hyperboarder and Pat. It seems well built - I'll definitely post my installation pics and our experience with it.

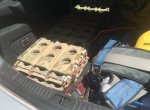
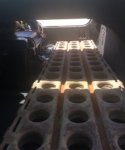
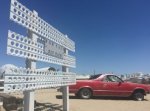
I had to come to California to visit a sick wind turbine in Phelan. Well, guess what, the site was only 30 minutes from an aircraft boneyard (and movie prop dealer) in El Mirage. They have PSP (aka Marston mat) in stock, so I picked up 9 of the 5-foot sections. I only needed 4, but thought a fifth might make a table top. And 4 are for another member.

Screen Shot 2016-07-15 at 7.45.02 PM.jpgScreen Shot 2016-07-15 at 7.51.45 PM.jpg

The 5-foot sections are $20 each and the full 10-foot sections are $35. If I'd had the truck, I'd have bought 10 footers and cut them down to 6 or so. But, the 5s fit into the rental car... and they'll be just fine. So, four traction/bridging mats for $80 was a great deal. The place was in the middle of nowhere (apologies if that's home for you...) but they were super nice folks and it was worth the detour.

Aviation Warehouse in El Mirage, California - http://aviationwarehouse.net/novelties-for-sale.html If you have room, they have a "few" planes and helicopters for sale, too...

Screen Shot 2016-07-15 at 7.44.38 PM.jpg
 

rlrenz

Explorer
Something you didn't know:

I ran into a guy today who used to teach driving of neonatal ambulances. He told me that you drove like you had a limousine, nothing sudden or jerky, and that the plan was for people to be able to walk around in the module without falling in all directions. He told me that when they qualified new drivers, they set up a water level and an accelerometer (basically a pin-ball machine tilt pendulum) with a buzzer - they had to drive smoothly enough that the buzzer never buzzed, even with an emergency run if at all possible.

He told me that they liked medium ambulances for all the extra space they had, but most of the hospitals they went to didn't have the clearance to back in, so they had to unload the incubator just outside the door.
 

rossvtaylor

Adventurer
Bob, thanks! True, indeed, we didn't know that. I felt like this wasn't a "first out" runner, so thought that was good. But this sounds like the proverbial "grandma only drove it once a week" vehicle. :)

Edit: I guess that means ours was babied?
 
Last edited:

rlrenz

Explorer
OUCH -- I finally got the pun.

Good one.

However, remember that about half the mileage would have been "empty", so any gentle driving requirements probably didn't apply....
 

rossvtaylor

Adventurer
Thanks, guys! I couldn't resist... :)

Anyway, back to serious stuff... my daughter and I are back from LegoLand, unscathed. I've got lots to get done this week, around work and life. But, first up is the suspension reassembly so it's drivable. Next, time to get organized and plan some layout. Every ambulance is different, so these compartment sizes won't match anyone elses. But, I thought that listing the sizes might help someone know what's possible with these rigs.

Starting on the left (driver's)side, from the front, there's the tall compartment #1 for backboards and bottles. It's going to house a couple of folding "seminar" tables, our promotional flags, and the blimp. If we didn't have those things in there, it would be ideal for sand ladders, fishing poles, dive gear, etc. This compartment has a usable height of 72" and 17" usable width. I say usable here, and in following dimensions, because this is the interior frame opening WITH the latches or hold-open spring hardware. If you removed those, we'd have 74" of height and 19" of width. This cabinet is 22 1/2" deep (usable, with the door closed).

Behind that, is the electronics cabinet. It's 15" W x 74" tall, but only about 5 3/4" deep. I will be able to get the PV charge controller in there, on the door.

In the left rear corner, there's cabinet #2 that's 53 1/2" W x 32 3/4" tall, and 22 1/2" deep. Much of this cabinet will be taken up by the shower floor, which will drop the interior ceiling of the cabinet. Below that, we'll have gray water tank and some storage.

The right rear cabinet, our future kitchen, is 53 1/2" W x 28 3/4" tall. That's cabinet #3 for you fire/rescue folks. We hope to show more of that plan soon.

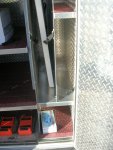
On the passenger side, at the front, there's a small cabinet (#4) we'll use for recovery and maintenance items (bottle jack, oil, vinyl gloves and paper towels for filling up). It's 16" W x 12" H, usable as is. If we remove the springy hold-open dohicky, which we will, we can get 15 1/2" of usable height inside. It's 22 inches deep.

I think the fire/rescue folks have an actual numbering system for these compartments, so I've just confused all of them. Feel free to set me straight and I'll edit this!

Edit: The experts set me straight and I added the numbers, at least as ours is configured.
 
Last edited:

rlrenz

Explorer
The numbering system starts with the first cabinet behind the driver - the Oxygen/backboard cabinet. That's #1, and they march counter clockwise around the module from there. The last compartment is the one closest to the passenger's seat.

Typically, cabinet #2 is a fairly square cabinet, generally about 48x42" or so. That was usually where rescue equipment was carried.

In my own case, I wound up buying some 30x60" plastic tables from Amazon Prime - they fit into the space normally used for back boards perfectly.
 

patoz

Expedition Leader
Ross, the compartments are numbered starting in the left front corner and go around the unit counter clockwise. If you have one compartment above another one, I'm not sure what happens there. Of course, if you have more compartments than I do, then the numbers are not going to match anyway, so it's really only good for standardization of identical units owned by an agency, or inventory purposes.

In regards to the door limiters, I don't know if you have the same kind I do, but I'm going to replace the cotter pin in the retaining pin at the end of the rod with one of those pins that's shaped like the capital letter 'R'. That way I can undo it easily when I need to and open the door fully, and still have it function normally when I don't.

AH DC23-5011 ZN-3T.jpg


Oops, looks like Bob and I were typing at he same time, I'm just slower!
 
Last edited:

rossvtaylor

Adventurer
The numbering system starts with the first cabinet behind the driver - the Oxygen/backboard cabinet. That's #1, and they march counter clockwise around the module from there. The last compartment is the one closest to the passenger's seat.

Typically, cabinet #2 is a fairly square cabinet, generally about 48x42" or so. That was usually where rescue equipment was carried.

In my own case, I wound up buying some 30x60" plastic tables from Amazon Prime - they fit into the space normally used for back boards perfectly.

Thanks Bob (and Pat, whose post showed up after I read Bob's). I presume the electronics cabinet wouldn't be numbered, right, as it's not a storage spot? In our case, cabinet #2 was consumed with a spare tire. I'll edit the post above.
 

rossvtaylor

Adventurer
In my own case, I wound up buying some 30x60" plastic tables from Amazon Prime - they fit into the space normally used for back boards perfectly.

Our cabinet #1 (I feel so official...) isn't deep enough for a 30" table, but there are lots of 18" wide tables classified as "seminar tables" which will work well for our use. We're going to be getting skirts for them and they'll be product info/sample tables at events. Of course, our new Marston mats would fit in there great, too. Hmmm...
 

rlrenz

Explorer
Our cabinet #1 (I feel so official...) isn't deep enough for a 30" table, but there are lots of 18" wide tables classified as "seminar tables" which will work well for our use. We're going to be getting skirts for them and they'll be product info/sample tables at events. Of course, our new Marston mats would fit in there great, too. Hmmm...

I wound up adding a shelf so I'd have a deep enough space for a 30" table. It starts from an existing jog in the rear of Cabinet 5 (behind the passenger), and gave me the space I needed. The photo shows the added shelf and a 24" table that lives in the same space.

panel.jpg
 

rossvtaylor

Adventurer
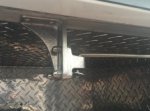
Bob, that's a clean extension job - looks good. Pat, yes we've got some of those. Changing out the pin is a good idea. But a couple, including the one we'll use for the jack and tools, have a different bracket and a looped spring. Those protrude over 2" down from the upper frame, which really cuts the usable height. Here's a pic - and this is one we'll remove, to gain that vertical space. We don't need this cabinet to hold itself open.

Screen Shot 2016-07-20 at 6.01.58 PM.jpg

By the way, here's a pic of the inspiration for our vision...

Screen Shot 2016-07-20 at 11.36.11 AM.jpg

Air horn and all... it bears an uncanny resemblance to our medium duty ambulances (with the tire/wheel upgrades). :)
 

rossvtaylor

Adventurer
Work does interfere with progress... but we're making some, finally. As we last left off, I'd cut the fender wells and pumped up the airbag suspension to the max to fit the new 42" tires in there. But, it wasn't really drivable like that, of course. And, with the airbags deflated the box rested on the tires.

So, the rear lift blocks are going in. With the right block in place, it's quite a difference. It may not look like it, with the shadow, but that ground is pretty close to level left-to-right.

Screen Shot 2016-07-22 at 3.05.56 PM.jpgScreen Shot 2016-07-22 at 3.05.42 PM.jpg

This is sitting on the suspension and, as you can see, the right side is noticeably higher. The lift blocks are 3 3/4" thick. The front doesn't need a lift for clearance, but I may add some lift (with spring re-arching) for leveling. We'll see how she sits with the winch on the front and the rear suspension aired to normal ride pressure.

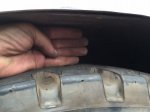
The best part of this is that, with the airbags fully deflated, there's still clearance between the top of the tire and the box. Here's what we've got in the way of clearance, with the truck sitting on the jounces. So, as someone poetically stated elsewhere, now a blown airbag won't become two problems...

Screen Shot 2016-07-22 at 3.06.17 PM.jpg
 

scooter421

Adventurer
Looking good Ross! Can't wait to see it riding high with everything in place! Where did you get the lift blocks? I apologize if you've already mentioned this previously. I am eagerly awaiting the addition of the winch. I am going to have questions on that install!

Scooter...
 

Forum statistics

Threads
188,007
Messages
2,901,023
Members
229,320
Latest member
SMBRoamer
Top