FWC Purchase and Camper Prep for Tennessee To Argentina Road Trip

ARB Awning Application

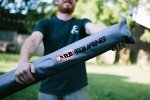
We've given lots of thought to what kind of awning we wanted to buy. We had settled on a Fiamma awning for a while, but lately we been thinking in terms of costs for camper/truck modifications vs. lengthening our trip. After more thought we decided on the way less pricey 8x8 foot ARB awning.
IMG_4868.jpg

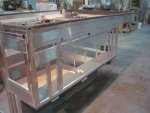
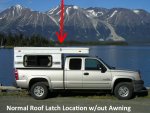
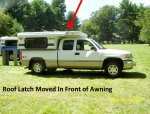
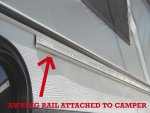
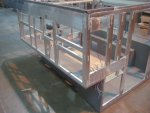
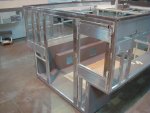
We were unsure of where to safely attach the awning so we contacted FWC. Again they were incredibly helpful and sent us photos of a camper frame without any siding......
P1010006.JPG

P1010005.JPG

P1010004.JPG

Atlin Mtn, BC.jpg

100_3877.jpg

1.jpg

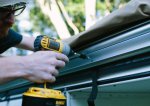
We predrilled 18 holes (probably overkill) in the metal in the back of the awning and placed some butyl tape on the bracket the full length of the awning and over the holes.

IMG_4885.jpg

We used 1 1/4 inch metal screws and screwed the awning to the metal channel that runs around the camper.
IMG_4899.jpg

Later we plan to apply dicor sealant across the top of the attached metal bracket for extra waterproofing.

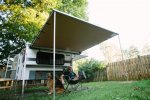
Now we have more 64 more square feet of living space!
IMG_4920.jpg

http://hereuntilthere.com
https://instagram.com/hereuntilthere
 
Last edited:

brian90744

American Trekker
You could add the gas can carrier to the rear bumper platform, and the roof "at best" could hold totally 100 lbs. just FYI=brian


Michael, You mentioned having a friend that put their Jerry can on the back of their camper. That was our plan and I wish we had done it when we had the fridge out for repair. We didn't realize that a full can would be so heavy that we needed to drill all the way through and attach bolts. Now we are unsure where to put it. Do you (or anyone else who is an informed FWC owner) know how much weight the roof can hold? I've read its 1000 pounds dispersed weight (i.e. snow), but I'm unsure of storage weight. We will already have a very full rocket box and possible recovery tracks.

Thanks!
 
That awning looks good. When I was down at RMFWC placing my order for a new Eagle I was asking about mounting my awning. I have the 6' version of the ARB currently mounted on my shell. I love it, and he was saying that all the new campers come with a wood brace built into the side even if you didn't order an awning. I plan on using your exact same method for mounting mine, I wish I had the 8' but I'm not going to get a new one over it!
 
That awning looks good. When I was down at RMFWC placing my order for a new Eagle I was asking about mounting my awning. I have the 6' version of the ARB currently mounted on my shell. I love it, and he was saying that all the new campers come with a wood brace built into the side even if you didn't order an awning. I plan on using your exact same method for mounting mine, I wish I had the 8' but I'm not going to get a new one over it!

We're incredibly happy we went with the ARB. It looks great and seems incredibly sturdy. Enjoy your new Eagle! Little envious I must say.
 

Ramblinman

Observer
Gas Can - I was able to attach mine on the rear of my camper with the fridge still installed - it is not really a big deal we did it in about 45 mins - let me know if you are looking for further info I will send photos if you like - The install was pretty basic.
 
Gas Can - I was able to attach mine on the rear of my camper with the fridge still installed - it is not really a big deal we did it in about 45 mins - let me know if you are looking for further info I will send photos if you like - The install was pretty basic.

I think we may put on the back right under the window and put our ladder behind the fridge. If we change our minds(which seems to be happening lately when it comes to the storing things on the camper) we'd love to see the photos.

Thanks.
 
Installing Simple Water Filtration System

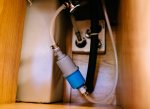
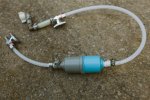
We realize that not everywhere in Central and South America has unsafe drinking water. But we also know that many places do. We didn't like the idea of chemical sanitizers like bleach or buying all of our drinking water. So we needed some sort of filtration system. All of the RV filtration systems we could find were mainly for filtering chemicals and metals and for improving taste. Not for sanitizing. We eventually found a company called Sawyer that makes a variety of different types of filters, and they had one that I thought I would be able to rig up under the sink in-line with our plumbing. It's called the "Sawyer 3 way in-line filter". https://sawyer.com/products/sawyer-3-way-water-filter/ It is a .1 micron filter which will remove everything except viruses and amoebas. Also, the filter never needs to be replaced. You just have to back flush it every so often. It comes with handy little quick release clips so I can take it out and flip it around in seconds to do this. I was a little worried that it might reduce the water flow at the sink but I can't tell any difference now that it's in. It took about $15 of various hoses and adapters to get it in place and we now have safe drinking water from just about any source. We may take a steripen as well for particularly sketchy sources.

IMG_5190.jpg

IMG_5199.jpg

http://hereuntilthere.com

https://instagram.com/hereuntilthere
 
Last edited:
Adding a Spice Rack

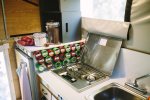
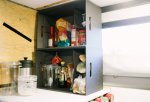
One of the things about this trip that we're the most looking forward to is slowing down and enjoying things that we haven't been able to do lately. That includes cooking. We hope we'll spend lots of time shopping at local markets; buying local food. Four Wheel has a perfect place for a spice rack, right next to the stove.

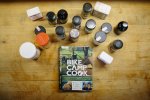
We have a friend who rode a bicycle with her husband from Europe to South Asia and wrote an awesome book called Bike Camp Cook about cooking while taking a long distance bike tour which also seems very applicable to anyone with a small space. It was an excellent reference for which spices were the most important to take. We bought some magnetic spice jars from World Market (the cheapest we could find) and a sheet of steel from a hardware store and VOILA!; we've got an awesome spice rack! 18 spices and 6 empties that we can fill on the road.

IMG_4955.jpg

IMG_5229.jpg

IMG_5235.jpg
 
Hanging a Jerry Can

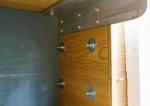
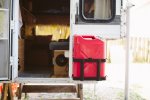
There's some long stretches of road in Central and South America where gas stations are few and far between so we decided we need a jerry can. The tricky part was figuring out where the hell to put it and how to mount it. After consulting the photos of the bare camper frame that Four Wheel sent us, and much measuring, we figured we could get it to fit on the rear passenger side of the camper. This thing will weigh close to fifty pounds when it's full, and we'll be bouncing around on rutted bumpy roads. I really wanted to make sure it was on there as securely as possible. There's two vertical framing members on that side of the door which just happened to be an appropriate distance apart for the holder that we got. Then on the inside of the camper there's plywood. I drilled all the way through and used 4 1/2" x 1/4" bolts with some washers and nuts to secure it. The exposed bolt ends come out in the space where we store our toilet, so it took quite a bit of measuring to make sure they didn't run into it, but in the end it worked out perfectly. I'm able to put my entire weight on it and it doesn't seem the least bit strained, so I feel pretty good about it standing up to the rough roads.

IMG_5047.jpg

IMG_5049.jpg


http://hereuntilthere.com
https://instagram.com/hereuntilthere/
 
Last edited:
Storage. Where do we put all this crap?

Our interior camper living space including our bed is approximately 6' x 10'. Fitting everything we think we'll need for 18 months in drastically different climates and geographical regions has been a challenge. We've gotten creative over the last few months in the packing and space saving departments.

Rubbermaid Bento Boxes will hold our food and can easily be moved to the floor when we put the camper top down

20151112-IMG_5927.jpg

Fabric bins behind our seating will hold towels, toiletries, and other random stuff.

IMG_5960.jpg

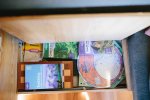
We utilized the space above are water tank

IMG_5978.jpg

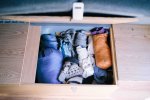
Under our couch seating we put our clothing.

IMG_5962.jpg

We also have a car top carrier that holds our backpacking and scuba gear. We couldn't put in as much stuff as we wanted because weight is a factor.

We have a few other hidden places that we'll keep to ourselves.:)

http://hereuntilthere.com
https://instagram.com/hereuntilthere/
 
Last edited:
Recovery Gear

I didn't grow up off-roading and this is the first four-wheel drive vehicle I've ever owned. So when I started looking at overland forums about what gear to take on this trip I had a lot to learn. We're not really sure how much hardcore off-road driving we plan on doing, but we definitely want to get off the paved roads to explore. There's tons of opinions out there about what recovery gear to have with you, and with no experience of my own to go on, I tried to find some kind of average middle ground. A winch and on-board air compressor were definitely not in the budget. Did I mention that I had never heard the term "recovery gear" before?

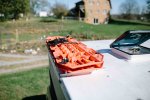
A tire repair kit, a small 12v air compressor, and a recovery strap and shackles all seemed prudent and relatively inexpensive. We also decided on some Maxtrax, or in our case the much cheaper "Escaper Buddies". The last time we were in Baja we got our Passat stuck in the famously soft and deep sand, so this was a no brainer.

Another item we kept coming across was a Hi-lift Jack. Since our used truck didn't come with a jack, It seemed we could kill two birds with one stone. Instead of just getting a bottle jack or a floor jack (which we totally don't have room for), we decided to get a Hi-lift Jack and a jack stand for changing tires. And we would also be able to use the Hi-lift to get ourselves out of a sticky situation. I did a ton of research before this purchase and am aware that they can be dangerous.

I hope all of these things become dusty with disuse, but in the unfortunate circumstance that we're stuck in the middle of nowhere with no help in sight, I feel like we can get ourselves rolling down the road again.

IMG_5952.jpg

IMG_5957.jpg

http://hereuntilthere.com
https://instagram.com/hereuntilthere/
 

Camelfilter

Explorer
Neat, thanks for the updates.

On your jack-cover it & grease it when you can, or it will be zero use when you need it.

Can you jack your truck with the camper on using it? Try it, make sure your bumpers are built for it. Most stockers are not.

If you can jack it up, bring a "landing pad" for it-wood metal plastic whatever.
 

Motafinga

Adventurer
Neat, thanks for the updates.

On your jack-cover it & grease it when you can, or it will be zero use when you need it.

Can you jack your truck with the camper on using it? Try it, make sure your bumpers are built for it. Most stockers are not.

If you can jack it up, bring a "landing pad" for it-wood metal plastic whatever.

This^^ One helpful hi-lift accessory is the lift mate which lifts your rig by the wheel, then you place the jack stand under and lower it onto the stand. Since you'll have a jack stand this will do the trick. http://www.ebay.com/itm/Hi-Lift-Jac...:g:ib0AAOSwd0BVzC6t&item=331391155664&vxp=mtr
 

Forum statistics

Threads
188,158
Messages
2,902,805
Members
229,582
Latest member
JSKepler
Top