You are using an out of date browser. It may not display this or other websites correctly.
You should upgrade or use an alternative browser.
You should upgrade or use an alternative browser.
Gladiator Pop-Up Pass Through Camper Build
- Thread starter Mules
- Start date
VanIsle_Greg
I think I need a bigger truck!
Man, this is looking FANTASTIC. I love the attention to detail, and I am really liking the way that this is coming along.
Lifting a roof / cap with fabric sides is a simple and very complex thing to engineer, but it looks like you have this well in hand. With the fabric off vs. on, the top will behave very differently. Fabric will stiffen up the sides and remove slop from most lift systems, so what may seem wobbly at first will be taught when the fabric is installed and tensioned correctly. The guy who did my fabric asked me if I was removing the front panel when the fabric was installed as it likely was not going to be needed... heh.
I built mine with the idea that it should be stiff and strong before the fabric is installed, and still have some adjustment side to side to tweak as needed. I very much followed the Tim Morrissey method of lifting the top, and mine weighs significantly more and it is still a simple process. Also, I put my lift mechanism on the sides not front and back. I like the ease of use, and also added a front panel similar to a 4WC to stop any possible side to side rocking... I live in BC, and on the West Coast, and it is windy here, always. heh I had to re-do the lift mechanism twice to get the geometry just right and it took me 2 tries to center the roof properly. I leverage 4 x gas struts to assist so lifting the roof is pretty simple for me.
Pretty stoked on this build you have there... envious really. FRP looks like it is pretty simple to work with too. Well simple in relative terms.
Mules
Well-known member
Thanks for the encouragement! I have to say this is a blast designing and building. What a fun winter project. I just received my (4) pneumatic struts, so I really appreciate your experience with a similar lift system. I was wondering if it will be stiff enough side to side, and I guess we’ll see.Man, this is looking FANTASTIC. I love the attention to detail, and I am really liking the way that this is coming along.
Lifting a roof / cap with fabric sides is a simple and very complex thing to engineer, but it looks like you have this well in hand. With the fabric off vs. on, the top will behave very differently. Fabric will stiffen up the sides and remove slop from most lift systems, so what may seem wobbly at first will be taught when the fabric is installed and tensioned correctly. The guy who did my fabric asked me if I was removing the front panel when the fabric was installed as it likely was not going to be needed... heh.
I built mine with the idea that it should be stiff and strong before the fabric is installed, and still have some adjustment side to side to tweak as needed. I very much followed the Tim Morrissey method of lifting the top, and mine weighs significantly more and it is still a simple process. Also, I put my lift mechanism on the sides not front and back. I like the ease of use, and also added a front panel similar to a 4WC to stop any possible side to side rocking... I live in BC, and on the West Coast, and it is windy here, always. heh I had to re-do the lift mechanism twice to get the geometry just right and it took me 2 tries to center the roof properly. I leverage 4 x gas struts to assist so lifting the roof is pretty simple for me.
Pretty stoked on this build you have there... envious really. FRP looks like it is pretty simple to work with too. Well simple in relative terms.
rruff
Explorer
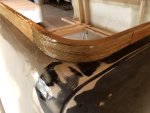
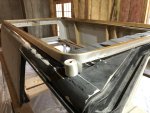
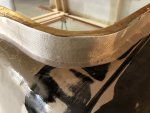
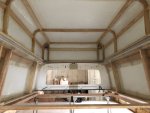
Sanding the fiberglassed transition and smoothing with bondo. Seems like I’m never done sanding.
So true... and why wet layup is a PITA! I decided before I started that it wasn't going to be pretty, but it's still a lot of sanding... and me and my entire garage (and quite a bit of the house!) are covered with glass and epoxy dust...
Mules
Well-known member
So true... and why wet layup is a PITA! I decided before I started that it wasn't going to be pretty, but it's still a lot of sanding... and me and my entire garage (and quite a bit of the house!) are covered with glass and epoxy dust...
Yeah, I hear you. I love that I'm building in my basement in the winter, but I'm paying the price with all the dust in the house.
Mules
Well-known member
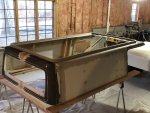
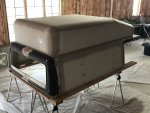
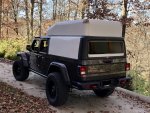
Here's an old picture of the back. Building the hatchback will be a bit tricky. I made the back of the shell narrower to fit the bed and can't use a stock Gladiator rear window. My plan is to use 3/16" or 1/4" Acrylic (plexiglass). Polycarbonate (Lexan) is stronger and easier to cut and drill but will yellow with time. The tricky part will be making a slight bend in the window, since it is not flat. It needs to be thick enough and not flimsy. It will have hinges, pneumatic struts, and probably a latch on each side.

VanIsle_Greg
I think I need a bigger truck!
Sanding the fiberglassed transition and smoothing with bondo. Seems like I'll never be done sanding.
One day you will be done sanding... and then about 10 days later the last of the itchy glass bits and dust will be out of your system too. heh
#stillscratching10dayslater #stillworthit
Similar threads
- Replies
- 0
- Views
- 563
- Replies
- 41
- Views
- 2K

