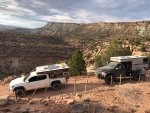
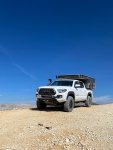
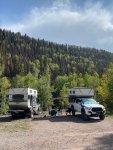
GrandiOdyssey: Circumnavigating the Globe in a '19 Tacoma Build Thread

You should also know that the front skid dropped my highway mileage enough to notice, about 1 to 2 MPG. I had already put on lift and the ARB bumper, which also had a mileage impact. But the skid plate I definitely saw correlation. It's not really the weight, 60 lbs or whatever is marginal. It seems to be the aerodynamics. So you might weigh protection against range for your trip. This is a major disadvantage IMO of using gasoline instead of diesel. Here in the U.S. range is manageable because we're littered with fuel stations and paved roads.

Good to know. I am able to get 18.7-20.5 MPG currently with the part truck partially loaded up in mixed driving with a stock setup so I will make a note of MPG changes when I add the engine skid, sliders, and 32inch KO2s.
 
-Update 6/9/2019

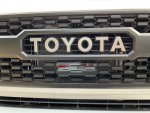
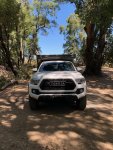
Finally had some free time to get down to business and get some more installations done! First up was the Toyota OEM garnish for TRD Pro Grille. I would highly recommend for anyone with a 18+ Tacoma with a replica TRD Pro Grille as without this you will likely get a warning message from the collision detection system every time you drive they truck. If your grille already has the proper cutout the installation is as easy as snapping out the out piece and pressing in the new garnish.

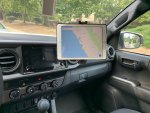
For navigation and central control unit purposes I then mounted the Hondo Garage Tacoma Tablet Mounting Bundle. I initially had some doubts about how sturdy the mount would be but after getting it clipped on the air vent ring and bolted up it was much stronger than I expected. The dexterity of the mount is a huge plus as it can transition between navigation mode for the driver to entertainment mode for the wife in a few second by loosening the knob on the RAM mount elbow.

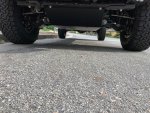
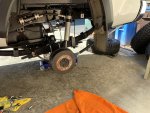
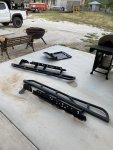
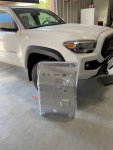
Next up was the IFS skid plate from BAMF. I decided to only run the front IFS skid instead of the trilogy due to weight concerns but I love the peace of mind having burly 0.250in thick steel protecting the lowest hanging and most sensitive parts of the underbelly. Installation is also fairly straightforward but I would suggest using a jack to support the plate while you get it into position and bolt it up.

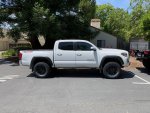
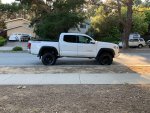
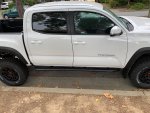
Lastly was the wheels and tires. After much contemplation and deal shopping I decided to go with 265/75/16 (31.6in diameter) BF Goodrich K02s on TRD Pro Wheels. I heavily considered going with KM3s but given the fact that that the majority (75%+) of the miles we will do on our 'Round the World Trip will be on tarmac I decided the improved drivability and fuel economy of an all terrain is worth the trade off for slightly worse mud performance. As far as the TRD Pro wheels they may be slightly lighter and stronger than the stock alloys but honestly we mainly bought them for looks :)

On deck for installation is:
-BAMF rock sliders
-OME Dakar Heavy rear leaf springs w/ +1 add-a-leaf
-Wheeler Off Road bump stops
-Completing ARB differential breather installation (need some additional fittings to make this work on a Tacoma)

Til next time
-GrandiOdyssey
 

Attachments

  • IMG_1286.jpg
    IMG_1286.jpg
    912 KB · Views: 75
  • IMG_1289.jpg
    IMG_1289.jpg
    642.2 KB · Views: 80
  • IMG_1292.jpg
    IMG_1292.jpg
    712 KB · Views: 92
  • image1.jpeg
    image1.jpeg
    1.2 MB · Views: 96
Update 7/21/19

We are continuing to make progress on our build as time allows and finished some critical items before our camper gets installed this coming week.

In order to handle the extra weight of the camper we installed the OME Dakar heavy leaf springs with +1 add-a-leaf along with polyurethane bushings and bump stops. The OME leafs springs are significantly heavier and thicker than the OEM springs so the installation was a bit challenging and required some strategic use of ratchet straps in order to get them oriented correctly. As the truck sits without any weight in the bed there is about a 4 inch lift in the rear compared to about a 1.25inch lift on front, resulting in a laughable rake . However, with the truck loaded up the ride height should be much more balanced front to rear.

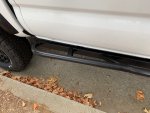
Next up was the kick out rock sliders from BAMF. Just like their IFS skid, the sliders are high quality product and look like they can take an absolute beating. Installation is a direct bolt on with only minor rearrangement of brackets required and overall we are extremely satisfied with these.
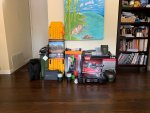
We took full advantage of Amazon Prime Day to load up on expedition gear at a huge savings . Maxtrax, Mophorn air jack, Gerber hatchet, Gerber combat knife, ARB tire repair kit, Advanced Elements sun shower, Peztio dual dash cam, and Warn medium accessory kit, and Warn 9.5XP winch are among the goodies that are piled up in our living room.

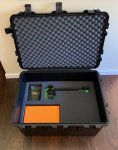
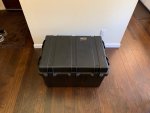
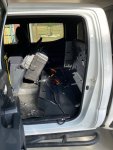
For our main cab storage system we decided to go with a Pelican Storm case that will eventually be bolted to the chassis with a custom mount with the 60 portion of the rear seats removed. We began to organize our items in the case in layer based on how frequently we would need each item. Towards the bottom are recovery gear/ spare parts, then shovel/ hatchet/ saw/ tire repair kit, hand tools, and finally our Coleman Triton stove with propane canisters. We will keep the 40 split rear seat in the truck for passengers (including our mandatory "guide" in China) but will likely keep it folded down the majority of the time and use it for storage.

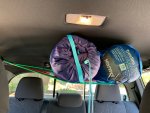
For additional storage we made a "overland shelf" from Bungee cords (and in the future maybe some some elastic mesh) that fits above the Pelican case that will hold our sleep bags and dry bags with our winter clothes.

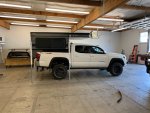
Our Swift Four Wheel Camper is getting installed this week and afterwards we are taking our on its first shakedown voyage through Eastern Oregon and the Northern Sierras. We are elated to finally see everything coming together after so much planning and preparation.
 

Attachments

  • IMG_1325.jpg
    IMG_1325.jpg
    1.1 MB · Views: 92
  • IMG_1328.jpg
    IMG_1328.jpg
    1.4 MB · Views: 95
  • IMG_1678.jpg
    IMG_1678.jpg
    1,004 KB · Views: 83
  • IMG_1679.jpg
    IMG_1679.jpg
    988.6 KB · Views: 81
  • IMG_1682.jpg
    IMG_1682.jpg
    788.1 KB · Views: 90
  • IMG_1687.jpg
    IMG_1687.jpg
    534 KB · Views: 95
  • IMG_1691.jpg
    IMG_1691.jpg
    374.4 KB · Views: 92
  • IMG_1688.jpg
    IMG_1688.jpg
    709.1 KB · Views: 99
  • IMG_1692.jpg
    IMG_1692.jpg
    477.8 KB · Views: 101
  • IMG_1318-2.jpg
    IMG_1318-2.jpg
    926.5 KB · Views: 105
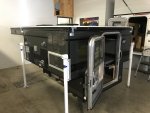
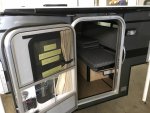
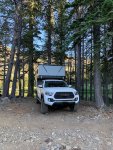
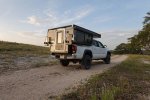
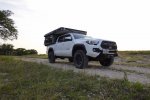
After loads of planning and waiting, we finally picked up our Swift Four Wheel Camper this past week from 10/40 Overland in Portland, OR! The guys at 10/40 did a great job with the installation and walking through all of the features of the Four Wheel Campers. The key parts of the install we are bed pad, mounting brackets, turn buckles (for internal mounting), Blue Sea relay on truck main battery, and supporting wiring.

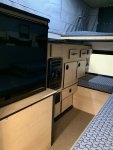
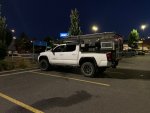
To recap our Swift model is equipped with thermal pack, propane forced air furnace, 6 gallon water heater with outdoor shower, dual powered vents, smooth aluminum siding in Charcoal, and 2 way 65L Dometic fridge. We are very happy with the current setup as is but will also be adding a 160W solar panel with MPPT controller and second 12V AGM battery in the camper in order to manage our electricity demand when we are parked for more than a few days.

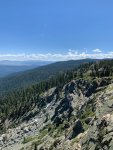
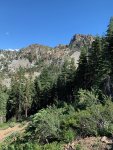
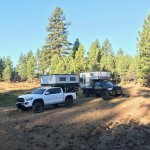
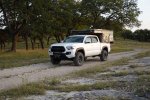
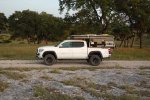
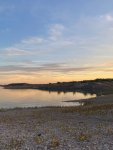
Our shakedown trip took us through Eastern Oregon and then into the Sierra mountains before heading back to Santa Cruz via Truckee. We were fortunate enough to find some excellent 4x4 trails as well as a pristine campsite right on a lake.
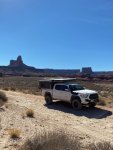
Overall we are extremely satisfied with our initial setup. The addition of the camper doesn’t seem to compromise the Tacoma’s docile on road manners while also still allowing the truck to be very capable on the trails. From a driving perspective slightly more clutch slipping is required to get the truck off the line compared to running without the camper and one needs to increase the normal shift points to ~3000RPM, but the extra weight is less noticeable that I would have guessed. We even averaged 18 MPG with the camper on the way home!

Camping in our Swift is almost cheating compared traditional camping setups and is nearly on par with an RV or small apartment in terms of comfort and utility. Being able to cook a nice meal inside or outside, take a hot shower, store large amounts of refrigerated/ frozen food, have a comfy bed, and a well insulated cabin are massive benefits that cannot be understated, especially for the journey that we plan to take.
 

Attachments

  • IMG_1772.jpg
    IMG_1772.jpg
    891.4 KB · Views: 119
  • IMG_1734.jpg
    IMG_1734.jpg
    740.9 KB · Views: 128
  • IMG_1780.jpg
    IMG_1780.jpg
    1.1 MB · Views: 120
  • IMG_4164.jpg
    IMG_4164.jpg
    501.7 KB · Views: 113
  • IMG_1785.jpg
    IMG_1785.jpg
    646.3 KB · Views: 130
  • IMG_4148.jpg
    IMG_4148.jpg
    573.4 KB · Views: 135
  • IMG_1722.jpg
    IMG_1722.jpg
    515.8 KB · Views: 140
  • IMG_1727.jpg
    IMG_1727.jpg
    774.4 KB · Views: 134
  • IMG_1748.jpg
    IMG_1748.jpg
    955.6 KB · Views: 135
Update 10/10

We have made some encouraging progress towards our 'round the world build over the past few months!

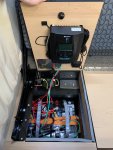
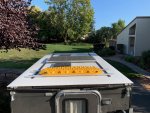
Our Swift four wheel camper came with a single 79aH 12v AGM battery and was pre wired for solar. We added a Renogy 160W solar panel to the Yakima track on the roof of the camper in between the two air vents. Then, in the battery box under the couch we added a second 79aH 12V AGM battery wired in parallel. Next we mounted a Renogy 20A MPPT controller in order to properly charge the batteries and a bluetooth module so that monitor the state of charge from our iPad or iPhones. We used marine shrink wrapped connectors with in line fuses in order to protect against moisture and current surges. If necessary there is another power connection on the back of the camper if we need to add an additional solar panel if we find 160watts (realistically 120-140w in direct sunlight) unsatisfactory.

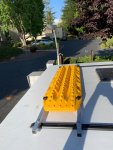
After looking around at many other builds, we decided the best place to mount our pair of Maxtrax were out of the way on top of the camper. In order to do this we made used two pieces of aluminum square bar stock and both these directly to the Yakima tracks. Then we use threaded screw caps in order to quickly release the Maxtrax when they are needed for get the rig unstuck to simply level it out when making camp.

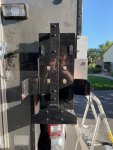
Given the ambition of our trip and our plan to go into remote areas, we needed to extend the range of the stock Tacoma. We first considered a long range fuel tank, but this was relatively expensive, not sold in the state of California, and won't pass our CA smog tests. Instead, we went for a more simple solution of making a mount out of aluminum that is bolted to the steel jack supports that holds a 5 gallon NATO jerry can in a front loading Wavian holder. The mount is fairly sturdy but should allow the can to move around enough to prevent it from breaking (time will tell). We will likely make another mount for the driver side to hold an extra 5 gallon jerry but still need to make measure to make sure that the access to the propane storage area is not impeded by doing so.

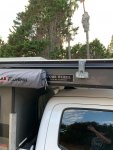
Next on the install list was the ARB awning (2x2.5m) which we directly bolt to the side of the camper with 6 M6 bolts and fender washers along with camper sealing foam between the aluminum awning mount and the side of the camper. Drilling holes into the side of our brand new camper was nerve racking by the result came out great and the awning only stick out about as much as the passenger side mirror so be more protected from branches compared to other mounting bracket options. The awning strikes a nice balance between weight, size, and durability and stand by our choice as opposed to something like a 270 degree bat wing style shade. Note in order to install the awning we had to relocate one of the latches that secures the roof of the camper to the body when in the collapsed position and uses copious amounts of RTV around all of the mounting holes to prevent water leakage.

Some of the last big items still on the to do list are:
-Install Southern Style Off Road bumper with 20in Caliraised LED and XP9500 Warn Winch
-Wire up 1-2 Rigid LED flood lights on the side of the camper
-Fabricate mounting brackets for the Pelican case (bolt from the inside) in place of the rear 60 split bench seat
-Install Front/ Rear dash cam
-Purchase water purification system
-Anything else that we decide that we need after our first large scale shakedown trip in November

Til next time
-GrandiOdyssey
 

Attachments

  • IMG_1931.jpg
    IMG_1931.jpg
    339.8 KB · Views: 88
  • IMG_2263.jpg
    IMG_2263.jpg
    526.6 KB · Views: 92
  • IMG_2262.jpg
    IMG_2262.jpg
    671.8 KB · Views: 94
  • IMG_2261.jpg
    IMG_2261.jpg
    589.8 KB · Views: 98
  • IMG_2184.jpg
    IMG_2184.jpg
    359.2 KB · Views: 98
  • IMG_2180.jpg
    IMG_2180.jpg
    1.1 MB · Views: 93
  • IMG_2178.jpg
    IMG_2178.jpg
    657.7 KB · Views: 88
  • IMG_2176.jpg
    IMG_2176.jpg
    716 KB · Views: 87
  • IMG_1935.jpg
    IMG_1935.jpg
    536.7 KB · Views: 81

Frazeur1

New member
That is a really nice looking truck, camper too! It still sits a little jacked in the back, but not bad at all. I imagine as you load it, or figure out what you really need etc. over the course of time, things can be adjusted. Enjoy your trip/travels, and rig build!
 

dman93

Adventurer
@GrandiOdyssey are you in Santa Cruz? I’ll have to keep an eye out for your truck. I’ve seen a white 3rd gen with a FlipPac on the far west side, but don’t see too many FWC Tacos around town.
 
That is a really nice looking truck, camper too! It still sits a little jacked in the back, but not bad at all. I imagine as you load it, or figure out what you really need etc. over the course of time, things can be adjusted. Enjoy your trip/travels, and rig build!

Thanks! Once it is full of gear/ water/ gas it should sit just about right. Having the adjustable shocks is a huge plus when tuning the ride for the weight/ terrain.

@GrandiOdyssey are you in Santa Cruz? I’ll have to keep an eye out for your truck. I’ve seen a white 3rd gen with a FlipPac on the far west side, but don’t see too many FWC Tacos around town.
That truck you are referring to actually belongs to a friend. Yes we are also in SC.:cool:
 
After a long hiatus thanks to COVID 19, our 'round the world Tacoma build has finally resumed! We began by fitting the Souther Style Off Road bumper with Warn 9.5XP winch and Caliraised 20" LED bar. I really like how the setup looks relatively stock yet provides excellent protection for the radiator and engine compartment in the case of an animal strike or minor accident. The 20" LED bar from Caliraised didn't quite fit in the allotted space as we had hoped, but we were still able to mount it using 1" aluminum bar stock as a spacer. We may modify the mounting setup further depending on how it holds up but so far so good. Next we added a second jerry can mount on the back of the camper, installed ARB drive carrier bearing spaces to address out vibration issue after the suspension lift, added Anytimebackup Camera front cam, added large ratchet steps to reinforce the attachment points between the camper and the truck bed, and took off on a shakedown trip over 4th of July weekend though the Texas Hill Country.

The Hill Country dirt roads provided a great mid to high speed testing ground for our setup and helped me quickly discover that I needed to make a few changes:
1. The truck was too heavy for our taste in its current iteration, showing up mainly in poor fuel consumption and lack luster handling performance
2. Our dual 79aH AGM battery bank as in 100+ degree F weather our fridge alone draws upwards of 30ah in a day
3. There was still a minor vibration under take off in first gear due to drive shaft mis alignment
4. Clutch modulation is difficult on hill starts
5. Hitting the OEM bump stops with such a load is a sensationally jarring experience
6. Even with a 1.5" light memory foam topper, our the mattress in our Four Wheel Camper still felt like sleeping on a 2x4

Immediately upon our return, we made some changes in an attempt to further refine our rig. We removed the heavy steel BAMF IFS skid plate and rock sliders and replaced them with only an aluminum RCI front skid plate. The steel cable and roller that comes with the Warn XP 9.5 winch was replaced with a synthetic 85ft rope with Factor 55 flatlink. And lastly we replaced our 1.5" light memory foam topper with a 2" 3lb memory foam topper which is much kinder to our backs and makes sleeping in the camper a pleasurable experience for once.

Next on the to list is:
1. Install Dobinson's snorkel (for cleaner intake air and to avoid hydrolock during water crossings)
2. Replace dual 79 aH AGM camper batteries with single Battleborn 100aH Lithium Iron Phosphate camper battery (increases energy storage capacity by 25% while saving 75lbs!)
3. Complete mounting SafH20 water filtration system in Pelican Case in the back seat of the cab
4. Wheeler's Off Road Axle Shim Kit to further reduce driveline vibration
5. Complete additional weight reduction (remove rear sliding window mechanism, unused rear seat belts, camper AC converter, camper bed slide out tray, etc)
6. Install front and rear DuroBump bump stops to soft the hit when the suspension bottoms out
7. Install SDHQ ABS guards to prevent ABS sensors from being damaged during off road use
8. Install clutch accumulator delete kit
9. Further organize camper for more efficient storage of commonly used items
10. Add rear seat attic organizer

Until next time
-GrandiOdyssey
 

Attachments

  • IMG_1541.jpg
    IMG_1541.jpg
    516.6 KB · Views: 60
  • IMG_1589-2.jpg
    IMG_1589-2.jpg
    760.7 KB · Views: 59
  • IMG_1603.jpg
    IMG_1603.jpg
    473.2 KB · Views: 55
  • IMG_1582.jpg
    IMG_1582.jpg
    621.9 KB · Views: 56
  • IMG_1407.jpg
    IMG_1407.jpg
    500.4 KB · Views: 59
  • DSC00007.jpg
    DSC00007.jpg
    2.2 MB · Views: 72
  • DSC00008.jpg
    DSC00008.jpg
    2.2 MB · Views: 73
  • DSC00013.jpg
    DSC00013.jpg
    1.6 MB · Views: 70
  • DSC00036.jpg
    DSC00036.jpg
    1.6 MB · Views: 60
Last edited:
Update 7/30/20

We have altered our route plan as shown below to due COVID 19 such that we can still hopefully cross Central Asia/ Russia during the summer of '21. Time permitting we would love to venture into some of the Gulf States after Egypt (Kuwait, Saudi Arabia, Bahrain, Qatar, UAE, and Oman) but we will make that call in early '22 depending on the situation at the time. Let us know if you have experiences overlanding through these counties.
 

Attachments

  • around the world.001.jpeg
    around the world.001.jpeg
    1.3 MB · Views: 23

AggieOE

Trying to escape the city
This looks like it'll be an awesome trip! Any issues with trying to get permission to enter another country nowadays?
 
This looks like it'll be an awesome trip! Any issues with trying to get permission to enter another country nowadays?
Yes currently there are numerous border restrictions throughout the world. We had planned on shipping our truck to Australia is September but its not clear that Australia would allow foreigners to end, even by 2021. Fingers crossed that by late Feb entering into Europe will be less of an issue.
 
Just realized its been quite a while since we posted here so here is an update of what we have been up to....

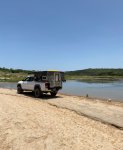
With COVID delaying our international ambitions we left Texas in mid September to do a loop of the Western US/ Baja. We drove straight across West Texas and New Mexico to Southwestern Colorado to catch that last few weeks of warm weather in the San Juan mountains. The leaves had already started to change which provided a scenic backdrop to the mountain towns of Telluride, Ouray, and Silverton. Luck for us, the mountain passes were still open so we completed most of of the Alpine Loop including Imogene and Engineer pass surprising many Jeep owners as well passed them with the camper on the back of our Tacoma ; ).

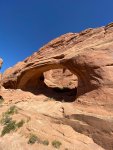
After a few weeks in CO, we then decided to take the Rim Rocker trail between Montrose and Moab, UT. I would highly recommend this track as it takes you through a wide array of terrain ranging from high elevation forrest to desert valleys as you wind your way towards the 4x4 mecca of Moab. As expected Moab in October was quite a zoo but we managed to book a day to complete the White Rim Trail through Canyonlands National Park which we would also highly recommend, but if you want tackle this in one day get an early start as it took us the entire day to complete the 100 miles. We also found time to visit Arches National Park and found that taking the dirt tracks was a an effective way to beat the crowds in RVs...much more peace and solitude that way.

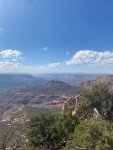
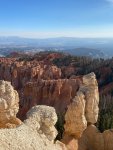
Following Moab we finished out Utah with Lake Powell, Capitol Reef, Grand Staircase- Escalante, Bryce Canyon all of which we would highly recommend. Southern Utah is like no place on earth and we could have wandered around there for weeks. As we passing into Northern Arizona, we began to see the damage caused by the wild fires that had happened during the previous months. Entire sections of of the Kaibab National Forest were closed as we had to take several detours in order to get to the North Rim of the Grand Canyon. Nevertheless we were able to encounter some wild buffalo roaming around the forest but given the limited options for camping we detoured down towards Sedona area for the weeks.

The overlanding opportunities in the Southwest are not to be understated, but we also like to break up our travel with visiting towns/ cities. Scottsdale, Lake Havasu, Laughlin, and Las Vegas are all a nice reprieve some long periods of time camping in the mountains desert. Top tip is to for some cuisine when you are in these places that you are not easily able to cook in your camper, a little treat can go a long way here. Following Vegas took most of the Mojave Road into Southern California and onto Palm Springs. While not quite as scenic as some of the other routes we had taken up to this point. we would still recommend it just be sure to check out some of the landmarks along the way and watch out for rouge side by sides coming down the narrow tracks.... to be continued...
 

Attachments

  • IMG_2449.jpg
    IMG_2449.jpg
    535.9 KB · Views: 23
  • IMG_2355.jpg
    IMG_2355.jpg
    633.4 KB · Views: 25
  • IMG_2312.jpg
    IMG_2312.jpg
    722.4 KB · Views: 26
  • IMG_2262-2.jpg
    IMG_2262-2.jpg
    473.9 KB · Views: 26
  • IMG_2147.jpg
    IMG_2147.jpg
    661.5 KB · Views: 26
  • IMG_2123.jpg
    IMG_2123.jpg
    687.8 KB · Views: 27
  • IMG_9695.jpg
    IMG_9695.jpg
    1.2 MB · Views: 28
  • IMG_2046.jpg
    IMG_2046.jpg
    293.9 KB · Views: 30
  • IMG_2015.jpg
    IMG_2015.jpg
    557.8 KB · Views: 29
  • IMG_2006.jpg
    IMG_2006.jpg
    904.1 KB · Views: 29

SDDiver5

Expedition Leader
Looks awesome!

I'm sure you were aware of the potential GVWR issues and the comments that would come from it so what were the deciding factors of going with a Tacoma over something bigger like a Tundra, F150 etc?
 

Forum statistics

Threads
188,399
Messages
2,906,860
Members
230,176
Latest member
Arcadia1415
Top