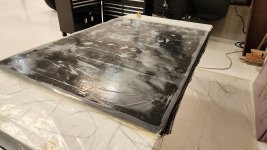
How to build your own Carbon Fiber Camper making your own Composite/Foam panels.

ebrabaek

Adventurer
A few years back I heavily modified an off road trailer by among other things building a carbon fiber front box making up for about half pf the trailer. It was a great build but as it began someone suggested that I started a new thread. I resisted as I thought it would not be that popular but sure enough it got lost in 221 pages which is where that trailer thread is now.
Learned my lesson and although I am not building a full size overland trailer but more like a camper shell size with rails and roof top tent, I thought that it could benefit the community if I share how to create your own panels as it is quite cheaper to do so than spending upwards of 1-2K for a pre build FRP 4x8 feet sheet.
The full build will be featured in another realm as I cant do both. If any of you have followed my build either here or on any of the other sites I have hosted builds on know this is not my first rodeo. I make things with simplicity in mind, using average tools made for the working man or woman and is easy to replicate.

The plan is to make my own foam/composite panels and then bond them together creating the box. It will be created by 3 layers of 6oz/3K 2x2 Carbon fiber twill fabric. That will be saturated by epoxy. Then 1/2 inch NGX foam and subsequent 3 final layer of the same. The panels will be bonded using a Thixotropic polymer.
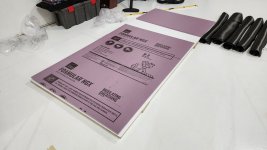
Had to go get the foam in Denver CO as no-one in the Grand Valley carried it or could get it. Foam is here. Polymer is ordered along with lots of Carbon fiber. I suspect the first board will be bonded in about 7-10 days. Feel free to ask away.

Until then.....
 
Last edited:

ebrabaek

Adventurer
What thickness and what is the weight per square foot?
The foam core in the middle will be half inch. Add the 6 layers in total .... 60/1000 inch. Total matrix just over 1/2 inch. That is however by choice for about $10 more pr 4x8 sheet you can go to 1 inch or even 1.5 inch and stick with the outer matrix of composites. The construction is the same, and price difference is miniscule. Exact weight pr square foot is not known at the moment. The first panel I will create and feature here will be a 4x6. I will document the build and subsequent wight. I can however assure you it will be lighter and stronger than the FRP boards. I suspect that the price of a 4x8 by 1 inch thick board will be about $450 in production cost.
 

ebrabaek

Adventurer
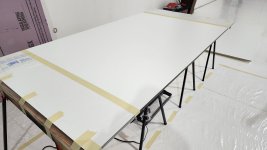
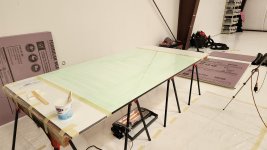
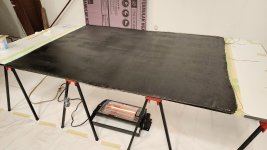
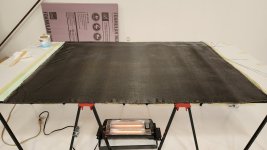
As The Carbon Fibers and Polymers are in transit, I started by creating a level platform to cast from. 4 saw horses and three straight 2x4x8's. The table sits on two chips on the floor so I shimmed the 2x4's with popsicle sticks....
20240222_111631[1].jpg


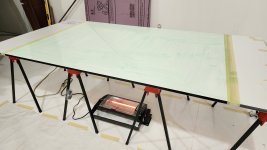
Then one sheet of 3/4 melamine covered particle board on top of that.....
20240222_115040[1].jpg

One perfectly straight base to cast several panels from. These boards are quite heavy and after the layup I will lay a second board on top to mechanically arrest the layers in the matrix. The boards will off course be treated with release agent......

I thought that perhaps now would be a good time to share linkies to the materials....

Epoxy: https://www.ebay.com/itm/3119464415...5MX3VH&hash=item48a174f356:g:fNQAAOSwRrNdZUvS
https://www.ebay.com/itm/3130596894...ZJ5V0V&hash=item48e3cfc40a:g:FxEAAOSwlThcNT6b
https://www.ebay.com/itm/2226484714...KDWRGC&hash=item33d6e20fcb:g:mRgAAOSwnhZeXWYy

Release agent: https://www.ebay.com/itm/2226293353...P46YVA&hash=item33d5be112a:g:AFoAAOSwmVxej5Ps

Carbon: #5750 https://uscomposites.com/shortroll.html

NGX Foam: https://www.homedepot.com/p/Owens-C...Foam-Board-Insulation-Sheathing-36L/100320356

Then off course a boat load of stir sticks, cups, brushes, nitrile gloves....etc...etc.

Til next time Skaaaaaaallll
 
Last edited:

ebrabaek

Adventurer
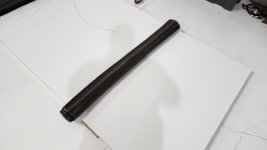
One big roll of Carbon fiber arrived yesterday and Epoxy will be here today UPS says. This begins next week Whoooooot....
20240224_093412[1].jpg
 

Teardropper

Well-known member

carbon fiber is not the best. will crack too easily.​


50% of Boeing's 787 is made from carbon fiber composites. And there are many other aircraft using the stuff.

Boeing-787-8-airplane.jpg


It's not going to fail.

Tony
 

ebrabaek

Adventurer
I appreciate everyone's input and opinions, and would love to discuss the properties of composites. How ever as I have seen all to often on public forums it turns into a food fight and mods have to get involved and many times the message is destroyed. I welcome suggestions and ideas, even when it is from people who think they know because they have read something somewhere. I take it as an opportunity to educate. The composite world offers so many different applications and properties. As a general rule Carbon fiber offers very high tensile and torsional strength and Aramid (Kevlar) offers very high abrasive resistive properties. You can sand or grind carbon fiber like a pencil lead. Stiff and strong as heck, but its kryptonite is sand paper. Kevlar is extremely hard to cut or grind, but it is not nor never will be as stiff as Carbon fiber.
Again we have to take in consideration what were building and what for, along with the construction. I am not building an impact resistant roll cage, but if I were, I would simply add an outer layer of Aramid which would offer an abrasive protection as the truck and camper roll's several times.
There are more than one way to skin this goat. This one is NOT the absolute best. Vacuum bagging with either pre-pregnated or resin transfer would be....Properly, but I am here to break through the fog of intimidation and share how to make this work with simple tools for the working man and woman who has an interest.

In circling the wagons, I ask that we stay focused, be respectful and kind and I will answer all questions that floats to the surface. Now lets build a panel or two shall we.....
Cheers
 

WanderingBison

Active member
I appreciate everyone's input and opinions, and would love to discuss the properties of composites. How ever as I have seen all to often on public forums it turns into a food fight and mods have to get involved and many times the message is destroyed. I welcome suggestions and ideas, even when it is from people who think they know because they have read something somewhere. I take it as an opportunity to educate. The composite world offers so many different applications and properties. As a general rule Carbon fiber offers very high tensile and torsional strength and Aramid (Kevlar) offers very high abrasive resistive properties. You can sand or grind carbon fiber like a pencil lead. Stiff and strong as heck, but its kryptonite is sand paper. Kevlar is extremely hard to cut or grind, but it is not nor never will be as stiff as Carbon fiber.
Again we have to take in consideration what were building and what for, along with the construction. I am not building an impact resistant roll cage, but if I were, I would simply add an outer layer of Aramid which would offer an abrasive protection as the truck and camper roll's several times.
There are more than one way to skin this goat. This one is NOT the absolute best. Vacuum bagging with either pre-pregnated or resin transfer would be....Properly, but I am here to break through the fog of intimidation and share how to make this work with simple tools for the working man and woman who has an interest.

In circling the wagons, I ask that we stay focused, be respectful and kind and I will answer all questions that floats to the surface. Now lets build a panel or two shall we.....
Cheers

Yes please! Can’t wait to learn more.


Sent from my iPad using Tapatalk
 

ebrabaek

Adventurer
First you need to set up a good work station with room to work around.....
20240226_102121[1].jpg

Then gather all the materials you need at the ready......
20240226_102137[1].jpg
20240226_102141[1].jpg

I used electrical tape to cover the edges of the particle board. It will off course be treated with release agent but still then, if epoxy gets a good hold it will tear the board apart when you break the mold.
20240226_102452[1].jpg

All ready for the cast. Next it to treat the two panels with release agent........
Cheeeeers
 

ebrabaek

Adventurer
Well....... Today was the day casting the first panel. Table marked with 2 inches overlap on both sides. Edges got a layer of plastic where I can set down stir sticks and buckets with resin.
20240227_084114.jpg


Then release agent was poured in a cup to treat the panel. It was plural, and I was going to treat both top and bottom, but I made a couple of changes as this went down. Instead of treating the top panel I will just use a 2 mil sheet of plastic. It matters not to me how it looks from the inside. If this is important to you then just trea5t both top and bottom panels and your good to go.
20240227_084422.jpg

Panel treated. Looks bad, I know but it will dry to a thin film and you wont see it on the finished product.
20240227_085901.jpg

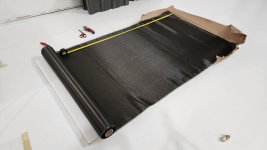
Then onwards with the cutting......My panel only needs to be 67 inches, and I cut the fabric 1 inch over both sides.
20240227_090532.jpg


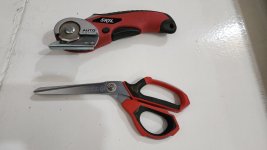
Choose ya weapon....
20240227_090421.jpg
20240227_091131.jpg
 

ebrabaek

Adventurer
Then you carefully roll the cut fabric up in small rolls.
20240227_091255.jpg
20240227_093603.jpg

The second change I did was to change the construction from 3 outer and 3 inner layers to 3 outer and 2 inner. There is plenty strength with a total of five and it will save some on the cost. 5 in total. Then it was time to cut the foam. Mind you I had to cut the 4x8 sheets in half in order for them to fit in transport from Denver. If you were making a whole 4x8 foot panel, you obviously just leave it intact.
20240227_104957.jpg


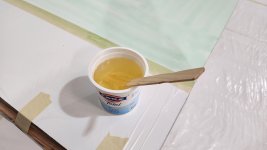
Resin was mixed. I had just a smidgen left over from the off road camper build back on 2017 so after 5 years on the shelf it had yellowed a bit. You wont see it in the end. Not bad for 7 years, really. First batch was a total of 900 grams. In the end I would need 3 of those.
20240227_110358.jpg


First layer of resin. You always want to lay resin, cloth resin and so forth. There will be bubbles due to surface tension. They can be released with a heat gun or a spray of acetone. I used a heat gun. Soothing to pop thousands of small bubbles... Ha ha
20240227_111829.jpg
 

ebrabaek

Adventurer
Rolled out the first layer. Then wet it in with another layer of resin....... then cloth.
20240227_113912.jpg


After the first 3 layers, then one more resin......
20240227_120506.jpg


Then it is time for the foam. Because I had cut mine I used Thixotropic epoxy to fill the crack.
20240227_125405.jpg


2 more layers of Cloth. Didn't do a very good job rolling the fabric, but there is plenty of cutaway.
20240227_133943.jpg


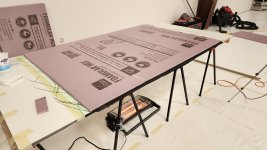
A layer of 2 mil plastic stretched out ready for the top panel....
20240227_134605.jpg


Then the top panel is laid down and a few clamps ensure a good press fit. You can off course also use C-clamps.
20240227_134901.jpg


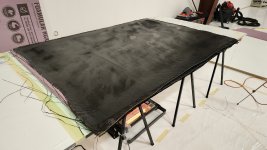
Now we wait till tomorrow where we will break the mold. Ohhhhhhhh fun times to see the fruit of this 4 hr labor job.
 

Forum statistics

Threads
188,337
Messages
2,905,711
Members
229,959
Latest member
bdpkauai
Top