How would you outfit this custom LJ?

jscherb

Expedition Leader
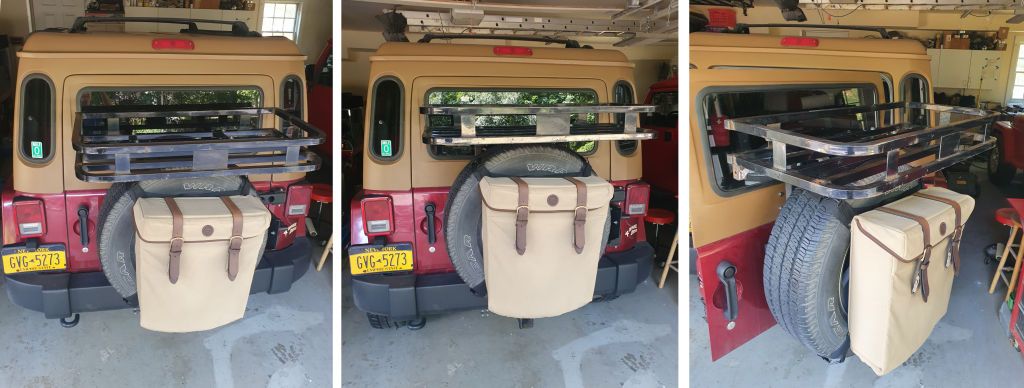
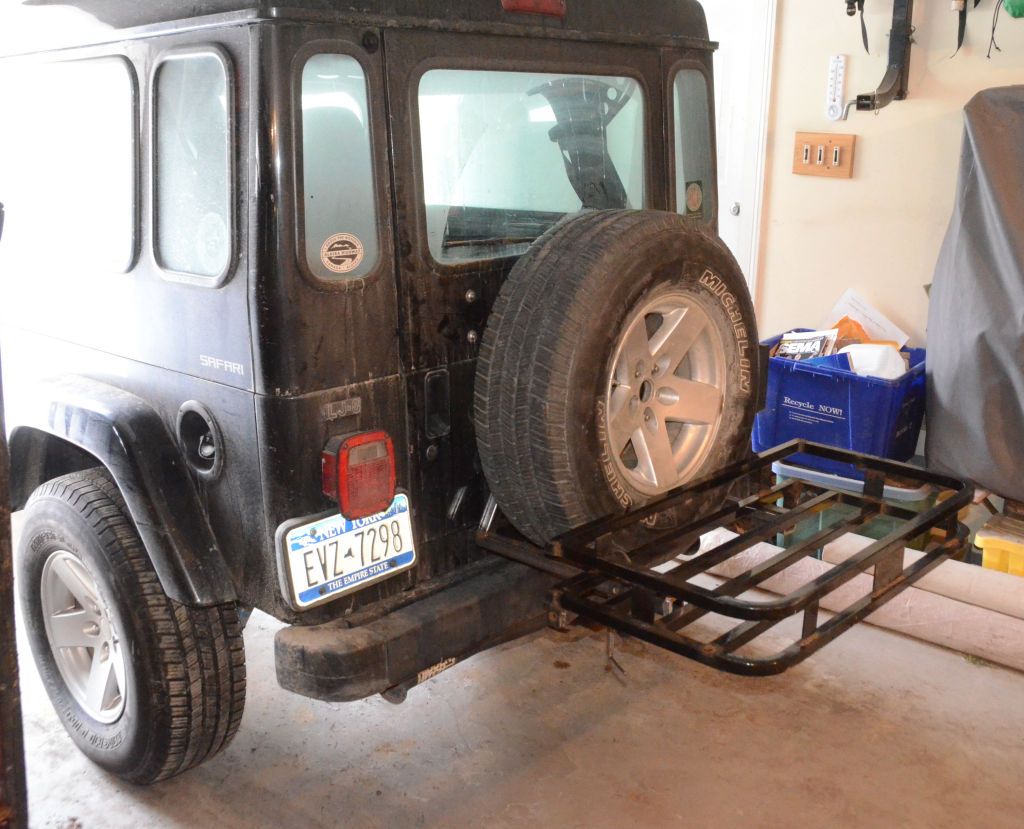
Recently I posted about the tailgate cargo receiver system I've been working on as a background project for a while; I showed the prototype bicycle rack that slips into the receivers. Yesterday I assembled an "over the spare" rack for the system from "salvage parts".

Back in 2017 I picked up the Garvin rack I adapted to fit my LJ and my JKU. The guy selling it threw in this partial tailgate rack, brand unknown and probably from the YJ or early TJ era. It's designed to bolt behind the spare carrier as shown in the right photo.
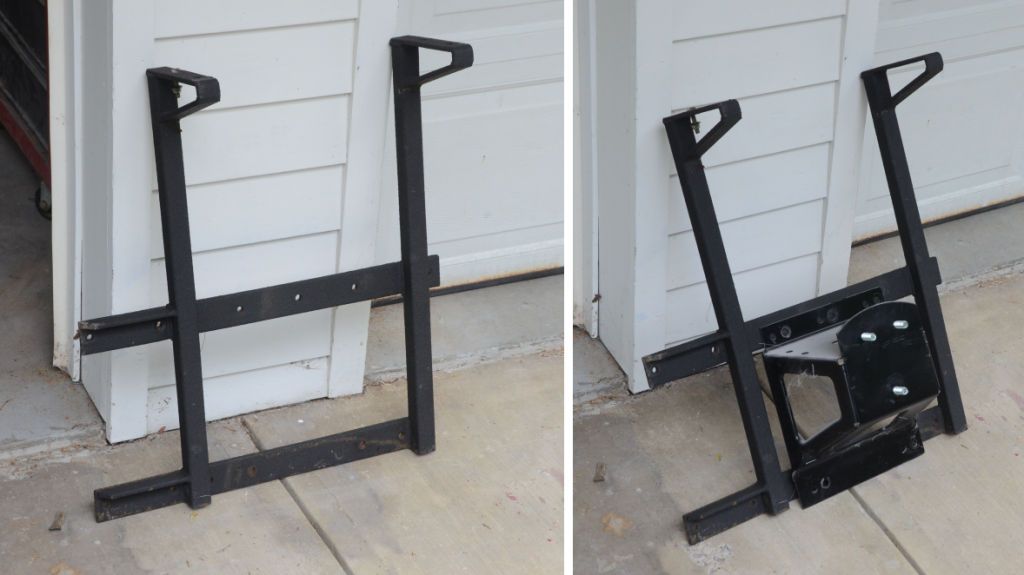
TJTailgateRack_zpssyeogiq6.jpg


I didn't have a use for it so it sat in the yard since then but while cleaning up the yard a few months ago I decided to cut it up and get rid of all of it except the arms, because those were the right size to be used with my cargo receiver project.
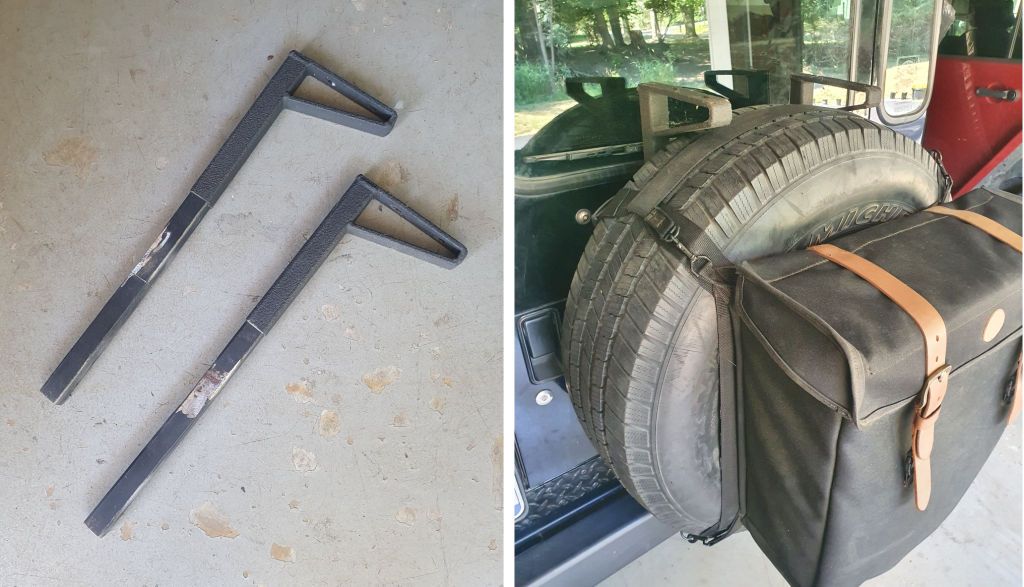
RackBrackets1.jpg


In 2019, I picked up this partial rack for I think $15 on Craigslist, I was in the design process for the cargo receiver system at the time and figured it might come in handy for prototyping. I got rid of the supports but kept the rack.
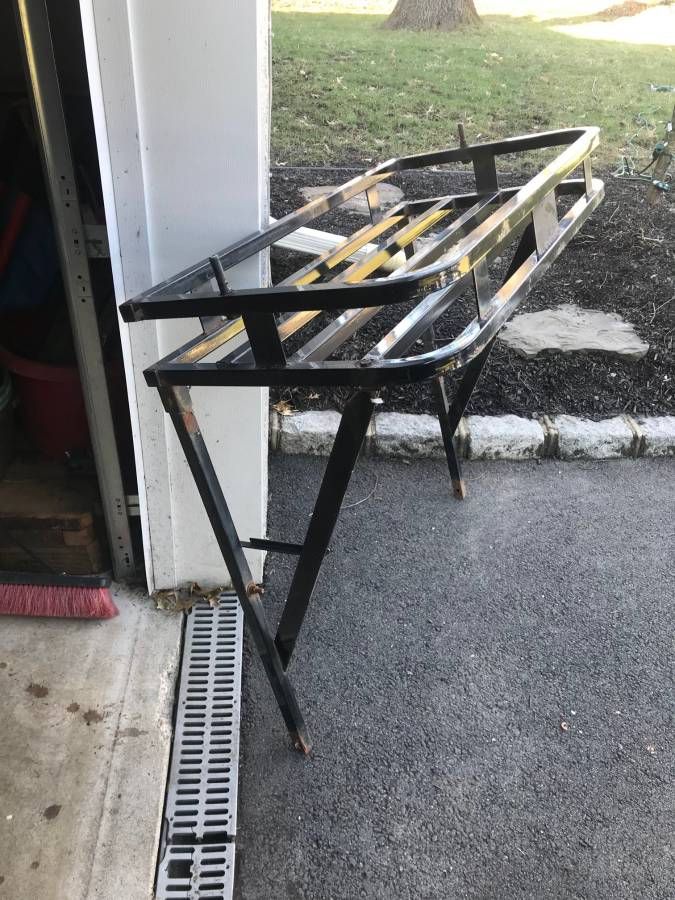
CLRack.jpg


Yesterday I drilled a few holes to put the "salvage parts" together. The result is a rack that slips into the cargo receiver system on either Jeep, and will serve as a prototype in the event the cargo receiver system ever sees production.

On the LJ:
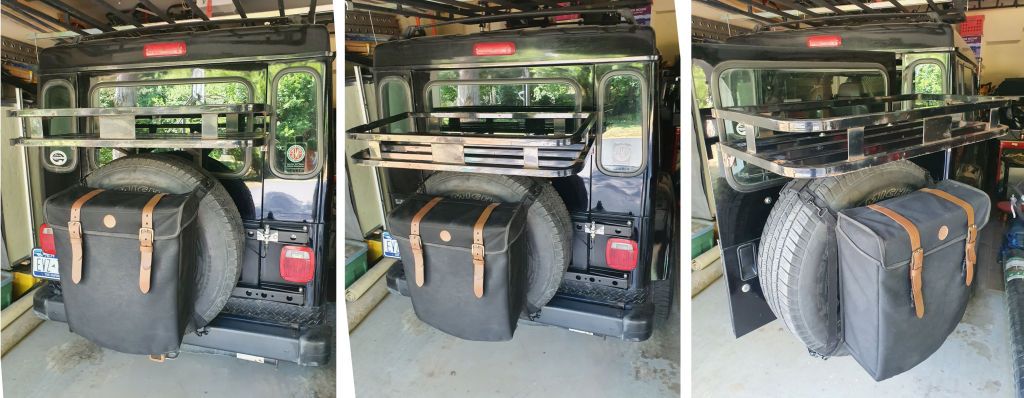
CargoRcvrRackLJ.jpg


On the JKU:

CargoRcvrRackJK.jpg


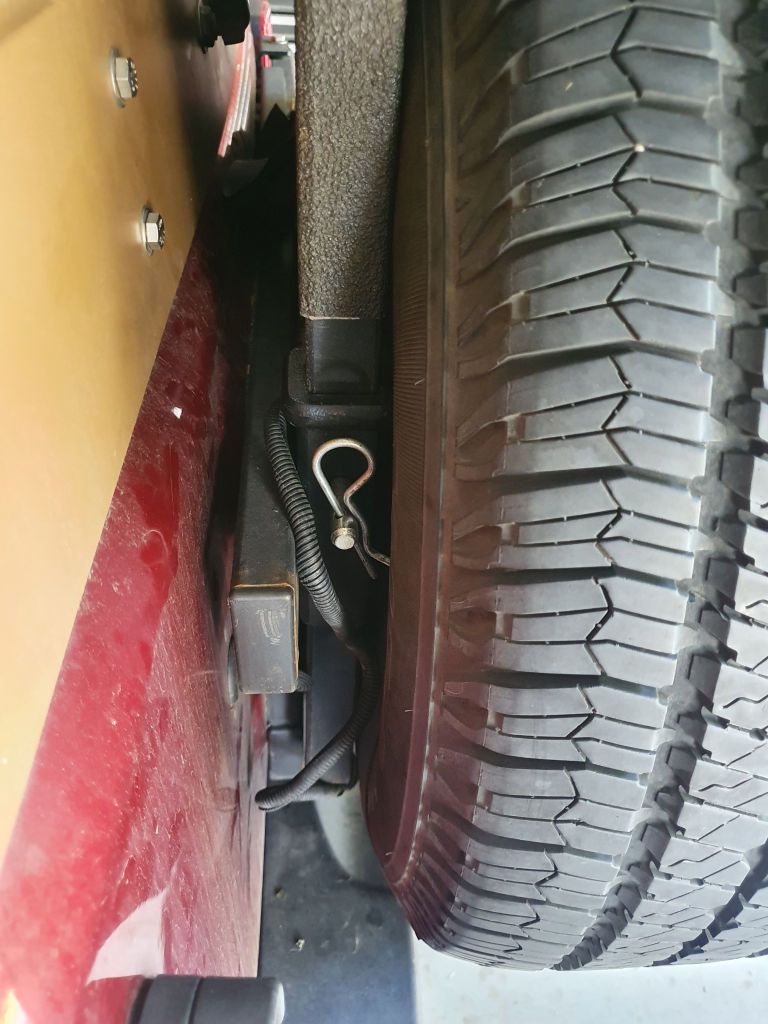
Hitch pins keep it in place.

CargoRcvrRackJKHitchPin.jpg


So far I've done the bicycle rack, this over-the-spare rack and jerry can and Rotopax carriers that slip into the receivers. In 2020 I did a different set of rack arms that place the same rack in a lower position behind the spare. These next photos are from a while ago:
RackLow1_zpsyt70bnpa.jpg


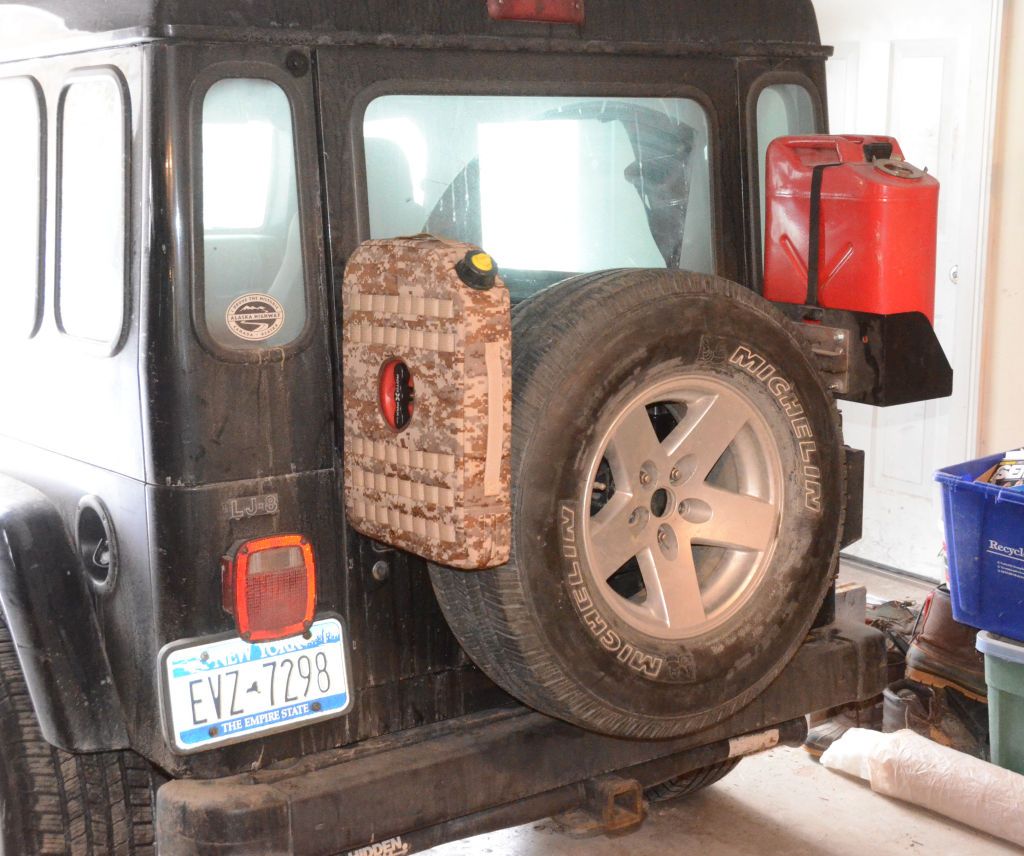
Rotopax and Jerry:

RotoJerry1_zpsmtmcljdw.jpg


All of the above work on the LJ and the JK and could easily be adapted to work on the JL as well.

I've got ideas for a few more slip-in accessories for the system, like a HiLift carrier but I probably won't build any more prototype accessories for the system unless it looks like the system might make it into production.
 
Last edited:

jscherb

Expedition Leader
A few months ago I posted this pieced-together map (https://expeditionportal.com/forum/...fit-this-custom-lj.46300/page-64#post-3009526), thinking it might a good Colorado expedition for us to do this summer. The trip would include parts of the Rocky Mountain National Park and exploring the headwaters of the Colorado River.

PiecedMap(1).jpg


Looks like we'll be able to do a trip in the first half of August, so I'm working on planning the details now.

Highlights include some trails - Pole Hill near Estes Park, Old Fall River Road west out of Estes, Flat Tops Trail (82 miles) and perhaps Hay Flat. Also checking out some of the historic railroad sites on the old Denver & Salt Lake Railroad (last year we did Rollins Pass, which was the highest point on that railroad). And, trying out the hot springs at Hot Sulphur Springs and Steamboat Springs, and a stay at the Glenwood Hot Springs Lodge. Maybe I'll call this the Hot Springs expedition :).

Still working on the details; suggestions around this route welcome.
 

jscherb

Expedition Leader
Outfitting my other LJ...

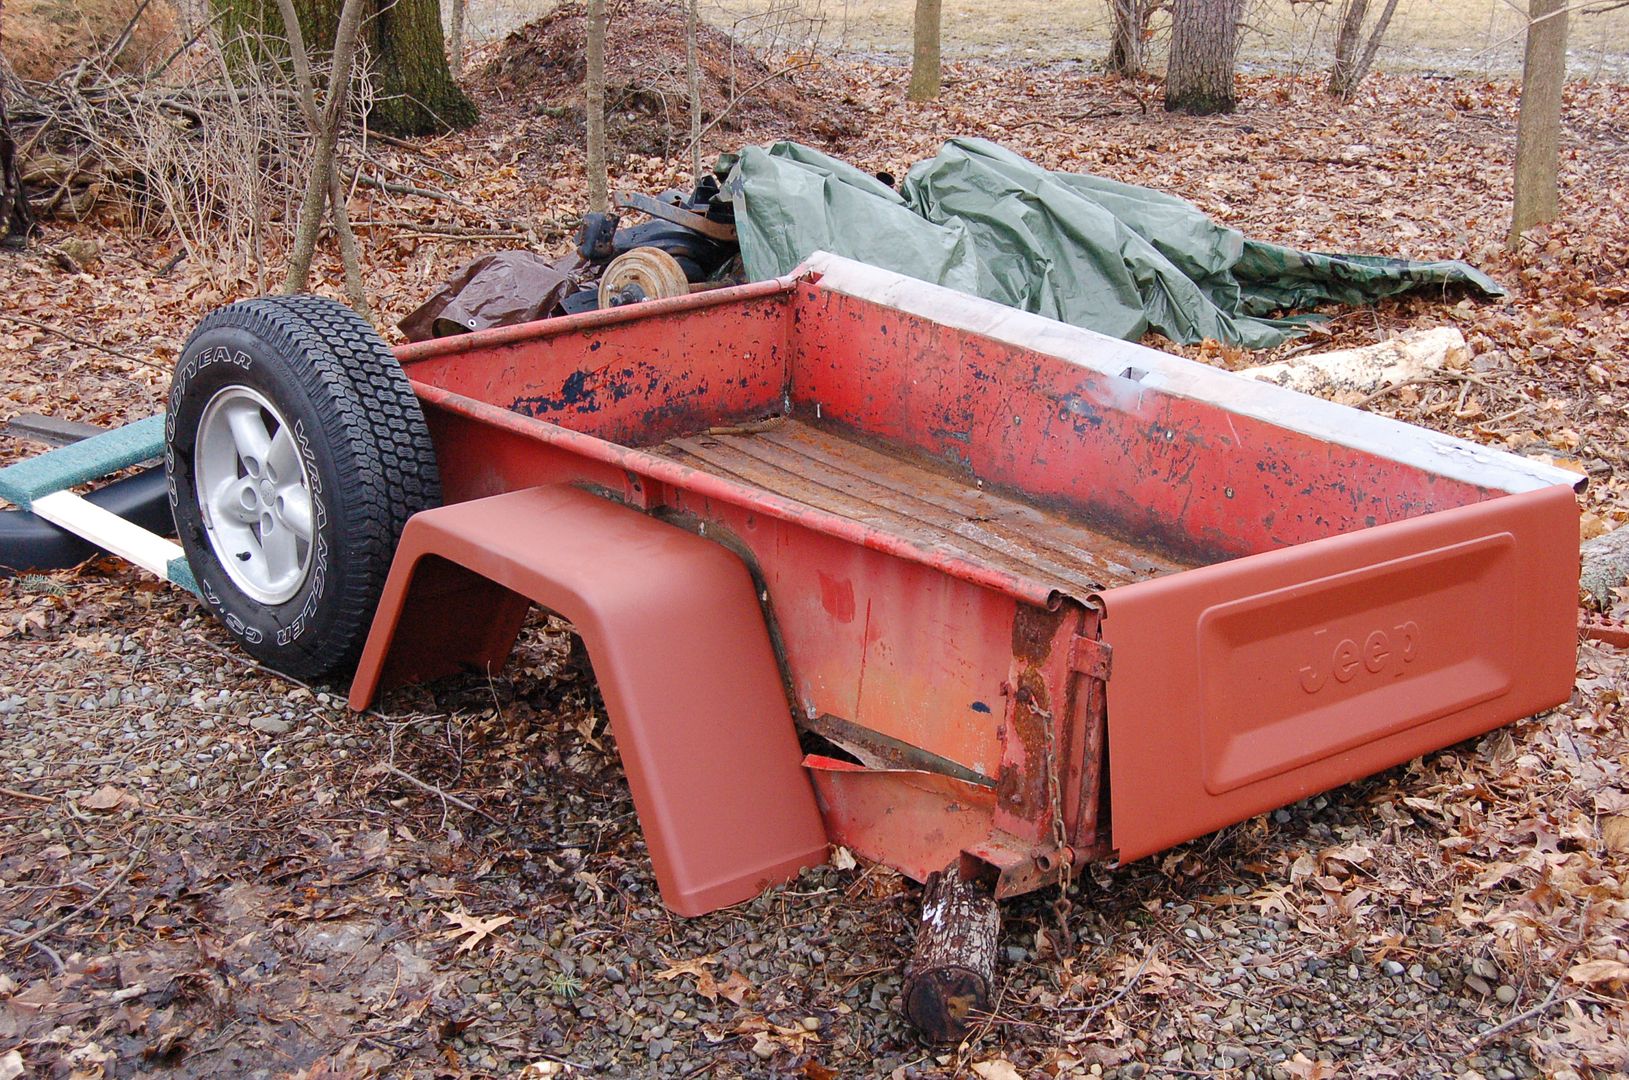
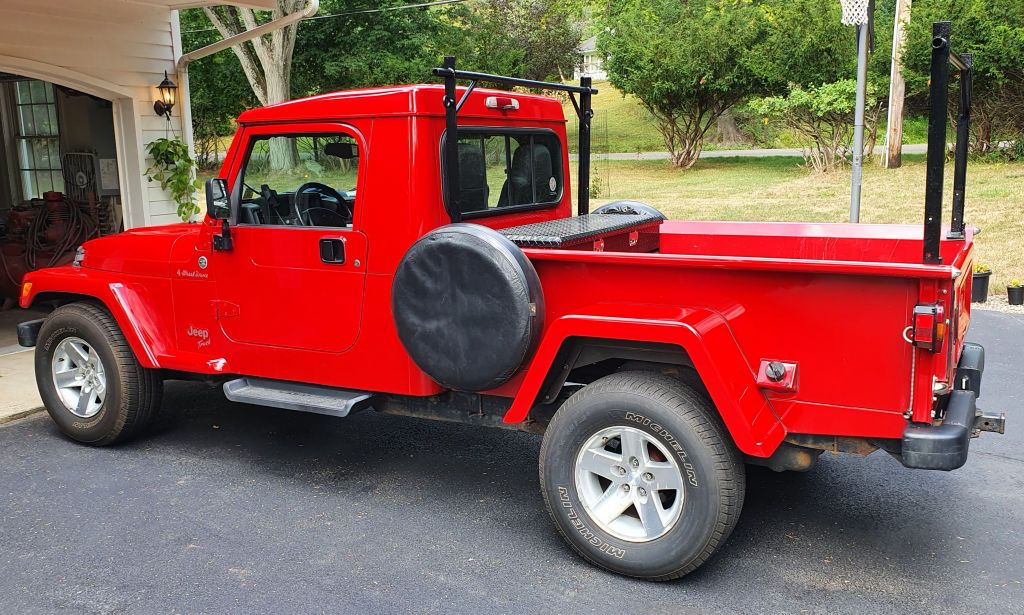
Back in 2007 when I was designing my Retro Wrangler pickup I bought an old Willys pickup bed I found on eBay. It was pretty much junk but I bought it because I needed the dimensions to design my truck. In this photo the tailgate I built for my pickup is posed with the old bed, and a Jeep spare is posed on the side, I think I was working on dimensions for the side mounted spares at the time this photo was taken.

DSC_8708.JPG


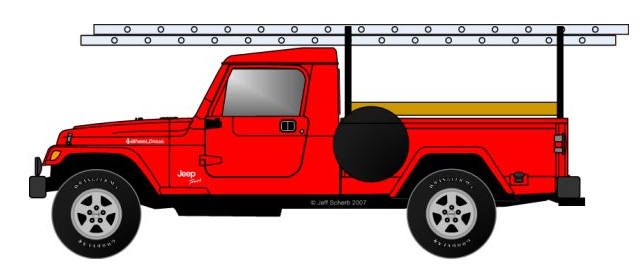
The seller of the bed threw in an old ladder rack for the bed. I never did anything with the rack but I did to this drawing at the time:

LadderRack.jpg


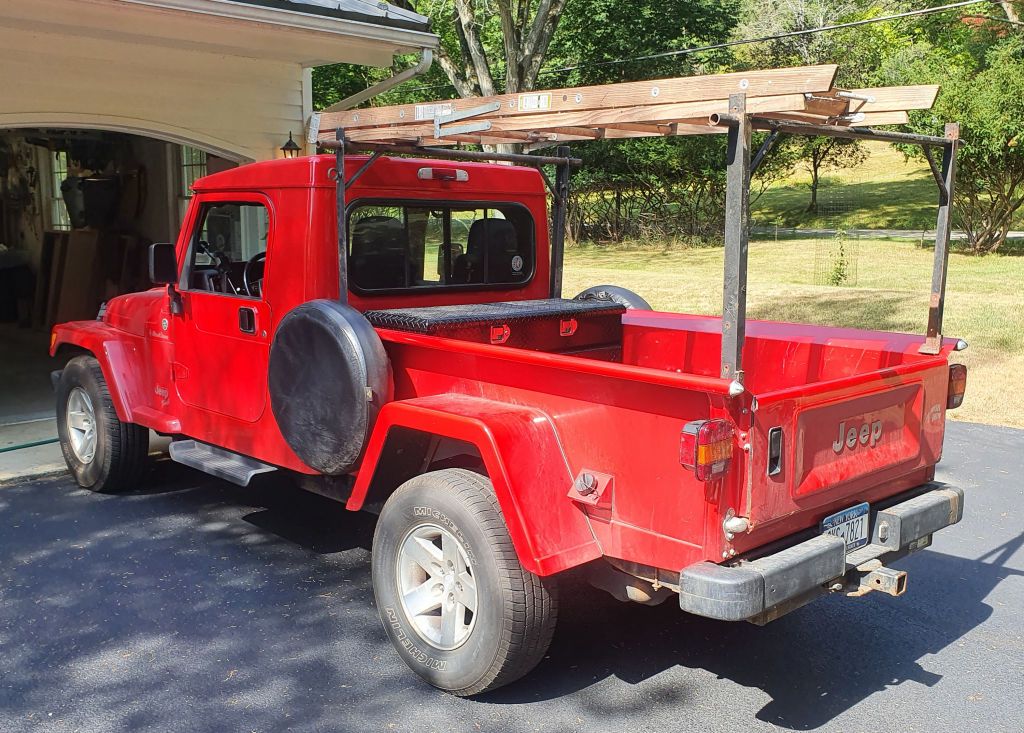
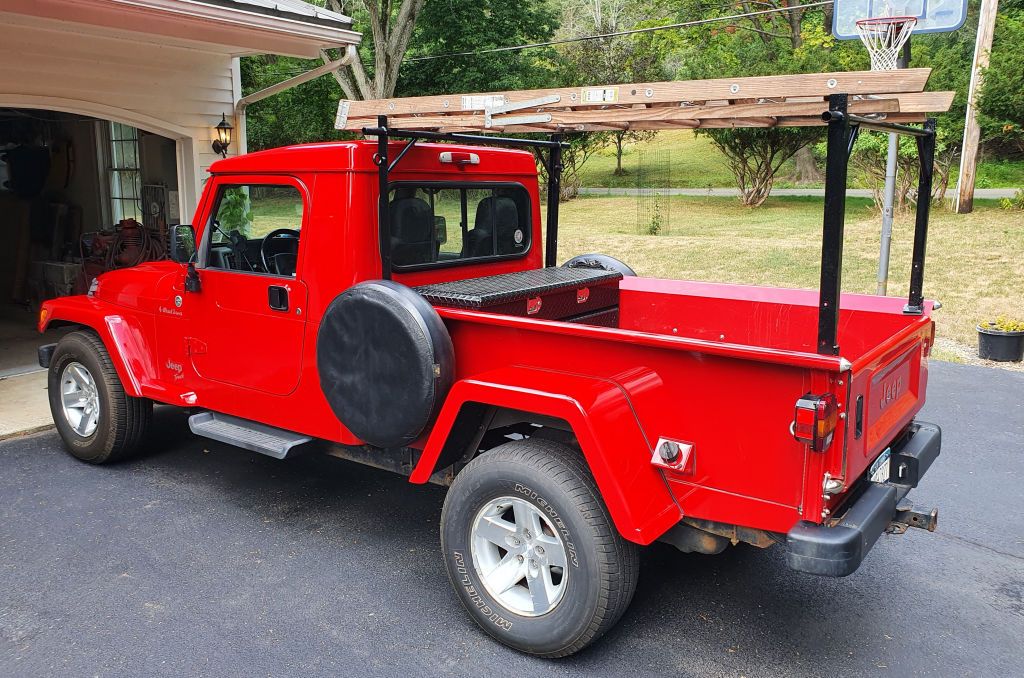
In the process of cleaning out the junk in the back corner of the property the other day I came across the rack, I had forgotten all about it. I thought about including it in the pickup load of scrap metal I took to the recycler last week, but thought I'd better give it a try on the truck before I got rid of it (I also came across the very rusty original Willys fenders that came with the bed, but they went to the recycler. I recycled the bed years ago). I tried the rack this morning, it slipped right into the stake pockets on the truck bed.

LadderRack2.jpg


I guess I'll keep it. It's a but rusty so I'll repaint it and I won't keep it on the truck all the time but I'm sure it'll be useful pickup up lumber for various projects around the house. Should have tried it years ago :). And yes I know the pickup is badly in need of a wash.
 

jscherb

Expedition Leader
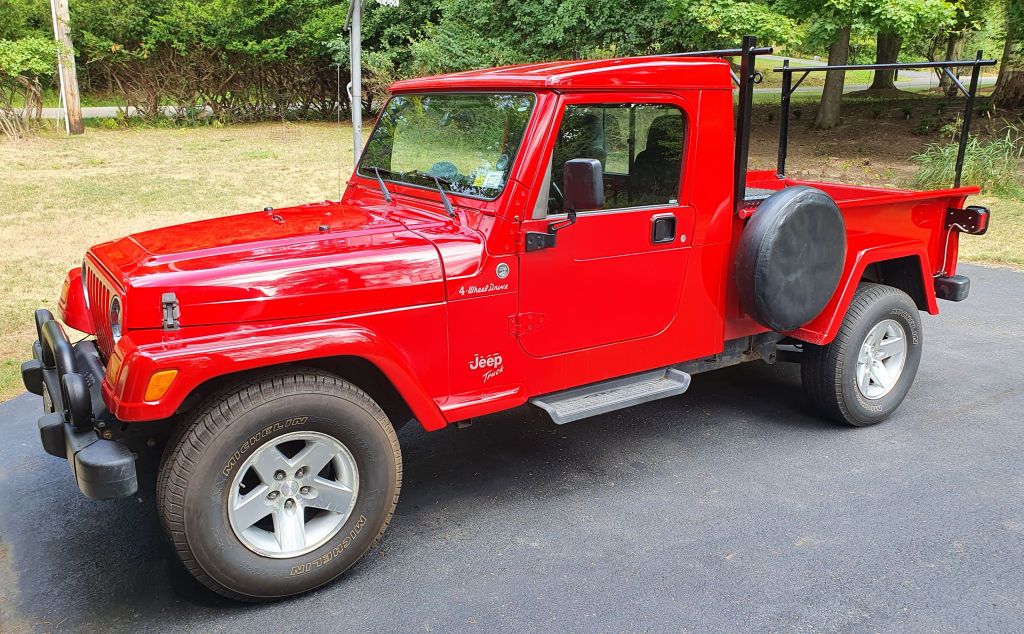
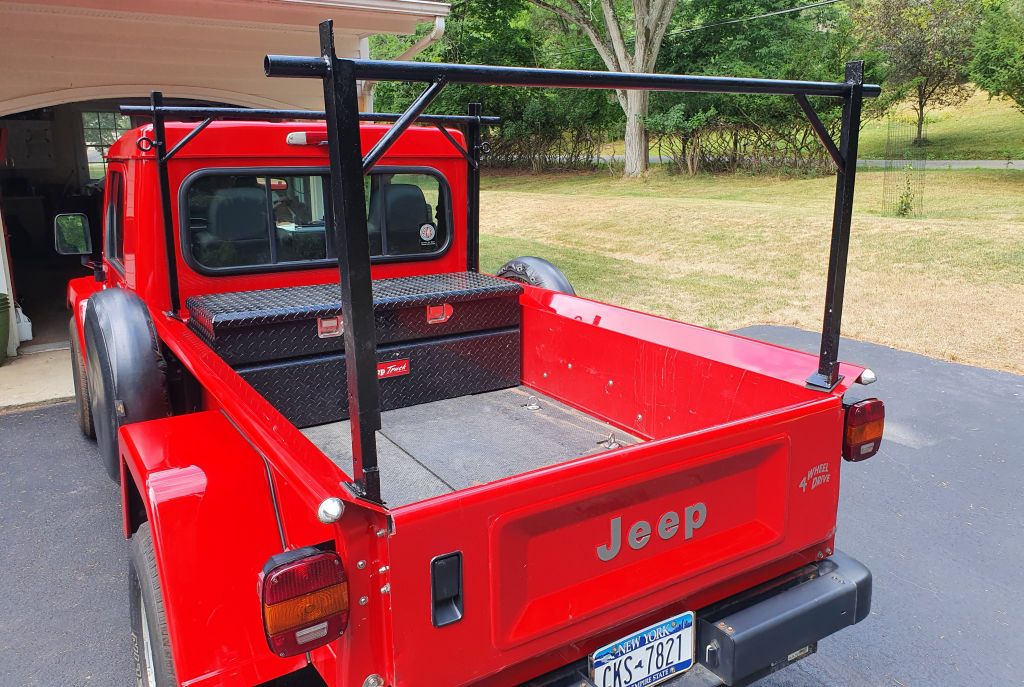
Posting those dirty photos of the pickup yesterday shamed me into washing it this morning. I also painted the ladder rack.

LadderRack3.jpg


LadderRack4.jpg


LadderRack5.jpg


LadderRack6.jpg


I think It cleans up pretty nicely, especially considering I built it in 2008 and it's now got over 130,000 miles on it.
 

jscherb

Expedition Leader
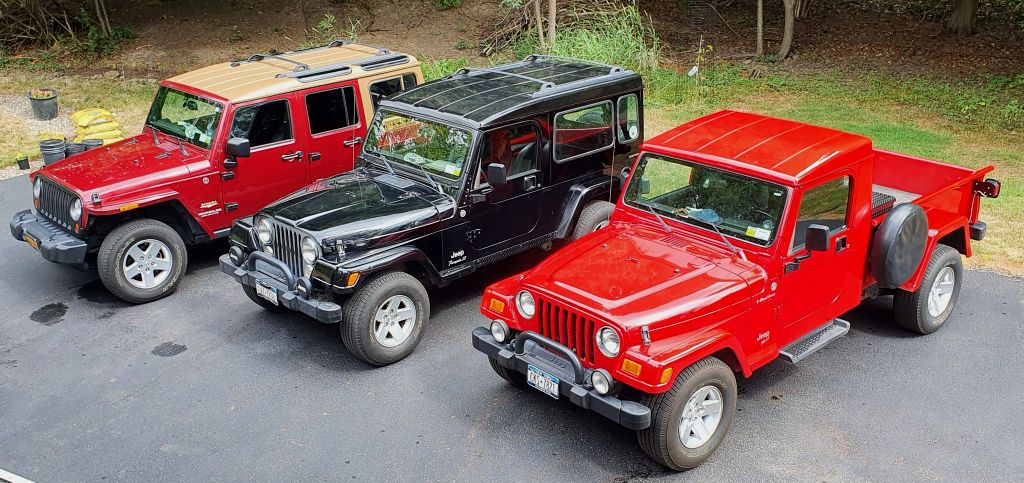
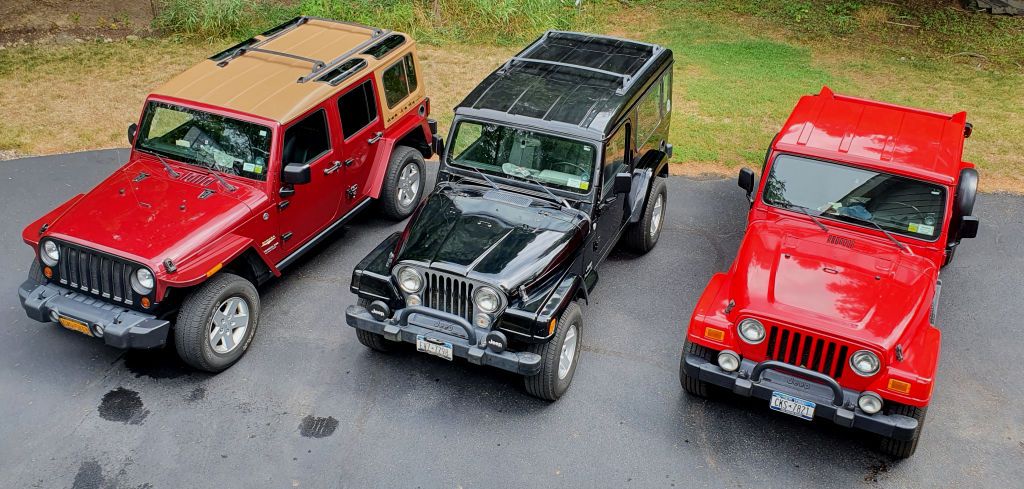
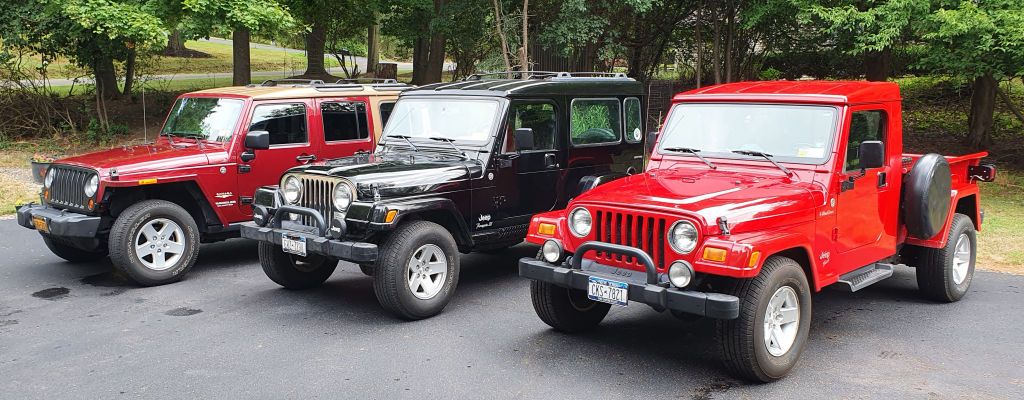
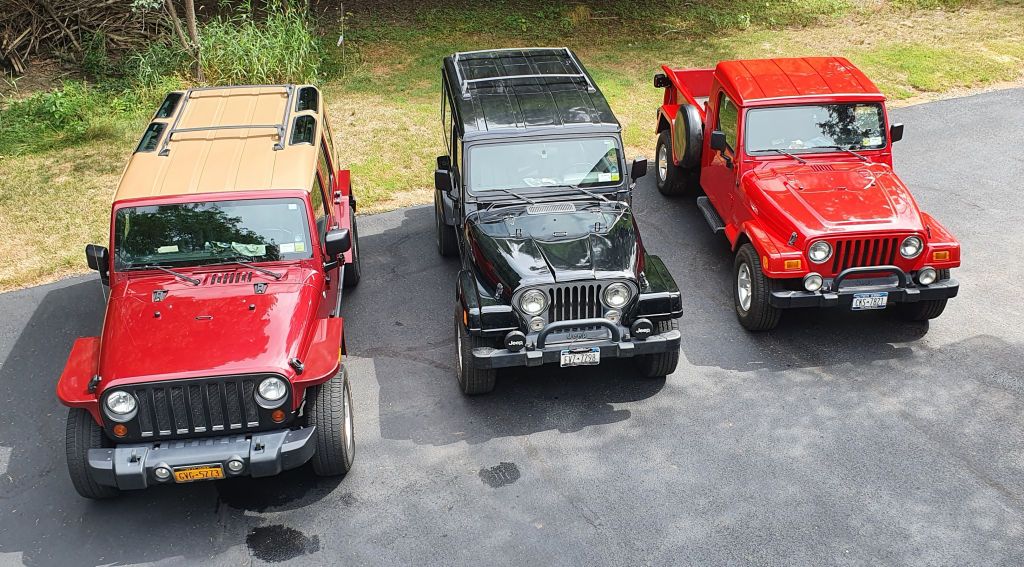
Once the pickup was clean, I was shamed into washing the other two. And having all 3 Jeeps clean at the same time is so rare for me (less than once a year) that I had to take photos. I take care to meticulously maintain the Jeeps mechanically (the JKU has 245,000, the LJ 200,000 and the pickup 130,000) but I'm not so disciplined about washing them so having all 3 clean at the same time is a real event so you'll have to forgive me for celebrating by posting these photos :).

ThreeCleanJeeps1.jpg


ThreeCleanJeeps2.jpg


ThreeCleanJeeps3.jpg


ThreeCleanJeeps4.jpg


BTW the LJ is scheduled to do about 5,000 miles in August on my planned trip to Colorado to explore the headwaters of the Colorado River.
 

jscherb

Expedition Leader
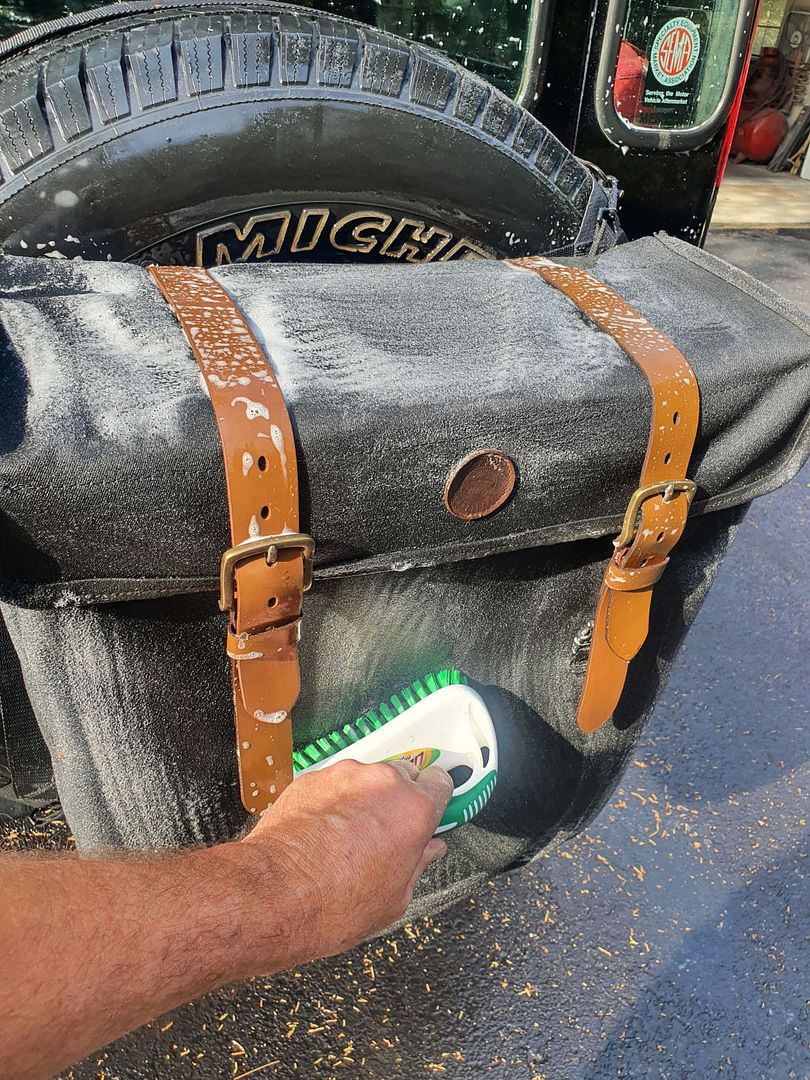
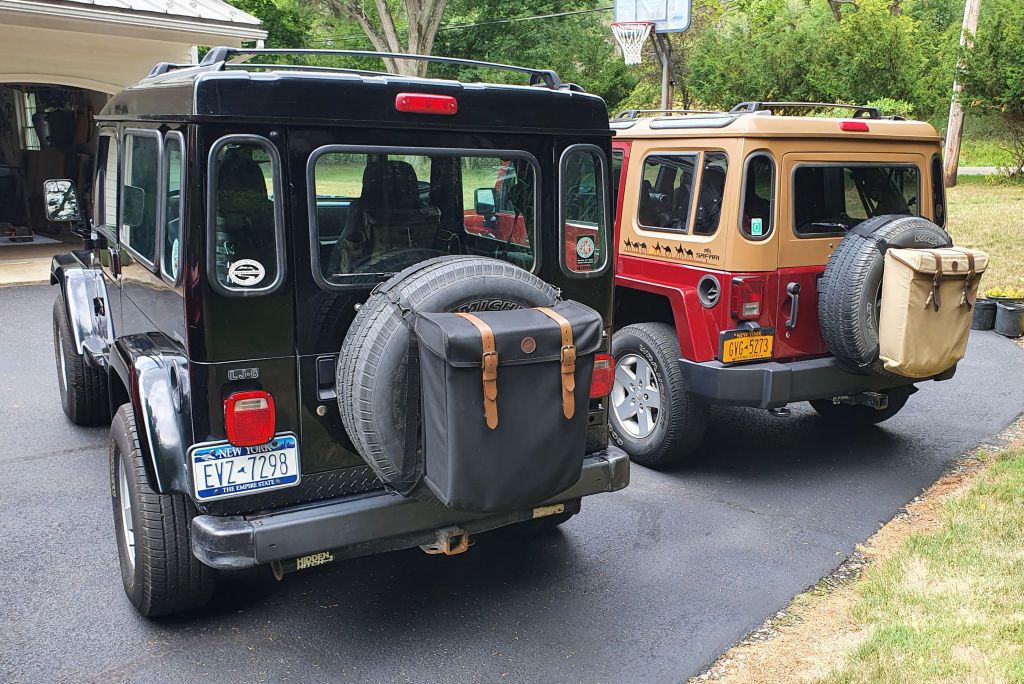
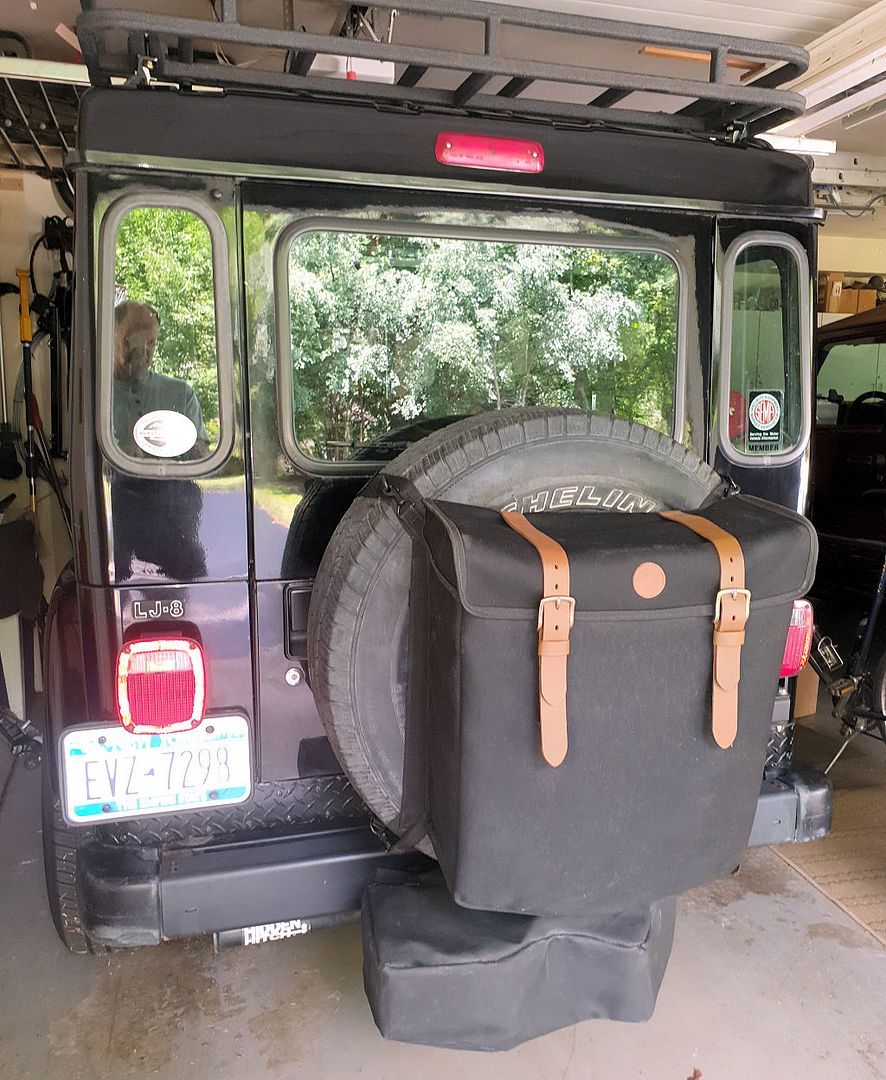
While I wash washing the Jeeps today I also washed the spare tire bags that I've got under long-term test. I washed the LJ by hand, so I used a scrub brush and soapy water, and rinsed with the garden hose.

Washing1024.jpg


The JKU I took through the automatic car wash and I asked the attendant to use his pressure wash wand to clean that bag. I regularly take these bags through the car wash and I instruct the attendant to spray downwards at the back to the water under pressure doesn't go up under the lid of the bag and it works just fine, no water gets inside. Bags look like new after washing.

SpareBagsClean.jpg
 

jscherb

Expedition Leader
Just because the LJ has over 200k on the clock doesn't mean it's close to retirement...

The Colorado trip is on and I'm outfitting the LJ for it now.

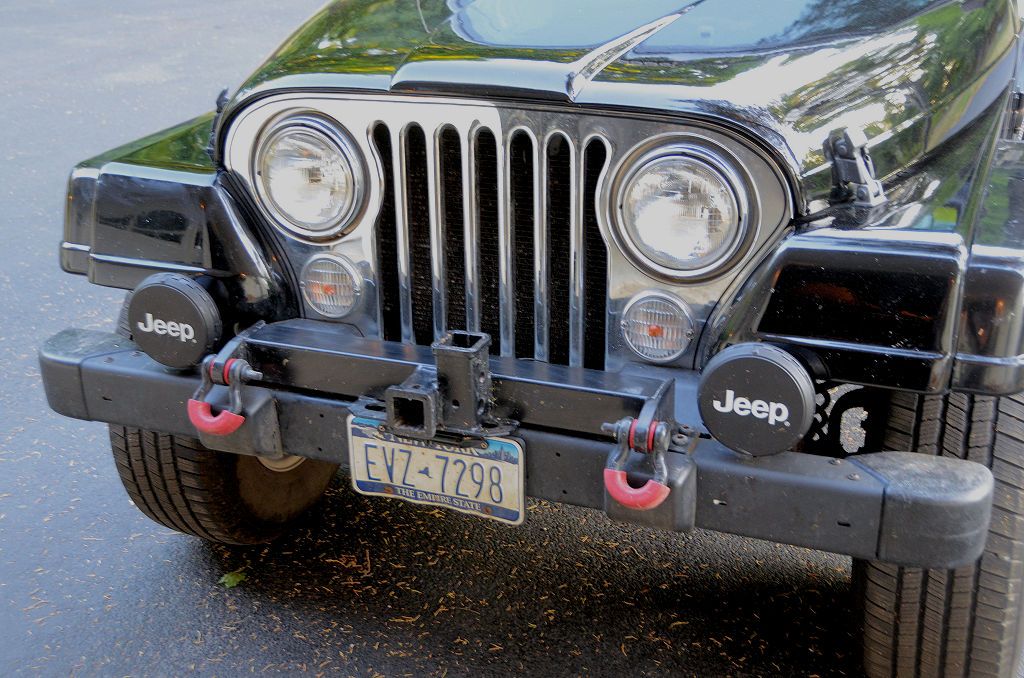
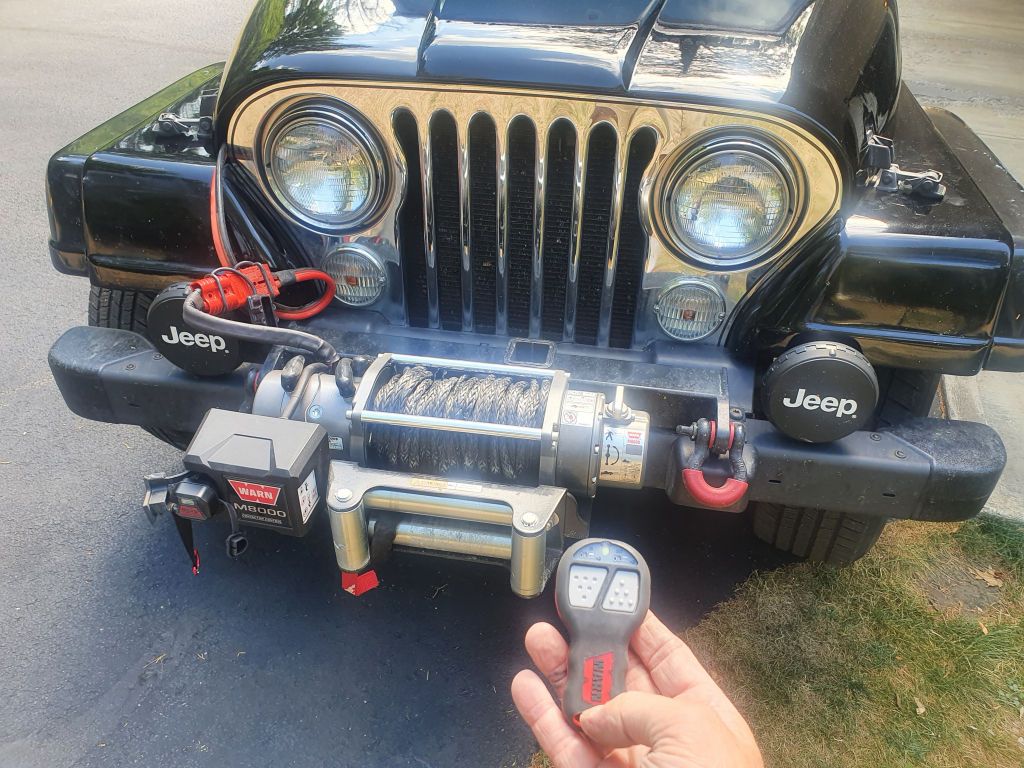
Even though most of the planned trails for this trip are fairly easy, it's much better to carry my recovery gear and not need it than to need it and have it at home in the garage, so the first thing I did was install the winch mount. My winch mount and winch live in the garage most of the time so when I'm leaving on an expedition I bolt the mount in place and throw the winch in the receiver.

WinchMount.jpg


I use this mount on both my LJ and my '06 Wrangler pickup and I have a similar mount for my JKU, so the same winch serves on all three Jeeps. Testing the winch in the driveway, I've want to make sure the remote batteries are good and everything works as expected:

WinchTest.jpg


The winch slides into the receiver so it can be used in the front or the back of all 3 Jeeps; for the interstate run from upstate NY to Colorado I usually carry the winch in the back. It's out of the way there and can be moved up front in a minute when needed.

WinchInBack.jpg


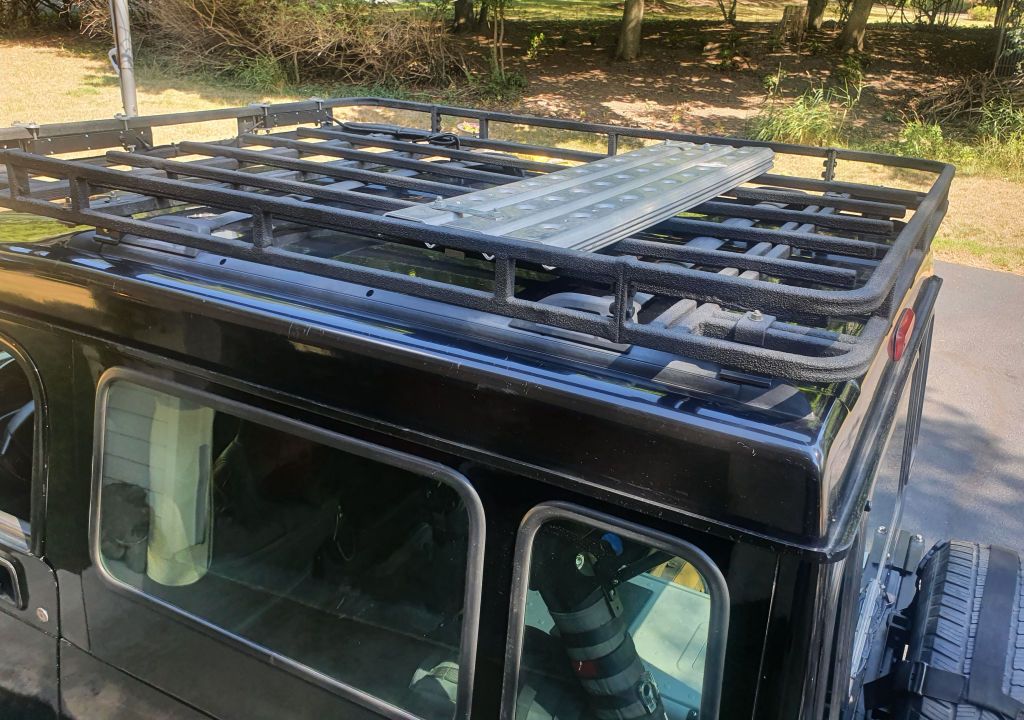
Also part of the recovery gear are 4 aluminum sand ladders/recovery tracks. There won't be any sand on the trails I plan for this trip, but there may be mud, so I put these up top.

SandLadders.jpg


The sand ladders also serve as anchor points for the winch, in the event there aren't any convenient trees or rocks to winch from.


Also to be carried on the rack is a second spare. It's not in the photo above because the Jeep won't fit in the garage with it on top so I'll put it up there the night before we leave. The trip is planned on a fairly tight schedule which would be disrupted by trying to get a tire fixed or replaced, so I like to carry a second spare as a precaution.

Inside the cabin, the overhead/swing-down MOLLE panel has a few more recovery items. A small shovel and a small tree saw are mounted on the panel. The long cable is the extension for when the winch needs to be used in the rear receiver. It's also a jumper cable extension; the battery clamps are also mounted to the panel. Both of these plug into the winch cable that lives in the engine compartment; that cable reaches the winch when it's in the front receiver but the same cable also serves as a jumper cable with the clamps. The panel swings up against the inside of the hardtop so it's out of sight and the gear on it doesn't take up any real storage space.

SwingDownMolle(1).jpg


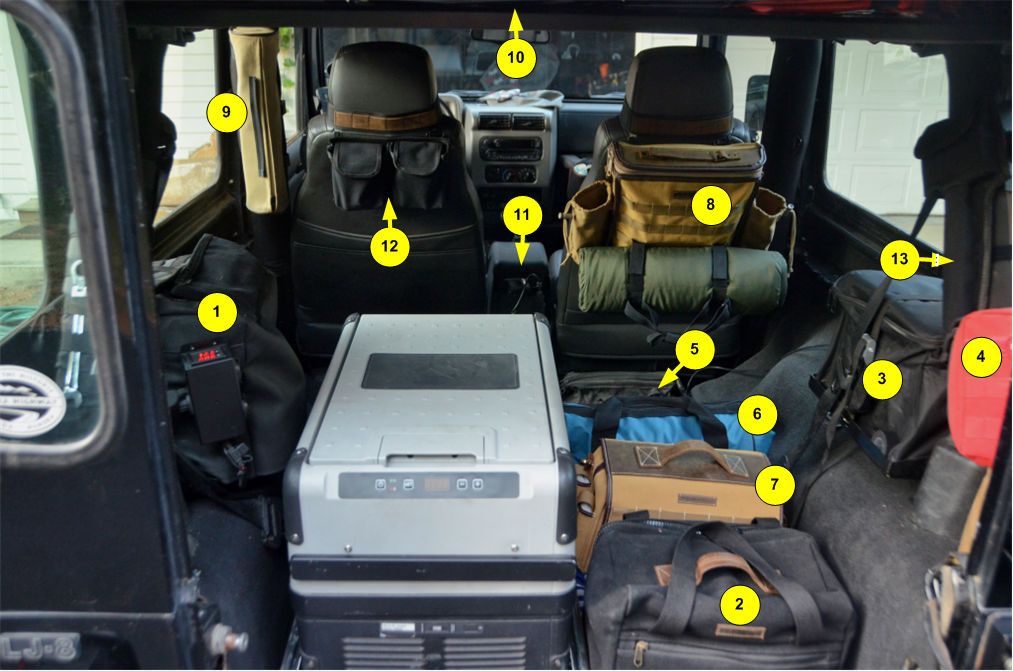
We're not camping on this trip so I don't have the full Trail Kitchen installed but we are bringing the fridge for snacks and lunch. It's on a homemade slide for easy access. Other gear in the cabin:

CabinAnnotated.jpg


  1. Battery and power panel for the fridge. This battery gets charged by the Jeep's alternator and can be used as a second battery to start the Jeep in case the main battery fails.
  2. Compressor and related supplies (hose, tire repair supplies).
  3. Ammo can containing the TrailVision camera system. The trails I'll be doing on this trip won't require the extra views the Trailvision system can provide, but it's in the Jeep in case I decide it will be helpful; it can be set up in a few minutes and offers a 3-camera view of the details of the trail ahead.
  4. First Aid kit; hanging on the rear slope of the roll bar. Out of the way but quickly accessible.
  5. (On the floor well behind the passenger seat) Hydraulic jack. Much quicker and easier than the factory jack.
  6. Winch/recovery bag. Includes winch line damper, ground anchor (bolts to the sand ladders), tree saver strap, snatch block, winch remote and other related gear.
  7. Tool bag.
  8. Cool Bag hanging on the seat back. Can be used to keep drinks and snacks cool on the road and easily accessible from the driver's seat and also can be used to carry lunch on hikes to picnic spots away from the Jeep. Also strapped to it is a picnic blanket to spread on the ground when we stop for lunch.
  9. 35,000-lb recovery strap in a roll bar bag on the vertical part of the main roll bar hoop. Out of the way but easily accessible.
  10. (Above the roll bars) Overhead/Swing-down Molle panel. And on the roof rack, the sand ladders and an extra spare.
  11. CB. This is only in the Jeep for expeditions, it's on a clip-on mount that hangs on the back of the center console.
  12. A pair of shackles hanging on pouches on an Overland Outfitters Zip & Go mount on the seat back.
  13. Small hatchet hanging in a pouch on the roll bar.

Most of the gear listed above doesn't live in the Jeep all the time, I put it in whatever Jeep I'm using before the trip.

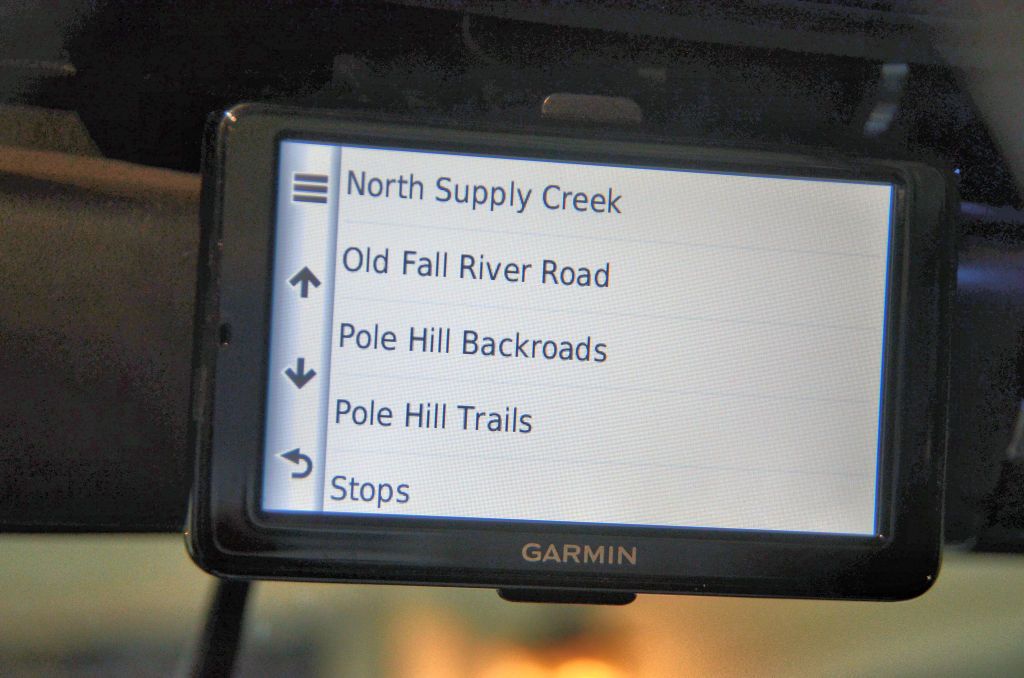
Before leaving on the trip, I add the GPS coordinate of the trails we plan to do to the GPS.

GPSTrails.jpg


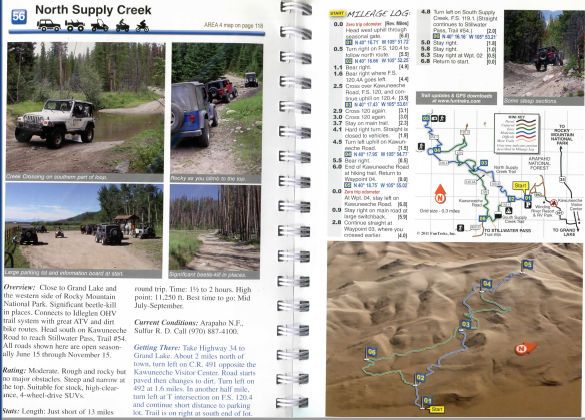
I have three of the same GPS, one for each Jeep. They're older models (Garmin 2555), and easily found on eBay for $50 or less so it's not a big investment to have 3, and they work just fine even though they're older. Usually I'll load the trails on two of them and bring the second one as a spare just in case the first one fails. If the trail is from a trail book, I'll also scan those pages and bring a printout on the trip, a piece of paper is much easier to deal with on the trail than a book that you need to hold open to a page.

TrailScan.jpg


Just about ready for the expedition :).
 

jscherb

Expedition Leader
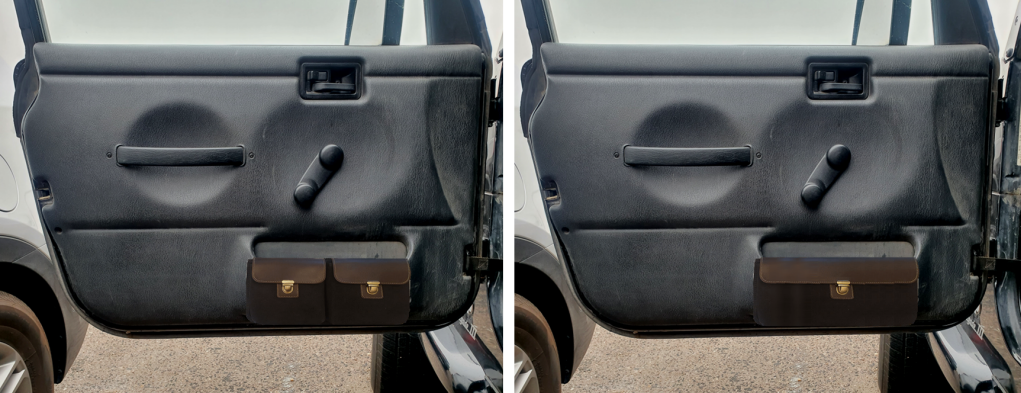
Overland Outfitters told me the other day that their JK and JL door pockets are one of their best selling products. I guess that's not too much of a surprise given that the factory net pockets stretch the first time they are used. The JK version in my JKU:

PocketPanelDriver1.jpg


So I was wondering what TJ door pockets might look like. The TJ door panels have pockets molded into the panels, but what if OO-style pockets attached to the outside of those? The factory pockets would still be usable, and there would be extra pockets for more storage. I did two what-if images - a wide single pocket and two smaller ones.

TJDoorPockets.png


I may sew a pair of these just to test the idea, seems like they might be useful.
I made the mistake of showing this concept to my wife and she was enthusiastic, so now I'll have to make at least one of set of these.
 

pith helmet

Well-known member
Just because the LJ has over 200k on the clock doesn't mean it's close to retirement...

The Colorado trip is on and I'm outfitting the LJ for it now.

Even though most of the planned trails for this trip are fairly easy, it's much better to carry my recovery gear and not need it than to need it and have it at home in the garage, so the first thing I did was install the winch mount. My winch mount and winch live in the garage most of the time so when I'm leaving on an expedition I bolt the mount in place and throw the winch in the receiver.

WinchMount.jpg


I use this mount on both my LJ and my '06 Wrangler pickup and I have a similar mount for my JKU, so the same winch serves on all three Jeeps. Testing the winch in the driveway, I've want to make sure the remote batteries are good and everything works as expected:

WinchTest.jpg


The winch slides into the receiver so it can be used in the front or the back of all 3 Jeeps; for the interstate run from upstate NY to Colorado I usually carry the winch in the back. It's out of the way there and can be moved up front in a minute when needed.

WinchInBack.jpg


Also part of the recovery gear are 4 aluminum sand ladders/recovery tracks. There won't be any sand on the trails I plan for this trip, but there may be mud, so I put these up top.

SandLadders.jpg


The sand ladders also serve as anchor points for the winch, in the event there aren't any convenient trees or rocks to winch from.


Also to be carried on the rack is a second spare. It's not in the photo above because the Jeep won't fit in the garage with it on top so I'll put it up there the night before we leave. The trip is planned on a fairly tight schedule which would be disrupted by trying to get a tire fixed or replaced, so I like to carry a second spare as a precaution.

Inside the cabin, the overhead/swing-down MOLLE panel has a few more recovery items. A small shovel and a small tree saw are mounted on the panel. The long cable is the extension for when the winch needs to be used in the rear receiver. It's also a jumper cable extension; the battery clamps are also mounted to the panel. Both of these plug into the winch cable that lives in the engine compartment; that cable reaches the winch when it's in the front receiver but the same cable also serves as a jumper cable with the clamps. The panel swings up against the inside of the hardtop so it's out of sight and the gear on it doesn't take up any real storage space.

SwingDownMolle(1).jpg


We're not camping on this trip so I don't have the full Trail Kitchen installed but we are bringing the fridge for snacks and lunch. It's on a homemade slide for easy access. Other gear in the cabin:

CabinAnnotated.jpg


  1. Battery and power panel for the fridge. This battery gets charged by the Jeep's alternator and can be used as a second battery to start the Jeep in case the main battery fails.
  2. Compressor and related supplies (hose, tire repair supplies).
  3. Ammo can containing the TrailVision camera system. The trails I'll be doing on this trip won't require the extra views the Trailvision system can provide, but it's in the Jeep in case I decide it will be helpful; it can be set up in a few minutes and offers a 3-camera view of the details of the trail ahead.
  4. First Aid kit; hanging on the rear slope of the roll bar. Out of the way but quickly accessible.
  5. (On the floor well behind the passenger seat) Hydraulic jack. Much quicker and easier than the factory jack.
  6. Winch/recovery bag. Includes winch line damper, ground anchor (bolts to the sand ladders), tree saver strap, snatch block, winch remote and other related gear.
  7. Tool bag.
  8. Cool Bag hanging on the seat back. Can be used to keep drinks and snacks cool on the road and easily accessible from the driver's seat and also can be used to carry lunch on hikes to picnic spots away from the Jeep. Also strapped to it is a picnic blanket to spread on the ground when we stop for lunch.
  9. 35,000-lb recovery strap in a roll bar bag on the vertical part of the main roll bar hoop. Out of the way but easily accessible.
  10. (Above the roll bars) Overhead/Swing-down Molle panel. And on the roof rack, the sand ladders and an extra spare.
  11. CB. This is only in the Jeep for expeditions, it's on a clip-on mount that hangs on the back of the center console.
  12. A pair of shackles hanging on pouches on an Overland Outfitters Zip & Go mount on the seat back.
  13. Small hatchet hanging in a pouch on the roll bar.

Most of the gear listed above doesn't live in the Jeep all the time, I put it in whatever Jeep I'm using before the trip.

Before leaving on the trip, I add the GPS coordinate of the trails we plan to do to the GPS.

GPSTrails.jpg


I have three of the same GPS, one for each Jeep. They're older models (Garmin 2555), and easily found on eBay for $50 or less so it's not a big investment to have 3, and they work just fine even though they're older. Usually I'll load the trails on two of them and bring the second one as a spare just in case the first one fails. If the trail is from a trail book, I'll also scan those pages and bring a printout on the trip, a piece of paper is much easier to deal with on the trail than a book that you need to hold open to a page.

TrailScan.jpg


Just about ready for the expedition :).
Jeff, do you have any more pics of the winch mount setup?
By the way, I have family in Denver who told me last week that Old Fall River Rd was still closed....I have not looked it up myself.
 

jscherb

Expedition Leader
Jeff, do you have any more pics of the winch mount setup?
By the way, I have family in Denver who told me last week that Old Fall River Rd was still closed....I have not looked it up myself.
I do have lots of pics of the winch mount, I'll post them shortly when I can open my computer.

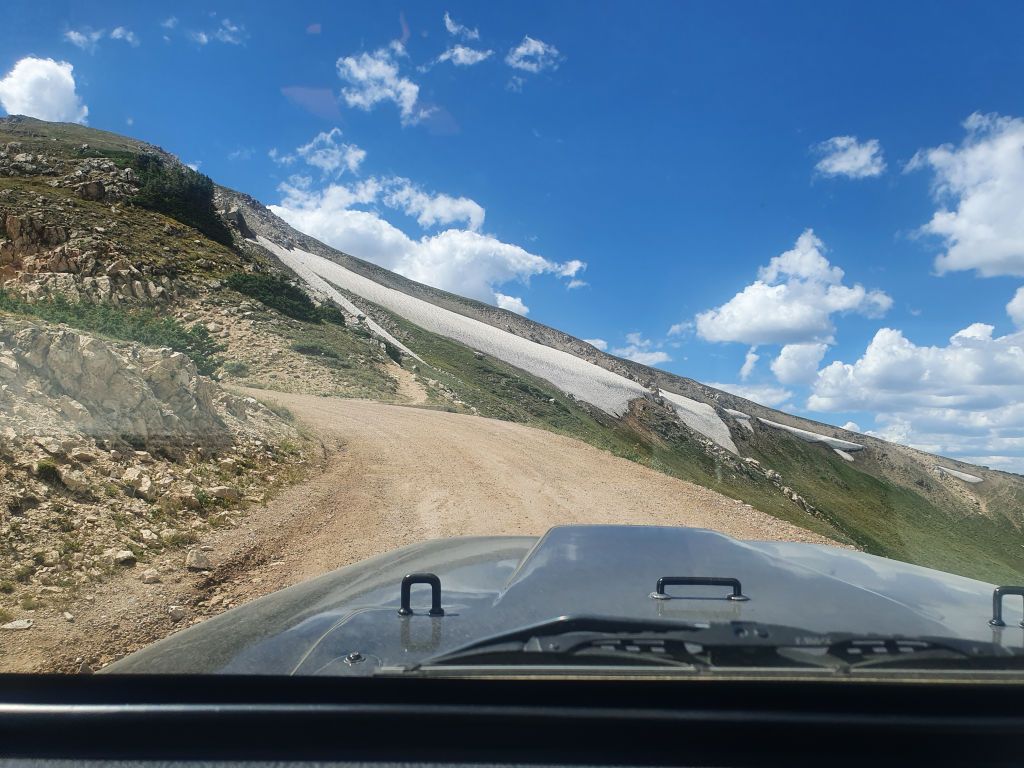
Fall River is open, I took this photo at 11,600' elevation near the west end the other day. Still snow up there but no snow near the road and some of the snow in the photo may remain all year every year.

OldFallRiver11600.jpg
 

jscherb

Expedition Leader
Jeff, do you have any more pics of the winch mount setup?

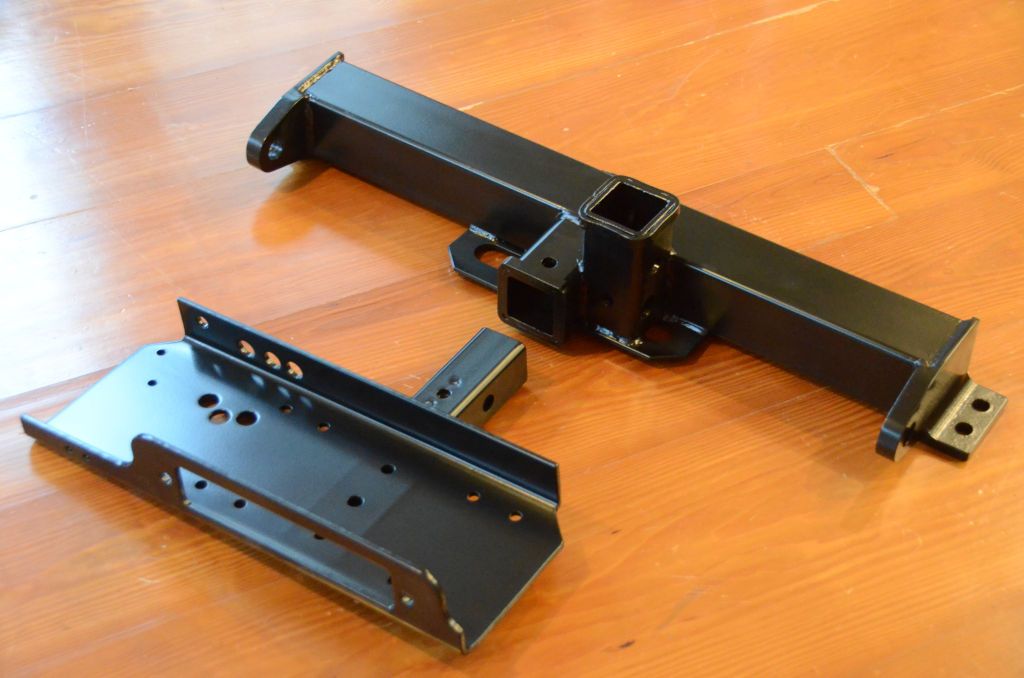
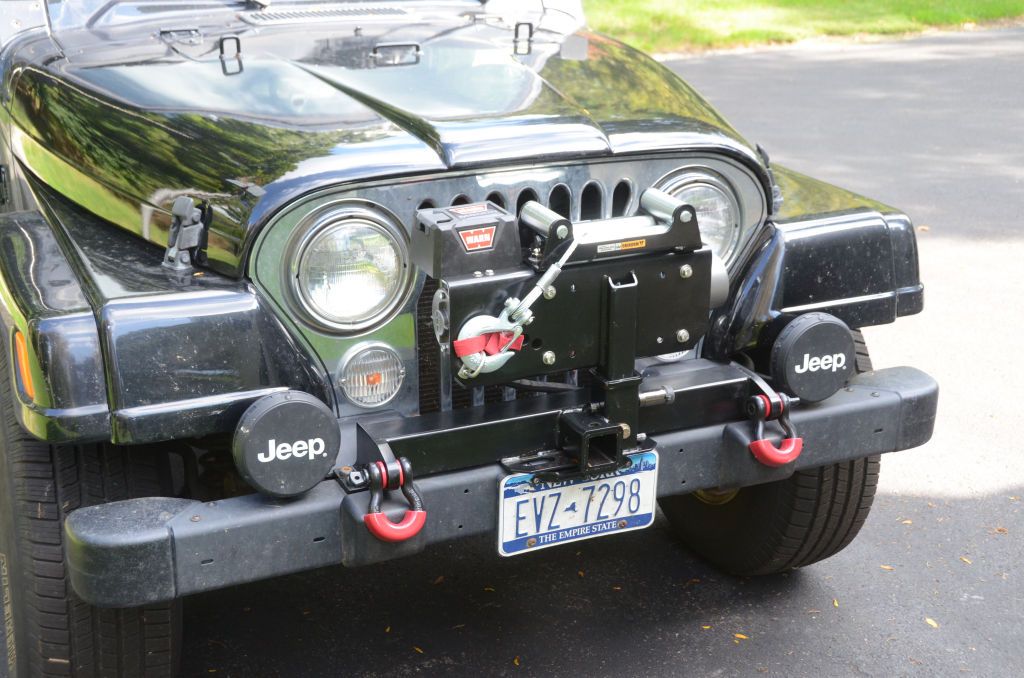
I built the winch mount from a used Class III hitch receiver I found on Craigslist. I added a vertical receiver for storing the winch, mounts for d-ring shackles on either side, and brackets to bolt it to the LJ's frame - the mount replaces the factory tow hooks and uses the same factory tow hook bolts. The finished components:

LJPowderCoat1_zpsxf0dusef.jpg


The mount and the winch live mostly in the garage; I only install the mount when I'm about to head out on an expedition.

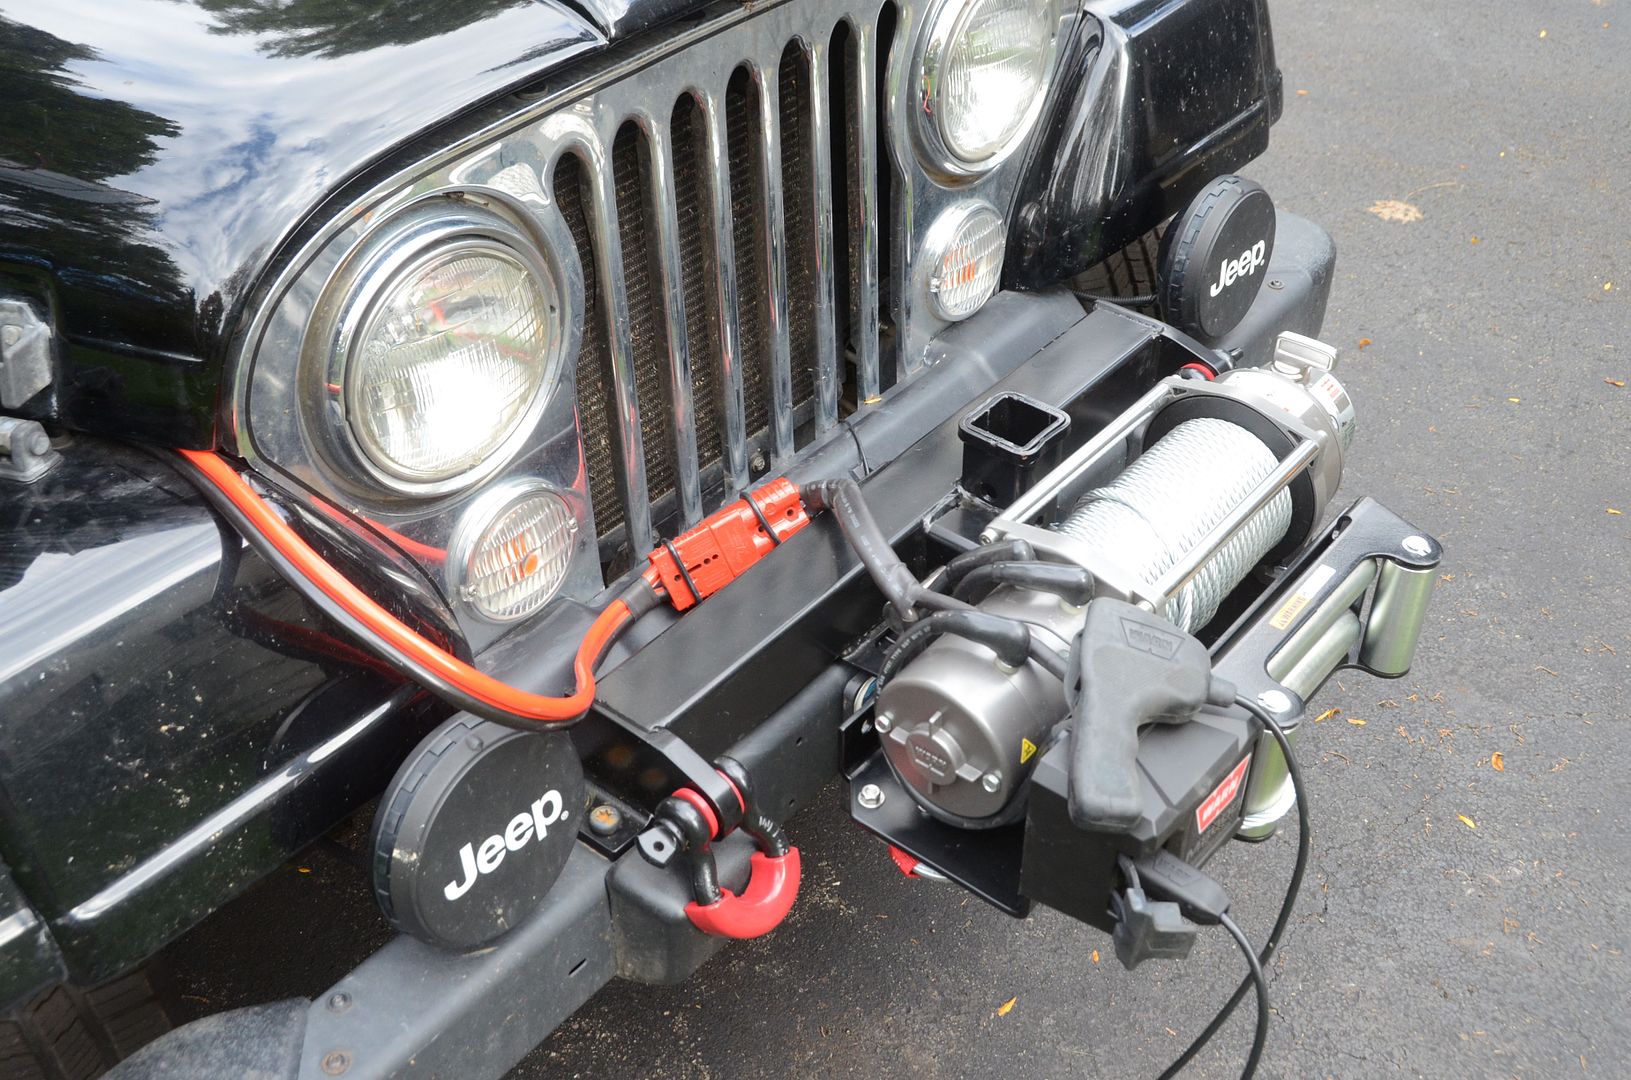
Bolted in place with the winch installed and ready for use:

LJDone1_zps1vbsp3bz.jpg


The photo above shows a wired winch control; since the photo was taken I added a wireless control and I keep the wired controller as a backup. The winch is powered with 2-gauge wire that is permanently connected to the battery and coiled under the hood. For use the wire is uncoiled from under the hood, it's got an Anderson connector on the end to hook up the power to the winch. There's an extension for when the winch is in the rear receiver (and also for use as a jumper cable).

The winch can be stowed vertically so it doesn't stick out in front of the bumper.

WinchWired2_zpssrurjjmd.jpg


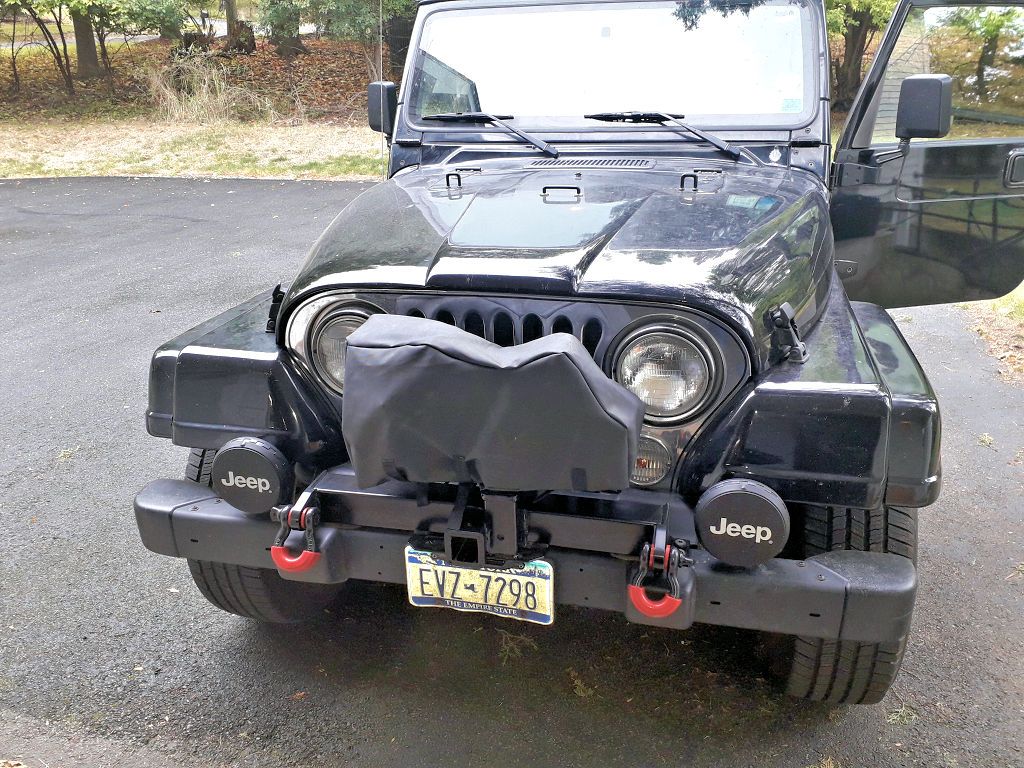
With a weatherproof cover made from scrap soft top fabric:

SoftTopWinchCover.jpg


I usually stow the winch out of the way in the rear receiver for the interstate trip out to the expedition area; once there the winch can be moved to the front.

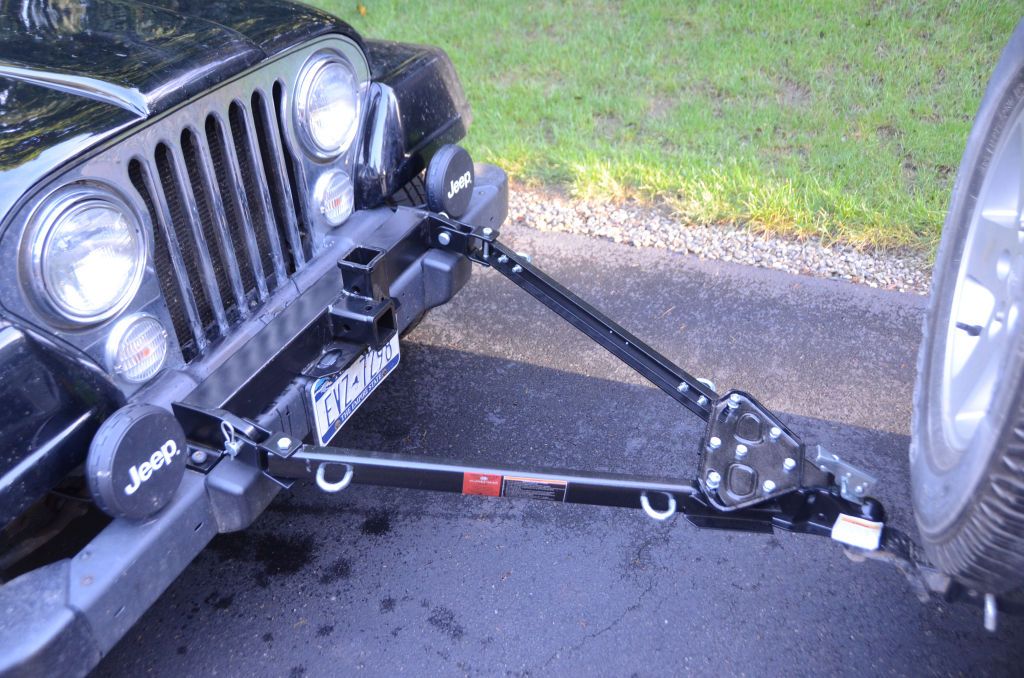
I use the shackles on the front of the mount to rig double-line pulls, but they also serve as tow bar mounts in the event I need to tow a Jeep somewhere:

TowBarTest1_zps5lvln9sk.jpg


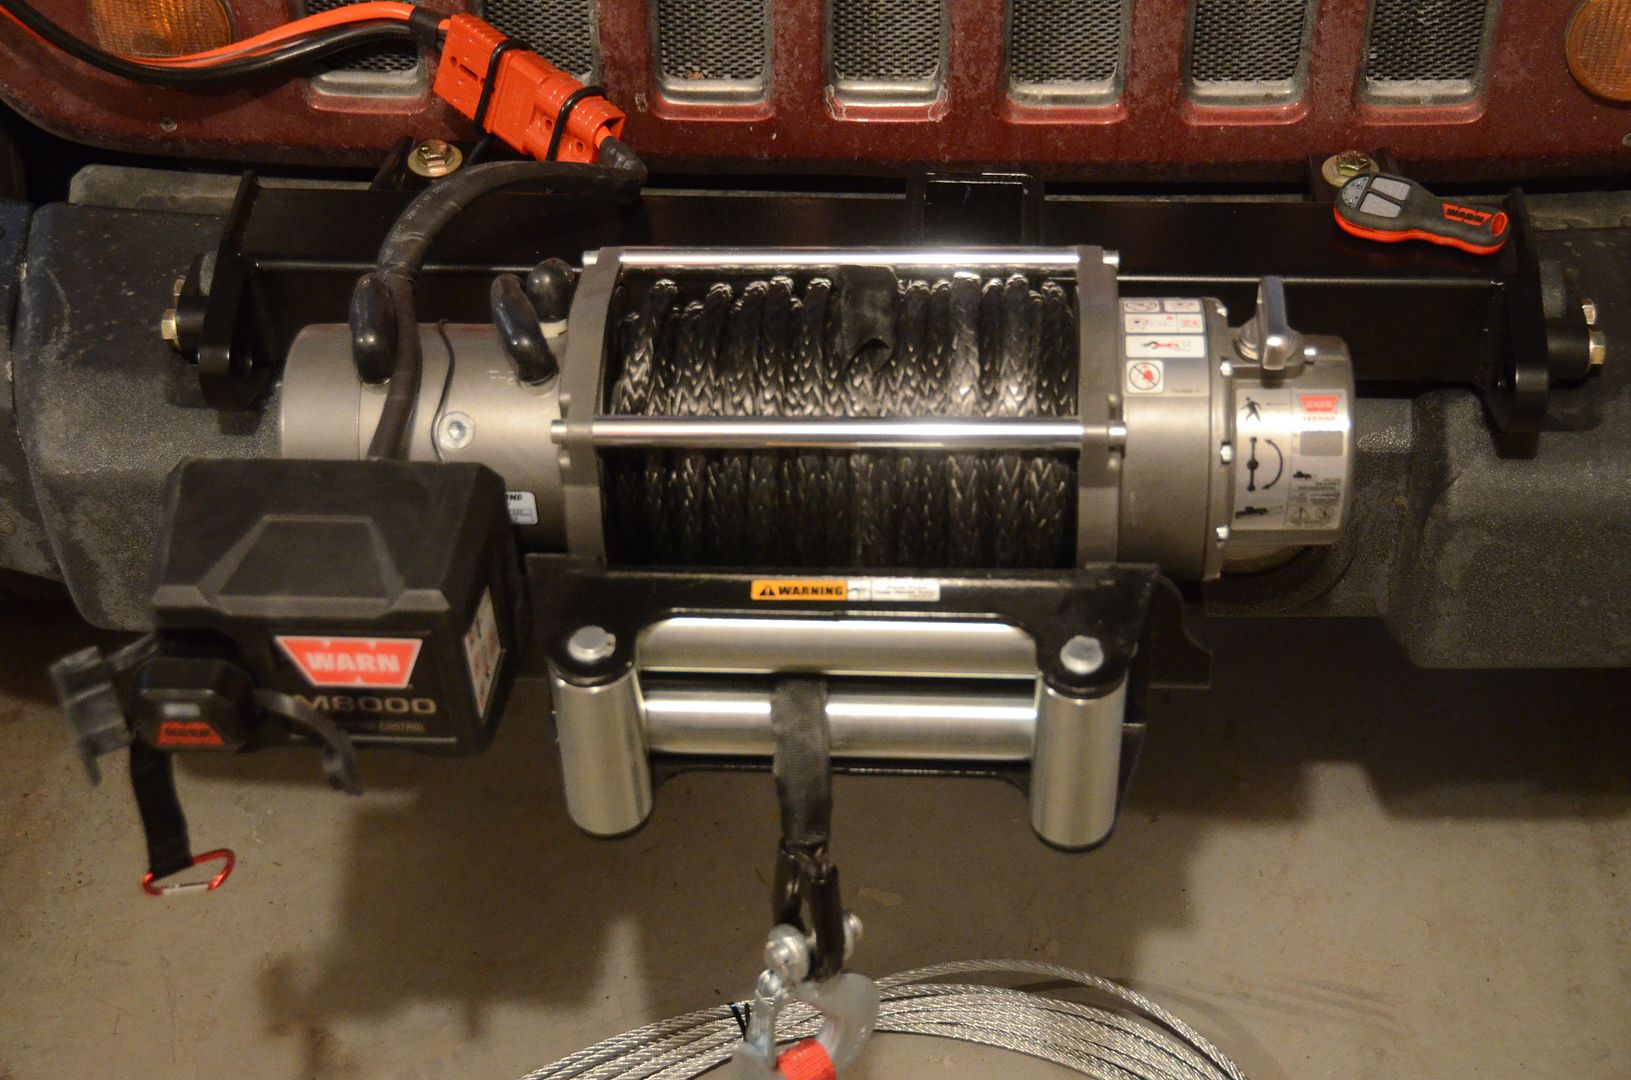
The photo above shows the winch in the JKU (also with the synthetic line I now use); the mount is very similar although it bolts to the Jeep differently than the LJ one does. If you're interested in seeing how the JKU version mounts I can post photos of that too. Let me know if you want any more detail on either the LJ or the JKU version.

Synthetic2_zpsrdirl0if.jpg
 

pith helmet

Well-known member
That is dandy, thank you. More on the JK mount would be great! I just put a Warn 10k in a lockable but moveable storage position in the bed of my truck and want to be able to swap it over to the JKU without putting a low hanging front receiver mount on it.
The photo above shows the winch in the JKU (also with the synthetic line I now use); the mount is very similar although it bolts to the Jeep differently than the LJ one does. If you're interested in seeing how the JKU version mounts I can post photos of that too. Let me know if you want any more detail on either the LJ or the JKU version.
 

Attachments

  • IMG_9726.jpg
    IMG_9726.jpg
    507.2 KB · Views: 8
  • IMG_9727.jpg
    IMG_9727.jpg
    476.6 KB · Views: 9

jscherb

Expedition Leader

jscherb

Expedition Leader
We're back from the "Hot Springs Expedition". Most of our Colorado trips are focused on trails and exploring Colorado history (abandoned mines, ghost towns, railroad sights) and this trip was about a few trails, trying out hot springs we hadn't been to before, exploring the headwaters of the Colorado river and exploring the historic railroad line west from Rollins Pass (we did the Rollins Pass trails last year). We didn't spend too much time taking photos on this trip, but here are a few.

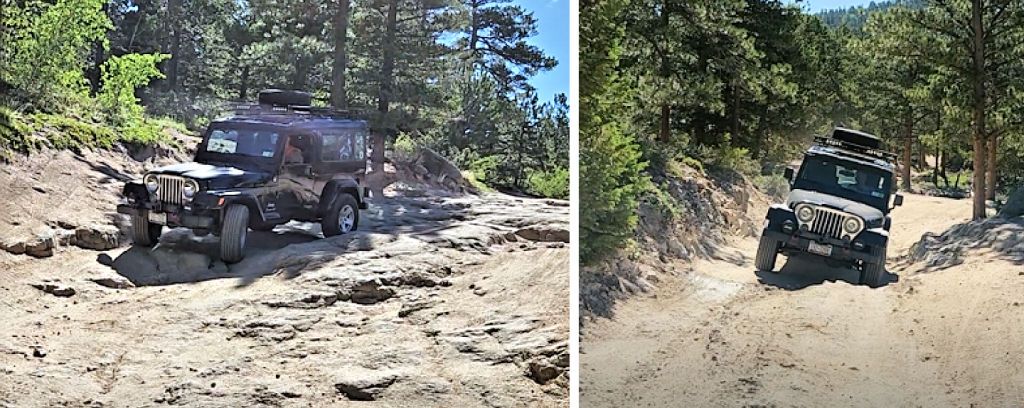
On Pole Hill Trail near Estes Park. It's not an especially challenging trail, but the line taken was important for a Jeep with only 2" of lift and 32" tires. I did drag the rear receiver once coming off a ledge.

PoleHillTrail2.jpg


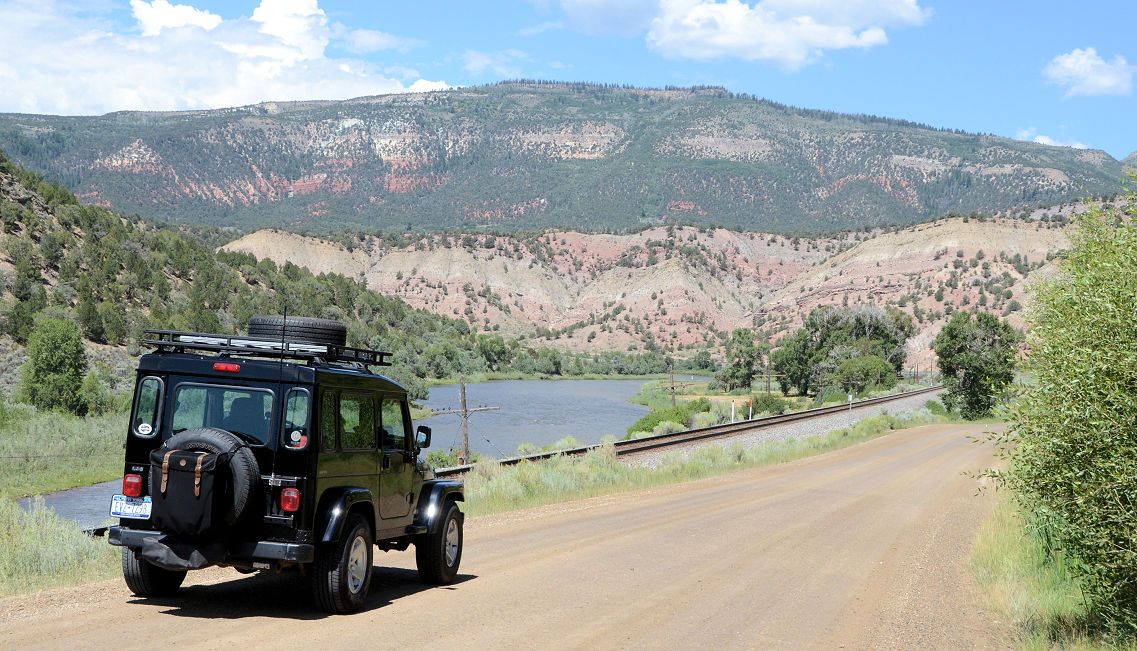
Off pavement (but not off road) following the railroad and the Colorado River:

ColoradoRiver1.jpg


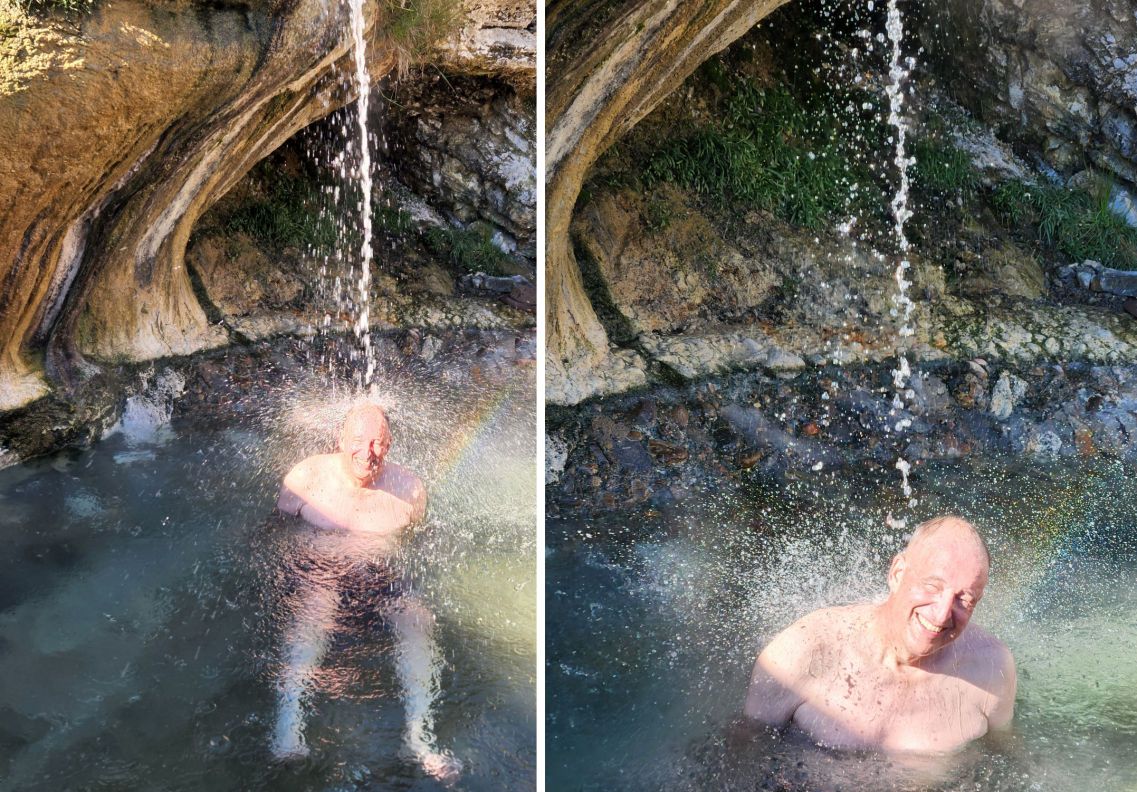
Enjoying the hot springs at Hot Sulphur Springs, pop. 800. They say these springs were used for bathing (both people and horses) by the Ute Indians and they've been a commercial enterprise since the mid 1800's. We're told the springs have the highest mineral content of any springs in Colorado and there are 19 pools there of various temperatures and minerals. It's a very rustic setting compared to some of the other springs one can visit in Colorado, well worth a visit.

HotSulphurSpringsUtePoolx2.jpg


We also visited Steamboat Springs and tried the springs there.

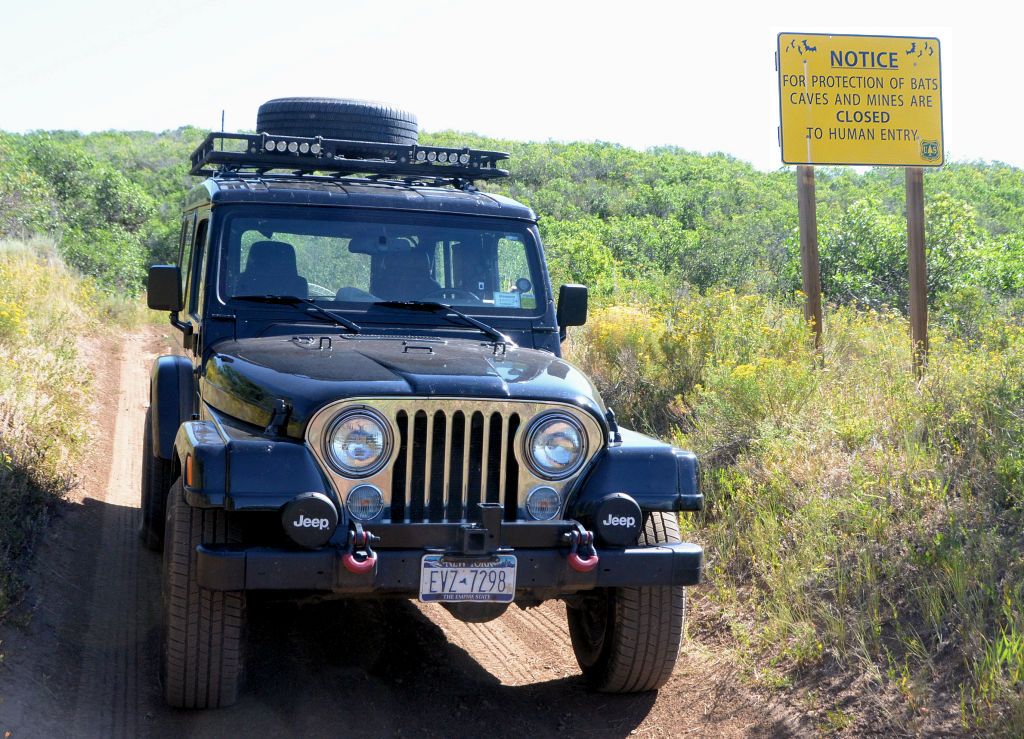
One stop on the trip was Glenwood Springs, we often stop there and enjoy staying at the Glenwood Springs Lodge which is part of the hot springs there. In the past I've explored most of the trails on the north rim of Glenwood Canyon from Coffee Pot Road to the Transfer Trail and all the trails in between so this time I decided to explore the south rim. I've always wanted to explore Hubbard's Cave - I've read conflicting reports about whether entering the cave is allowed so I decided to go see. About 100 yards into the 4wd trail I came across this sign (photo taken after I had turned around and was heading back out). No point in traveling some miles on a very narrow trail if there's no entry to the cave.

HubbardsCave4wdRoad.jpg


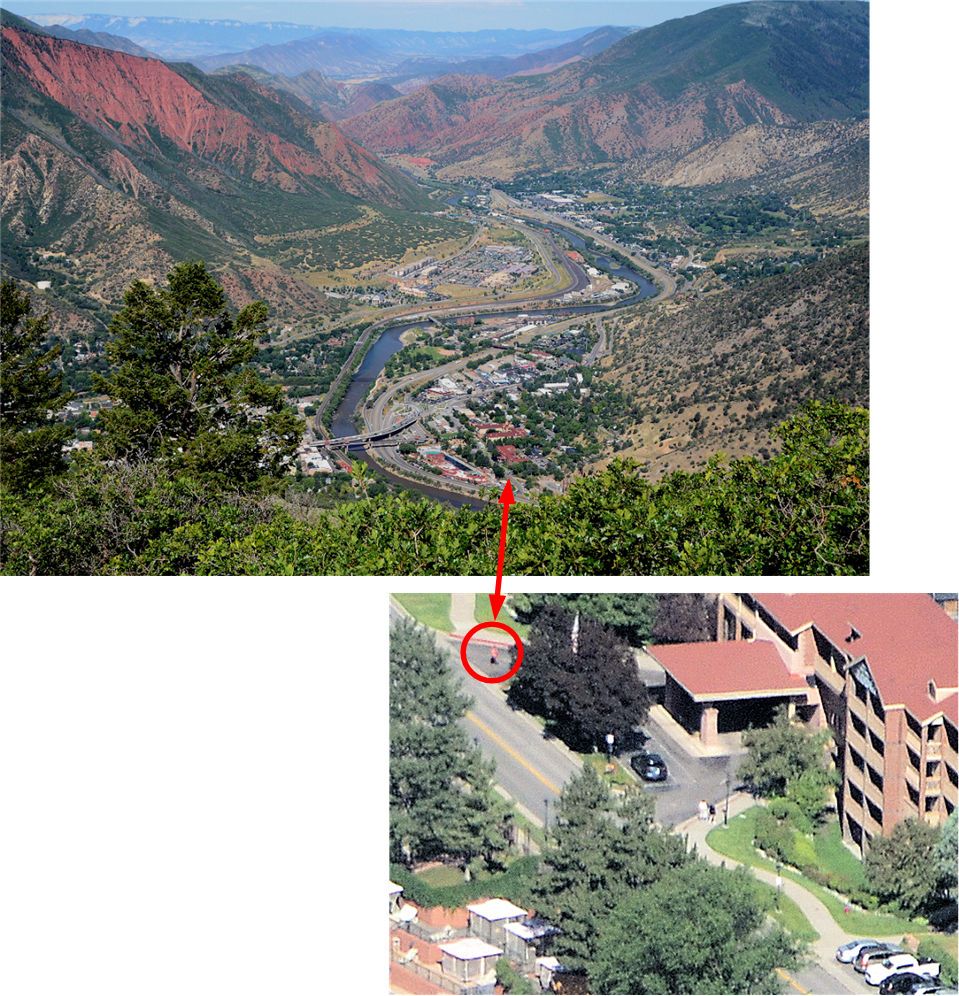
After that I found my way up to the rim overlooking the town of Glenwood Springs. Just as I was about to reach the rim, my wife called - she wasn't with me that day because she decided to get a spa treatment. She was just about to head over to the spa and wanted to let me know. I told her to wait outside the hotel for just a minute because I was almost to the rim. At the rim I took these photos...

GlenwoodLookoutFoundHer.jpg


The rim is about a half mile higher in elevation than the town, and I'd estimate the hotel is about a half mile horizontally from where I was standing on the rim. I don't have a very long telephoto lens because almost all of my photography can be done with an 18-200 zoom, but it is a very sharp Nikon lens and my camera has enough pixels that I was able to zoom in to catch her standing there. Fun.

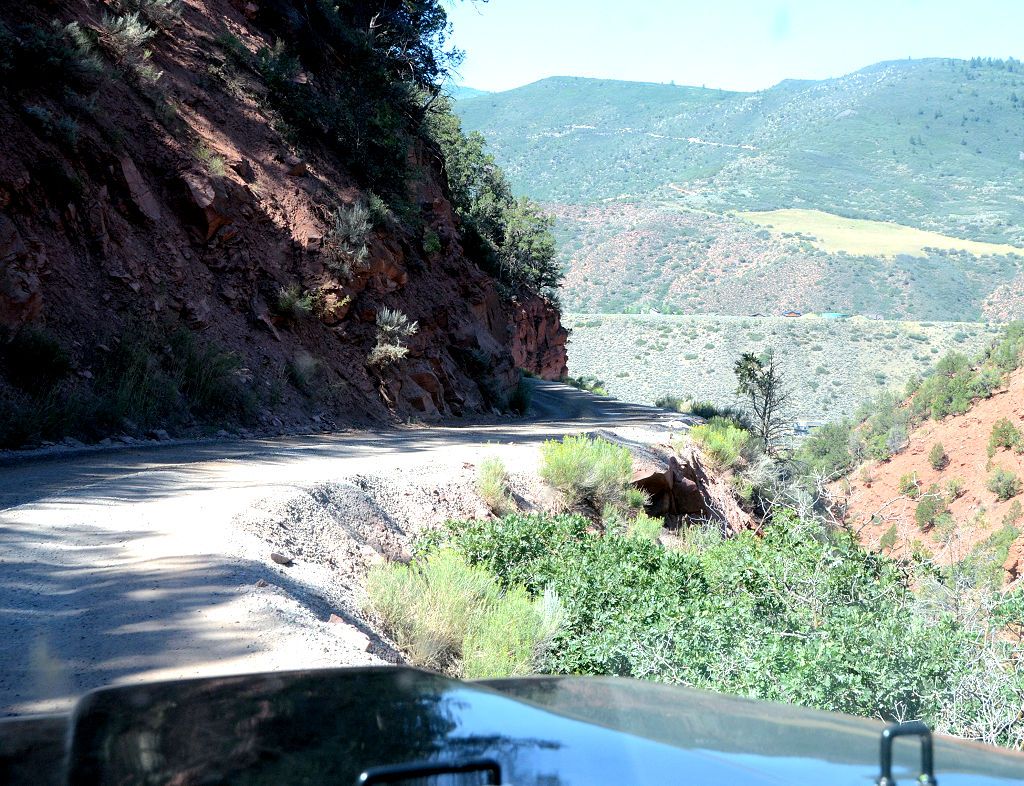
More fun: The last half mile down from the south rim is Red Canyon; the road there is a very narrow shelf road with almost no room for passing most of its length. Just after turning the corner pictured below, I came face to face with a semi truck and trailer. Luckily it was in the one spot where passing was possible. I stopped to talk to the driver as I passed and he said his GPS told him to go this way. I told him the road got a lot narrower right around the bend and he said he planned to back down to the switchback and turn around. I offered to spot for him but he said he would be fine so I went on my way.

RedCanyon.jpg


We did a lot more than I showed above but like I said we didn't spend much time taking photos on this trip.

As usual, the LJ performed great - it's comfortable and quiet at 75+ mph across the Great Plains states and plenty capable crawling over rocks on narrow mountain trails.

The next long trip planned for the LJ will be at the end of October when I plan to drive it out to Las Vegas to attend the SEMA Show. I also plan a trail or two along the way, more on that when the trip happens.
 
Last edited:

Forum statistics

Threads
188,032
Messages
2,901,443
Members
229,352
Latest member
Baartmanusa
Top