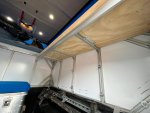
I decided to build my own Pop Top camper

97heavyweight

Well-known member
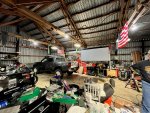
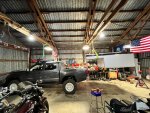
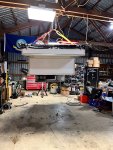
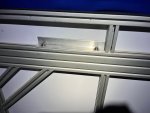
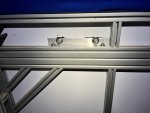
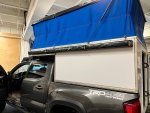
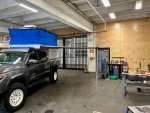
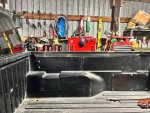
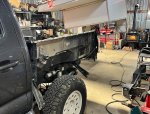
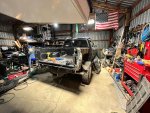
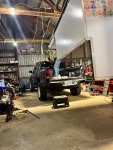
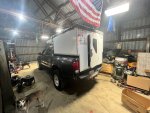
With the camper removed I drove into town to pressure wash the bed and my buddy mentioned I should weigh. So with full armor, OME BP-51 suspension, a large fridge and two dogs plus all kinds of gear and tools under the rear seat delete the truck came in at 5250lbs. Also with the camper off the truck has quite the rake.
 

Attachments

  • 2.jpg
    2.jpg
    937.9 KB · Views: 175
  • 4.jpg
    4.jpg
    954.8 KB · Views: 173
  • 5.jpg
    5.jpg
    847.5 KB · Views: 146
  • 7.jpg
    7.jpg
    1,022.7 KB · Views: 143
  • 6.jpg
    6.jpg
    705.4 KB · Views: 147
  • 10.jpg
    10.jpg
    967.1 KB · Views: 130
Last edited:

97heavyweight

Well-known member
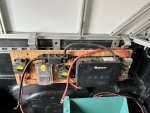
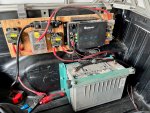
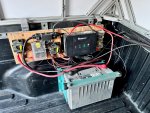
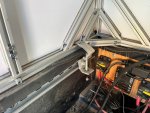
With the camper successfully reinstalled it was time to get the interior back together. The House to starter battery had to be replaced because the original was too short now, as well as the fridge power to the fuse panel. The last item was to extend the solar panel wires and instead of redoing them completely I added an anderson plug where the camper and truck meet. Last photo is where it was originally.

Hoping to get the little compartments that are built into the bed replaced with sheet metal and sealed up becasue those suckers let all kinds of dust and water in. Then get the couch finished and reinstalled.
 

Attachments

  • 26.jpg
    26.jpg
    699.7 KB · Views: 75
  • 27.jpg
    27.jpg
    947.5 KB · Views: 75
  • 28.jpg
    28.jpg
    866.6 KB · Views: 76
  • 29.jpg
    29.jpg
    733.6 KB · Views: 73

Utleymu

New member
First off, thanks so much for documenting your entire process on this build, even the mistakes. I just finished reading through the entire thread and came away with a ton of inspiration and learned a lot. Your camper looks fantastic, I'm hoping I can build something similar and this is a huge resource for me. I do have a couple questions, if you have some time I'd really appreciate your insight!

Over the years, have you had any issues with the aluminum extrusion frame? I've read in other places that the hardware tends to loosen from vibrations over time. Not sure if that was just hearsay, but I'm really interested to see if you've encountered any of that in practice.

I know there are different methods to connect the aluminum extrusions. Would you recommend one method or connector over the others?

I noticed they make extrusion with some sides flat (without the channel). Do you think it's a good idea to use these on sides that attach to the exterior panels or sides that seal? I'm just thinking it might be easier to get a seal or attach the 3m adhesive to flat pieces.

Thanks again for documenting this build!
 

97heavyweight

Well-known member
Over the years, have you had any issues with the aluminum extrusion frame? I've read in other places that the hardware tends to loosen from vibrations over time. Not sure if that was just hearsay, but I'm really interested to see if you've encountered any of that in practice.
I believe it depends on the hardware. I used internal fasteners where you have to mill a hole for the fastener to sit. It really locks everything into place and in the 2 years and thousands of miles of dirt i have not had a single fastener loosen up on me. I do recommend that you build the frame in some sort of CAD program and send that CAD file to whoever you purchase the 80/20 from so they can cut and mill the ends. It was quite the long and daunting task to mill out every hole and there are about 200+.

I know there are different methods to connect the aluminum extrusions. Would you recommend one method or connector over the others?
See above explanation. I also have used the external fasteners but i used a modified carriage bolt that i slid into the channel and used a locking nut to ensure it wouldn't come loose. Not sure how that would've worked using the standard external fastener with a bolt going into a t-nut in the channel.

I noticed they make extrusion with some sides flat (without the channel). Do you think it's a good idea to use these on sides that attach to the exterior panels or sides that seal? I'm just thinking it might be easier to get a seal or attach the 3m adhesive to flat pieces.
All of the outer facing framing is smooth with no channel for the exacting reason you noted. It allows more surface area. the bottom and corner pieces only have channel on two adjacent sides.

Feel free to ask any questions.
 

Utleymu

New member
Over the years, have you had any issues with the aluminum extrusion frame? I've read in other places that the hardware tends to loosen from vibrations over time. Not sure if that was just hearsay, but I'm really interested to see if you've encountered any of that in practice.
I believe it depends on the hardware. I used internal fasteners where you have to mill a hole for the fastener to sit. It really locks everything into place and in the 2 years and thousands of miles of dirt i have not had a single fastener loosen up on me. I do recommend that you build the frame in some sort of CAD program and send that CAD file to whoever you purchase the 80/20 from so they can cut and mill the ends. It was quite the long and daunting task to mill out every hole and there are about 200+.

I know there are different methods to connect the aluminum extrusions. Would you recommend one method or connector over the others?
See above explanation. I also have used the external fasteners but i used a modified carriage bolt that i slid into the channel and used a locking nut to ensure it wouldn't come loose. Not sure how that would've worked using the standard external fastener with a bolt going into a t-nut in the channel.

I noticed they make extrusion with some sides flat (without the channel). Do you think it's a good idea to use these on sides that attach to the exterior panels or sides that seal? I'm just thinking it might be easier to get a seal or attach the 3m adhesive to flat pieces.
All of the outer facing framing is smooth with no channel for the exacting reason you noted. It allows more surface area. the bottom and corner pieces only have channel on two adjacent sides.

Feel free to ask any questions.
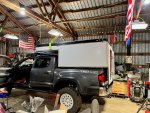
Thanks for that info, I feel much better about the fasteners. I'll definitely try to get my cad design as detailed as possible so I can avoid milling all the connections. Thanks for the helpful tips!
 

97heavyweight

Well-known member
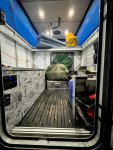
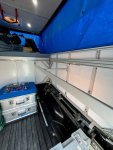
It took some testing and some additional waterproofing (to which I still need more), but I finally got the interior back together and finished the storage bench.
 

Attachments

  • 36.jpg
    36.jpg
    689.5 KB · Views: 106

97heavyweight

Well-known member
I was going to make my own awning and was just waiting on a small canvas shop to get back to me about making the awning bag. With all that waiting I was able to score a used James Baroud Large Classic awning. The best part about it is that I can flush mount it to the camper thus preventing rain dripping between camper and awning.
Initially I was going to through bolt my awning into the frame using T-Nuts, but since the JB awning uses extruded aluminum and captured bolts that was out of the question. So instead I used some angle aluminum which in theory should transfer all weight/movement into the frame. I also used VHB tape between awning and camper and around the holes.
Overall i'm super happy with how it came out.
 

Attachments

  • 32.jpg
    32.jpg
    444.6 KB · Views: 59
  • 33.jpg
    33.jpg
    531.8 KB · Views: 60
  • 34.jpg
    34.jpg
    608.5 KB · Views: 63
  • 35.jpg
    35.jpg
    733 KB · Views: 58

97heavyweight

Well-known member
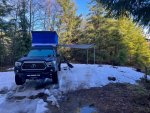
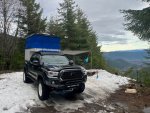
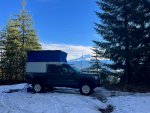
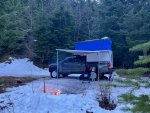
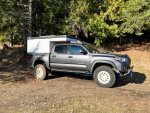
Had the opportunity to go out and use the camper after all the modifications to how it sits on the truck and the new awning. I have one area at the rear driver side where the camper meets the truck bed that has a slight leak which is way better than it was before. Overall the camper and awning did great and if you live in the PNW and do any fall/spring/winter camping you know how crucial an awning is.

I also arrived at this site in the dark and the forecast was suppose to be cloudy all weekend. It was nice to wake up to this amazing view of Rainier in all her glory!
 

Attachments

  • 37.jpg
    37.jpg
    508.5 KB · Views: 64
  • 38.jpg
    38.jpg
    589.1 KB · Views: 60
  • 39.jpg
    39.jpg
    1.2 MB · Views: 63
  • 41.jpg
    41.jpg
    931.3 KB · Views: 67
  • 40.jpg
    40.jpg
    816.2 KB · Views: 67
  • 42.jpg
    42.jpg
    937.3 KB · Views: 66

97heavyweight

Well-known member
We are going to go back in time a little to October. After I replaced the camper to truck gasket I had new and worse leaks than ever before coming from where the truck bed and fender meet. I think in my anger and frustration I kind of blanked that 5 weekend period out.

I went back to my buddies shop and pulled the camper off. Unfortunately the Sikaflex 252 did not do it's job and the gasket subsequently fell off.

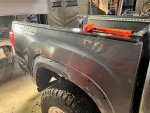
I then started the fun task of ripping my truck bed apart and effectively turning it into a boat. If this thing doesn't float i'd be surprised. There is now a layer of Sikaflex 221 where the bed and fender meet. I also used a can of spray foam to seal up the top of the fender well cavity and then painted it. I know it's overkill, but I just want it to stop leaking. I also used this time to make custom bedrails. I used 3/8" ABS plastic and cut it to follow the trucks body lines. If you own a tacoma then you understand the huge gap that exists between the front bed rail and the side bed rail. I glued a piece of scrap ABS to the front of the bed at this gap and used tape on the inside to make a cavity and then filled it with Sikaflex.

While is was doing all this my buddy decided to do me a solid and started buffing out the multitude of scratches on the truck.

It has been several months since this work and i'm pleased to say the worst of the leaks is fixed. I still get an ounce over a long weekend in the front corners, but that is way better than before.
 

Attachments

  • 54.jpg
    54.jpg
    436.4 KB · Views: 50
  • 55.jpg
    55.jpg
    463 KB · Views: 47
  • 57.jpg
    57.jpg
    383.8 KB · Views: 47
  • 56.jpg
    56.jpg
    405 KB · Views: 49
  • 58.jpg
    58.jpg
    721.6 KB · Views: 49
  • 59.jpg
    59.jpg
    917.9 KB · Views: 50
  • 60.jpg
    60.jpg
    742.5 KB · Views: 58
  • 62.jpg
    62.jpg
    1.4 MB · Views: 59

97heavyweight

Well-known member
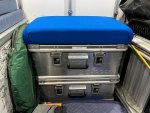
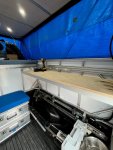
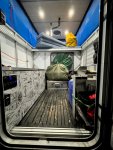
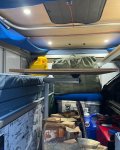
Now to present time. This past weekend I wrapped up some projects to get ready for the super cold oregon desert this weekend. I installed a coupling for a diesel heater, as well as a countertop. I also made a cushion for my Zarges boxes so i have more seating and when I get back i'll be installing a Lagun Table system to allow even more use of the camper during the cold winter months. So far so good and it's been a great start to the year.
 

Attachments

  • 46.jpg
    46.jpg
    608.6 KB · Views: 68
  • 47.jpg
    47.jpg
    883.6 KB · Views: 73
  • 49.jpg
    49.jpg
    760.3 KB · Views: 69
  • 50.jpg
    50.jpg
    743.8 KB · Views: 66
  • 51.jpg
    51.jpg
    614.9 KB · Views: 66
  • 52.jpg
    52.jpg
    703.9 KB · Views: 67
  • 53.jpg
    53.jpg
    618.2 KB · Views: 65

Spencer for Hire

Active member
Nice build. How do you think you will attach the Lagun? I see you are using the boxes for seats. How come you didn't build fixed benches with storage that you could remove?
Thank you for your time.
 

97heavyweight

Well-known member
I do have seating/storage running along the driver side. The boxes with cushion is just some additional seating. I attached the table to that seating/storage area.

FYI, for anyone using the Lagun table I recommend some anti-seize the first time you put the nut on the bolt that they provide. I was still in the fitment process trying to figure out how to mount the table and about half way down the bolt the nut galled and I had to cut the bolt to remove it. I was not a happy camper.
 

Attachments

  • 36.jpg
    36.jpg
    689.5 KB · Views: 66
  • 63.jpg
    63.jpg
    314.8 KB · Views: 65

Spencer for Hire

Active member
I do have seating/storage running along the driver side. The boxes with cushion is just some additional seating. I attached the table to that seating/storage area.

FYI, for anyone using the Lagun table I recommend some anti-seize the first time you put the nut on the bolt that they provide. I was still in the fitment process trying to figure out how to mount the table and about half way down the bolt the nut galled and I had to cut the bolt to remove it. I was not a happy camper.
Thanks. I see them now. Do you plan to put a floor in for more insulation.and use as a base plate?
 

97heavyweight

Well-known member
Thanks. I see them now. Do you plan to put a floor in for more insulation.and use as a base plate?

What you see is what i'm doing. I had thought about a floor, but decided that the possibility of unseen water getting under it and sitting for longer than i'd like wasn't worth it. During the winter I throw down a thick packing blanket.
 

97heavyweight

Well-known member
On my recent trip I had the opportunity to weight the truck in all her glory. This is fully loaded with two passengers and two dogs and gear and food for a long cold weekend.

The truck without camper with a 1/4 tank of gas and no people or dogs weighs about 5268lbs.
The truck fully loaded with 3/4 tank of gas weighs 6950lbs.

I removed and weighed all of the gear that was in the camper so I could get an estimate on the weight of the camper. The camper with electrical system weighs just under 700lbs and minus the electrical it weighs about 600lbs. Which I am honestly pretty pleased with, but damn gear adds up and weighs a lot.
 

Attachments

  • 64.jpg
    64.jpg
    462.9 KB · Views: 19

Forum statistics

Threads
188,368
Messages
2,903,823
Members
230,227
Latest member
banshee01
Top