Joinin' the Montero Club with a Gen 2.5

Hey Josh,

That rear bumper is looking good! Are you doing all the welding yourself? I am really itching to get into welding. What kind of setup do you use? Thanks!
 

jlocster

Explorer
Thanks eurosonic...I'm not sure how heavy it's gonna be in the end, but it's beginning to get up there. I've already started trying to think of ways to decrease the weight. Maybe some lightening holes are in order?

Hey Brian...Thanks dude. Yeah, I'm doing the welding myself. I just bought a Hobart 210 MVP for myself for Christmas and love it. I've had a 110V Lincoln for many years that I mostly use for sheet metal work, but it wasn't up to the task of safely welding the thicker stock used in a bumper. An added benefit of the Hobart is that it can run on either 110V or 220V and weld both light and heavy gauge material.

If you're interested in getting into welding, I'd say just get a welder and do it, man. There's a bit of an upfront cost, but it's money well spent. A welder will pay for itself many times over in the long run. Welding a functional bead is not as hard as you might think...you'll pick it up fast. It's just a big glue gun.
 
Last edited:

jlocster

Explorer
Dual Tire Carrier Swing-out Build, Part IV

Some more progress on the bumper today.

Started with tacking the swing-out uprights in place.
WP_20140210_001.jpg


Test fit after adding a support brace.
WP_20140210_002.jpg


Both swing-outs in place with the tire mount tailpieces. I left the tailpieces long so I could fine tune the wheel placement. They'll be shortened.
WP_20140210_003.jpg


WP_20140210_008.jpg


Proof of concept. These are 30" tires. I spaced the mounts to accommodate 33" tires as I plan to eventually run 235/85 R16s.
WP_20140210_004.jpg
 
Last edited:

jlocster

Explorer
Dual Tire Carrier Swing-out Build, Part V

The saga continues....

1/4" plate drilled for wheel studs.
WP_20140211_001.jpg


Wheel mount plate finished.
WP_20140211_003.jpg


Wheel mount plate and studs tacked.
WP_20140211_009.jpg


Side view.
WP_20140211_011.jpg


Test fit light weight.
WP_20140211_013.jpg


Test fit heavy weight.
WP_20140211_016.jpg


Side view with tires.
WP_20140211_017.jpg
 
Last edited:

jlocster

Explorer
The circles I bought at the metal supply house...8" round by 1/4". They would have worked fine round but I decided to start putting the bumper on a diet.
 

off-roader

Expedition Leader
Like the progress and the bumper. I'm no fabricator so I can only guess at how complex this might be but my only suggestion would have been to angle the ends of the bumper maybe ~5 degress so it hugs the rear end better. This would also mean angling the tire carriers as well but hey, what's a few angle cuts between friends LOL.

Also curious to see how you plan to lock them in place (open and closed).
 

jlocster

Explorer
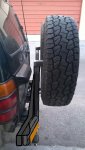
off-roader, I'm bothered by the bumper not hugging the body more, as well. Aesthetically and functionally, keeping the bumper tight to the body works better. I've thought a lot about this issue. Problem is I'm planning on using 6 1/2 " trailer lights on the bumper since the stock ones will be obscured by the tires.
WP_20140212_006.jpg


bumper+with+lights.jpg


In order for them to fit as shown, I need the full length of the bumper to be flat (I guess I could curve the very ends where the hinges are and still have room for the lights). Smaller lights would eliminate this issue by taking up less space and allow for more curve. I'm open to other suggestions on lighting if anyone has any ideas.

For latches I was planning on using these flush latch De-Sta-Co units.
WP_20140212_008.jpg


I'm currently rethinking my latch design and may switch to these 90 degree ones.
destaco+90.jpg


I'm still fleshing out the latching.

I'm also thinking about redoing the vertical supports like so.
redesign.jpg


I don't like how the diagonal braces currently are on the side of the swing-outs opposite the hinges. This redesign would put the bracing and the weight of the tire closer to the hinge and allow me to shorten the length of the swing-out. A more robust design in my book....but then again, with the swing-outs already being so short, maybe it doesn't really matter. At least, that's what I initially figured.

All input is appreciated.

On a side note, I saw this while driving home from work today.
WP_20140212_003.jpg
 
Last edited:

eurosonic

Expedition Leader
How about two smaller angles on each side so you can bring them in close to the hinges?

Mayve try something like this. (ignore the bottom bar)

hg_01_b.jpg
 

off-roader

Expedition Leader
What I had in mind. If you make the bend close to where the light ends, it should still fit both of them, assuming the dimensions are relatively close/accurate. Amber block of color is the amber light in your drawing... mounted in the same spot but just angled with the rest of the bumper.
JLocsterBumperDesignMod.jpg
 

Attachments

  • JLocsterBumperDesignMod.jpg
    JLocsterBumperDesignMod.jpg
    78.1 KB · Views: 32
Last edited:
On a side note, I saw this while driving home from work today.
WP_20140212_003.jpg
[/QUOTE]

WOW! I WANT! Cool bumper build btw. I like Off-Roader's idea on light placement. You'll need to fit some back up lights in there somewhere too!
 

monkey620

New member
jlocster, love all the mods on your Montero I've been reading about. The bumper is looking great. On an unrelated note, I was wondering if you could answer a question. As I read through the last 20 pages or so :drool: I noticed your heated seats buttons on the front of your console. Mine are down low beside the seats by the seatbelts. In the position where yours are I have a panel with two openings for switched and behind it I found an open electric plug that looks like it's supposed to connect to something. Any idea what that is? Did you move your heated seats to that location? Was or is there supposed to be something else there. Just curious as I dig more into my new (to me) Montero. Thanks a lot!

Cheers,

Matt
 

jeep-N-montero

Expedition Leader
jlocster, love all the mods on your Montero I've been reading about. The bumper is looking great. On an unrelated note, I was wondering if you could answer a question. As I read through the last 20 pages or so :drool: I noticed your heated seats buttons on the front of your console. Mine are down low beside the seats by the seatbelts. In the position where yours are I have a panel with two openings for switched and behind it I found an open electric plug that looks like it's supposed to connect to something. Any idea what that is? Did you move your heated seats to that location? Was or is there supposed to be something else there. Just curious as I dig more into my new (to me) Montero. Thanks a lot!

Cheers,

Matt

He mentioned that spot is normally used by trucks equipped with the adjustable suspension, some folks who do not have this feature have moved the heated seat switches to this position, pretty straightforward and easy to do.
 

Forum statistics

Threads
188,470
Messages
2,905,509
Members
230,428
Latest member
jacob_lashell
Top