You are using an out of date browser. It may not display this or other websites correctly.
You should upgrade or use an alternative browser.
You should upgrade or use an alternative browser.
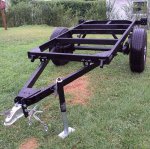
Just purchased a Military trailer to build a family hauler
- Thread starter Mark Harley
- Start date
Mark Harley
Expedition Leader
Rain Delay in Pittsburgh
A down pour when I got home from work put a hault on todays work.
I wanted to get the tail lights wired and the license plate mounted to the frame
before the tub was put back on.
I did have some progress at work. I sand blasted the tailgate pins, tub mount tabs and helecopter lift rings and bolts. They were all in great condition and cleaned up nice.
They will all get a coat of silver paint. " a nice contrast to the black and red.
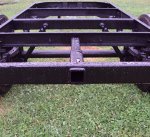
I finished the rear reciever tube and had it welded at work. Much better job than I could have done and it only cost me a lunch!
Hope tomorrow brings good weather so I can get the taillights wired.
I started to design the chuck wagon kitchen.
I have a Griswald three burner cast iron camp stove and a small grill I picked up on ebay.
I want to make the cook kitchen out of aluminum diamond plate. This is still in the drawing stage.
Attachments
Mark Harley
Expedition Leader
Too hot to work!
It has been way too hot for working on the trailer, Luckly I got everything painted last week and the parts have baked in the sun. I did do some easy work on the trailer.
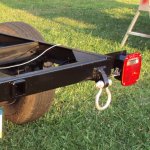
After sandblasting the original lift / tow rings and hardware I sprayed them with metalic silver they add a little color to the build. The tub mounting bolts also got cleaned and painted black.
I mounted the license plate on the rear cross member.
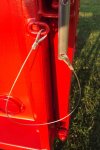
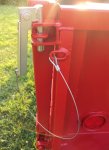
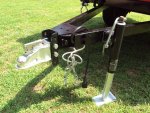
I made two tailgate pin KEEPERS out of 1/8" cable, thimbles and crimps to keep them from walking off or getting lost.
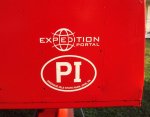
I did get some EXPO stickers and slapped them on the sides and front of the tub.
The white sticker on the front goes well with my Presque Isle sticker.
This is our closest beach and we spend lots of time exploring.
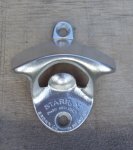
I did find one other add on, A bottle opener. A must have for camping.
This will be bolted on the front wall of the trailer.
Attachments
Mark Harley
Expedition Leader
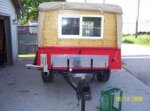
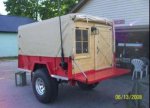
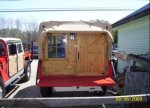
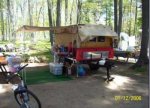
Trailer HUT on Steel Solders dot com
I post on SS website also and like to see what is being built on there,
I came across these pictures and it started the wheels turning, This may be anouther build I need to do!
I post on SS website also and like to see what is being built on there,
I came across these pictures and it started the wheels turning, This may be anouther build I need to do!
Attachments
Mark Harley
Expedition Leader
More work finished today
I started the trailer wiring last night and ran into some snags.
I bought a set of large Grotte stake body tail lights that have a back up light too.
I used a 7 position plug with 8 foot sealed lead from the truck to the trailer.
All as going well and I had ran the wires from a junction box to the taillights and went color to color, The right light went together fast and I sealed it up, The left light had a mind of it's own, I sat for half an hour trying to figure what I was doing wrong.
After several attempts I figured it out The taillight had a plug on both sides to use on Right or left position. The other was right specifc. ONE RED WIRE to bridge the circuit was not on the side I was useing. I swotched it in the housing and now it works great!
I still have to run a blue wire to the back up lights but they are pulled inside the frame and ready to hook up.
I mounted the tub to the frame by my self wich was not an easy task but I used simple engineering and gravity as my assistant. There bolt mounts front and rear center that I placed bolts into and centered the frame and lowered the tub from the saw horses.
A little push and they both tropped in washers and nuts on and tightened up and it was on. 8 carriage bolts lock in the frame and mounting tabs tightened the frame to the tub crossmembers.
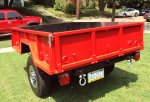
I slapped some of my favorite stickers on and she is ready to roll.
More to come.
1. canvas cover for the tub
2. field kitchen made from aluminum diamond plate
3. RTT with rack over the tub "On my Christmas list"
4. 30 gallon RV water tank with pump mounted above the axle in the frame.
5. a couple more 1 1/4" receivers for slide in counter tops and stove.
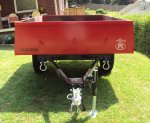
Here is the current progress:
Attachments
Mark Harley
Expedition Leader
Shake down run this weekend.
I took the trailer out this weekend for a shake down run.
I pulled it on friday and saturday while running erands.
The trailer pulled great, I hit the scales at the scrap yard and got it weighed.
1080 pounds a little lighter than when I towed it home from Ohio.
Pulls great quiet with the 2" ball coupler. I did not test the lunette yet.
Lights are bright and the reflectors shine good. I really like the safety cables I purchased, No more clanging on the bumpy roads and they coil up to keep from draging.
The trailer turns well and follows the 2500HD fine.
Next will be the camping extras. Keep posted for more.
Anyone know a good place to get a Black canvas tonneau cover made?
The local shop wants $400.00 for vinyl I think that is too expensive.
I have a couple more local awning shops to check.
Attachments
youwillforget
Adventurer
Tarpstop.com makes the covers for the steel haulers dont know much on cost though. I got a 3x5 patch for free from them. They have great prices on all kinds of straps and tie down equipment. Going after work today to pick up 20' grade 70 3/8 chain for my Hi-Lift winch kit.
Mark Harley
Expedition Leader
Dan:
I want to support the local shops but they seem to be chasing me away.
I find it very hard to spend $400.00 for a top when the trailer was $500.00 to buy.
I checked with another local shop and they would use marine canvas $385.00
I can get black marine canvas 80" wide for $120.00 on ebay. that tells me their labor is
$265.00?
I emailed a couple tarp companies about vinyl machine tops 71" x 101" x 4"
so far one replied back at $97.00 shipped This may be the route I take.
I like the look of canvas but this would work.
I may go the military tarp route also and see how it looks.
I could buy the canvas and a used heavy duty sewing machine for less.
This is another reason to use the smaller trailers. you can use 4' x 8' sheets of metal for the top with out a big seem.
Mark
youwillforget
Adventurer
Sorry I didnt reply yesterday, my bike died on the trip home from tarp stop. A 8x10 is around $70 from them but that is flat with grommets, they can do a fitted with D rings but it will be a little more. My local steel fab shop wants 247.81 + tax for a 10x5 sheet of 10 guage steel but that probably isnt big enough. I have access to a mid 90's Chevy tunneau cover and a buddy that does fiberglass work if you want to go with fiberglass.
85CUCV
Adventurer
Mark,
I thought $400 seemed alittle high. Mine was basically all labor since I supplied the tarp. The shop supplied grommets and the rubber tie downs (which I'm liking very much). Labor should be the less for your cover since I had the water can cover fabbed also.
I used a local Amish shop. Good quality work reasonably priced.
Dan
upcountry
Explorer
Well put together thread. Very helpfull! Hope its okay if I steal some ideas! BTW...your nice pics of the finished product saved my ******** after I disclosed to my wife that I had upgraded my trailer from the crappy harbor freight one to the real deal. She was okay with it after I showed her this thread. Thanks for the help!
Mark Harley
Expedition Leader
Upcountry:
Thank You for the kind words.
This trailer has been a fun project and a way to keep my mind off other things.
"wife is going through thyroid cancer"
I plan on many other items to be added, I am researching a RTT,
but need one for a family of two adults and two children without being cramped.
I will post more pictures when I do more work.
Mark
upcountry
Explorer
Its a good project. I know all about that....had a bout with Colon cancer over the last three years and I'm only 35 now. Scary to say the least. Fortunately they were able to cut it all out withou loosing too much. I was diagnosed with it the week after my daughter (2nd) was born.
I wish all four of you the best.
I wish all four of you the best.
Last edited:
JamesDowning
Explorer
Looks like a solid trailer base. Looking forward to seeing where you take it from here!
Similar threads
- Replies
- 2
- Views
- 839
- Replies
- 1
- Views
- 702
- Replies
- 31
- Views
- 5K
- Replies
- 3
- Views
- 699


