You are using an out of date browser. It may not display this or other websites correctly.
You should upgrade or use an alternative browser.
You should upgrade or use an alternative browser.
Kitchen Kit/Chuck Box
- Thread starter jim65wagon
- Start date
OneWheelDrive
Observer
Ha, happy to build you one, but my shop rate is $100/hr! This little sucker took me over 20 hours to build (can you tell I'm not a carpenter by trade?)! Shoot me a couple grand via paypal and I'll gladly build you another one ;-).
OneWheelDrive
Observer
Very nice. How tall is that when it is all closed up?
Benny.
I built it to be 20" tall so it could fit snugly under my camper shell, and strapped down to my sleeping platform in my Tacoma. It's standard 36" counter height when assembled. Footprint is 15"x24".
Alrighty, I've finished the chuck box and the plans are still in development. Here is a look at it in its finished state. I also shot a video yesterday afternoon so you can see how it works. Not that it's terribly complicated.

Features Include
- Table height work surface, 29.5" high
- Work surface area of approx. 14" x 34"
- Folds down to 15" x 20" foot print, approx. 18" high
- Stable base that doubles as a carry cradle with handles
- Skeletonizing to shave off approx. 6.5 lb of weight for a total empty weigh of approx. 28 lb.
- Fast, 15 second set up time
- Slot for modest campfire cooking grate
- Storage for two 1 lb. propane canisters
- Self-supporting utensil drawer
- Deep doors which include two spice racks and room for hooks for big serving utensils
- Large main cavity with modular adjustable shelves
- Paper towel roll storage
Destructive Testing
Incidentally, I had a scrap base cut and assembled that I didn't need so I decided to do some destructive testing. It was darn hard to break. I beat it on the ground. I jumped on it. Setting it on it's end upright I put all my weight (220 lb.) on the cantilevered legs. Nothing. Then I tried wracking it by putting one of the legs point down and pressing down with all my weight on the diagonal opposite side, repeatedly. That finally did it. Sort of. The corner joints cracked but that was it. I wasn't actually able to rip or break the base into separate pieces. And the base went back to it's regular shape after some severe distortion. It rather surprised me since the legs are simple butt joints, however, the base panel-to-leg connection is a rabbeted joint. But the whole thing is held together with regular finish nails and Titebond III glue.
So, I did manage to break the spare base but I was also impressed with just how much abuse it took from someone actually trying to break it. I feel a lot more confident about the build quality and durability of this chuckbox system.
Finish
There are 5 coats of Daly's Seafin Teak Oil on the chuck box exterior surfaces and at least two on the interior. FWIW, I liked working with this finish. Easy to apply and it helps harden up the wood fibers and looks good. However, it goes on very thin so it takes many coats (as recommended by Daly's) but a little goes a long way.

.
Please someone has the measurements of the project
tks
Cristiano
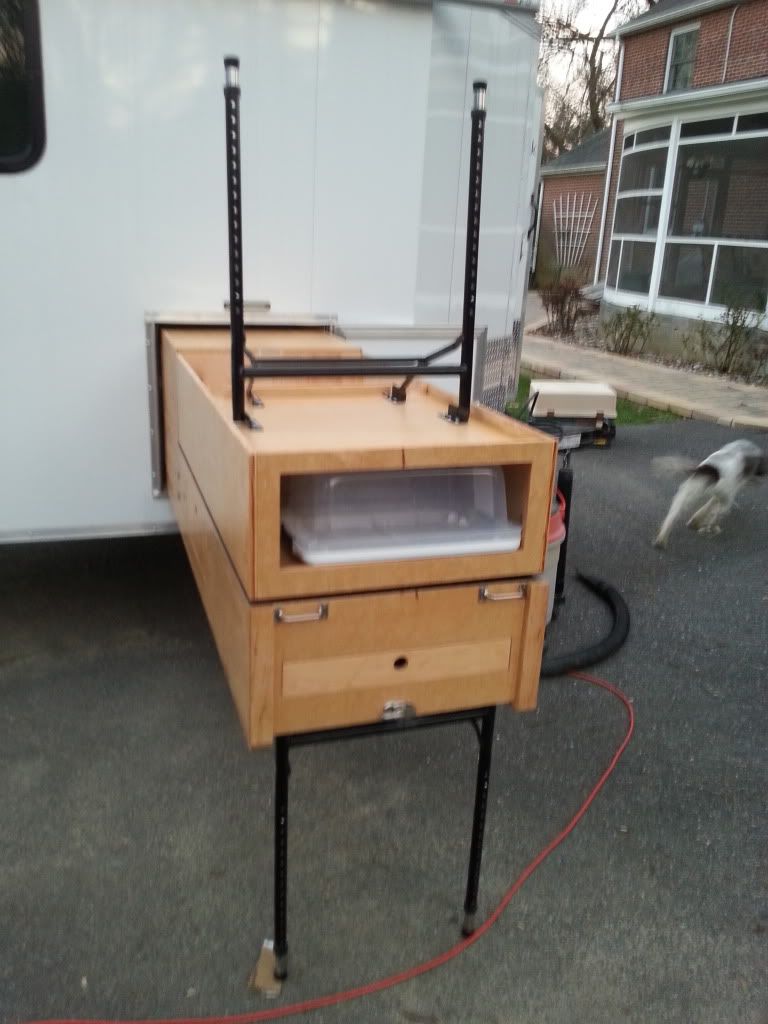
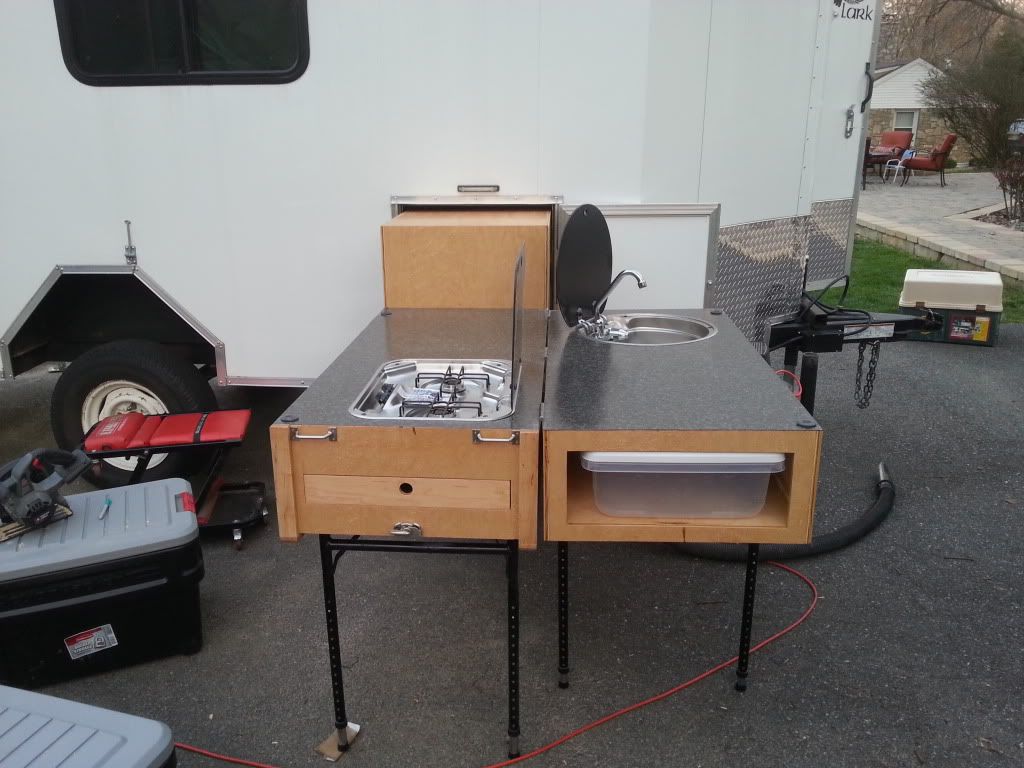
Thought I'd add some pictures of mine finished with the exception of the quick disconnect for the gas and water lines which will hopefully happen next week. 4 coats of spar urethane gave it a pretty thick and smooth finish. I think it will give me some good service, But I'll still have to keep it mostly out of the rain because of the plywood. The canopy extends completely over the kitchen, but not sure if I'd chance it.
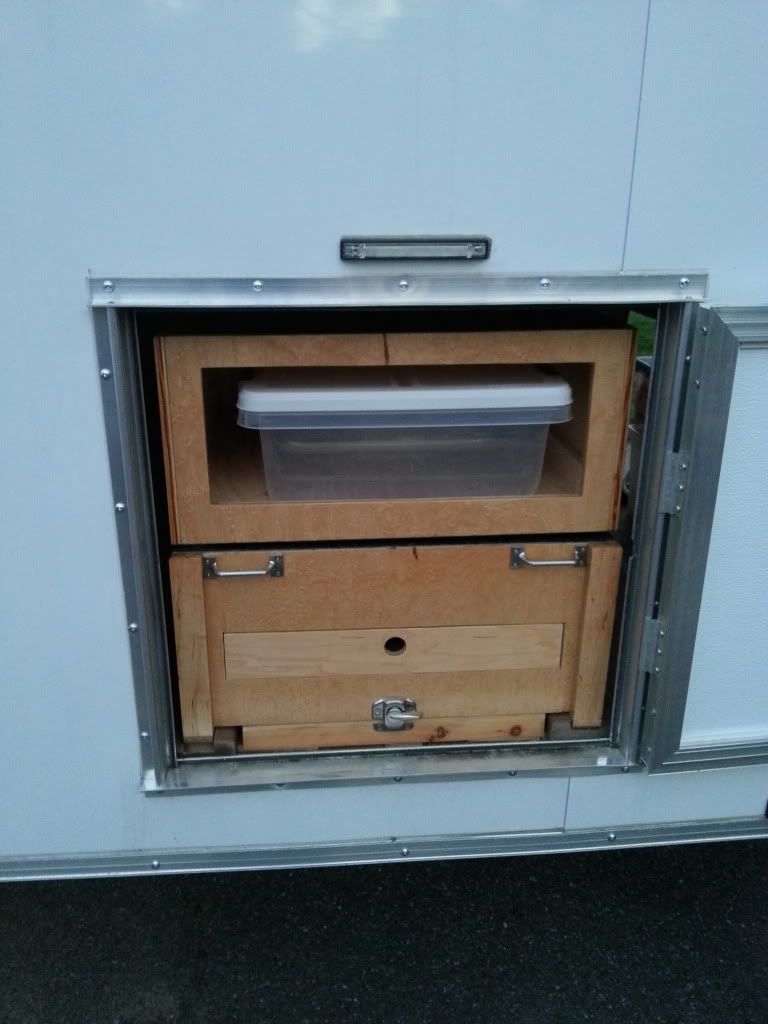
In the trailer. The latch on the front, bottom will keep it from moving in/out or up/down. There is also a cleat in the back that will keep that end from bouncing.
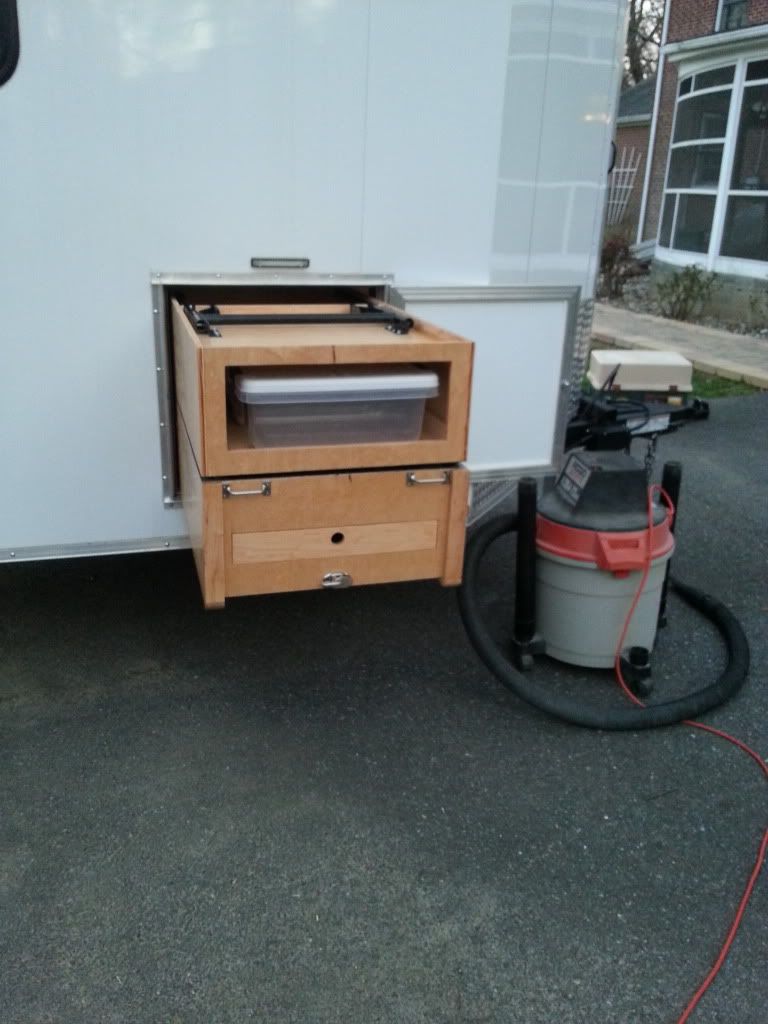
Pull it out about half way.
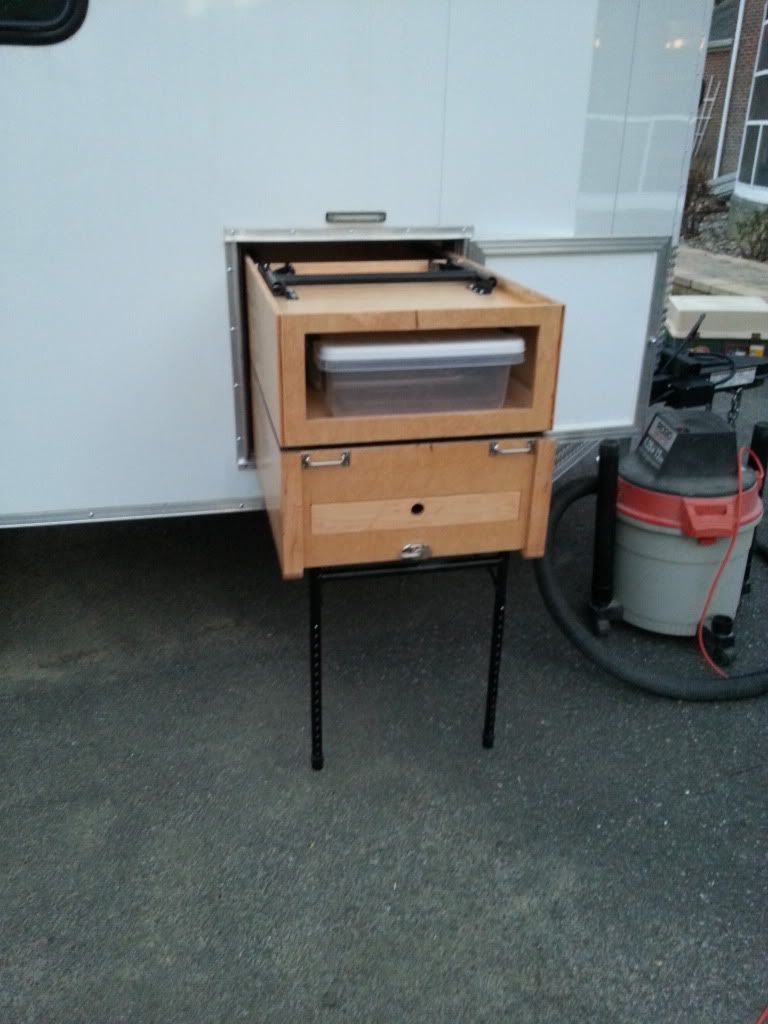
Pull out the legs and extend so they are about where they need to be:
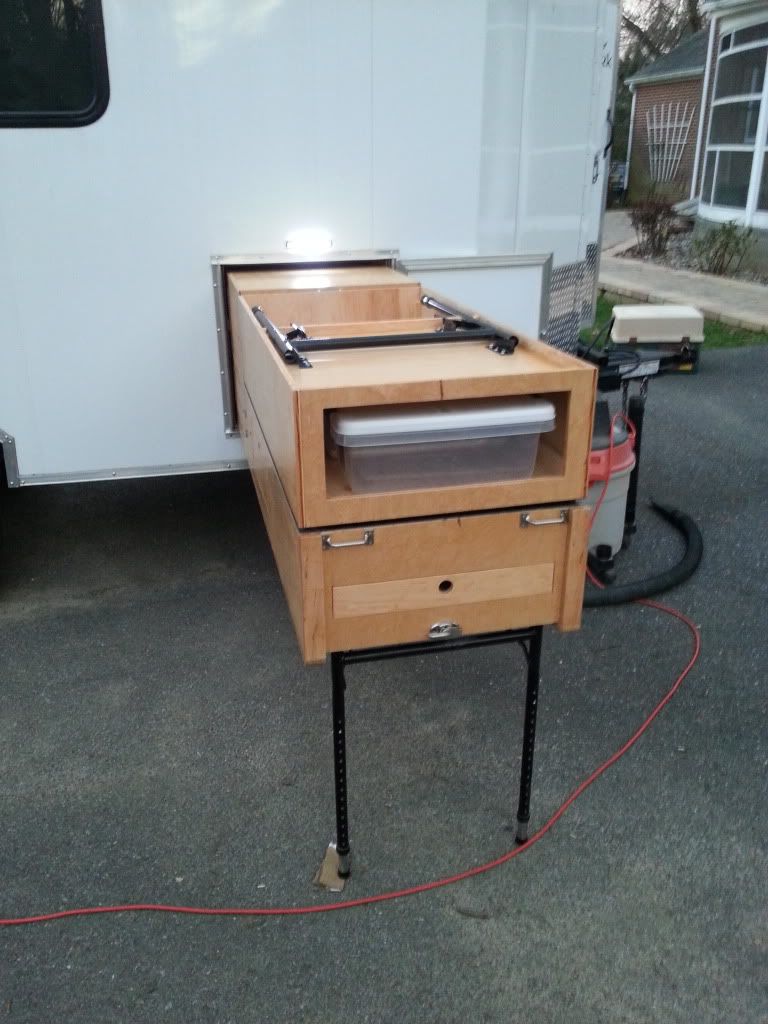
Pull out the rest of the way and fine tune the legs if needed. There is a brace wider than the opening that is screwed across the back of the kitchen unit that keeps it from falling out:
Raise the other set of legs: (Sorry for the crappy picture, I think the motion of the dog screwed up the camera)
Unfold, and this is when I'd be hooking up the propane and water connections:
Just a picture with all the doors open, showing the plates, bowls, cups, and cutlery (still need to get some nice knives).
The bottom left drawer fits all of the pots and pans (3 liter and 5 liter pots, 10 and 14" frying pans) plus coffee mugs and extra cups. Not sure what I'll put in the upper compartment. May larger dish washing tubs? The second has spices, foil, saran wrap, zip lock bags, and trash bags.
http://i304.photobucket.com/albums/nn195/elmo_4_vt/Camper/20130413_192830_zps0a94b926.jpgIMG][/URL]
This show the kitchen all the way out. You can see why I couldn't make these doors hinge open:
[URL=http://s304.photobucket.com/user/elmo_4_vt/Camper/media/20130413_1929_zpsccbd6f4a.jpg.html][IMG]http://i304.photobucket.com/albums/nn195/elmo_4_vt/Camper/20130413_192919_.jpg
http://i304.photobucket.com/albums/nn195/elmo_4_vt/20130413_192915_zpsaed24809IMG][/URL]
[URL=http://s304.photobucket.com/user/elmo_4_vt/Camper/media/20130413_192908_zps8c1db62e.jpg.[IMG]http://i304.photobucket.com/albums/nn195/elmo_4_vt/Camper/20130413_192908_zps8c1db62e.jpg[[/URL]
Can't wait to use it in two weeks for the first camping trip of spring. It was so nice today in the Northeast I got my first sunburn on my neck and nose. Weird since it was only 60 deg.
Don
-[/QUOTE]
Love this. Where did you get the stove and sink?
Jeff
Social Casualty
Observer
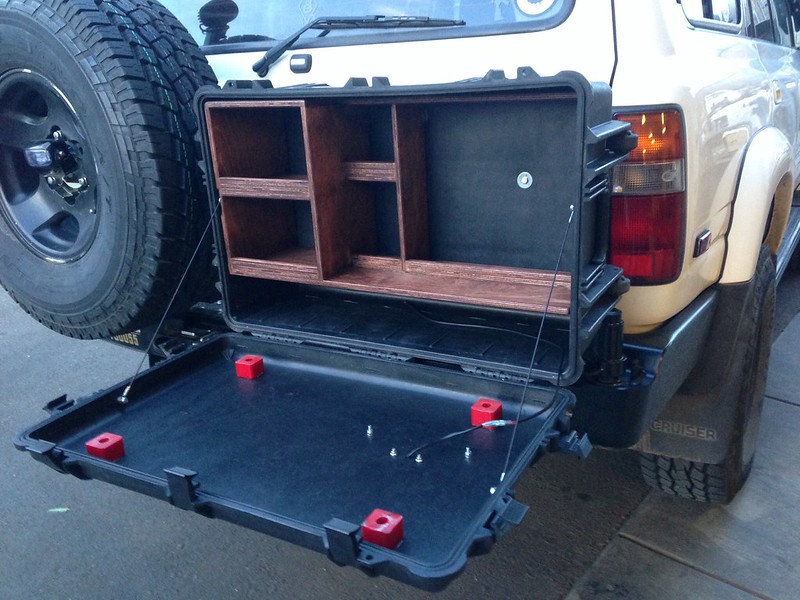
Getting close to completing our rear bar mounted Chuck Box. Complete with storage for pots, pans, cups, plates as well as cooking oils/sauces, salt, pepper, dish soap and others.
We based it off a Pelican 1650 case and had to do some modification to the swing out to be able to mount the case.

Getting close to completing our rear bar mounted Chuck Box. Complete with storage for pots, pans, cups, plates as well as cooking oils/sauces, salt, pepper, dish soap and others.
We based it off a Pelican 1650 case and had to do some modification to the swing out to be able to mount the case.
Now that is awesome.
Sent from my SCH-I605 using Tapatalk
steelheadbum
Adventurer

Getting close to completing our rear bar mounted Chuck Box. Complete with storage for pots, pans, cups, plates as well as cooking oils/sauces, salt, pepper, dish soap and others.
We based it off a Pelican 1650 case and had to do some modification to the swing out to be able to mount the case.
I am in the process of building one as well....using the same case but will have it mount onto my passenger side ladder

there is a quick disconnect on that side for the on board propane.
Buck
Sent from my DROID RAZR using Tapatalk
I am in the process of building one as well....using the same case but will have it mount onto my passenger side ladder.
Sent from my DROID RAZR using Tapatalk
Please don't take this as a slam, but....
I hope you mean it carried in another location and mounted there when you stop it would such replacing kitchens on a frequent basis.
Sent from my SCH-I605 using Tapatalk
steelheadbum
Adventurer
Lol ya ill carry it on the rack up top which is not shown in pick
Buck
The Redneck Mexican
2002 E350 7.3 PSD 4x4 8inch lift pop top conversion....
Buck
The Redneck Mexican
2002 E350 7.3 PSD 4x4 8inch lift pop top conversion....
Heres another....
http://www.amazon.com/My-Camp-Kitch...?s=lawn-garden&ie=UTF8&qid=1390445042&sr=1-10
Seems cheap....
sa
http://www.amazon.com/My-Camp-Kitch...?s=lawn-garden&ie=UTF8&qid=1390445042&sr=1-10
Seems cheap....
sa
Social Casualty
Observer
Almost finished the Chuck Box today, have a little wiring for night lights to complete and that should be it.
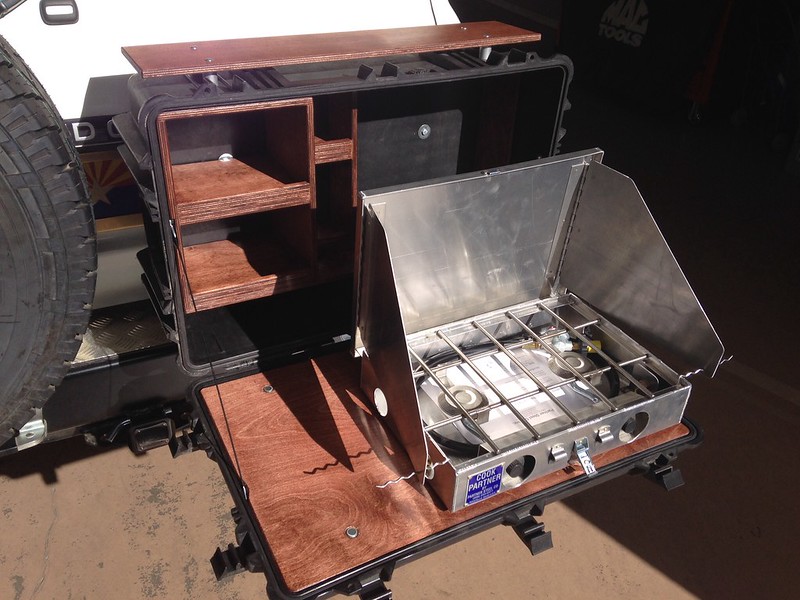
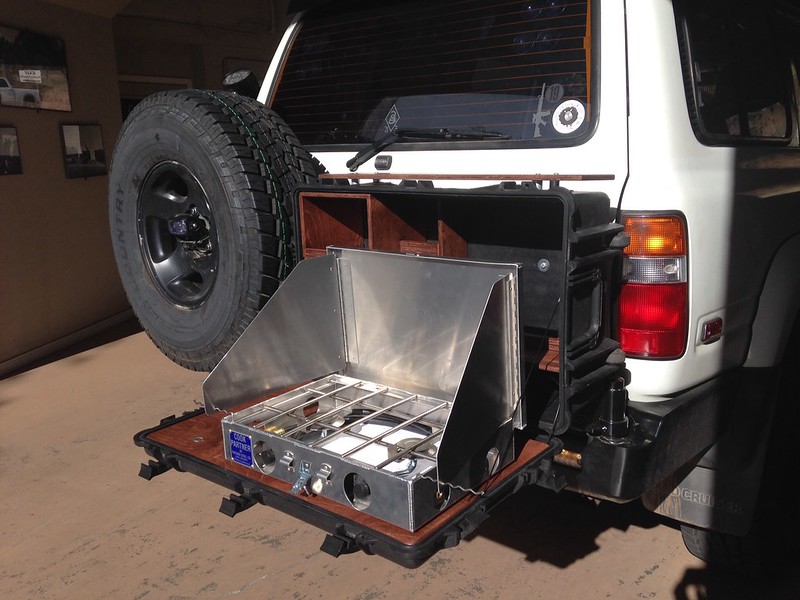
The stove is fastened to the box lid and folds up into the case just by lifting the lid up and snapping the locks
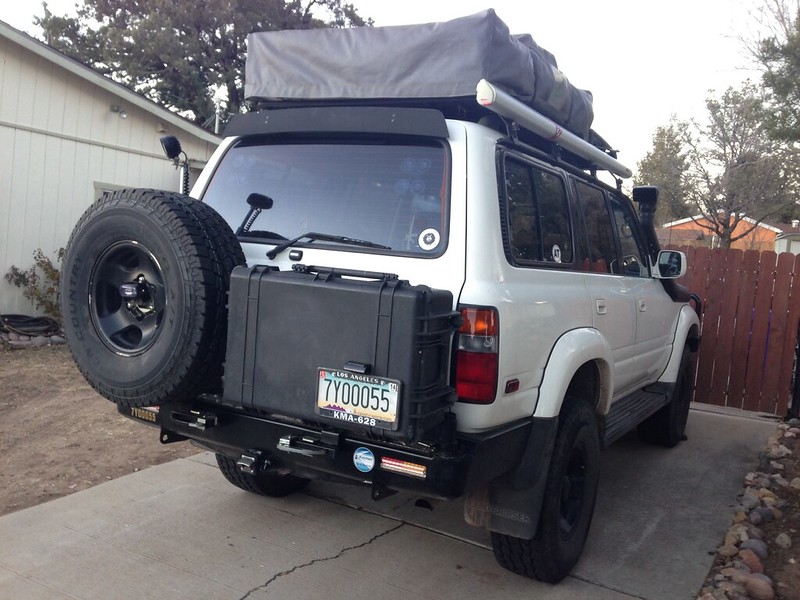
Chuck Box build
Started with a used Pelican 1650 case, a Partner Steel 18" twin burner camping stove, sheet of .5inch berch plywood, 2 stainless tethers, and a handful of fasteners as well as a can of stain and two spray cans of satin clear.


The stove is fastened to the box lid and folds up into the case just by lifting the lid up and snapping the locks

Chuck Box build
Started with a used Pelican 1650 case, a Partner Steel 18" twin burner camping stove, sheet of .5inch berch plywood, 2 stainless tethers, and a handful of fasteners as well as a can of stain and two spray cans of satin clear.
Every Miles A Memory
Expedition Leader
This Pelican case Chuck Box looks awesome!
Quick question, does the swing away bring the Pelican case to the side of the vehicle with the spare tire? Or do you have the Pelican case on it's own swing away?
Question is where is the Chuck Box when the tailgate is open??
Cant wait to see this built out and loaded up
Quick question, does the swing away bring the Pelican case to the side of the vehicle with the spare tire? Or do you have the Pelican case on it's own swing away?
Question is where is the Chuck Box when the tailgate is open??
Cant wait to see this built out and loaded up
Similar threads
- Replies
- 0
- Views
- 451
- Replies
- 0
- Views
- 391
- Replies
- 5
- Views
- 1K
- Replies
- 10
- Views
- 1K
Forum statistics
Members online
- Rogoszr
- STREGA
- vatsacom
- jeno
- IdaSHO
- driller
- osukj04
- fatmab
- NOPEC
- MamboSA
- 85_Ranger4x4
- WillyDoIt
- skirunman
- sancap
- SheepShagger
- DesertIslands
- ITTOG
- spookiedog
- bigsam
- BP89
- fisher205
- asespc13
- Czgheib
- lince
- rgv
- rfeagan
- Rube2K6
- buffalojay
- freedomproject
- crolison
- 86scotty
- mark5280
- D45
- tadg
- LivinAnAdvntr
- KellyM
- john61ct
- ExpoMike
- RealTruck
- 82sappervet
- shinyblackdeer
Total: 3,303 (members: 43, guests: 3,260)

