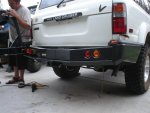
Looking for Tire Carrier Spindles

KG6BWS

Explorer
The problem in most cases is not the spindle but the design of the carrier and the latching mechanism that allows excessive movement in the carrier. This is a common mistake in DIY systems as well as the overloading, to big carrier situation.

thats what i was going to say. the picture of the broken rocklogic hinge is exactly what happened to mine. broke in exactly the same spot. where i screwed up was on the other end of the carrier i didnt brace it enough. it allowed the carrier to vibrate and bounce so badly that it fatigued the spindle until it broke. when i redesigned it i just braced the latch end so that the carrier had no movement whatsoever when it was latched.

and if you build your own ADD A SAFETY PIN!!!!!!!! the only thing that kept my spare, hilift and 10 gallons of gas from going thru the windshield of a minivan behind me was a safety pin i made out of 1/2" round bar that went thru the carrier and then thru the bumper with a cotter key underneath to keep it from bouncing out.
 

ntsqd

Heretic Car Camper
Most of these designs have the carrier on top of the bumper. For my application I need it to sit flush against the outside of the bumper. Something like this: WELD ON HINGE
782012-lg.jpg


I'm not sure if thats quite heavy duty enough and I really don't like the price...
I've seen some people convert their spindle into double shear, which would work great if it doesn't take too much work. Are there any spindles that lend themselves to this conversion better?
It seems like the main problem with most spindles is the center shaft has a nut on one end which prevents connecting that end to a tab.
So what spindles don't have that nut?
All spindles will have that nut. No way around it as it retains the bearings.

You could build something as serviceable for the application from McMaster-Carr's catalog.
For instance, you could use two of p/n 6338K436 ($2.60 ea.) flanged Oilite Bronze bearings:
flangedsleevecollage.gif

inside of 1-1/4" ID, 1-5/8" OD steel tube; p/n 7767T811, $34.86 for a 12" long section, or p/n 7767T551, $20.43 for a 12" piece.(Probably can do much better than that at a local welding shop or metals vendor.) Fabricate the upper and lower tabs from cold rolled. Then use a 1" Hex head bolt, like p/n 91257A991, $9.55, for the pivot pin.
Would look something like this:
tirecarrierhinge.jpg

Though how I personally would build it would look more like this:
tirecarrierhingereva.jpg
 

solidfrontaxle

New member
Yes, I like that second design alot! Simple and as stout as I need it to be. I could make it greaseable too. Thats probably the direction I'll go.

Since I have a trailer spindle lying around, I'd still be interested to see how some people have put theirs into double shear.
 

cruiseroutfit

Well-known member
Though how I personally would build it would look more like this:
tirecarrierhingereva.jpg

That is very similar to how ARB builds their rear bumpers, they step it up from there by using a nylock on the bottom that rests up against an allen head screw that can be adjusted from the side of the bumper to "level" the swing arm throughout its motion.

Two thumbs up for the visual :D
 

cruiseroutfit

Well-known member
Does anyone know what Kaymar is using for this tire carrier?

Not sure what your asking? Their tire carrier, well... is there tire carrier, manufactured much like they've been doing for years and years now for 60's, 80's, 100's and now the FJC. If your referring to the actual spindle, single shear spindle, custom manufactures for their applications. Uses bearings similar to many of the "off the shelf" spindle kits available from 4x4 fab outlets.
 

ntsqd

Heretic Car Camper
That is very similar to how ARB builds their rear bumpers, they step it up from there by using a nylock on the bottom that rests up against an allen head screw that can be adjusted from the side of the bumper to "level" the swing arm throughout its motion.

Two thumbs up for the visual :D
Kurt, would you happen to have a picture of this? I'm not "seeing" it.
Thanks!
 

Beowulf

Expedition Leader
Kurt,

The latter part of your comment is the concept I was inquiring about. I figured what ever Kaymar used had to be good enough for me. I was hoping that it was a basic off the shelf spindle readily available through someone like McMaster Carr or others. It does not surprise me that it is semi custom as their stuff seems to beslightly better than everything else.
 

cruiseroutfit

Well-known member
Kurt, would you happen to have a picture of this? I'm not "seeing" it.
Thanks!

But of course :sombrero:

Just wish it were a better picture. So underneath the top foam trip peice is the bolt that pins the swing out (or cap in this case on the right side), there is a nut on the bottom you access from underneath. Now, under the wing panels, there is an allen head that is perpendicular to the swing out bolt, it is used to trip the swing outs so they hit exactly as you desire on the latch mechanism. I'll try and find some more pics from other installs we've done, worst case I can snag a picture of the install instructions to show that aspect.
 

Attachments

  • CUST 025 (Medium).jpg
    CUST 025 (Medium).jpg
    66.6 KB · Views: 207

Fergie

Expedition Leader
Though how I personally would build it would look more like this:
tirecarrierhingereva.jpg

Okay, the dark blue tabs mount to the bumper. I see the oiled bushings and the bolts.

Is the outer sleeve what the swing arm attaches to?

If so, what does the inner sleeve attach to? It looks to be 'welded' to on of the dark blue tabs. Is this correct? How would the oiled bushing operate if it didnt have a smooth surface to seat against?

Thanks

Gavin
 

ntsqd

Heretic Car Camper
The gray is the actual pivot pin and is held in place solely by the tension in the bolt. Blue are the tabs welded to the bumper. Turquoise is the sleave that the swing-out is welded to. Light color are Oilite-Bronze flanged bushings.

Note that the bottom tab's hole is bolt sized while the top tab's hole allows the pivot pin to fit through, and that the pivot pin is slightly taller than the distance from the top of the bottom tab to the top of the top tab. This means that when the bolt is tight that the pin is clamped and shouldn't rotate and that the pivot pin is effectively in double shear without the bolt's tension causing the tabs to have to bend. Making the pivot pin an exact fit between the tabs sort of like in the first version is possible, but having gone down that path in the past it can be a difficult moving target. Doesn't seem like it should be, but over time it is. Having the pivot pin slightly longer than the tab to tab distance takes all of that hand fitting & removes it from consideration. Fit of the pivot pin in that upper hole wants to be tight bordering on being a slight drive fit.

It's a lot of complexity to do things correctly. Most wouldn't bother. If one does opt to use the first version I highly recommend that there be a small block of steel welded to the tab that will have the bolt head, and that it be fitted up fairly tight to the bolt head's hex. The idea is to prevent the bolt from turning instead of the bushings rotating around the bolt. (It is usually considered poor form to allow something to pivot on the shoulder of a tension bolt. A should bolt is designed for that, but tension bolts, like we normally use in nearly everything, are not.)

EDIT: In thinking about this further, there is no reason that the turquoise tube can't be part of the bumper and the blue tabs attach to the swing-away.
 
Last edited:

JAFJO

New member
My last two were built like this.

On my Scout I used 2" DOM with a .120 wall and a piece of 1.75" solid cold rolled.
I just did one on my TJ and used 1.75" DOM with a .120 wall and a piece of 1.5" solid cold rolled.

Use a hole saw and drill the diameter needed for the DOM to slip through, cut it so the bottom is near flush and the top has about an 1/8" lip. Weld it all in top and bottom. Take one of the slugs that you drilled out of the bumper, trim it up a bit and slip it in the bottom of the bumper, up about 3/8". Do not weld the hole shut. Now use what's left of the DOM and weld it on the end of the carrier. I take the cold rolled and put it in a lathe, drill a hole in it so I can tap a 1/2" NF bolt into it. Then slip the cold rolled into the DOM on the carrier and weld it in so it can't move. You will need to enlarge the hole in the bottom of the bumper so a 1/2" bolt will go through it, that will hold the tire carrier in and set tension. All and all with this system you end up with .010 space in the hinge, enough for some lube. It has worked very well, I think it works because there is no welding done near any of the high stress points changing the strength of the solid cold rolled steel. Sorry for the long winded story, I hope it helps someone out. It's not as tricky as some I've seen but it's very simple and it doesn't rattle (other than the damn hi lift handle, note the "temp" rubber band).
DSC02846.jpg

DSC03897.jpg
 
Last edited:

threepiece188

New member
Hello all, my first post on this sight. I undserstand used wheel spindle assemblies are things some of us might have sitting around, so it's easy to see how popular they might be for a home built carrier but I don't see the advantage when they are used in the product design of so many after market carriers. Ball and roller bearings were developed to handle the high rotational speeds found on powered machines, they are a nessesary expense to keep things working. I don't know of any OEM swing away that uses them.
Dan
 

wADVr

Adventurer
I built a tire carrier with the 1000lb trailer axle stub (1") and snapped it just like the one pictures earlier in the thread. My latch was a 5/8" screw type (similar also posted earlier) with a derlin landing pad and bumpstop that completely held the swing out from vibrating loose, jaring or putting any added stress on the hinge. When I broke mine it took quite a bit of abuse. I replaced it with a 1750 lb spindle that is much larger at the base, I want to say it was 1.75" or so and felt much better about it. This hinge has been working flawlessly for 3 years or so now. I am not sure about overtightening but I have always tightened the nut to acheive the desired preload to take out the play and never to create resistance when opening and closing. If you overtighten the spindle is wont open of close smoothly just as if you overtighten your wheel bearings the wheel/tire wont turn smoothly.

My last tire carrier I have built used a double sheer mount with derlin bushings and a inner sleever, just like the pictures above. I am very happy with this design and will continue to use it when possible. The biggest point to any of these designs is to latch the carrier in a way that does not increase the stress on the hinge. Many builders clamp the carrier downward to the bumper to eliminate rattles. While this works for the rattles it also wears on the hinge and creates play. A pad for the carrier to sit on and a bumpstop will do wonders for eliminating rattles and prolonging the life of the hinge(s) Also setting the height of the pad so that it supports the carrier as high as it would be without the weight of the tire will help prolong the life of the hinge as it removes alot of the stress when closed.
 

Forum statistics

Threads
189,900
Messages
2,921,975
Members
233,083
Latest member
Off Road Vagabond
Top