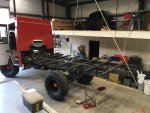
Lowly the Lorry. . .

VerMonsterRV

Gotta Be Nuts
Had the pleasure of hosting the Vermonster and its occupants Jon and Heather for a night as they made their way thru to visit the Redwoods. So glad to meet up with other people who have equally crazy ideas as us. We just wish we were as quick in the conversion process as they were! They did a fantastic job on the Vermonster; definitely something to aspire to on our build. Looking forward to meeting up with them again in the future (hopefully at some remote backcountry spot while traveling in a fully kitted out and completed Lowly).

View attachment 688272

- Sheik
Yup, it was great meeting the entire Lowly family! Had a very nice evening getting to know them pass our online correspondence. Really can't wait to see Lowly evolve as their build progresses. And as a side benefit Ryan reminded me that @mog lived nearby so we were also able to swing by and say hi the following morning. @mog helped me decipher the different models and features of the various types of Mercedes when I was looking for our future truck. Really glad he helped out as I was able to eventually find our 1120, which we are very happy with.
 

Sitec

Adventurer

It's photo's and replies like these that really inspire me (and hopefully others)! I still get a buzz out of looking back at the photos when we had 3 visiting trucks here for a few days. Great fun. Being able to look around another build while being at home instead of a show gave me heaps of good info, and friends for life!! Great work and pic guys!! :)
 
Lowly Update:

After showing Lowly to Jon and Heather (VerMonsterRV's owners) during their visit and discussing some of the issues I was having with the hydraulically driven winch and hold-down claws, it was determined that Lowly go on another diet. The entire hydraulic power unit (reservoir, pump, jackshafts/bearings/belt, controls, hoses, mounting brackets, cylinders, winch, etc) had to be removed. Subtracting this HPU will eliminate another system(s) that would require maintenance as well as reduce a massive amount of weight. The winch will get replaced with an electrically driven one. The one major loss (in my mind) will be the hold-down claws which I was planning to utilize as a truck leveling jacks when parked on uneven terrain; a loss I'm willing to absorb in order to simplify and lighten the overall build.

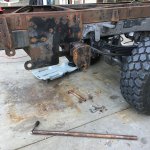
The bolts holding the winch on were massive and well-rusted. Sometimes a 5-foot long cheater bar is what is required!
IMG_6898.JPG

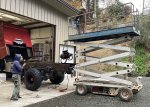
Our janky scissor lift was once again put to use to help pluck the hydraulic winch and lower the massive bracket that connected the chassis to the subframe, housed the hold-down claws and held the winch.
IMG_4678.jpg

The bracket was a bit stuck due to it being rust-welded in place. A good round of hammering with a heavy splitting maul did the trick.
IMG_4716.JPG

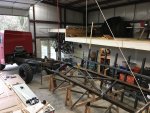
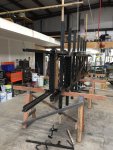
With the HPU removed the original subframe was ready to be taken off using a rope come-along attached to the scissor lift as a dead-man, through a snatch block hanging off the shop's center truss and down to the subframe.
IMG_6980.JPG

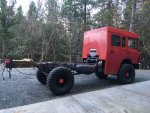
Lowly is looking pretty lean these days. Now only if I could put things on him rather than take them off!
IMG_6982.JPG

- Sheik
 
Last edited:

VerMonsterRV

Gotta Be Nuts
Any idea of the weight you took off?
My guess, is a lot (@Sitec I'll take your 160kg and raise you another 700!) ! I have to say our truck was way simpler than yours once our firebox was removed. When I saw Lowly there was a lot of systems there that looked extremely heavy. These trucks are not over powered to begin with so any unneeded weight removed will help not only in the hills but in softer surfaces, like sand and mud. Plus with the hydraulic jacks removed you will have a great space for some under storage boxes. Great progress and hope to soon see the new subframe resting on the chassis.
 
Lowly Update:

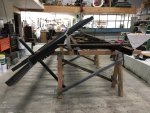
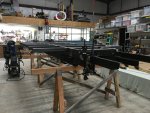
Before tack-welding the new subframe together I knew its design would result in significant heat distortion due to the welding process. The process of welding creates highly concentrated areas of high temperatures in the material getting welded. As these locations cool back to ambient the material shrinks, causing warping to occur. Some of this distortion can be mitigated by designing equal amounts of necessary welding on opposing sides of a weldment, however my design was not going to allow for this. There are other tricks to mitigate weld heat distortion, one of them a technique where the weldment is pre-stressed in the opposite direction of the anticipated distortion. In order to accomplish this a rigid "strongback" is needed to clamp to. Lowly's original subframe was a perfect candidate for the new subframe's strongback.

I unloaded the original subframe off Lowly and onto my sawhorses. The tack-welded subframe is propped off to the side.
IMG_6980.JPG

With the strongback in place I hoisted the tacked subframe on top.
IMG_6983.JPG

Using shims and clamps in the appropriate places, I bent the tacked subframe in the opposite direction of the anticipated distortion caused by heavy welding. This is not an exact science so I guessed at how big of a preload I would need.
IMG_6985.JPG

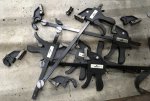
Inexpensive Harbor Freight clamps were not up to the task. Once one broke, I hit the deck while the remaining clamps on one end took on the broken clamp's load and subsequently self-destructed sending chunks of clamp flying. RIP cheap Chinese clamps!
IMG_7001.jpg

With old-school bar clamps to the rescue, I welded and flipped and welded and turned on its side and welded and flipped and welded. I kept preloading the frame in each orientation but could see I was losing ground every time I unclamped the subframe. It took lots of planning to turn this beast over by myself without damaging me or anything else!
IMG_6988.JPG

In the end I didn't preload enough as the fully welded subframe is curled up 3/8" on each end (think rocking chair). I'm going to attempt to pull the frame flat by laying some weld beads on the bottom flange of the the C-channel. If that doesn't work I'm going to have resort to torturing it flat using bottle jacks and braces.

Wish me luck!

- Sheik
 
Last edited:

joeblack5

Active member
Nice shop with nice light.. without crane or forklift moving that steel around is a tiring operation.

I think it pulled up because you welded your crossmembers on the top half of the beams...not sure how much prestress you gave the frame? It is hard to see in the pics. To bend it back will be tough. Maybe drive on top with the truck it self..?? A bit uncontrolled. Or better weld 4" short stubs on the bottom half also. That will add support strength to your crossmembers and not add to much weight.

Good luck,
Johan
 

RoamIt

Well-known member
I've done my share of welding, but never on such a large scale. I didn't think that thickness of steel would distort that much!? When doing blacksmithing, I reheat and straighten a warped piece. But that is typically on knives, not sure if you could apply heat and then pull back into line with a come-along?

After seeing your build and hearing the weight estimates, I may drop the PTO on my truck and go the electric winch route as well. Have one on each end that could be swapped as needed. 2 is one, 1 is none.

And anything to simplify a system that could leak is a good thing as well.

I appreciate the learning from you sharing your build, thank you!
 
Last edited:

mog

Kodiak Buckaroo
Before tack-welding the new subframe together I knew its design would result in significant heat distortion due to the welding process. The process of welding creates highly concentrated areas of high temperatures in the material getting welded. As these locations cool back to ambient the material shrinks, causing warping to occur.
If you had done the welding this summer in Grants Pass, the 'concentrated' welding zone temperature and ambient outside air temperature would have been the same, +/- 5 degrees ;)
 
I've done my share of welding, but never on such a large scale. I didn't think that thickness of steel would distort that much!? When doing blacksmithing, I reheat and straighten a warped piece. But that is typically on knives, not sure if you could apply heat and then pull back into line with a come-along?

After seeing your build and hearing the weight estimates, I may drop the PTO on my truck and go the electric winch route as well. Have one on each end that could be swapped as needed. 2 is one, 1 is none.

And anything to simplify a system that could leak is a good thing as well.

I appreciate the learning from you sharing your build, thank you!
Any form of stick or MIG welding I've been involved with results in heat distortion - a nature of the beast. Good design, good weld management/logistics, and/or proper preload can help mitigate warpage. Post weld straightening is common for weldments where distortion cannot be avoided. My professional background has resulted in friendships with professional welders and without their insight I'd be in a much bigger pickle than I am now!

- Sheik
 
Lowly Update:

With the subframe 95% welded up (there are some parts needing to be welded once they are located off of the truck's chassis) it was time to remove the deformation caused by the heat of the weld and subsequent shrinkage of the material. Once again utilizing the original subframe as a strongback, I used 12 ton bottle jacks to push up on the places needing straightening while holding down on either side using chain rated for 5400lb capacity.
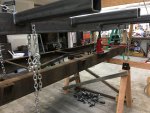
IMG_7002.JPG

Once the system was lightly loaded, I fired up my propane powered weed burning torch and heated up the metal above the jack I intended to bend. With it flesh sizzling hot, I then put the bottle jack to work and pushed up on the subframe past its straightened state (knowing there would be spring-back). I then used a towel soaked in cold water to repeatedly quench the heated area with the hope the steel would retain some of the torture it was being subjected to.
IMG_7007.JPG

Once the entire area returned to ambient temperature I backed off the bottle jack to reveal if any progress had been made. It took a few times per side but the frame eventually straightened out to my liking.
A few things to note:
1) systems under tension like this should make your sphincter nearly turn itself into a localized black hole; if it doesn't then you aren't aware of the acute risk of bodily harm or death should something break under load
2) drapes such as a towel or jacket over the tensioned chains can go a long way toward dissipating or redirecting kinetic energy in high velocity chains
3) don't try and get all the results in one cycle, in one location (see below)
4) watch out that you don't brand yourself of the steel or give yourself steam burns when quenching

As for note #3 above, I did get too ambitious on one side and ended up cracking a weld on the c-channel rail where I had previously had to patch a wrongly located notch.
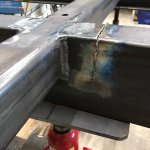
IMG_7008.JPG

When it decided to let go, the entire frame/jack/chain/sawhorse system jumped due to the quickly relieved stress and there was a brief disturbance in the space/time continuum several inches below my tailbone (see note #1 above). Once I said a prayer of thanksgiving for being given the opportunity to keep on living I went about grinding, drilling, clamping and welding up the offending crack.
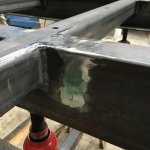
IMG_7009.JPG

With the subframe finally straightened, I chopped up and removed the original subframe. Cleaned up the shop a little bit, resettled the new subframe on the sawhorses and got ready for the next phase of the project: introducing the habitat's floor panel to the subframe.
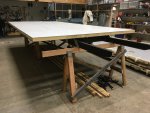
IMG_7011.JPG

Three cheers for progress!

- Sheik
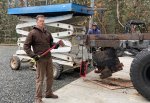
 
Last edited:
Lowly Update:

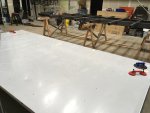
With the habitat's floor panel laying on the new subframe, I shifted, nudged and coaxed it into its centered position both side to side and front to back. After measuring numerous times and confirming it was in the correct position with the panel's internal stiffeners above the subframe's cross-tubes I then transfer-marked the holes in the subframe onto the underside of the panel.

Once all 49 holes were marked the panel was slid off the subframe and turned over.
IMG_7017.JPG

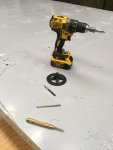
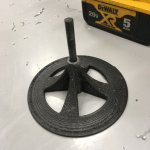
I then center-punched all 49 holes and pilot drilled all 49 holes to 3/16". Using a perpendicular drilling fixture I 3D printed the holes were then drilled out to the same diameter hole used in my hole cutter's center bit.
IMG_7020.JPG
IMG_7021.JPG

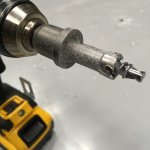
I then used my 9/16" hole cutter with its center bit cut down in order to keep it from penetrating thru both sides of the panel's stiffening members.
IMG_7022.JPG

With these holes cut out and the inside of the panel stiffeners vacuumed out the floor panel is supposedly ready to bolt up to the subframe. Hopefully I've provided sloppy enough tolerances for all 49 holes to line up between the subframe and panel to allow 49 bolts to slip through and thread into the steel bars that will live inside the panel's stiffening members and act as nuts, 7 per crossmember.

With this task complete it was time to test fit the subframe onto Lowly; it actually fits!
IMG_7023.JPG

- Sheik
 
Last edited:

Forum statistics

Threads
188,154
Messages
2,902,877
Members
229,582
Latest member
JSKepler
Top