M416 trailer build my brother and I

Crush Jeep

Adventurer
Well if you have been reading the thread after the camping trip a few weeks ago the weld cracked on the tailgate. It's fixed now and here are some of the pictures of the fix. We put tubing all the way around the tub. Prior to this I was noticing that the tub was getting farther out of square from the 250 lb struts.
T161.jpg
The tub was squared off again using a ratchet strap, then the tubing was bolted in and welded together.
T162.jpg
T163.jpg
Extra reinforcement for the front strut.
T164.jpg
T170.jpg
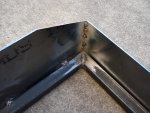
Testing the fit of the tailgate, it fits again.
T166.jpg
Taped off and repainted.
T167.jpg
The before and after shots.
T158.jpg T168.jpg
The other picture I loaded by accident and could not figure out how to take it off.
 

Attachments

  • T67.jpg
    T67.jpg
    559.1 KB · Views: 68

Crush Jeep

Adventurer
Thanks Wayne, I follow a lot of threads on m416 builds and yours & your brothers is one of the best. I plan on copying your tailgate mod later this year. Thanks for the advice on the reinforcement around the corners. I'll keep that in mind.:)

Ken

Thanks for the nice comments Ken, with us it's been a learing experience. Learing from our mistakes and getting ideas from all the smart guys on this site. Speaking of a smart guy I got this idea from Travis (tdittyrocks), it's slightly different but close. Its a table that sits on the fender of the trailer and locks into the tie downs using a slide lock.
T171.jpg
T172.jpg
When not in use it stores neatly into the side of the trailer.
T173.jpg
 
Last edited:

Crush Jeep

Adventurer
My brother built a new license plate holder, the old one was just a quick fix to get it on. Plus it really bothered my brother.
T178.jpg
I got a new battery tender and installed it.
T180a.jpg
I oredered a connector that I could plug the tender plug into (pic 1) and recieved one that you have to wire in (pic 2).
T180 b ordered plug.jpgT180 c recieved plug.jpg
Amazon was very good about the whole thing and they refunded me the difference and they are sending me the correct plug. I had already installed the other plug and liked it so we will use the ordered plug on the next build. Here are a few pics of it installed. I figured that having the extra plugs on the inside might come in handy at some point.
T179.jpg
T180.jpg
One of the other upgrades is leveling bubbles on the front and side above the table. After all you wouldn't want your beer to roll off the table.
Just recieved some LED flood lights today that I'm going to wire in, in the next few days.
 

Septu

Explorer
If you look closely at the pictures, the pipe on top slides into the bottom pipe, we drilled holes through the outside pipe in two places. The rack stays in the down position until I need the room. Then to adjust the height I just slide the rack up and put pins through the outside pipe in one of the two holes. We did not drill holes in the inside pipe because it would be too hard to line up the holes and just a hassle. When you put the pin through the hole on the outside pipe the inside pipe will rest on the top of the pin.

I was talking to my dad tonight about this - as I think it's the route I'll take with mine (down the road). His first question was what prevents the top part from bouncing out, other than the weight of the rack system and the tent?
 

Crush Jeep

Adventurer
I was talking to my dad tonight about this - as I think it's the route I'll take with mine (down the road). His first question was what prevents the top part from bouncing out, other than the weight of the rack system and the tent?
Well first when it is all the way down there is over a foot for it to travel in order for it to come out, second it would have to all go up at the same time because if it doesn't it will wedge itself and third yes the weight of the whole thing keeps it down. We did discus if I need to travel with it up because of the kayak or something else in there, I would just take a racket strap and secure it down to the cargo basket.
Lifting the rack up it a two person job because as I had said it has to travel up at the same time.
 

Crush Jeep

Adventurer
Here is a few pictures of my latest trip to Cape Lookout on the Outter Banks. Loading up on the ferry and riding to the island.
P8130559.jpg
P8130567.jpg
The light house.
P8140582.jpg
 

Crush Jeep

Adventurer
Within the first 30 minutes I was stuck in the sand (sorry no pictures). I didn't lower the air pressure in the tires, a learning experence. Our first camp site was on the point, alot of wind but the rig held up fine.
P8130576.jpg
P8130578.jpg
The second camp site on the beach.
P8140587.jpg
P8140590.jpg
Loading up on the ferry for the ride back.
P8150591.jpg
 

daninghram

Adventurer
Great pictures of the trailer in action. Is it stable with the tent at that height? Looks like a great way to haul kayaks.
 

Crush Jeep

Adventurer
Great pictures of the trailer in action. Is it stable with the tent at that height? Looks like a great way to haul kayaks.

Sorry I have not checked the page in a little while. Yes the trailer is very stable, I only keep it that high to travel with the kayaks in it then let it down. I have a rear stablizer leg that works fine along with the front jack. The only issue is that you have to but the back leg up when you want to move, I seemed to have forgot that on this last trip and ripped some of the metal up. I looked in the rear veiw mirror and saw sand flying up all over the place, then I remembered the rear leg.
T183.jpg
Nothing a little welding can not fix.
T184.jpg
This was another issue I was having with the front leg, trying to move it around was not that easy.
T181.jpg
So here was the fix, of course the holes for the pin in the knuckle was not the same size. Again a little grinding the old one off and welding the new knuckle on. Now I can flip the jack up and lock it in place, before I had to take it off because the foot plate would hit the box. It's all good now.
T182.jpg
 
Last edited:

Crush Jeep

Adventurer
I also added a solar pannel trickle charger from Nothern Tool. It worked great on the trip. So the drivers side of the trailer is the power inputs and the passenger side is the outputs.
T185.jpg
Solar pannel.jpg
 

Crush Jeep

Adventurer
I took the trailer back to my brother's shop and we are making new additions to the trailer. I got a new fuel can and a propane tank, so now I have 2 water and 2 fuel. The 2 fuel and one water will be inside and the other water can will be mounted on the side. So we needed to do a little building to make this work.
Fuel propane.jpg
Here's the start of the side step.
T186.jpg
T187.jpg
I'm also going to put a bumper on the back like this one.
T190.jpg
T191.jpg
And yes build #2 is in the works as you can see. :Wow1:
 

Crush Jeep

Adventurer
We will be taking to trailer to the Bank of America 500 next weekend to tailgate (the ultimate tailing vehicle) :beer:and then the following weekend to Uwharrie Rover Expedition (as long as the government gets there stuff together and reopens the parks). :camping:So I can not wait until it's finished to try it out. :jumping:
 
Last edited:

Forum statistics

Threads
186,763
Messages
2,887,866
Members
227,160
Latest member
roamingraven
Top