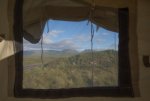
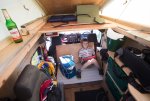
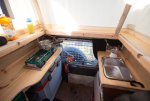
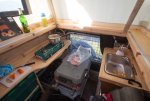
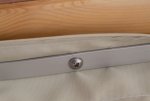
Cheers Arjan - hopefully by the end of the month it will have been off to the west coast for a shakedown trip!
Well I have have partially removed and refitted (permanently) the fabric sides . There was a slight 'error' with the rear angle - I say 'error' because it's not a huge practical problem more an aesthetic one: the top and bottom of the fabric is the same width - which is not ideal.
The top should be slightly narrower to enable the fixing point on the roof to be out of alignment with the bottom - in fact at least 1" if not 2" inwards, which, when the roof is dropped, allows the fabric to more easily 'fall' inside clearing the closing joint.
If you recall this pic:

....you can see the lower roof edge and upper section with the gap between to allow the fabric to come inside. Basically if the fabric fastening at top and bottom is inline vertically it less easily falls inwards. I've designed it with tie loops sewn in in several spots along the side and rear onto which elastic cords are attached which tension it and 'pull' inwards as it closes but it was still proving to be rather near to the closing joint. Anyway moving the fabric inwards at the rear 2" from where it sat naturally and looked perfect has resolved the issue but created a small 'billow' of surplus fabric at the top corners which I've had to fold inside and screw down.
It's not hugely noticeable, unless you've had your head filled with this nonsense for the last year and your face stuffed up against the fabric for a fortnight!
Anyway here are some close-ups to show the detail of the fabric attachment and where it fits (I'll do some internal ones another time).
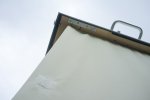
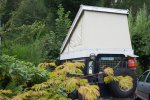
This is looking up to the rear left hand side. (and you can see the stitching for the internal cord loops in this pic on the left - slathered with seam sealer. These are what the internal elastic cords are fastened to when the roof is dropped).
And this is the opposite (driver's side) it shows the slight 'billow' of fabric more clearly. You can also see the solar wires snaking down the outside of the fabric, fastened to the wooden subframe, well out of the way. And snaking around the gas struts:
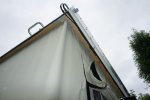
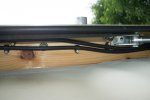
However it's not so noticeable that you'd focus on it:
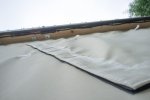
Seam-sealed the stitching yesterday, and ran a thin smear of clear silicone mastic along the bottom edge where the alloy flatbar fastens the fabric, and another bead along the roof joint between fabric and wood.
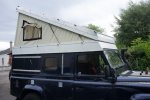
And the opening vents on the side with very very fine bug net behind - the bug net is on velcro on the inside in the same configuration as the outside so I can open & close the flaps from the interior.

I'm now onto making a folding internal bench, and cushions. Some curtains are required too, so that's another bit of sewing.
Well I have have partially removed and refitted (permanently) the fabric sides . There was a slight 'error' with the rear angle - I say 'error' because it's not a huge practical problem more an aesthetic one: the top and bottom of the fabric is the same width - which is not ideal.
The top should be slightly narrower to enable the fixing point on the roof to be out of alignment with the bottom - in fact at least 1" if not 2" inwards, which, when the roof is dropped, allows the fabric to more easily 'fall' inside clearing the closing joint.
If you recall this pic:
....you can see the lower roof edge and upper section with the gap between to allow the fabric to come inside. Basically if the fabric fastening at top and bottom is inline vertically it less easily falls inwards. I've designed it with tie loops sewn in in several spots along the side and rear onto which elastic cords are attached which tension it and 'pull' inwards as it closes but it was still proving to be rather near to the closing joint. Anyway moving the fabric inwards at the rear 2" from where it sat naturally and looked perfect has resolved the issue but created a small 'billow' of surplus fabric at the top corners which I've had to fold inside and screw down.
It's not hugely noticeable, unless you've had your head filled with this nonsense for the last year and your face stuffed up against the fabric for a fortnight!
Anyway here are some close-ups to show the detail of the fabric attachment and where it fits (I'll do some internal ones another time).
This is looking up to the rear left hand side. (and you can see the stitching for the internal cord loops in this pic on the left - slathered with seam sealer. These are what the internal elastic cords are fastened to when the roof is dropped).

And this is the opposite (driver's side) it shows the slight 'billow' of fabric more clearly. You can also see the solar wires snaking down the outside of the fabric, fastened to the wooden subframe, well out of the way. And snaking around the gas struts:


However it's not so noticeable that you'd focus on it:

Seam-sealed the stitching yesterday, and ran a thin smear of clear silicone mastic along the bottom edge where the alloy flatbar fastens the fabric, and another bead along the roof joint between fabric and wood.

And the opening vents on the side with very very fine bug net behind - the bug net is on velcro on the inside in the same configuration as the outside so I can open & close the flaps from the interior.


I'm now onto making a folding internal bench, and cushions. Some curtains are required too, so that's another bit of sewing.


