You are using an out of date browser. It may not display this or other websites correctly.
You should upgrade or use an alternative browser.
You should upgrade or use an alternative browser.
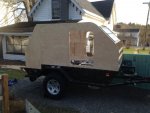
Matthewp's MuTTT (Multiple Terrain Tactical Teardrop).
- Thread starter matthewp
- Start date
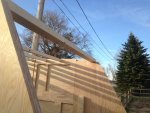
I must have missed it somewhere, and if so, feel free to link me back to it ... but can you talk a bit about how you're sealing the plywood to the angle you've got at the top of your frame?
I don't see any moisture barrier there (at least at first blush), and you've got the joint overlapped the wrong way to simply rely on mechanical sealing ... so I'm assuming you must be planning on something additional.
I like the profile, and everything you've done so far seems well laid out; seems like it's coming together nicely!
matthewp
Combat Truck Monkey
I must have missed it somewhere, and if so, feel free to link me back to it ... but can you talk a bit about how you're sealing the plywood to the angle you've got at the top of your frame?
I don't see any moisture barrier there (at least at first blush), and you've got the joint overlapped the wrong way to simply rely on mechanical sealing ... so I'm assuming you must be planning on something additional.
I like the profile, and everything you've done so far seems well laid out; seems like it's coming together nicely!
I'm planning on a small wooden overlap above the frame edge, with sealant underneath, before the body receives four coats of epoxy (once I have smoothed and sanded). All the edges are also going to be rounded off.
Thank you very much for the compliments.
jim65wagon
Well-known member
I'm planning on a small wooden overlap above the frame edge, with sealant underneath, before the body receives four coats of epoxy (once I have smoothed and sanded). All the edges are also going to be rounded off.
Thank you very much for the compliments.
I'd take the walls back down. Seal them with epoxy, then install them with sealant. That way you've got epoxy in all the open edges that water would want to wick into. Water has a wicked abilty to find the smallest opening and rot your wood to ruin.
matthewp
Combat Truck Monkey
I'd take the walls back down. Seal them with epoxy, then install them with sealant. That way you've got epoxy in all the open edges that water would want to wick into. Water has a wicked abilty to find the smallest opening and rot your wood to ruin.
Now you've got me nervous! I don't think I'd be able to take the frame down too easily as all the joints with the roof spars, etc. are glued. I will have to think long and hard about how to work that issue (possibly the one I didn't over-engineer for!).
Wavebreaker
Adventurer
Can always use S-1 epoxy sealer at joint it will wick its way down the joint if you cant take it apart. We use it in the boat industry it will travel places.
http://www.systemthree.com/store/pc/S-1-Sealer-c32.htm
http://www.systemthree.com/store/pc/S-1-Sealer-c32.htm
Last edited:
matthewp
Combat Truck Monkey
Can always use S-1 epoxy sealer at joint it will wick its way down the joint if you cant take it apart. We use it in the boat industry it will travel places.
http://www.systemthree.com/store/pc/S-1-Sealer-c32.htm
Perfect Wavebreaker! It looks perfect to cover the entire wooden body.
To elaborate on the original plan, I am also going to loosen all the body bolts and "fill" the area between the wood and the steel with 3M 5200.
Last edited:
matthewp
Combat Truck Monkey
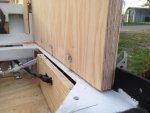
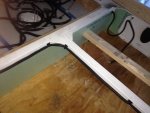
Today, I undid all the bolts mounting the sides to the frame and gooped the crap out of them. I put a 1/4" bead of 3M 5200 about midway down in the "trench" between the wall and the side of the frame. I ensured that, when the bolts were tightened, the sealant encompassed the bolt entry into the frame & wood in addition to leaving a bead at the top of the frame section.
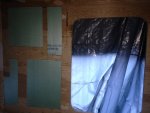
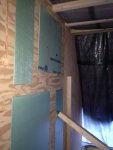
After that, I started on the insulation for the under-bed storage area. The 3/4" is easy to work with using a sharp knife. The 2"? Well, the mess made by the hand router and circular saw was bad! There was so much "fluff" from the green hard insulation all over the garage, it looked like someone dropped a frag grenade in Oscar the grouch's trash can!
After that, I started on the insulation for the under-bed storage area. The 3/4" is easy to work with using a sharp knife. The 2"? Well, the mess made by the hand router and circular saw was bad! There was so much "fluff" from the green hard insulation all over the garage, it looked like someone dropped a frag grenade in Oscar the grouch's trash can!
matthewp
Combat Truck Monkey
Today, the woodwork (and some remedial electrical work) was completed in the basement storage.
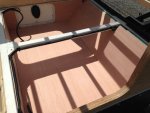
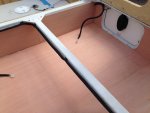
The rough wood for the sleeping platform is also done (I will also finish it with 5mm maple ply), and I have started with the layout of the control hatch area.
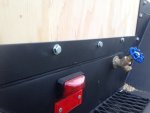
Clockwise from top left: battery capacity & charge meter, switches for the battery meter and water gauge, water gauge, 120v shoreline, water fill.


matthewp
Combat Truck Monkey
Any ideas on the weight of the build so far? Frame only ? While I know it will be too heavy for what I need/have (tow vehicle ), I 'm thinking of doing a lighter weight version using a lot of these ideas. Great job and thank for all the photos!
The frame was estimated at about 750lbs. I'm looking at close to 2000lbs. loaded when done. Please enjoy any design aspect you're interested in. If you want pictures of any of my drawings for parts, feel free to PM me.
Sent from my iPhone using Tapatalk
Last edited:
silvrzuki77
explorer
Like the door with everything behind it very clean!
My only concern on the door, which looks great is the 110 coming in. Meaning in the rain that door would be open. I would try to put the 110 outside the box, so it does not have to be open for it. It looks clean for sure, but might develop into a problem down the road?
matthewp
Combat Truck Monkey
My only concern on the door, which looks great is the 110 coming in. Meaning in the rain that door would be open. I would try to put the 110 outside the box, so it does not have to be open for it. It looks clean for sure, but might develop into a problem down the road?
Wait! You think I camp in the rain? Thanks for the input. I never thought of that aspect.
Similar threads
- Replies
- 8
- Views
- 2K
- Replies
- 8
- Views
- 3K
- Replies
- 7
- Views
- 8K

